2015 MERCEDES-BENZ S-Class steering
[x] Cancel search: steeringPage 148 of 502
X
Adjust the front-passenger seat accord-
ingly (Y page 124).
X Press memory button Mand one of the
storage position buttons 1,2or 3within
three seconds.
The settings are stored in the selected stor- age position.
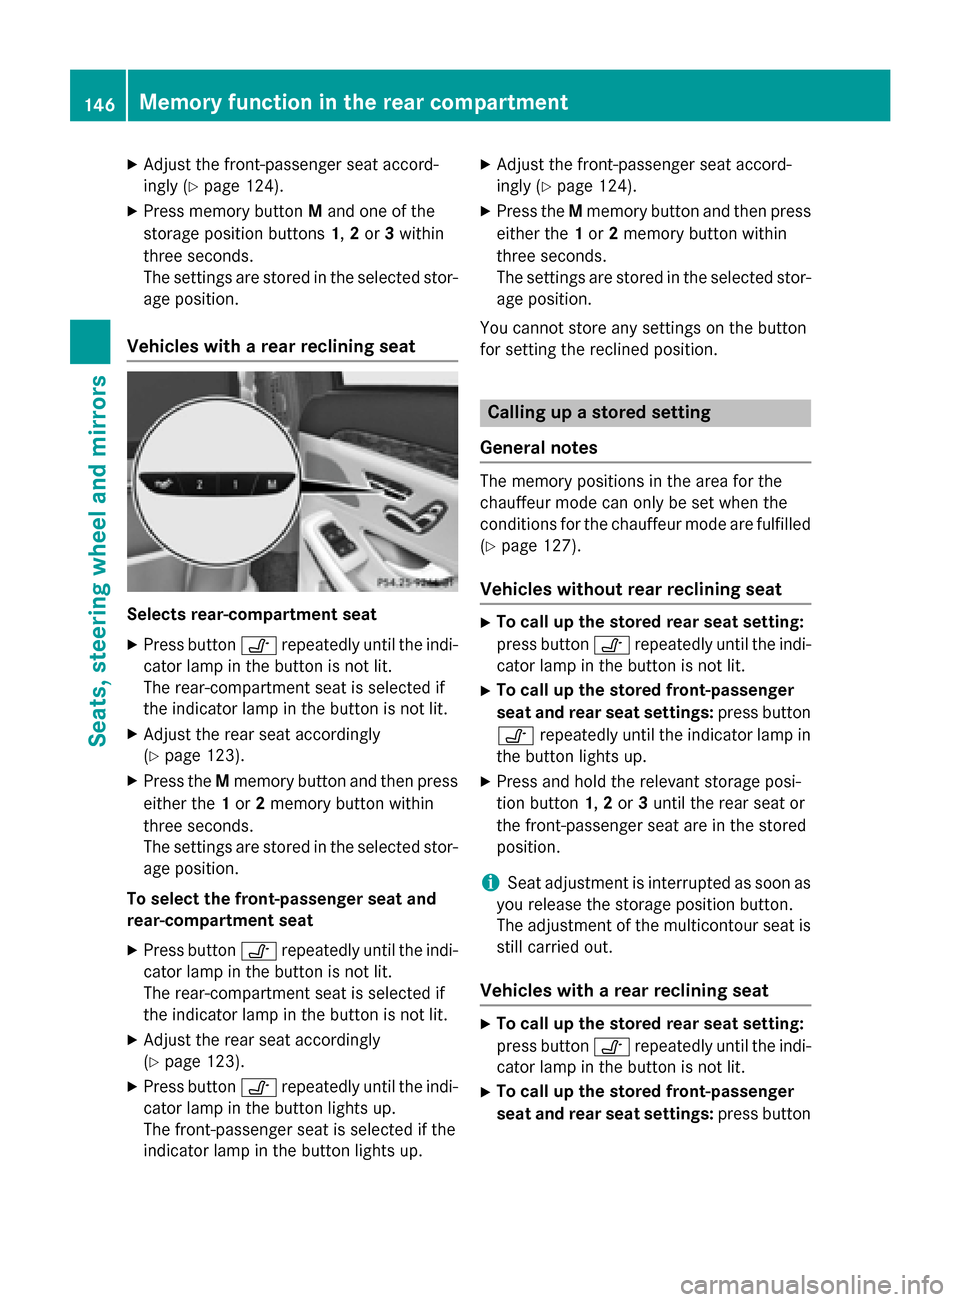
Vehicles with a rear reclining seat Selects rear-compartment seat
X Press button vrepeatedly until the indi-
cator lamp in the button is not lit.
The rear-compartment seat is selected if
the indicator lamp in the button is not lit.
X Adjust the rear seat accordingly
(Y page 123).
X Press the Mmemory button and then press
either the 1or 2memory button within
three seconds.
The settings are stored in the selected stor- age position.
To select the front-passenger seat and
rear-compartment seat
X Press button vrepeatedly until the indi-
cator lamp in the button is not lit.
The rear-compartment seat is selected if
the indicator lamp in the button is not lit.
X Adjust the rear seat accordingly
(Y page 123).
X Press button vrepeatedly until the indi-
cator lamp in the button lights up.
The front-passenger seat is selected if the
indicator lamp in the button lights up. X
Adjust the front-passenger seat accord-
ingly (Y page 124).
X Press the Mmemory button and then press
either the 1or 2memory button within
three seconds.
The settings are stored in the selected stor- age position.
You cannot store any settings on the button
for setting the reclined position. Calling up a stored setting
General notes The memory positions in the area for the
chauffeur mode can only be set when the
conditions for the chauffeur mode are fulfilled
(Y page 127).
Vehicles without rear reclining seat X
To call up the stored rear seat setting:
press button vrepeatedly until the indi-
cator lamp in the button is not lit.
X To call up the stored front-passenger
seat and rear seat settings: press button
v repeatedly until the indicator lamp in
the button lights up.
X Press and hold the relevant storage posi-
tion button 1,2or 3until the rear seat or
the front-passenger seat are in the stored
position.
i Seat adjustment is interrupted as soon as
you release the storage position button.
The adjustment of the multicontour seat is still carried out.
Vehicles with a rear reclining seat X
To call up the stored rear seat setting:
press button vrepeatedly until the indi-
cator lamp in the button is not lit.
X To call up the stored front-passenger
seat and rear seat settings: press button146
Memory function in the rear compartmentSeats, steering
wheel and mirrors
Page 149 of 502
v
repeatedly until the indicator lamp in
the button lights up.
X Press and hold the relevant storage posi-
tion button 1or 2until the rear seat or the
front-passenger seat is in the stored posi-
tion.
i Seat adjustment is interrupted as soon as
you release the storage position button.
The adjustment of the multicontour seat is still carried out. Memory function in the rear compartment
147Seats, steering wheel and mirrors Z
Page 155 of 502

The hazard warning lamps automatically
switch on if:
R an air bag is deployed or
R the vehicle decelerates rapidly from a
speed of above 45 mph (70 km/h) and
comes to a standstill
The hazard warning lamps switch off auto-
matically if the vehicle reaches a speed of
above 6 mph (10 km/h) again after a full
brake application.
The hazard warning lamps still operate if the
ignition is switched off. Cornering light function
The cornering light function improves the illu-
mination of the road over a wide angle in the direction you are turning, enabling better vis-
ibility in tight bends, for example. It can only
be activated when the low-beam headlamps
are switched on.
Active:
R if you are driving at speeds below 25 mph
(40 km/h) and switch on the turn signal or
turn the steering wheel
R if you are driving at speeds between
25 mph (40 km/ h)and 45 mph (70 km/h)
and turn the steering wheel
The cornering lamp may remain lit for a short
time, but is automatically switched off after
no more than three minutes. Adaptive Highbeam Assist Plus
General notes With Adaptive Highbeam Assist Plus, you can
automatically switch between low-beam, par-
tial high-beam and high-beam headlamps.
Partial high-beam is a form of illumination
whereby the high-beam is directed past other
road users. Other road users are kept out of
the high-beam. This prevents glare. When
there is a vehicle in front, for example, the
high-beam headlamps illuminate the areas to
its right and left, and the vehicle in front is
illuminated by the low-beam headlamps.
The system automatically adapts the low-
beam headlamp range depending on the dis-
tance to the other vehicle. Once the system
no longer detects any other vehicles, it reac-
tivates the high-beam headlamps.
If the high-beam or partial high-beam are
causing too much reflection from traffic
signs, the lights are automatically dimmed
and glare for the driver caused by the reflec-
tions is thus avoided.
The system's optical sensor is located behind the windshield near the overhead control
panel. Exterior lighting
153Lights and windshield wipers Z
Page 182 of 502
Problems with the perfume atomizer
Problem
Possible causes/consequences and
M
MSolutions The vehicle interior is
not perfumed although
the perfume atomizer is
activated. The perfume vial has not been pushed into the holder as far as it
will go.
X Slide the perfume vial into the holder as far as it will go. The perfume vial has not been adequately filled.
X Pre-filled vials: dispose of the empty vial.
X Use a new pre-filled vial.
X Refillable vials: refill the vial with a maximum of 15 ml of the
same perfume. The perfume atomizer is faulty.
X Have the perfume atomizer checked at a qualified specialist
workshop. Ionization
You can use the "Ionization" function to purify
the air in the vehicle interior and attain an
improved interior climate.
The ionization of the interior air is odorless
and cannot be perceived directly in the vehi-
cle interior.
You can switch ionization on and off using
COMAND (see the separate operating
instructions).
Ionization can only be switched on if the front automatic climate control is activated. The
side air vent on the driver's side must be
open. Pre-entry climate control via Smart-
Key
General notes The "Pre-entry climate control via SmartKey"
function is only available on PLUG-IN HYBRID
vehicles.
Before getting in, the driver's seat area or the whole interior can be briefly warmed or ven-
tilated in advance with the air from the air
vents being pre-cooled. The high-voltage battery must be sufficiently
charged before "Pre-entry climate control via
SmartKey" can be activated.
When the vehicle is pre-cooled, the following functions are activated:
R Climate control system
R Blower
R Seat ventilation
When the vehicle is pre-warmed, the following
functions are activated:
R Climate control system
R Blower
R Seat heating
R Steering wheel heating
R Exterior mirror heating
R Rear window defroster
If you have activated the following functions
using COMAND, they are activated together
with the "Pre-entry climate control via Smart-
Key" function:
R Armrest heating
R perfume atomizer
R Ionization 180
Operating the climate control systemsClimate control
Page 185 of 502
When the vehicle is heated, the following
functions are activated:
R Climate control system
R Blower
R Seat heating
R Steering wheel heating
R Armrest heating
R Exterior mirror heating
R Rear window defroster
i In contrast to the rest of the climate con-
trol functions, the seat heating/ventilation,
steering wheel heating and armrest heating only switch on if required.
If you have switched on the perfume atomizer or the ionization using COMAND, these will beactivated together with the "Pre-entry climate control at departure time".
Activating the perfume atomizer/ionization
(see separate COMAND operating instruc-
tions).
Setting the departure time You can set the departure time using the
instrument cluster or via the "Vehicle Home-
page" (Y
page 220). The activation of the
"Pre-entry climate control at departure time"
function can be linked to this departure time.
Your vehicle will then be cooled or heated
until the desired temperature is reached in
time for the set departure time. "Pre-entry
climate control at departure time" will be acti- vated a maximum of 55 minutes before
departure. If the departure is delayed, the
vehicle will be heated or cooled for a further
five minutes.
X To set the departure time: set the depar-
ture time via the instrument cluster. To set the departure time via the "Vehicle Home-
page" (Y page 220).
X To activate/deactivate "Pre-entry cli-
mate control at departure time": acti-
vate/deactivate "Pre-entry climate control
at departure time" via COMAND (see sep-
arate operating instructions). To activate/ deactivate the "Pre-entry climate control at
departure time" function via the Vehicle
Homepage (Y page 220).
When activating the "Pre-entry climate con-
trol at departure time" function: you can
select whether only the driver's area or the
whole vehicle interior should be heated or
cooled.
The "Pre-entry climate control at departure
time" function switches off automatically
when the vehicle is started. The following
functions remain active:
R Seat heating
R Seat ventilation
R Armrest heating
R Steering wheel heating
R Perfume atomizer
R Ionization
Switching off "Pre-entry climate control
at departure time": the activated "Pre-entry
climate control at departure time" can be
switched off using the rocker switch
(Y page 183).
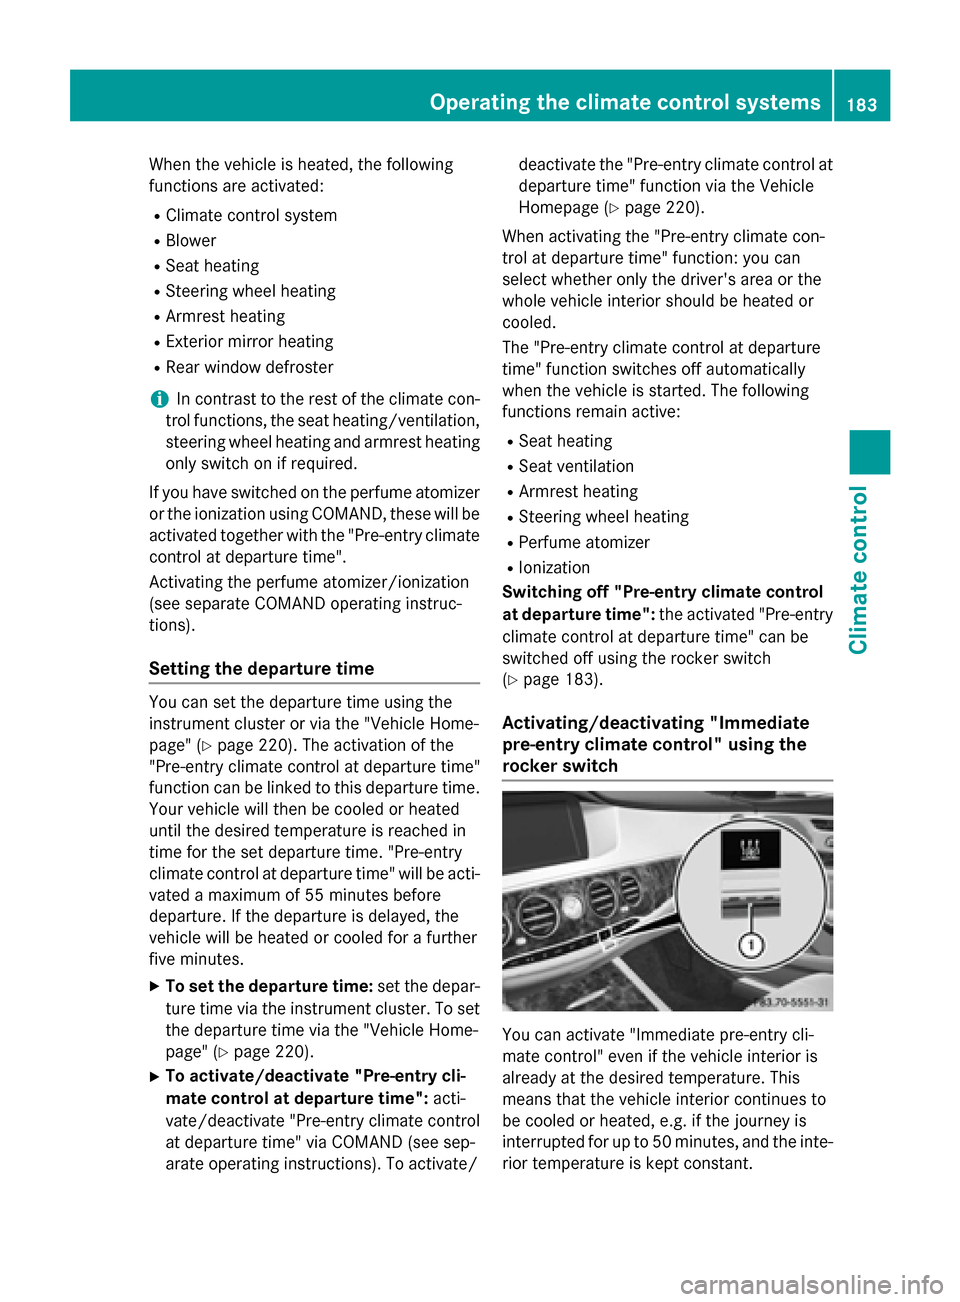
Activating/deactivating "Immediate
pre-entry climate control" using the
rocker switch You can activate "Immediate pre-entry cli-
mate control" even if the vehicle interior is
already at the desired temperature. This
means that the vehicle interior continues to
be cooled or heated, e.g. if the journey is
interrupted for up to 50 minutes, and the inte-
rior temperature is kept constant. Operating the climate control systems
183Climate control Z
Page 191 of 502

G
WARNING
Unsuitable footwear can hinder correct usage of the pedals, e.g.:
R shoes with thick soles
R shoes with high heels
R slippers
There is a risk of an accident.
Wear suitable footwear to ensure correct
usage of the pedals. G
WARNING
If you switch off the ignition while driving,
safety-relevant functions are only available
with limitations, or not at all. This could affect, for example, the power steering and the brake
boosting effect. You will require considerably
more effort to steer and brake. There is a risk of an accident.
Do not switch off the ignition while driving. G
WARNING
If the parking brake has not been fully
released when driving, the parking brake can:
R overheat and cause a fire
R lose its hold function.
There is a risk of fire and an accident. Release
the parking brake fully before driving off.
! Do not warm up the engine with the vehi-
cle stationary. Drive off immediately. Avoid high engine speeds and driving at full throt-
tle until the engine has reached its operat-
ing temperature.
Only shift the automatic transmission to
the desired drive position when the vehicle is stationary.
Where possible, avoid spinning the drive
wheels when pulling away on slippery
roads. You could otherwise damage the
drive train.
! AMG vehicles:
at low engine oil temper-
atures below 68 ‡ (+20 †), the maximum
engine speed is restricted in order to pro-
tect the engine. To protect the engine and maintain smooth engine operation, avoid
driving at full throttle when the engine is
cold.
Observe the important safety notes for PLUG-
IN HYBRID vehicles (Y page 46). Key positions
SmartKey g
To remove the SmartKey
1 Power supply for some consumers, such
as the windshield wipers
2 Ignition (power supply for all consumers)
and drive position
3 To start the engine
The SmartKey can be turned in the ignition
lock even if it is not the correct SmartKey for
the vehicle. The ignition is not switched on.
The engine cannot be started.
Start/Stop button General notes
All vehicles are equipped with a removable
Start/Stop button.
The Start/Stop button must be inserted in the ignition lock and the SmartKey must be in the
vehicle.
When you insert the Start/Stop button into
the ignition lock, the system needs approx-
imately two seconds recognition time. You
can then use the Start/Stop button.
Pressing the Start/Stop button several times
in succession corresponds to the different Driving
189Driving and parking Z
Page 199 of 502

Automatic transmission
Important safety notes
G
WARNING
If the engine speed is above the idling speed
and you engage transmission position Dor R,
the vehicle could pull away suddenly. There is a risk of an accident.
When engaging transmission position Dor R,
always firmly depress the brake pedal and do not simultaneously accelerate. G
WARNING
The automatic transmission switches to neu-
tral position Nwhen you switch off the engine.
The vehicle may roll away. There is a risk of an
accident.
After switching off the engine, always switch
to parking position P. Prevent the parked vehi-
cle from rolling away by applying the parking
brake.
Observe the important safety notes for PLUG-
IN HYBRID vehicles (Y page 46).DIRECT SELECT lever
Overview of transmission positions j
Park position with parking lock
k Reverse gear
i Neutral
h Drive
The DIRECT SELECT lever is on the right of the
steering column. The DIRECT SELECT lever always returns to
its original position. The current transmission
position P,R, Nor Dappears in the transmis-
sion position display (Y page 199) in the mul-
tifunction display.
Engaging park position P !
If the engine speed is too high or the vehi-
cle is moving, do not shift the automatic
transmission directly from Dto R, from Rto
D or directly to P. The automatic transmis-
sion could otherwise be damaged. j
Park position with parking lock
k Reverse gear
i Neutral
h Drive
X Push the DIRECT SELECT lever in the direc-
tion of arrow P.
Engaging park position P automatically Park position
Pis automatically engaged if:
R you switch off the engine using the Smart-
Key and remove the SmartKey.
R you switch off the engine using the Start/
Stop button and open the driver's door.
R you open the driver's door when the vehicle
is stationary or driving at very low speed
and the transmission is in position Dor R.
Engaging reverse gear R !
Only shift the automatic transmission to
R
when the vehicle is stationary. Automatic trans
mission
197Driving an d parking Z
Page 203 of 502
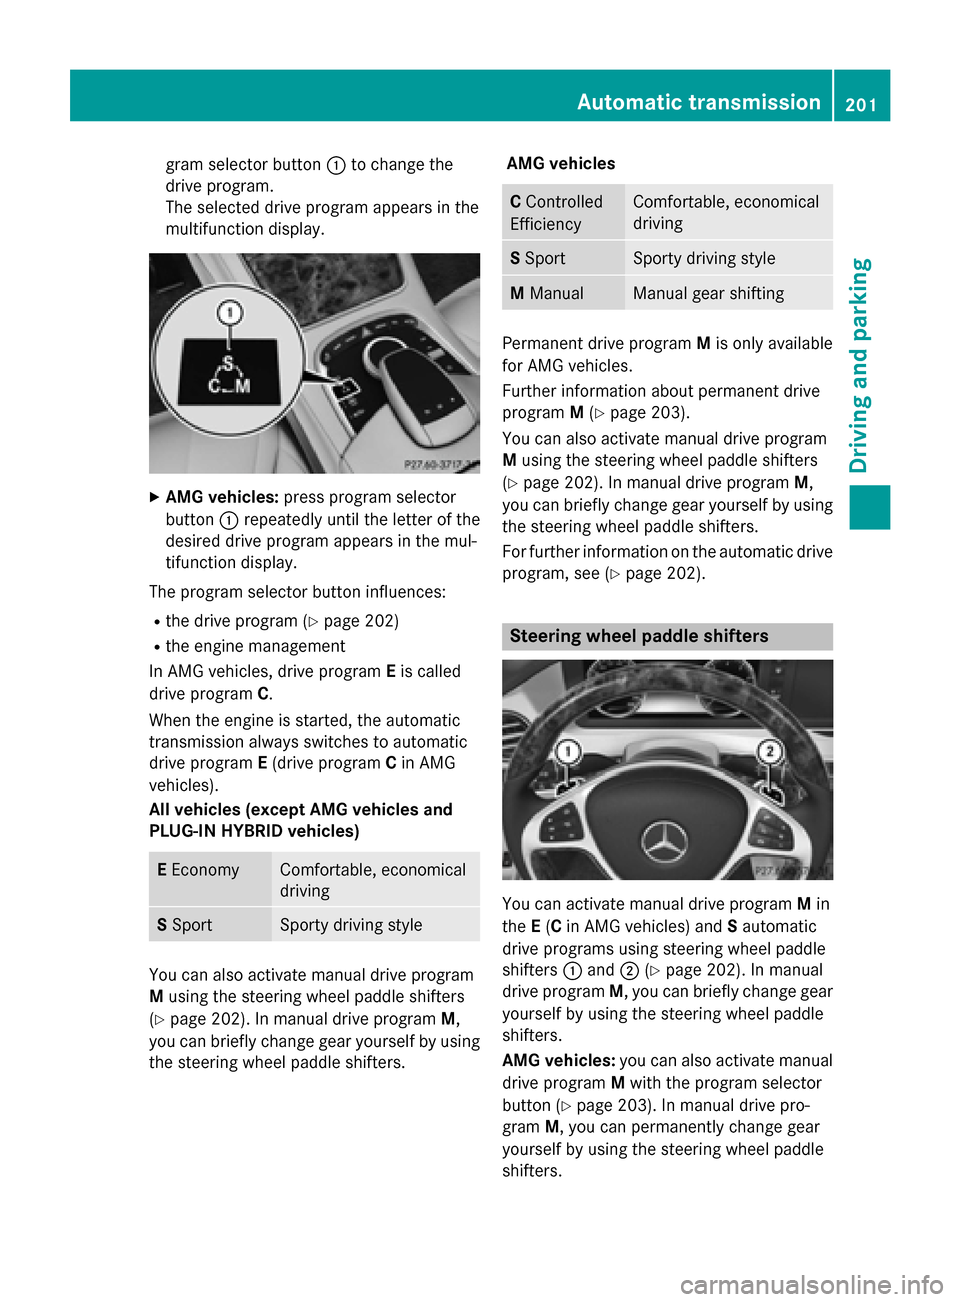
gram selector button
:to change the
drive program.
The selected drive program appears in the
multifunction display. X
AMG vehicles: press program selector
button :repeatedly until the letter of the
desired drive program appears in the mul-
tifunction display.
The program selector button influences: R the drive program (Y page 202)
R the engine management
In AMG vehicles, drive program Eis called
drive program C.
When the engine is started, the automatic
transmission always switches to automatic
drive program E(drive program Cin AMG
vehicles).
All vehicles (except AMG vehicles and
PLUG-IN HYBRID vehicles) E
Economy Comfortable, economical
driving
S
Sport Sporty driving style
You can also activate manual drive program
M
using the steering wheel paddle shifters
(Y page 202). In manual drive program M,
you can briefly change gear yourself by using the steering wheel paddle shifters. AMG vehicles C
Controlled
Efficiency Comfortable, economical
driving
S
Sport Sporty driving style
M
Manual Manual gear shifting
Permanent drive program
Mis only available
for AMG vehicles.
Further information about permanent drive
program M(Y page 203).
You can also activate manual drive program
M using the steering wheel paddle shifters
(Y page 202). In manual drive program M,
you can briefly change gear yourself by using
the steering wheel paddle shifters.
For further information on the automatic drive
program, see (Y page 202). Steering wheel paddle shifters
You can activate manual drive program
Min
the E(C in AMG vehicles) and Sautomatic
drive programs using steering wheel paddle
shifters :and ;(Ypage 202). In manual
drive program M, you can briefly change gear
yourself by using the steering wheel paddle
shifters.
AMG vehicles: you can also activate manual
drive program Mwith the program selector
button (Y page 203). In manual drive pro-
gram M, you can permanently change gear
yourself by using the steering wheel paddle
shifters. Automatic transmission
201Driving and parking Z