2015 MERCEDES-BENZ S-Class service
[x] Cancel search: servicePage 315 of 502
X
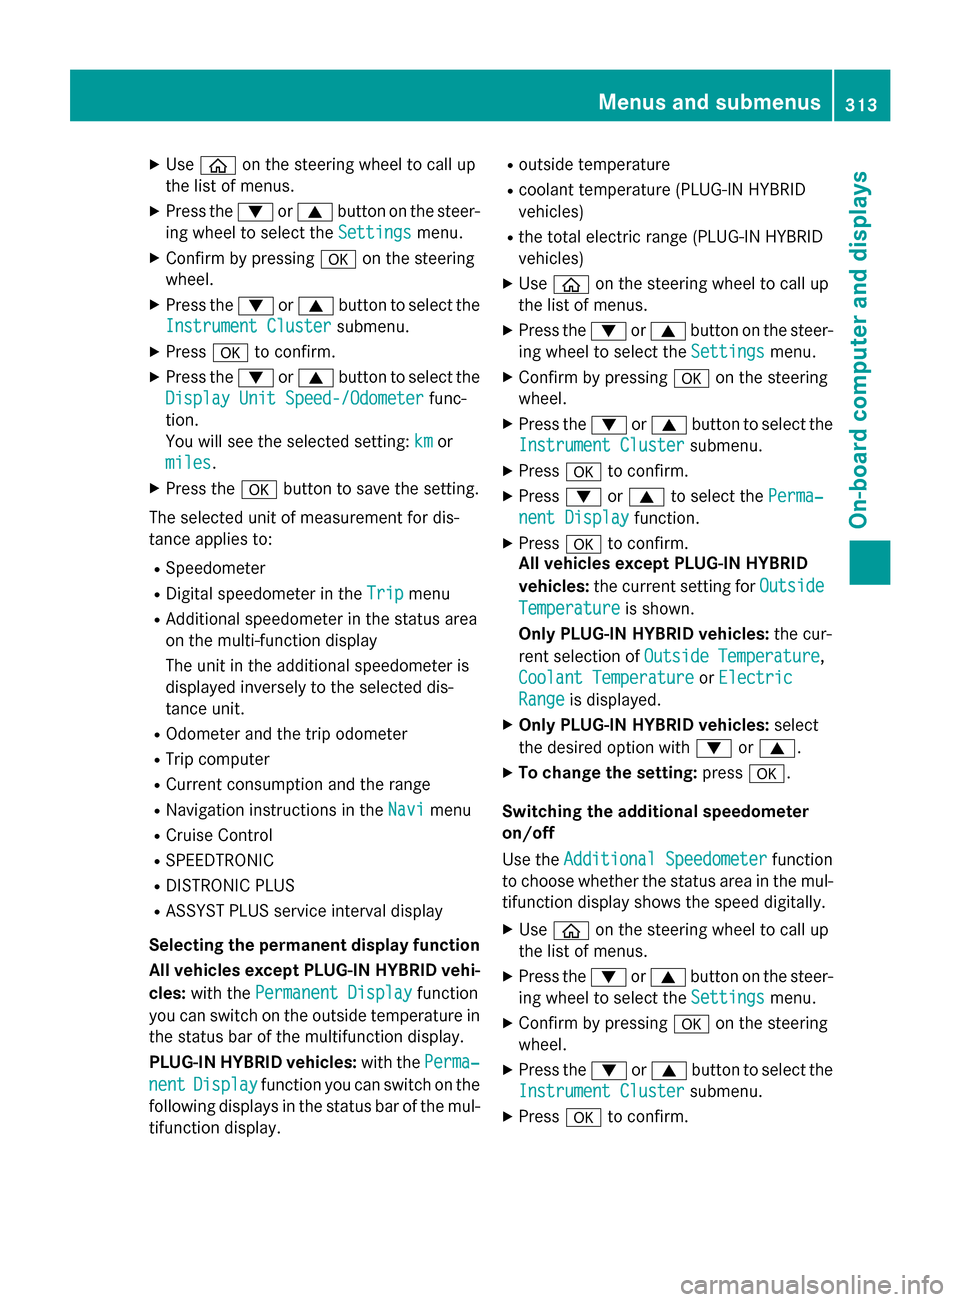
Use ò on the steering wheel to call up
the list of menus.
X Press the :or9 button on the steer-
ing wheel to select the Settings
Settingsmenu.
X Confirm by pressing aon the steering
wheel.
X Press the :or9 button to select the
Instrument Cluster
Instrument Cluster submenu.
X Press ato confirm.
X Press the :or9 button to select the
Display Unit Speed-/Odometer
Display Unit Speed-/Odometer func-
tion.
You will see the selected setting: km
km or
miles miles.
X Press the abutton to save the setting.
The selected unit of measurement for dis-
tance applies to:
R Speedometer
R Digital speedometer in the Trip
Trip menu
R Additional speedometer in the status area
on the multi-function display
The unit in the additional speedometer is
displayed inversely to the selected dis-
tance unit.
R Odometer and the trip odometer
R Trip computer
R Current consumption and the range
R Navigation instructions in the Navi
Navi menu
R Cruise Control
R SPEEDTRONIC
R DISTRONIC PLUS
R ASSYST PLUS service interval display
Selecting the permanent display function
All vehicles except PLUG-IN HYBRID vehi-
cles: with the Permanent Display
Permanent Display function
you can switch on the outside temperature in the status bar of the multifunction display.
PLUG-IN HYBRID vehicles: with thePerma‐ Perma‐
nent
nent Display
Display function you can switch on the
following displays in the status bar of the mul-
tifunction display. R
outside temperature
R coolant temperature (PLUG‑IN HYBRID
vehicles)
R the total electric range (PLUG-IN HYBRID
vehicles)
X Use ò on the steering wheel to call up
the list of menus.
X Press the :or9 button on the steer-
ing wheel to select the Settings
Settings menu.
X Confirm by pressing aon the steering
wheel.
X Press the :or9 button to select the
Instrument Cluster Instrument Cluster submenu.
X Press ato confirm.
X Press :or9 to select the Perma‐
Perma‐
nent Display
nent Display function.
X Press ato confirm.
All vehicles except PLUG-IN HYBRID
vehicles: the current setting for Outside Outside
Temperature
Temperature is shown.
Only PLUG-IN HYBRID vehicles: the cur-
rent selection of Outside Temperature
Outside Temperature,
Coolant Temperature
Coolant Temperature orElectric
Electric
Range
Range is displayed.
X Only PLUG-IN HYBRID vehicles: select
the desired option with :or9.
X To change the setting: pressa.
Switching the additional speedometer
on/off
Use the Additional Speedometer Additional Speedometer function
to choose whether the status area in the mul- tifunction display shows the speed digitally.
X Use ò on the steering wheel to call up
the list of menus.
X Press the :or9 button on the steer-
ing wheel to select the Settings Settingsmenu.
X Confirm by pressing aon the steering
wheel.
X Press the :or9 button to select the
Instrument Cluster
Instrument Cluster submenu.
X Press ato confirm. Menus and submenus
313On-board computer and displays Z
Page 318 of 502
Display messages
Introduction
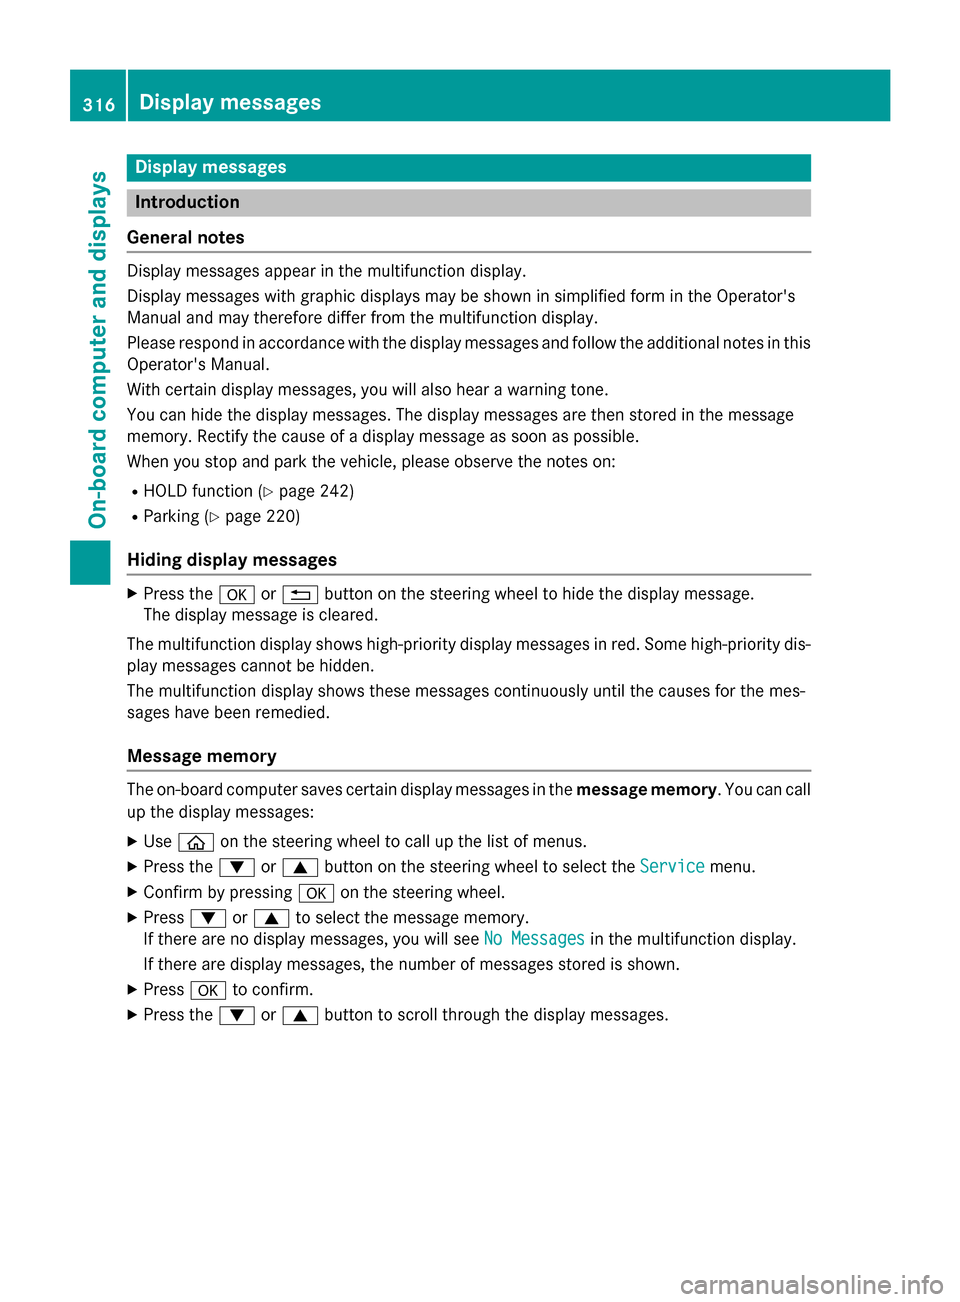
General notes Display messages appear in the multifunction display.
Display messages with graphic displays may be shown in simplified form in the Operator's
Manual and may therefore differ from the multifunction display.
Please respond in accordance with the display messages and follow the additional notes in this Operator's Manual.
With certain display messages, you will also hear a warning tone.
You can hide the display messages. The display messages are then stored in the message
memory. Rectify the cause of a display message as soon as possible.
When you stop and park the vehicle, please observe the notes on:
R HOLD function (Y page 242)
R Parking (Y page 220)
Hiding display messages X
Press the aor% button on the steering wheel to hide the display message.
The display message is cleared.
The multifunction display shows high-priority display messages in red. Some high-priority dis- play messages cannot be hidden.
The multifunction display shows these messages continuously until the causes for the mes-
sages have been remedied.
Message memory The on-board computer saves certain display messages in the
message memory. You can call
up the display messages:
X Use ò on the steering wheel to call up the list of menus.
X Press the :or9 button on the steering wheel to select the Service Servicemenu.
X Confirm by pressing aon the steering wheel.
X Press :or9 to select the message memory.
If there are no display messages, you will see No Messages
No Messages in the multifunction display.
If there are display messages, the number of messages stored is shown.
X Press ato confirm.
X Press the :or9 button to scroll through the display messages. 316
Display
messagesOn-board computer and displays
Page 330 of 502
Display messages
Possible causes/consequences and
M
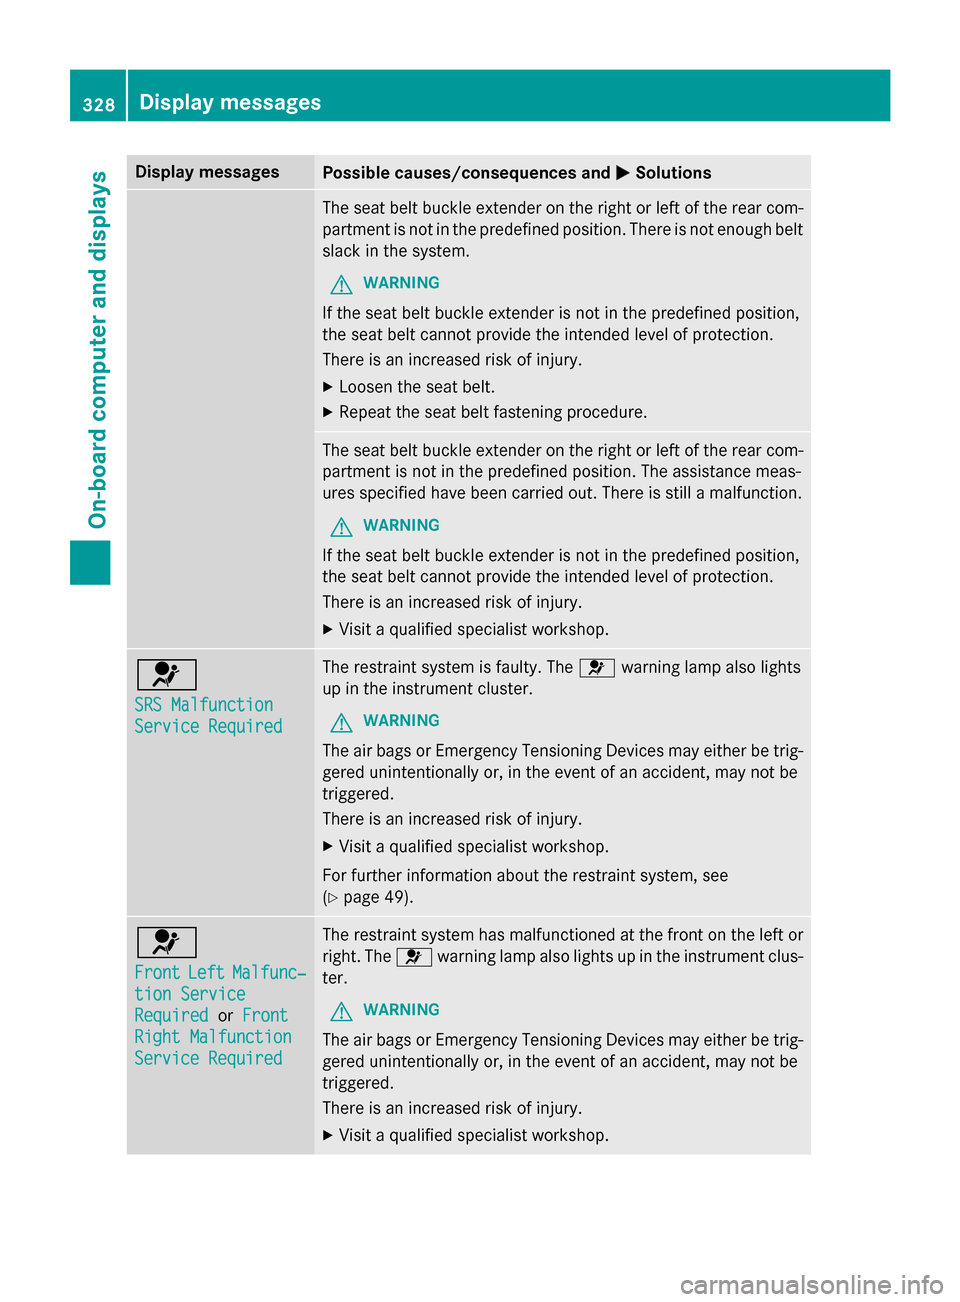
MSolutions The seat belt buckle extender on the right or left of the rear com-
partment is not in the predefined position. There is not enough belt slack in the system.
G WARNING
If the seat belt buckle extender is not in the predefined position,
the seat belt cannot provide the intended level of protection.
There is an increased risk of injury. X Loosen the seat belt.
X Repeat the seat belt fastening procedure. The seat belt buckle extender on the right or left of the rear com-
partment is not in the predefined position. The assistance meas-
ures specified have been carried out. There is still a malfunction.
G WARNING
If the seat belt buckle extender is not in the predefined position,
the seat belt cannot provide the intended level of protection.
There is an increased risk of injury. X Visit a qualified specialist workshop. 6
SRS Malfunction SRS Malfunction
Service Required Service Required The restraint system is faulty. The
6warning lamp also lights
up in the instrument cluster.
G WARNING
The air bags or Emergency Tensioning Devices may either be trig- gered unintentionally or, in the event of an accident, may not be
triggered.
There is an increased risk of injury.
X Visit a qualified specialist workshop.
For further information about the restraint system, see
(Y page 49). 6
Front Front
Left
LeftMalfunc‐
Malfunc‐
tion Service
tion Service
Required Required orFront
Front
Right Malfunction
Right Malfunction
Service Required Service Required The restraint system has malfunctioned at the front on the left or
right. The 6warning lamp also lights up in the instrument clus-
ter.
G WARNING
The air bags or Emergency Tensioning Devices may either be trig- gered unintentionally or, in the event of an accident, may not be
triggered.
There is an increased risk of injury.
X Visit a qualified specialist workshop. 328
Display
messagesOn-board computer and displays
Page 331 of 502

Display messages
Possible causes/consequences and
M
MSolutions 6
Rear Left Malfunc‐ Rear Left Malfunc‐
tion Service tion Service
Required Required
orRear
Rear
Right Malfunction
Right Malfunction
Service Required Service Required The restraint system has malfunctioned at the rear on the left or
right. The 6warning lamp also lights up in the instrument clus-
ter.
G WARNING
The air bags or Emergency Tensioning Devices may either be trig- gered unintentionally or, in the event of an accident, may not be
triggered.
There is an increased risk of injury.
X Visit a qualified specialist workshop. 6
Rear Left Malfunc‐ Rear Left Malfunc‐
tion Service tion Service
Required Required
orRear
Rear
Right Malfunction
Right Malfunction
Service Required Service Required G
WARNING
If the seat belt buckle extender is not in the predefined position,
the seat belt cannot provide the intended level of protection.
There is an increased risk of injury. X Pull over and stop the vehicle safely as soon as possible, paying
attention to road and traffic conditions.
X Perform the specified assistance measures when display mes-
sage Check Left Rear Belt See Operator's Manual Check Left Rear Belt See Operator's Manual or
Check
Check Right
RightRear
RearBelt
Belt See
SeeOperator's
Operator's Manual
Manualis shown
(Y page 327).
If the display message does not disappear:
X Visit a qualified specialist workshop immediately. 6
Rear Center Mal‐ Rear Center Mal‐
function Service function Service
Required Required The restraint system has malfunctioned at the rear center. The
6 warning lamp also lights up in the instrument cluster.
G WARNING
The air bags or Emergency Tensioning Devices may either be trig- gered unintentionally or, in the event of an accident, may not be
triggered.
There is an increased risk of injury.
X Visit a qualified specialist workshop. Display
messages
329On-board computer and displays Z
Page 332 of 502
Display messages
Possible causes/consequences and
M
MSolutions 6
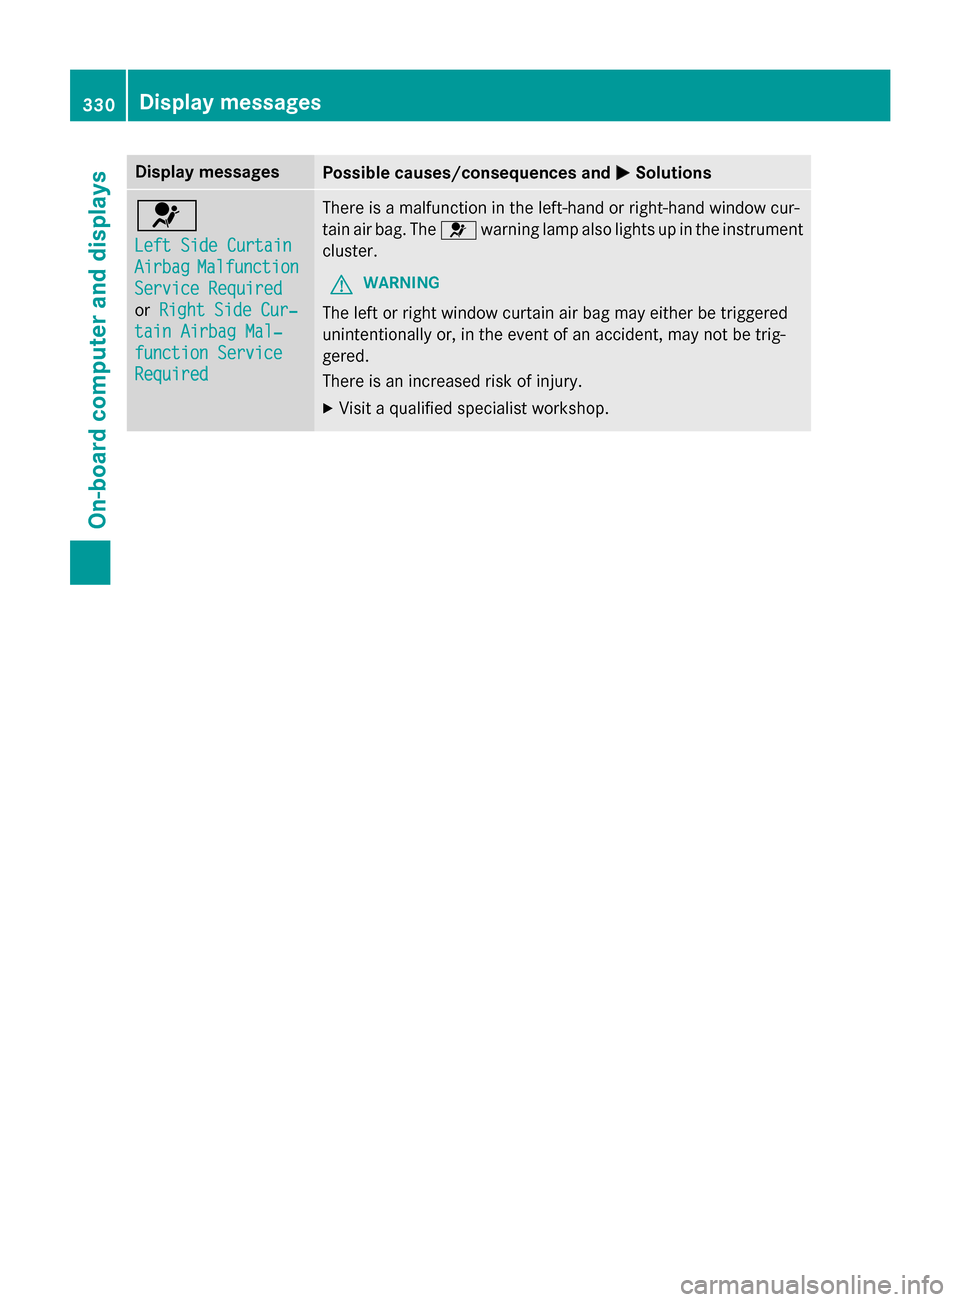
Left Side Curtain Left Side Curtain
Airbag Airbag
Malfunction
Malfunction
Service Required
Service Required
or Right Side Cur‐ Right Side Cur‐
tain Airbag Mal‐
tain Airbag Mal‐
function Service function Service
Required Required There is a malfunction in the left-hand or right-hand window cur-
tain air bag. The
6warning lamp also lights up in the instrument
cluster.
G WARNING
The left or right window curtain air bag may either be triggered
unintentionally or, in the event of an accident, may not be trig-
gered.
There is an increased risk of injury. X Visit a qualified specialist workshop. 330
Display
messagesOn-board computer and displays
Page 353 of 502

Vehicle
Display messages
Possible causes/consequences and
M
MSolutions Shift to 'P' or
Shift to 'P' or
'N' 'N'
to
toStart
Start Engine
Engine You have attempted to start the engine with the transmission in
position
Ror D.
X Shift the transmission to position Por N. Auxiliary Battery Auxiliary Battery
Malfunction Malfunction The auxiliary battery for the transmission is no longer being
charged.
X Visit a qualified specialist workshop. Apply Brake to Apply Brake to
Shift from 'P' Shift from 'P' You have attempted to move the transmission selector lever to
position
D,Ror Nwithout depressing the brake pedal.
X Depress the brake pedal. Transmission Not Transmission Not
in P Risk of Vehi‐ in P Risk of Vehi‐
cle Rolling Away cle Rolling Away The driver's door is open/not completely closed and the trans-
mission is in position
R,Nor D.
A warning tone also sounds.
G WARNING
The vehicle may roll away.
There is a risk of an accident. X Shift the transmission to position P.
X Secure the vehicle against rolling away (Y page 220).
X Close the driver's door completely. Service Required Service Required
Do Do
Not
Not Shift
Shift Gears
Gears
Visit Dealer
Visit Dealer You cannot change the transmission position due to a malfunction.
A warning tone also sounds.
If transmission position Dis selected:
X Drive to a qualified specialist workshop without shifting the
transmission from position D.
If transmission position R,Nor Pis selected:
X Notify a qualified specialist workshop or breakdown service. Transmission Mal‐ Transmission Mal‐
function Stop function Stop A malfunction has occurred in the mechanical transmission com-
ponents.
A warning tone also sounds. The gearbox automatically shifts to
position N.
X Pull over and stop the vehicle safely as soon as possible, paying
attention to road and traffic conditions.
X Shift the transmission to position P.
X Secure the vehicle against rolling away (Y page 220).
X Notify a qualified specialist workshop or breakdown service. Display messages
351On-board computer and displays Z
Page 355 of 502
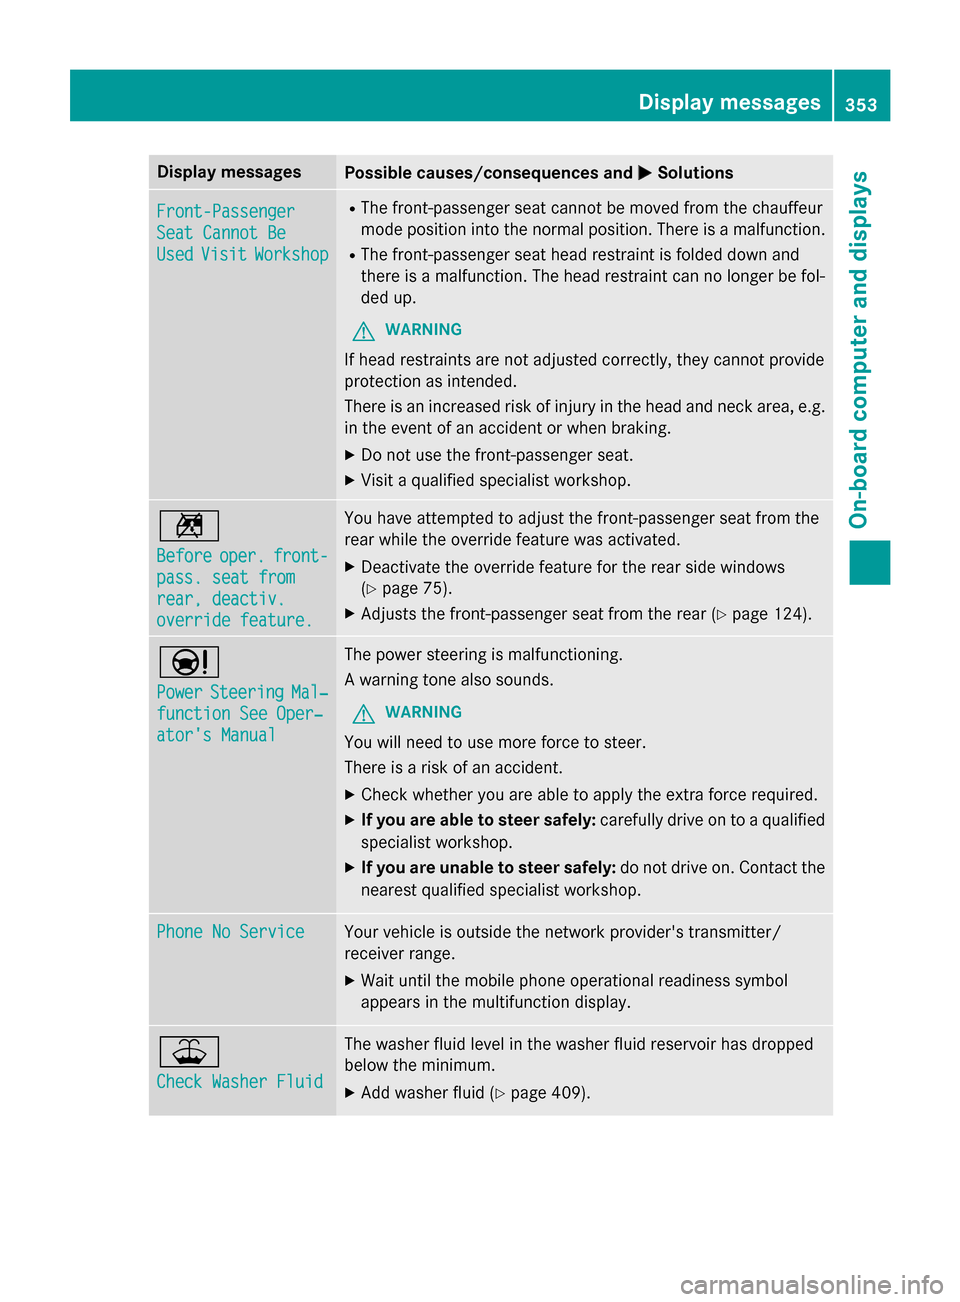
Display messages
Possible causes/consequences and
M
MSolutions Front-Passenger
Front-Passenger
Seat Cannot Be Seat Cannot Be
Used Used
Visit
Visit Workshop
Workshop R
The front-passenger seat cannot be moved from the chauffeur
mode position into the normal position. There is a malfunction.
R The front-passenger seat head restraint is folded down and
there is a malfunction. The head restraint can no longer be fol-
ded up.
G WARNING
If head restraints are not adjusted correctly, they cannot provide
protection as intended.
There is an increased risk of injury in the head and neck area, e.g. in the event of an accident or when braking.
X Do not use the front-passenger seat.
X Visit a qualified specialist workshop. n
Before Before
oper.
oper.front-
front-
pass. seat from
pass. seat from
rear, deactiv. rear, deactiv.
override feature. override feature. You have attempted to adjust the front-passenger seat from the
rear while the override feature was activated.
X Deactivate the override feature for the rear side windows
(Y page 75).
X Adjusts the front-passenger seat from the rear (Y page 124).Ð
Power Power
Steering
Steering Mal‐
Mal‐
function See Oper‐
function See Oper‐
ator's Manual ator's Manual The power steering is malfunctioning.
A warning tone also sounds.
G WARNING
You will need to use more force to steer.
There is a risk of an accident. X Check whether you are able to apply the extra force required.
X If you are able to steer safely: carefully drive on to a qualified
specialist workshop.
X If you are unable to steer safely: do not drive on. Contact the
nearest qualified specialist workshop. Phone No Service Phone No Service Your vehicle is outside the network provider's transmitter/
receiver range.
X Wait until the mobile phone operational readiness symbol
appears in the multifunction display. ¥
Check Washer Fluid Check Washer Fluid The washer fluid level in the washer fluid reservoir has dropped
below the minimum.
X Add washer fluid (Y page 409). Display
messages
353On-board computer and displays Z
Page 391 of 502

X
To open: pull handle :on the cover.
X Fold the cover out to the front.
X To switch cooling level to low: press but-
ton ;once.
An indicator lamp in the button lights up.
X To switch cooling level to high: press
button ;twice.
Both indicator lamps in the button light up.
X To switch off cooling: press button;
repeatedly until the indicator lamps go out.
The cooling output of the coolbox depends on
the ambient temperature and the selected
cooling level.
The coolbox reduces its cooling output or
switches off, if:
R many electrical consumers are turned on
R the starter battery is not sufficiently
charged
This is indicated by the flashing indicator
lamps in the button. The cooling function will automatically switch back on as soon as there is sufficient voltage.
Caring for the coolbox If you do not need to use the coolbox for an
extended period you should switch it off,
defrost it and clean it. After doing so, leave
the lid open for a time. Removing and installing the coolbox
You can remove the coolbox for maintenance
purposes.
X To remove: switch off the coolbox.
X Pull plug ;down and out.
X Unscrew both screws =.
X Pull out the coolbox.
X Close flap :.
X To install: swing flap:to the side until it
is locked in place by the magnets.
X Insert the coolbox.
X Tighten both screws =.
X Connect plug ;. mbrace
General notes The mbrace system is only available in the
USA.
You must have a license agreement to acti-
vate the mbrace service. Make sure that your
system is activated and operational. To log in,
press the ïMB Info call button. If any of
the steps mentioned are not carried out, the
system may not be activated.
If you have questions about the activation,
contact one of the following telephone hot-
lines:
Mercedes-Benz Customer Assistance Center
at 1-800-FOR-MERCedes (1-800-367-6372)
or 1-866-990-9007 Features
389Stowage an d features Z