2015 MERCEDES-BENZ S-CLASS COUPE oil pressure
[x] Cancel search: oil pressurePage 7 of 417
1, 2, 3 ...
4ETS (Electronic Traction System) see ETS/4ETS (Electronic Trac-
tion System)
4MATIC (permanent four-wheel
drive) .................................................. 212
4MATIC off-road system ...................212
12 V socket
see Sockets
360° camera
Cleaning ......................................... 350
Function/notes ............................ .224 A
ABS (Anti-lock Braking System) Display message ............................ 267
Function/notes ................................ 70
Important safety notes .................... 70
Warning lamp ................................. 305
Accident
Automatic measures after an acci-
dent ................................................. 60
Activating/deactivating air-recir-
culation mode ................................... .146
Activating/deactivating cooling
with air dehumidification ................. 141
Activating/deactivating Night
View Assist Plus
With spotlight function ................... 235
Active Blind Spot Assist
Activating/deactivating (on-
board computer) ............................ 260
Display message ............................ 289
Function/notes ............................ .236
Active Body Control (ABC)
Display message ............................ 288
Active Body Control ABC
Function/notes ............................ .207
Active Lane Keeping Assist
Activating/deactivating (on-
board computer) ............................ 261
Display message ............................ 289
Function/notes ............................ .239
Active light function ......................... 129
Active Light System
Display message ............................ 282 Active multicontour seat
.................. 113
Active Parking Assist
Detecting parking spaces .............. 216
Display message ............................ 290
Exiting a parking space .................. 218
Function/notes ............................ .215
Important safety notes .................. 215
Parking .......................................... 217
ADAPTIVE BRAKE ................................. 77
Adaptive Brake Assist
Function/notes ................................ 74
Adaptive brake lights .......................... 75
Adaptive Damping System (ADS) ..... 211
Adaptive Highbeam Assist Plus
Display message ............................ 283
Function/notes ............................ .130
Switching on/off ........................... 131
Additional speedometer ................... 264
Additives (engine oil) ........................ 408
Air conditioning
General notes ................................ 138
Air pressure
see Tyre pressure
Air vents
Glove compartment ....................... 156
Important safety notes .................. 155
Rear ............................................... 157
Setting .......................................... .155
Setting the centre air vents ........... 156
Setting the side air vents .............. .156
Air-conditioning system
see Climate control
Airbag
Automatic front-passenger front
airbag deactivatio n.......................... 51
Introduction ..................................... 48
PASSENGER AIR BAG indicator
lamps ............................................... 43
Airbags
Display message ............................ 279
Front airbag (driver, front
passenger) ....................................... 50
Important safety guidelines ............. 48
Kneebag ........................................... 50
Sidebag ............................................ 50
Triggering ......................................... 57
Windowba g...................................... 51 4
Index
Page 261 of 417
X
Confirm by pressing aon the steering
wheel.
The multifunction display shows the
DISTRONIC PLUS distance display in the
assistance graphic.
The assistance graphic shows you the sta-
tus of and/or information from other driv-
ing systems or driving safety systems:
R DISTRONIC PLUS (Y page 200)
R Spotlight function of Night View Assist
Plus (Y page 263)
R Distance warning function and autono-
mous braking system of COLLISION PRE-
VENTION ASSIST PLUS (Y page 72)
R PRE-SAFE ®
Brake (Y page 77)
R Active Blind Spot Assist (Y page 236)
R ATTENTION ASSIST (Y page 228)
R Active Lane Keeping Assist
(Y page 239)
X Press :to display the ATTEN-
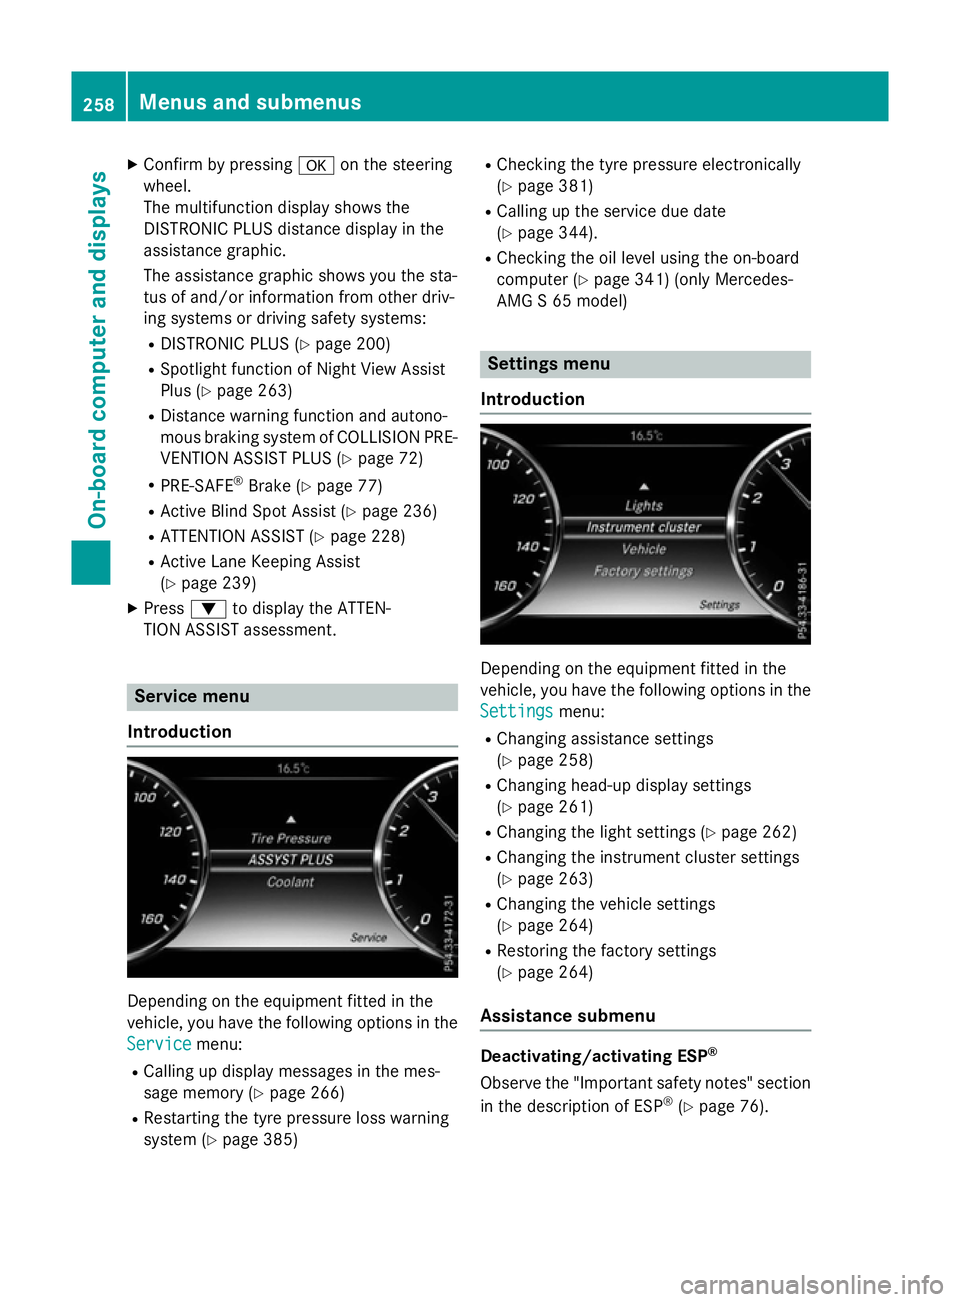
TION ASSIST assessment. Service menu
Introduction Depending on the equipment fitted in the
vehicle, you have the following options in the
Service Service menu:
R Calling up display messages in the mes-
sage memory (Y page 266)
R Restarting the tyre pressure loss warning
system (Y page 385) R
Checking the tyre pressure electronically
(Y page 381)
R Calling up the service due date
(Y page 344).
R Checking the oil level using the on-board
computer (Y page 341) (only Mercedes-
AMG S 65 model) Settings menu
Introduction Depending on the equipment fitted in the
vehicle, you have the following options in the
Settings
Settings menu:
R Changing assistance settings
(Y page 258)
R Changing head-up display settings
(Y page 261)
R Changing the light settings (Y page 262)
R Changing the instrument cluster settings
(Y page 263)
R Changing the vehicle settings
(Y page 264)
R Restoring the factory settings
(Y page 264)
Assistance submenu Deactivating/activating ESP
®
Observe the "Important safety notes" section
in the description of ESP ®
(Y page 76). 258
Menus and submenusOn-board computer and displays
Page 345 of 417
Adding engine oil
G
WARNING
Certain components in the engine compart-
ment could be very hot, e.g. the engine, the
radiator and parts of the exhaust system.
There is a risk of injury when accessing the
engine compartment.
As far as possible, allow the engine to cool
down and only touch the components descri- bed in the following. G
WARNING
If engine oil comes into contact with hot com- ponents in the engine compartment, it may
ignite. There is a risk of fire and injury.
Make sure that engine oil does not spill out
over the filler neck. Allow the engine to cool
down and thoroughly clean the components
that have come into contact with engine oil
before you start the engine. H
Environmental note
When topping up the oil, take care not to spill
any. If oil enters the soil or waterways, it is
harmful to the environment.
! Only use engine oils and oil filters that
have been approved for vehicles with a ser-
vice system. You can obtain a list of the
engine oils and oil filters tested and
approved in accordance with the
Mercedes-Benz Specifications for Service
Products at any Mercedes-Benz Service
Centre.
Damage to the engine or exhaust system is caused by the following:
R using engine oils and oil filters that have
not been specifically approved for the
service system
R changing the engine oil and oil filter after
missing the change interval required by
the service system
R using engine oil additives
! Do not add too much oil. Topping up with
too much engine oil can result in damage to the engine or to the catalytic converter.
Have excess engine oil siphoned off.
Example
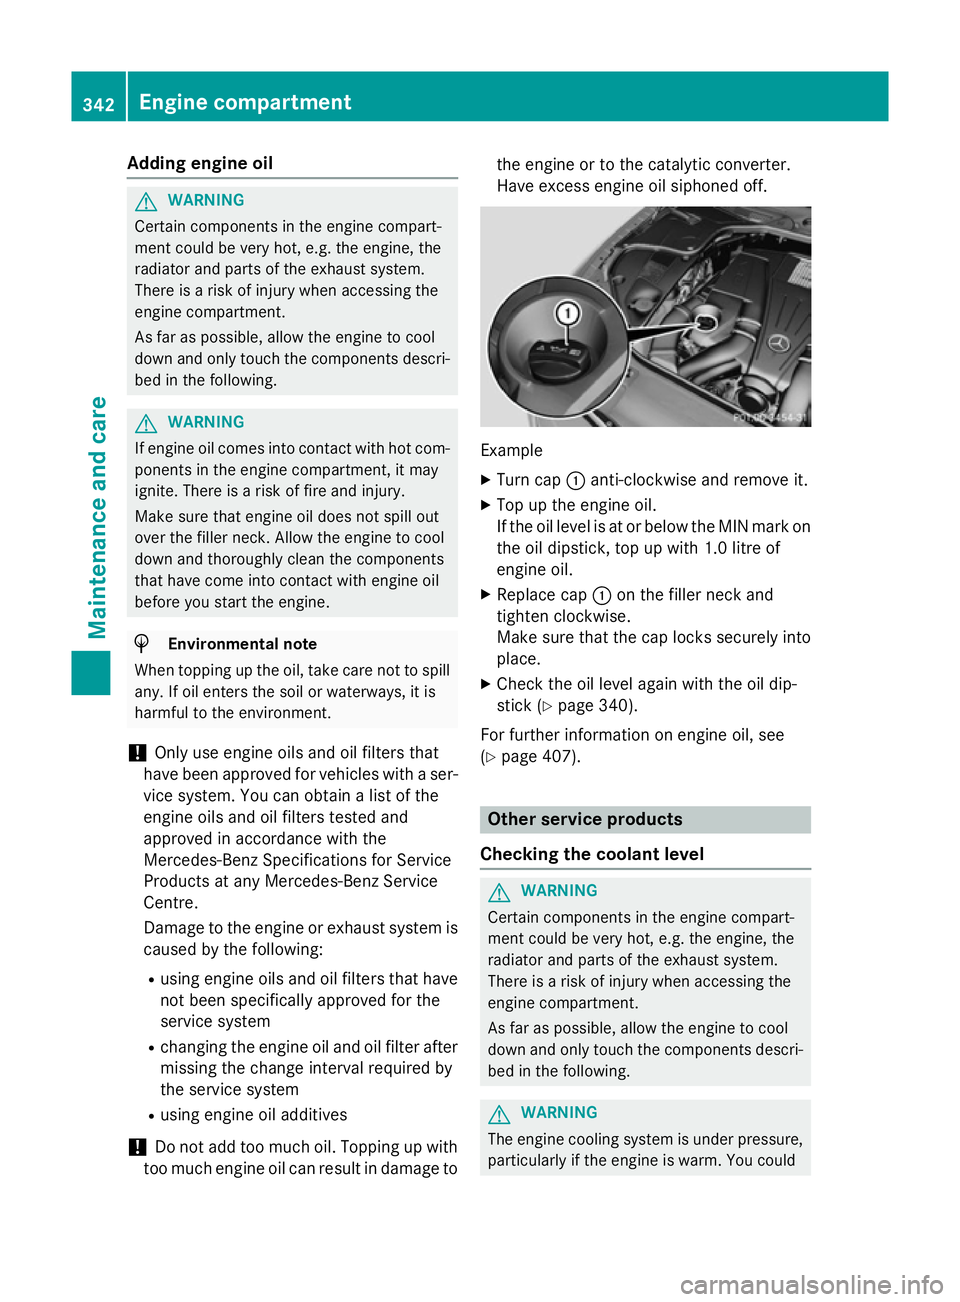
X Turn cap :anti-clockwise and remove it.
X Top up the engine oil.
If the oil level is at or below the MIN mark on
the oil dipstick, top up with 1.0 litre of
engine oil.
X Replace cap :on the filler neck and
tighten clockwise.
Make sure that the cap locks securely into place.
X Check the oil level again with the oil dip-
stick (Y page 340).
For further information on engine oil, see
(Y page 407). Other service products
Checking the coolant level G
WARNING
Certain components in the engine compart-
ment could be very hot, e.g. the engine, the
radiator and parts of the exhaust system.
There is a risk of injury when accessing the
engine compartment.
As far as possible, allow the engine to cool
down and only touch the components descri- bed in the following. G
WARNING
The engine cooling system is under pressure, particularly if the engine is warm. You could 342
Engine compartmentMaintenance and care
Page 351 of 417
X
Remove impurities immediately, where
possible, whilst avoiding rubbing too hard.
X Soak insect remains with insect remover
and rinse off the treated areas afterwards.
X Soak bird droppings with water and rinse
off the treated areas afterwards.
X Remove coolant, brake fluid, tree resin,
oils, fuels and greases by rubbing gently
with a cloth soaked in petroleum ether or
lighter fluid.
X Use tar remover to remove tar stains.
X Use silicone remover to remove wax.
Care and treatment of matt paintwork !
Never polish the vehicle or the light alloy
wheels. Polishing makes the paintwork
shiny.
! The following may cause the paint to
become shiny and thus reduce the matt
effect:
R vigorous rubbing with unsuitable materi-
als
R frequent use of car washes
R washing the vehicle in direct sunlight
! Never use paint cleaner, buffing or pol-
ishing products, or gloss preserver, e.g.
wax. These products are only suitable for
high-gloss surfaces. Their use on vehicles
with matt finish leads to considerable sur-
face damage (shiny, spotted areas).
Always have paintwork repairs carried out
at a qualified specialist workshop.
! Do not use wash programs with a hot wax
treatment under any circumstances.
Observe these notes if your vehicle has a
clear matt finish. This will help you to avoid
damage to the paintwork due to incorrect
treatment.
These notes also apply to light-alloy wheels
with a clear matt finish.
The vehicle should preferably be washed by
hand using a soft sponge, car shampoo and
plenty of water. Use only insect remover and car shampoo
from the range of approved Mercedes-Benz
care products. Cleaning vehicle parts
Cleaning the wheels G
WARNING
The water jet of circular-jet nozzles (dirt grind- ers) can cause damage not visible from the
outside to tyres or chassis components. Com-
ponents damaged in this way can unexpect-
edly fail. There is a risk of an accident.
Do not use high-pressure cleaners with circu-
lar-jet nozzles to clean the vehicle. Have dam- aged tyres or chassis components replaced
immediately.
! Do not use acidic wheel cleaning products
to remove brake dust. This could damage
wheel bolts and brake components.
! Do not park up the vehicle for an extended
period straight after cleaning it, particularly after having cleaned the wheels with wheel cleaner. Wheel cleaners could cause
increased corrosion of the brake discs and
brake pads/linings. For this reason, you
should drive for a few minutes after clean-
ing. Braking heats the brake discs and the
brake pads/linings, thus drying them. The
vehicle can then be parked up.
Cleaning the windows G
WARNING
If the windscreen wipers are set in motion
when cleaning the windscreen or wiper
blades, you could become trapped. There is a danger of injury.
Always switch off the windscreen wipers and
the ignition before cleaning the windscreen orwiper blades.
! Do not use dry cloths, abrasive products,
solvents or cleaning agents containing sol- vents to clean the inside of the windows. Do 348
CareMaintenance and care
Page 389 of 417
Interchanging the wheels
G
WARNING
Interchanging the front and rear wheels may
severely impair the driving characteristics if
the wheels or tyres have different dimensions. The wheel brakes or suspension components may also be damaged. There is a risk of acci-
dent.
Interchange front and rear wheels only if the
wheels and tyres are of the same dimensions.
! On vehicles fitted with a tyre pressure
monitor, electronic components are loca-
ted in the wheel.
Tyre-fitting tools should not be applied in
the area of the valve, as this could damage
the electronic components.
Only have tyres changed at a qualified spe- cialist workshop.
Interchanging the front and rear wheels of
differing dimensions can render the general
operating permit invalid.
Observe the instructions and safety notes in
the "Fitting a wheel" section (Y page 386).
The wear patterns on the front and rear tyres differ depending on the operating conditions.Interchange the wheels before a clear wear
pattern has formed on the tyres. Front tyres
typically wear more on the shoulders and the
rear tyres in the centre.
On vehicles that have the same size front and
rear wheels, you can interchange the wheels
every 5,000 to 10,000 km depending on the
degree of tyre wear. Ensure the direction of
rotation is maintained.
Clean the contact surfaces of the wheel and
the brake disc thoroughly every time a wheel is interchanged. Check the tyre pressure and,
if necessary, restart the tyre pressure loss
warning system (Y page 385) or the tyre pres-
sure monitor (Y page 383) . Direction of rotation
Tyres with a specified direction of rotation
have additional benefits, e.g. if there is a risk of aquaplaning. These advantages can only begained if the tyres are fitted corresponding to
the direction of rotation.
An arrow on the sidewall of the tyre indicates
its correct direction of rotation. Storing wheels
Store wheels in a cool, dry and preferably
dark place if they are not being used. Protect the tyres against oil, grease, petrol and diesel. Fitting a wheel
Preparing the vehicle X
Stop the vehicle on solid, non-slippery and
level ground.
X Apply the electric parking brake manually.
X Move the front wheels to the straight-
ahead position.
X Shift the transmission to position P.
X Make sure that "normal" level is selected
for AIRMATIC (Y page 210).
X Switch off the engine.
X Open the driver's door.
The on-board electronics now have status
0. This is the same as the key having been
removed.
X Remove the Start/Stop button from the
ignition lock (Y page 161).
or, if the key is inserted in the ignition lock: X Remove the key from the ignition lock.
X If included in the vehicle equipment,
remove the tyre-change tool kit from the
vehicle.
X Safeguard the vehicle against rolling away.
i Apart from some country-specific var-
iants, vehicles are not equipped with tyre-
changing tools. Some tools for changing a 386
Changing a wheelWheels and ty
res