2015 MERCEDES-BENZ S-CLASS COUPE instrument cluster
[x] Cancel search: instrument clusterPage 317 of 417
Vehicle
Warning/
indicator
lamp
N N
Signal type
Possible causes/consequences and M
MSolutions Ð
N
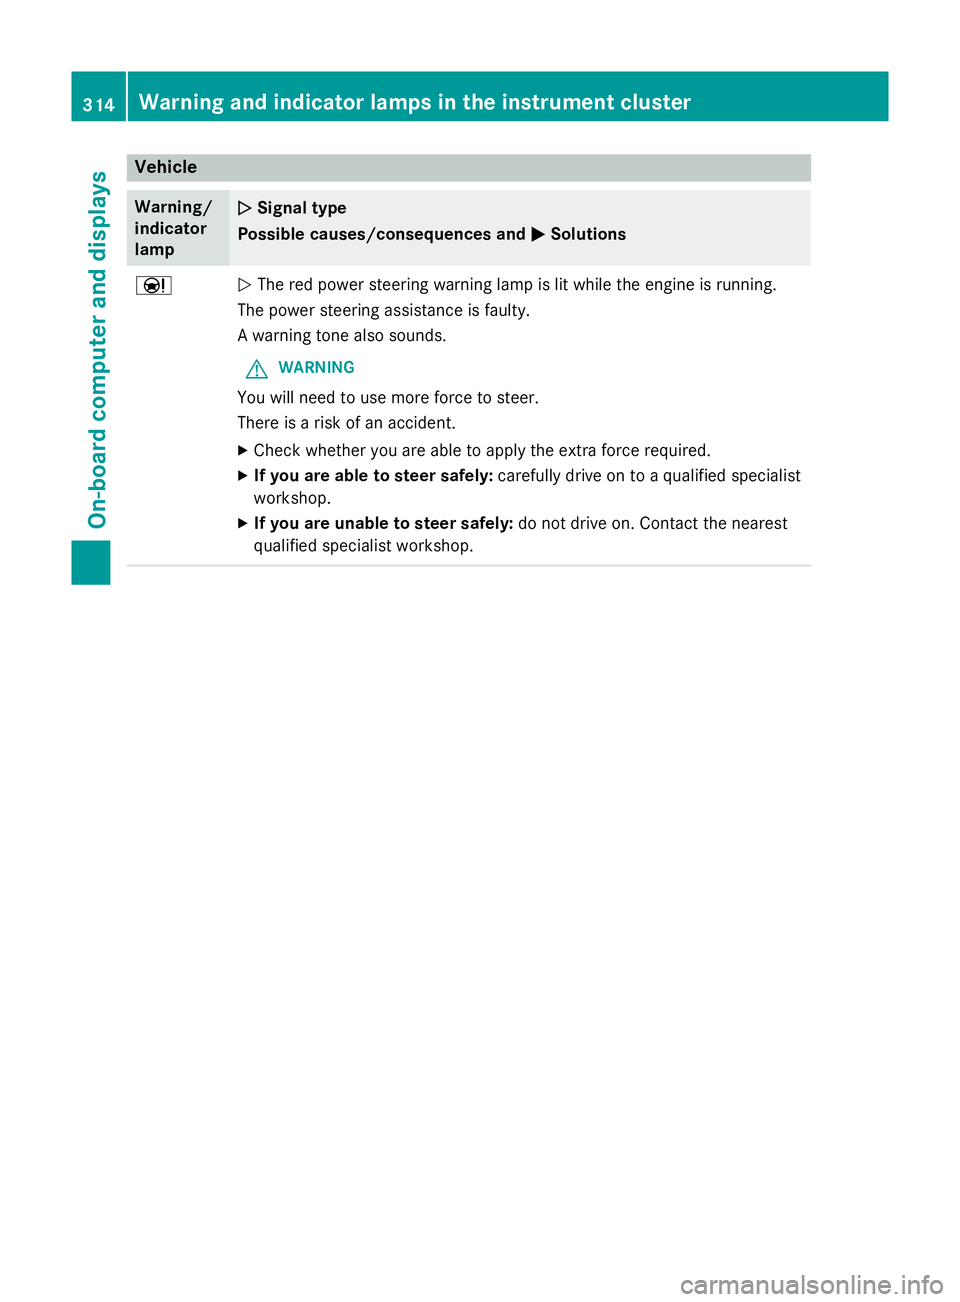
The red power steering warning lamp is lit while the engine is running.
The power steering assistance is faulty.
A warning tone also sounds.
G WARNING
You will need to use more force to steer.
There is a risk of an accident. X Check whether you are able to apply the extra force required.
X If you are able to steer safely: carefully drive on to a qualified specialist
workshop.
X If you are unable to steer safely: do not drive on. Contact the nearest
qualified specialist workshop. 314
Warning and indicator lamps in the instrument clusterOn-board computer and displays
Page 346 of 417
be scalded by hot coolant spraying out when
opening the cap. There is a danger of injury.
Allow the engine to cool before opening the
cap. Wear gloves and protective eyewear
when opening. Slowly turn the cap half a turn to allow pressure to escape. X
Park the vehicle on a level surface.
Only check the coolant level if the vehicle is on a level surface and the engine has
cooled down.
X Turn the key to position 2in the ignition
lock (Y page 161).
or
X Press the Start/Stop button twice
(Y page 161).
X Check the coolant temperature display in
the instrument cluster.
The coolant temperature must be below
70 †.
X Turn the key to position 0in the ignition
lock (Y page 161).
or
X Remove the Start/Stop button from the
ignition lock (Y page 161).
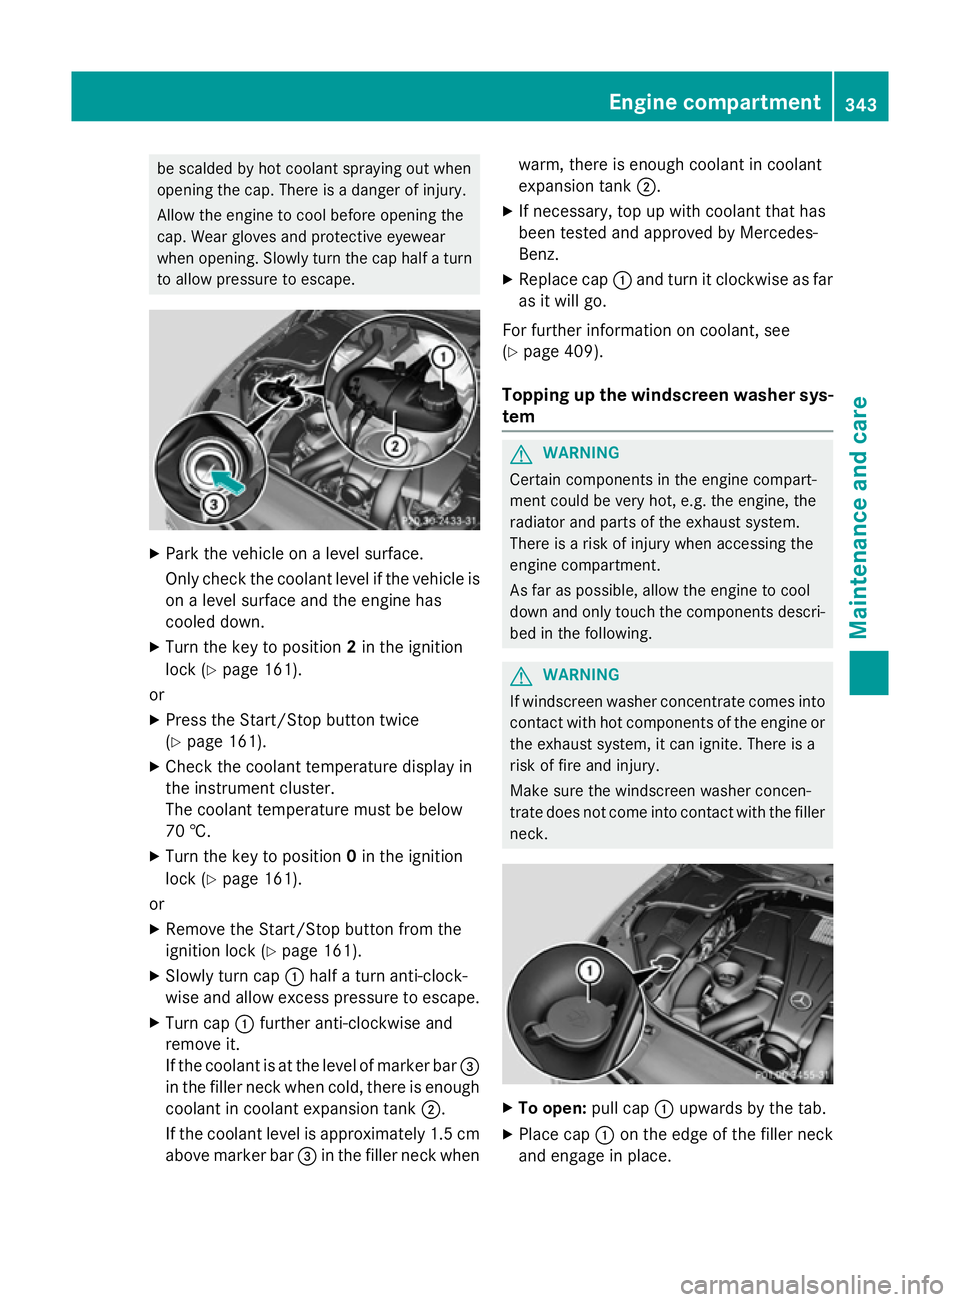
X Slowly turn cap :half a turn anti-clock-
wise and allow excess pressure to escape.
X Turn cap :further anti-clockwise and
remove it.
If the coolant is at the level of marker bar =
in the filler neck when cold, there is enough
coolant in coolant expansion tank ;.
If the coolant level is approximately 1.5 cm above marker bar =in the filler neck when warm, there is enough coolant in coolant
expansion tank
;.
X If necessary, top up with coolant that has
been tested and approved by Mercedes-
Benz.
X Replace cap :and turn it clockwise as far
as it will go.
For further information on coolant, see
(Y page 409).
Topping up the windscreen washer sys-
tem G
WARNING
Certain components in the engine compart-
ment could be very hot, e.g. the engine, the
radiator and parts of the exhaust system.
There is a risk of injury when accessing the
engine compartment.
As far as possible, allow the engine to cool
down and only touch the components descri- bed in the following. G
WARNING
If windscreen washer concentrate comes into contact with hot components of the engine or
the exhaust system, it can ignite. There is a
risk of fire and injury.
Make sure the windscreen washer concen-
trate does not come into contact with the filler neck. X
To open: pull cap:upwards by the tab.
X Place cap :on the edge of the filler neck
and engage in place. Engine compartment
343Maintenance and care Z
Page 366 of 417
G
WARNING
Electrostatic build-up can lead to the creation of sparks, which could ignite the highly explo-
sive gases of a battery. There is a risk of an
explosion.
Before handling the battery, touch the vehicle body to remove any existing electrostatic
build-up.
The highly flammable gas mixture is created
while the battery is charging and when jump-
starting.
Always make sure that neither you nor the
battery is electrostatically charged. Electro-
static charge is created, for example:
R by wearing synthetic fibre clothing
R due to friction between clothing and the
seat
R when you pull or push the battery across
carpet or other synthetic materials
R when you rub the battery with a cloth G
WARNING
During the charging process, a battery produ- ces hydrogen gas. If a short circuit occurs or
sparks are created, the hydrogen gas can
ignite. There is a risk of an explosion.
R Make sure that the positive terminal of a
connected battery does not come into con- tact with vehicle parts.
R Never place metal objects or tools on a bat-
tery.
R It is important that you observe the descri-
bed order of the battery terminals when
connecting and disconnecting a battery.
R When jump-starting, make sure that the
battery poles with identical polarity are
connected.
R It is particularly important to observe the
described order when connecting and dis-
connecting the jump leads.
R Never connect or disconnect the battery
terminals while the engine is running. G
WARNING
Battery acid is caustic. There is a risk of injury. Avoid contact with the skin, eyes or clothing.
Do not breathe in any battery gases. Do not
lean over the battery. Keep the batteries out
of the reach of children. Immediately rinse off
battery acid thoroughly with plenty of clean
water and seek medical attention at once.
All vehicles: H
Environmental note Batteries contain pollutants.
It is illegal to dispose of them
with the household rubbish.
They must be collected sep-
arately and disposed of in anenvironmentally responsible
recycling system. Dispose of batteries in an
environmentally responsible
manner. Take discharged
batteries to a qualified spe-
cialist workshop or to a col-
lection point for used batter-
ies.
! Have the battery checked regularly at a
qualified specialist workshop.
Observe the service intervals in the Service
Booklet or contact a qualified specialist
workshop for more information.
! Always have work on the batteries carried
out at a qualified specialist workshop.
Should it, in exceptional circumstances, be absolutely necessary to disconnect the 12-
volt battery yourself, please observe the
following:
R secure the vehicle to prevent it from roll-
ing away.
R switch off the engine and remove the
key. Make sure the ignition is switched
off. Check that all the indicator lamps in
the instrument cluster are off. Otherwise,
you may damage electronic components such as the alternator, for example. Battery (vehicle)
363Breakdown assistance Z
Page 368 of 417
lean over the battery. Keep the batteries out
of the reach of children. Immediately rinse off
battery acid thoroughly with plenty of clean
water and seek medical attention at once. G
WARNING
A discharged battery can freeze at tempera-
tures below freezing point. When jump-start-
ing the vehicle or charging the battery, gases can escape from the battery. There is a risk of
an explosion.
Allow the frozen battery to thaw out before
charging it or jump-starting.
! Only use battery chargers with a maxi-
mum charging voltage of 14.8 V.
All vehicles:
! Only charge the battery using the jump-
start connection point.
The jump-starting connection point is in the
engine compartment (Y page 366).
X Open the bonnet.
X Connect the battery charger to the positive
terminal and earth point in the same order
as when connecting the donor battery in
the jump-starting procedure (Y page 366).
Keep away from fire and open flames. Do not lean over the battery. Never charge the bat-
tery if it is still fitted to the vehicle, unless you
use a battery charger which has been tested
and approved by Mercedes-Benz. A battery
charger unit specially adapted for Mercedes- Benz vehicles and tested and approved by
Mercedes-Benz is available as an accessory.
This device permits charging of the battery in position. Contact a Mercedes-Benz Service
Centre for information and availability. Read
the battery charger's operating instructions
before charging the battery.
All vehicles except Mercedes-AMG vehi-
cles: if the indicator/warning lamps in the
instrument cluster do not light up at low tem-
peratures, it is very likely that the discharged
battery has frozen. In this case you may nei-
ther jump-start the vehicle nor charge the battery. The service life of a battery that has
been thawed may be reduced. The starting
characteristics may be impaired, especially at
low temperatures. Have the thawed battery
checked at a qualified specialist workshop.
Mercedes-AMG vehicles: at low tempera-
tures, do not charge a battery which has been
removed using a battery charger. Allow the
battery to warm up gently first, if necessary.
Otherwise, the service life can be shortened
and the starting characteristics impaired,
especially at low temperatures. Battery (vehicle)
365Breakdown assistance Z
Page 370 of 417
Do not use a rapid charging device to start the vehicle. If your vehicle's battery is discharged,
the engine can be jump-started from another vehicle or from a second battery using jump
leads. Observe the following points:
R The battery is not accessible in all vehicles. If the other vehicle's battery is not accessible,
jump-start the vehicle using a second battery or a jump-starting device.
R You may only jump-start the vehicle when the engine and exhaust system are cold.
R Keep away from fire and open flames.
R Do not start the engine if the battery is frozen. Let the battery thaw first.
R All vehicles except Mercedes-AMG vehicles: do not start the engine if the battery is
frozen. Let the battery thaw first.
R Jump-starting may only be performed using batteries with a nominal voltage of 12 V.
R Only use jump leads that have a sufficient cross-section and insulated terminal clamps.
R Do not lean over the battery.
R If the battery is fully discharged, leave the battery that is being used to jump-start connected
for a few minutes before attempting to start. This charges the empty battery a little.
R Make sure that the two vehicles do not touch.
Make sure that:
R The jump leads are not damaged.
R Non-insulated parts of the terminal clamps do not come into contact with other metal parts
while the jump leads are connected to the battery.
R The jump leads cannot come into contact with parts which can move when the engine is
running, such as the V-belt pulley or the fan.
X Secure the vehicle by applying the electric parking brake.
X Shift the transmission to position P.
X Make sure the ignition is switched off (Y page 161). All indicator lamps in the instrument
cluster must be off. When using the key, turn the key to position 0in the ignition lock and
remove it (Y page 161).
X Switch off all electrical consumers, e.g. rear window heating, lighting etc.
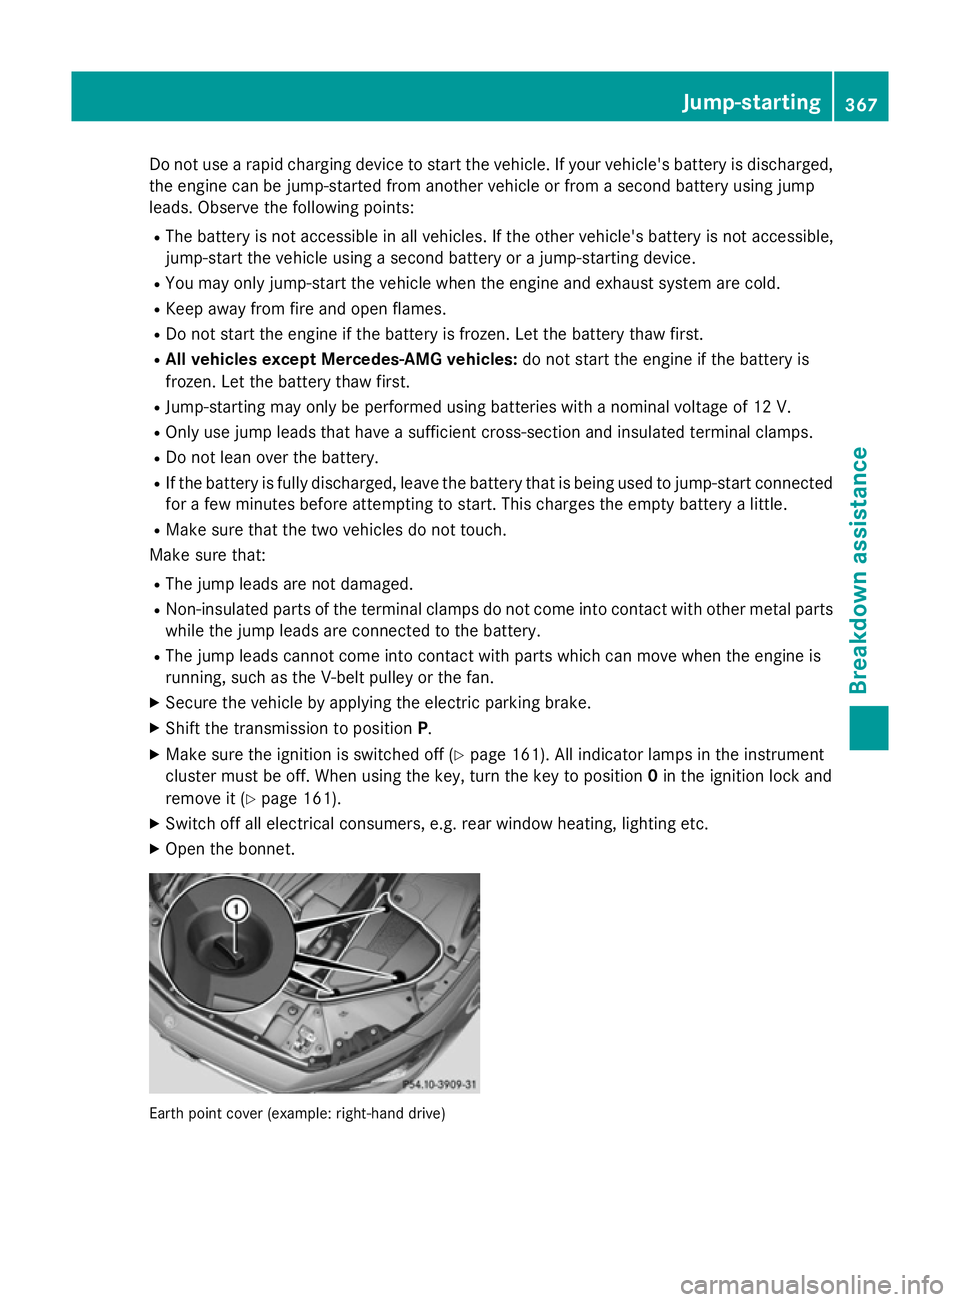
X Open the bonnet. Earth point cover (example: right-hand drive) Jump-starting
367Breakdown assistance Z
Page 375 of 417

As soon as the vehicle is loaded:
X Prevent the vehicle from rolling away by
applying the electric parking brake.
X Shift the automatic transmission to posi-
tion P.
X Turn the key to position 0in the ignition
lock and remove it.
X Secure the vehicle. Notes for 4MATIC vehicles
! Vehicles with 4MATIC must not be towed
with the front or rear axle raised; otherwise,
the transmission may be damaged.
Vehicles with 4MATIC may either be towed
away with both axles on the ground or be loa- ded up and transported.
If the vehicle has transmission damage or
damage to the front or rear axle, have it trans-
ported on a transporter or trailer.
In the event of damage to the electrical
system: if the battery is defective, the auto-
matic transmission will be locked in position
P. To shift the automatic transmission to posi-
tion N, you must provide power to the vehi-
cle's electrical system in the same way as
when jump-starting (Y page 366).
Have the vehicle transported on a transporter
or trailer. Tow-starting (emergency engine
starting)
! Do not tow-start vehicles with automatic
transmission. You could otherwise damage the automatic transmission.
i Information on "Jump-starting"
(Y page 366). Electrical fuses
Important safety notes
G
WARNING
If you manipulate, bridge or replace a faulty
fuse with a fuse of a higher amperage, the
electric cables could be overloaded. This may result in a fire. There is a risk of an accident
and injury.
Always replace faulty fuses with specified new fuses of the correct amperage.
Blown fuses must be replaced with fuses of
the same rating, which you can recognise by
the colour and fuse rating. The fuse ratings
are listed in the fuse allocation chart.
The fuse allocation chart is on the fuse box in
the boot (Y page 374).
If the newly inserted fuse also blows, have the
cause traced and rectified at a qualified spe-
cialist workshop, e.g. a Mercedes-Benz Ser-
vice Centre.
! Only use fuses that have been approved
for Mercedes-Benz vehicles and which
have the correct fuse rating for the system
concerned. Otherwise, components or sys-
tems could be damaged.
The fuses in your vehicle disconnect faulty
circuits. If a fuse blows, all the components on the circuit and their functions will fail. Before replacing a fuse
X Safeguard the vehicle against rolling away
(Y page 181).
X Switch off all electrical consumers.
X Make sure that the ignition is switched off
(Y page 161).
or
X When using the key, turn the key to position
0 in the ignition lock and remove it
(Y page 161).
All indicator lamps in the instrument cluster
must be off. 372
Electrical fusesBreakdown assistance
Page 385 of 417

ensure that a warning message will only
appear if the tyre pressure drops significantly.
The tyre pressure monitor does not warn you of an incorrectly set tyre pressure. Observe
the notes on the recommended tyre pressure
(Y page 380).
The tyre pressure monitor is not able to warn
you of a sudden loss of pressure, e.g. if the
tyre is penetrated by a foreign object. In the
event of a sudden loss of pressure, bring the
vehicle to a halt by braking carefully. Avoid
abrupt steering manoeuvres.
The tyre pressure monitor has a yellow warn-
ing lamp in the instrument cluster for indicat- ing a pressure loss or malfunction. Depending
on how the warning lamp flashes or lights up, a tyre pressure that is too low or a malfunc-
tion in the tyre pressure monitor is indicated:
R if the warning lamp is lit continuously, the
tyre pressure on one or more tyres is sig-
nificantly too low. The tyre pressure moni-
tor is not malfunctioning.
R if the warning lamp flashes for around a
minute and then remains lit constantly, the tyre pressure monitor is malfunctioning.
In addition to the warning lamp, a message
appears in the multifunction display. Observe
the information on display messages
(Y page 295).
It may take up to ten minutes for a malfunc-
tion of the tyre pressure monitor to be indi-
cated. A malfunction will be indicated by the
tyre pressure warning lamp flashing for
approximately one minute and then remain-
ing lit. When the fault has been rectified, the
tyre pressure warning lamp goes out after you
have driven for a few minutes.
The tyre pressure values indicated by the on- board computer may differ from those meas-
ured at a filling station using a pressure
gauge. The tyre pressures shown by the on-
board computer refer to those measured at
sea level. At high altitudes, the tyre pressure
values indicated by a pressure gauge are
higher than those shown by the on-board computer. In this case, do not reduce the tyre
pressures.
The operation of the tyre pressure monitor
can be affected by interference from radio
transmitting equipment (e.g. radio head-
phones, two-way radios) that may be being
operated in or near the vehicle.
Checking the tyre pressure electroni-
cally X
Make sure that the key is in position 2in the
ignition lock (Y page 161).
X Press the òbutton on the steering
wheel to call up the list of menus.
X Press 9or: on the steering wheel
to select the Service Servicemenu.
X Press the abutton.
X Press 9or: to select Tyre pres‐
Tyre pres‐
sure
sure .
X Press the abutton.
The current tyre pressure for each wheel
will be displayed in the multifunction dis-
play.
If the vehicle was parked for longer than
20 minutes, the Tyre Tyrepressures
pressures will
willbe
be
displayed after a few minutes of
displayed after a few minutes of
driving driving message appears.
After a teach-in period, the tyre pressure
monitor automatically detects new wheels or new sensors. As long as a clear allocation of
the tyre pressure values to the individual
wheels is not possible, the Tyre pressure Tyre pressure
monitor active
monitor active message is shown instead
of the tyre pressure display. The tyre pres-
sures are already being monitored. 382
Tyre pressureWheels and tyres