2015 MERCEDES-BENZ M-Class condit
[x] Cancel search: conditPage 214 of 466
ADS (Adaptive Damping System)
General notes
ADS adapts the damping characteristics to
the current operating and driving situation.
This depends on:
R your driving style
R the road surface conditions
R the ADS setting
R the vehicle level setting
Your selection remains stored even if you
remove the SmartKey from the ignition lock.
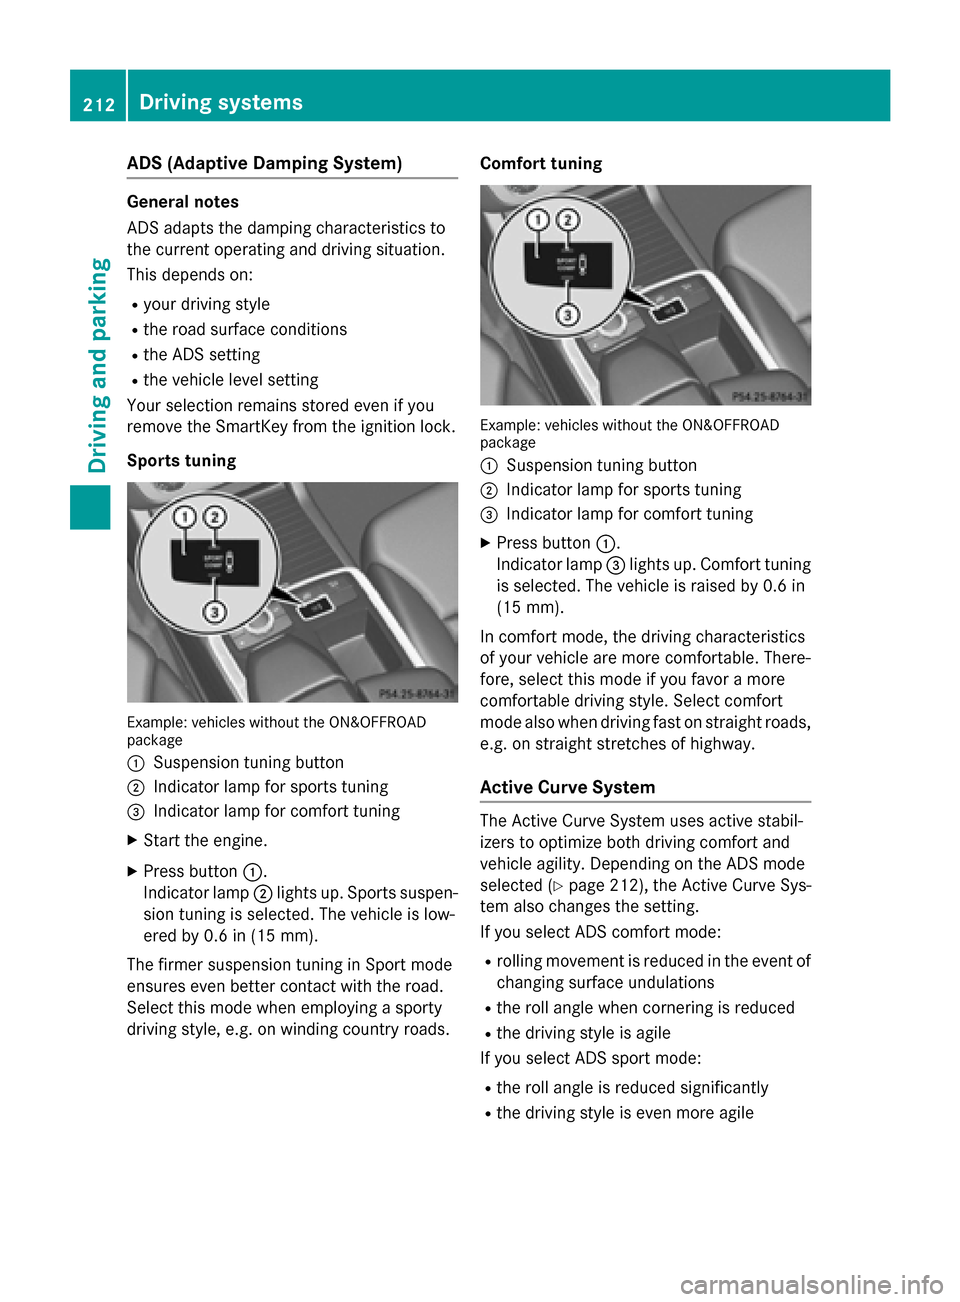
Sports tuning Example: vehicles without the ON&OFFROAD
package
0043 Suspension tuning button
0044 Indicator lamp for sports tuning
0087 Indicator lamp for comfort tuning
X Start the engine.
X Press button 0043.
Indicator lamp 0044lights up. Sports suspen-
sion tuning is selected. The vehicle is low-
ered by 0.6 in (15 mm).
The firmer suspension tuning in Sport mode
ensures even better contact with the road.
Select this mode when employing a sporty
driving style, e.g. on winding country roads. Comfort tuning Example: vehicles without the ON&OFFROAD
package
0043 Suspension tuning button
0044 Indicator lamp for sports tuning
0087 Indicator lamp for comfort tuning
X Press button 0043.
Indicator lamp 0087lights up. Comfort tuning
is selected. The vehicle is raised by 0.6 in
(15 mm).
In comfort mode, the dr iving characteristics
of your vehicle are more comfortable. There-
fore, select this mode if you favor a more
comfortable driving style. Select comfort
mode also when driving fast on straight roads,
e.g. on straight stretches of highway.
Active Curve System The Active Curve System uses active stabil-
izers to optimize both driving comfort and
vehicle agility. Depending on the ADS mode
selected (Y page 212), the Active Curve Sys-
tem also changes the setting.
If you select ADS comfort mode:
R rolling movement is reduced in the event of
changing surface undulations
R the roll angle when cornering is reduced
R the driving style is agile
If you select ADS sport mode:
R the roll angle is reduced significantly
R the driving style is even more agile 212
Driving systemsDriving and parking
Page 215 of 466
Level control
Important safety notes
G
WARNING
When the vehicle is being lowered, people
could become trapped if their limbs are
between the vehicle body and the wheels or
underneath the vehicle. There is a risk of
injury.
Make sure no one is underneath the vehicle or in the immediate vicinity of the wheel arches
when the vehicle is being lowered. G
WARNING
When you drive with the vehicle raised, the
driving characteristics could be impaired by
the vehicle's raised center of gravity. The vehi- cle could rollover more easily, for example on
a bend. There is a risk of an accident.
Always select as low a vehicle level as possi-
ble and adjust your driving style. G
WARNING
When you drive with the chassis lowered or
raised, the vehicle's braking and driving char-
acteristics can be significantly impaired. You
could also exceed the permissible vehicle
height if the chassis is raised. There is a risk of an accident.
Adjust the vehicle level before pulling away. G
WARNING
Due to the high center of gravity, the vehicle
may start to skid and roll over in the event of
an abrupt steering maneuver and/or when
the vehicle's speed is not adapted to the road conditions. There is a risk of an accident.
Always adapt your speed and driving style to
the vehicle's driving characteristics and to the prevailing road and weather conditions.
! When driving on extremely rough terrain,
select a high vehicle level in good time.
Make sure there is always sufficient ground
clearance. You will otherwise damage the
vehicle. !
When you raise the vehicle in such a way
that not all wheels have contact with the
ground, remove the SmartKey from the
ignition lock.
R Utility vehicles have a significantly higher
rollover rate than other types of vehicles.
Failure to operate this vehicle safely may
result in an accident, rollover of the vehicle, and severe or fatal injury.
R In a rollover crash, an unbelted person is
significantly more likely to die than a per-
son wearing a seat belt.
You and all vehicle occupants should
always wear your seat belts.
General notes
Further information about "Driving off-road"
(Y page 191).
Level control adapts the vehicle level auto-
matically to the current operating and driving situation. This results in reduced fuel con-
sumption and improved handling.
If you select ADS comfort mode (Y page 212),
the vehicle is lowered to high-speed level as
the speed increases. As the vehicle speed
decreases, the vehicle is raised back up to
highway level.
If you select ADS sport mode (Y page 212),
the vehicle skips highway level and lowers
directly to high-speed level depending on the
basic setting (Y page 214).
Make changes to the vehicle level while the
vehicle is in motion. This enables the vehicle
to adjust to the new level as quickly as pos-
sible.
The vehicle level may change visibly if you
park the vehicle and the outside temperature
changes. If the temperature drops, the vehi-
cle level is lower; with an increase in temper- ature, the vehicle level rises.
If you unlock the vehicle or open a door, the
vehicle begins to compensate for load dis-
crepancies while still parked. However, for
significant level changes, such as after the
vehicle has been stationary for a long period,
the engine must be on. For safety reasons, Driving systems
213Driving and parking Z
Page 216 of 466
the vehicle is only lowered when the doors are
closed. Lowering is interrupted if a door is
opened, and it continues once the door has
been closed.
Basic settings (excluding AMG vehicles)
The extent to which the vehicle is raised or
lowered depends on the basic setting selec-
ted. Select raised level for off-road driving or
highway/high-speed level for normal roads.
The individual vehicle levels differ from high-
way level as follows:
R highway level: +/–0 in (+/–0 mm)
R high-speed level: –0.6 in (–15 mm)
R raised level: +2.3 in (+60 mm)
Basic settings for AMG vehicles
The extent to which the vehicle is raised or
lowered depends on the AMG adaptive sport
suspension setting selected. Select the
raised level for off-road driving or highway/
high-speed level for normal roads.
The raised level corresponds to a vehicle level
raised by 50 mm when compared with high-
way level in comfort mode.
Raised level Only select raised level if this is appropriate
for the road conditions. Otherwise, fuel con-
sumption may increase and handling may be
affected.
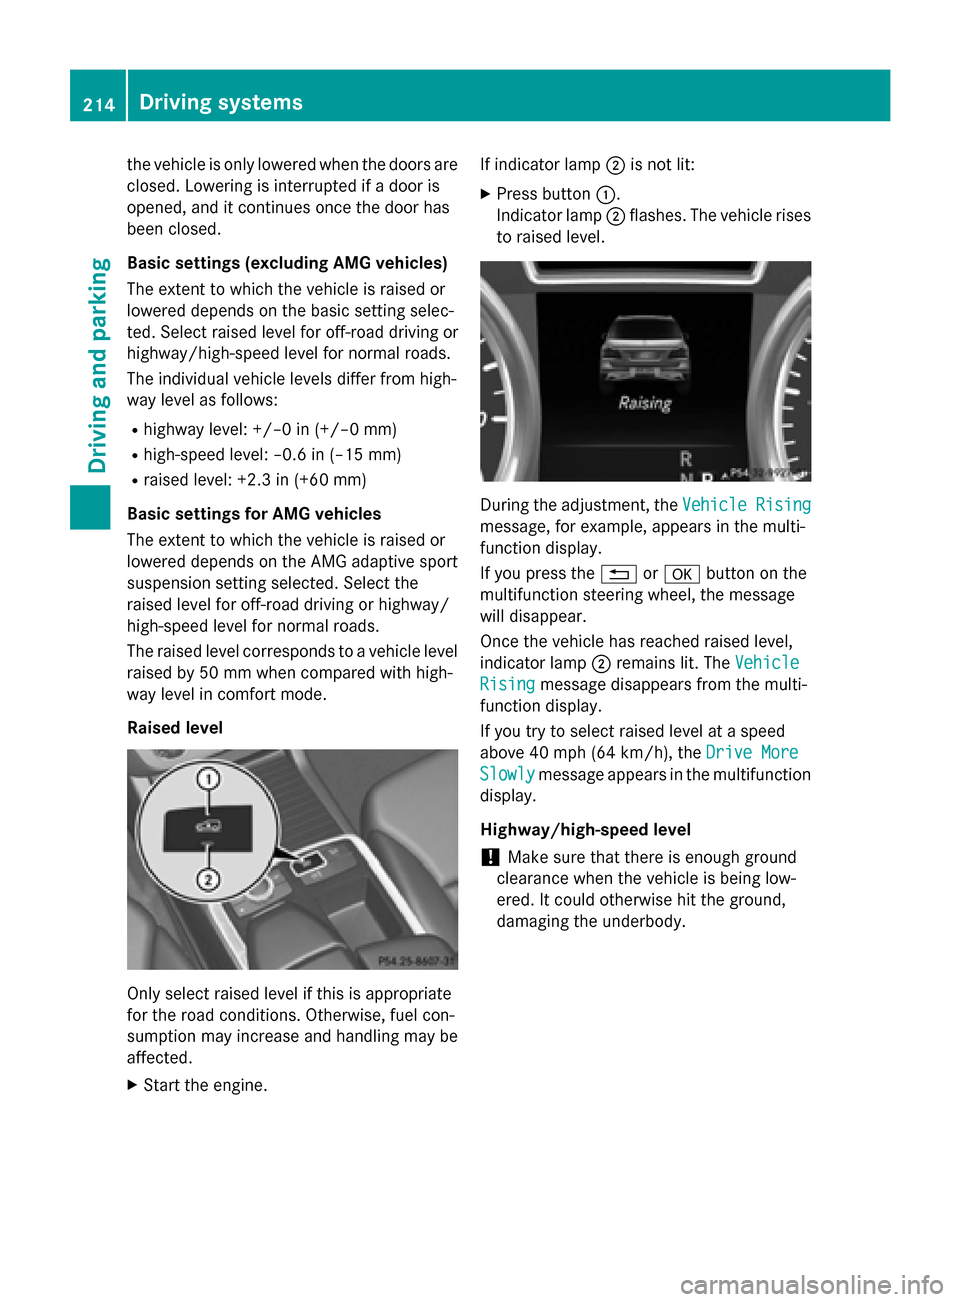
X Start the engine. If indicator lamp
0044is not lit:
X Press button 0043.
Indicator lamp 0044flashes. The vehicle rises
to raised level. During the adjustment, the
Vehicle Rising Vehicle Rising
message, for example, appears in the multi-
function display.
If you press the 0038or0076 button on the
multifunction steering wheel, the message
will disappear.
Once the vehicle has reached raised level,
indicator lamp 0044remains lit. The Vehicle
Vehicle
Rising Rising message disappears from the multi-
function display.
If you try to select raised level at a speed
above 40 mph (64 km/h), the Drive More Drive More
Slowly Slowly message appears in the multifunction
display.
Highway/high-speed level
! Make sure that there is enough ground
clearance when the vehicle is being low-
ered. It could otherwise hit the ground,
damaging the underbody. 214
Driving systemsDriving an
d parking
Page 218 of 466

Vehicle level
Level control adapts the vehicle level auto-
matically to the current operating and driving
situation. Level control ensures the best pos-
sible suspension and constant ground clear-
ance, even with a laden vehicle. This improves
driving safety and fuel consumption.
The AIRMATIC package and ACTIVE CURVE
SYSTEM are always components of AMG
adaptive suspension system (Y page 211).
Due to the sportier suspension settings com- pared to standard vehicles, the levels and
speed thresholds for sinking and raising the
vehicle are different.
In Comfort and Sport driving modes, after
locking the vehicle it lowers to the Sport+
level. When locking the vehicle at the raised
level, the vehicle does not lower.
The settings will remain stored after you
switch off the engine. When starting the
engine, the selected setting, e.g. AMG adap-
tive suspension system Comfort, is restored.
i The vehicle level may change visibly if you
park the vehicle and the outside tempera-
ture changes. If the temperature drops, the vehicle level lowers; with an increase in
temperature, the vehicle level rises.
Suspension tuning General notes
The electronically controlled damping system
works continuously. This improves driving
safety and ride comfort.
The damping is tuned individually to each
wheel and depends on:
R your driving style
R the road surface conditions
R your individual selection of Sport, Sport +
or Comfort
Your selection remains stored even if you
remove the SmartKey from the ignition lock. Sport mode
The firmer suspension tuning in Sport mode
ensures even better contact with the road.
Select this mode when employing a sporty
driving style, e.g. on winding country roads.
X Press button 0043once.
Indicator lamp 0044lights up. You have selec-
ted Sport mode.
The AMG
AMG Suspension Suspension System
SystemSPORT
SPORTmes-
sage appears in the multifunction display.
Sport + mode
The very firm setting of the suspension tuning in Sport + mode ensures the best possible
contact with the road. Select this mode pref-
erably when driving on race circuits.
If indicator lamps 0087and 0044are off:
X Press button 0043twice.
Indicator lamps 0087and 0044light up. You
have selected Sport + mode. The vehicle is
lowered by 10 mm.
The AMG Suspension System SPORT + AMG Suspension System SPORT +
message appears in the multifunction dis-
play.
If indicator lamp 0044lights up:
X Press button 0043once.
Second indicator lamp 0087lights up. You
have selected Sport + mode. The vehicle is
lowered by 10 mm.
The AMG Suspension System SPORT + AMG Suspension System SPORT +
message appears in the multifunction dis-
play. 216
Driving systemsDriving an
d parking
Page 225 of 466

As soon as the parking procedure is com-
plete, the Park
ParkAssist
Assist switched
switched off
offmes-
sage appears and a warning tone sounds.
Active Parking Assist no longer supports you
with steering interventions. When Active
Parking Assist is finished, you must steer
again yourself. PARKTRONIC is still available.
Parking tips:
R The way your vehicle is positioned in the
parking space after parking is dependent
on various factors. These include the posi-
tion and shape of the vehicles parked in
front and behind it and the conditions of the
location. It may be the case that Active
Parking Assist guides you too far into a
parking space, or not far enough into it. In
some cases, it may also lead you across or
onto the curb. If necessary, you should can- cel the parking procedure with Active Park-ing Assist.
R You can also select preselect transmission
position D. The vehicle redirects and does
not drive as far into the parking space.
Should the gear change occur too soon to
achieve a sensible parking position, the
parking procedure will be aborted.
Exiting a parking space In order that Active Parking Assist can sup-
port you when you exit the parking space:
R you need to have parked using Active Park-
ing Assist.
R the border of the parking space must be
high enough at the front and the rear. A
curb stone is too small, for example.
R the border of the parking space must not be
too wide, as the position of the vehicle must
not exceed an angle of 45° to the starting
position as it is maneuvered into the park-
ing space.
R a maneuvering distance of at least 3.3 ft
(1.0 m) must be available.
X Start the engine.
X Release the electric parking brake. X
Switch on the turn signal in the direction
you are pulling away.
X Shift the transmission to position Dor R.
The Start Park Assist? Yes: OK No: Start Park Assist? Yes: OK No:
0038 message appears in the multifunction
display.
X To cancel the procedure: press the0038
button on the multifunction steering wheel or pull away.
or
X To exit a parking space using Active
Parking Assist: press the0076button on
the multifunction steering wheel.
The Park Assist Active Accelerate Park Assist Active Accelerate
and
and Brake
Brake Observe
Observe Surroundings
Surroundings mes-
sage appears in the multifunction display.
X Let go of the multifunction steering wheel.
X Reverse the vehicle or drive forwards, being
ready to brake at all times. Do not exceed a
maximum speed of approximately 6 mph
(10 km/h) when exiting a parking space.
Otherwise Active Parking Assist will be can- celed.
X Stop as soon as PARKTRONIC sounds the
continuous warning tone, if not before.
X Shift the transmission to position Dor Ras
required while the vehicle is stationary.
Active Parking Assist immediately steers in the other direction.
i You will achieve the best results by wait-
ing for the steering procedure to complete before pulling away.
If you back up after activation, the steeringwheel is moved to the straight-ahead posi-
tion.
X Drive forwards or back up the vehicle, being
ready to brake at all times.
X Stop as soon as PARKTRONIC sounds the
continuous warning tone, if not before.
X Drive forwards and back up as prompted by
the PARKTRONIC warning displays, several
times if necessary.
Once you have exited the parking space com- pletely, the steering wheel is moved to the
straight-ahead position. You hear a tone and Driving systems
223Driving and parking Z
Page 232 of 466
R
if the tailgate is open
R in heavy rain, snow or fog
R at night or in very dark places
R if the cameras are exposed to very bright
light
R if the area is lit by fluorescent bulbs or LED
lighting (the display may flicker)
R if there is a sudden change in temperature,
e.g. when driving into a heated garage in
winter
R if the camera lenses are dirty or covered
R if the vehicle components in which the
cameras are installed are damaged. In this
event, have the camera position and setting
checked at a qualified specialist workshop.
Do not use the 360° camera in this case. You
can otherwise injure others or cause damage to objects or the vehicle.
Activation conditions The 360° camera image can be displayed if:
R your vehicle is equipped with a 360° cam-
era
R COMAND is switched on, see the separate
COMAND operating instructions
R the 360° Camera
360° Camera function is activated
Activating the 360° camera using the
SYS button X
Press and hold the 0066button for longer
than 2 seconds, see the separate COMAND
operating instructions.
Depending on whether position Dor Ris
engaged, the following is shown:
R full screen display with the image from
the front camera
R full screen display with the image from
the rear view camera Activating the 360° camera with
COMAND X
Press the 0066button, see the separate
COMAND operating instructions.
X Select System System by turning 00790052007Athe
COMAND controller and press 0098to con-
firm.
X Select 360° camera 360° camera and press0098to con-
firm.
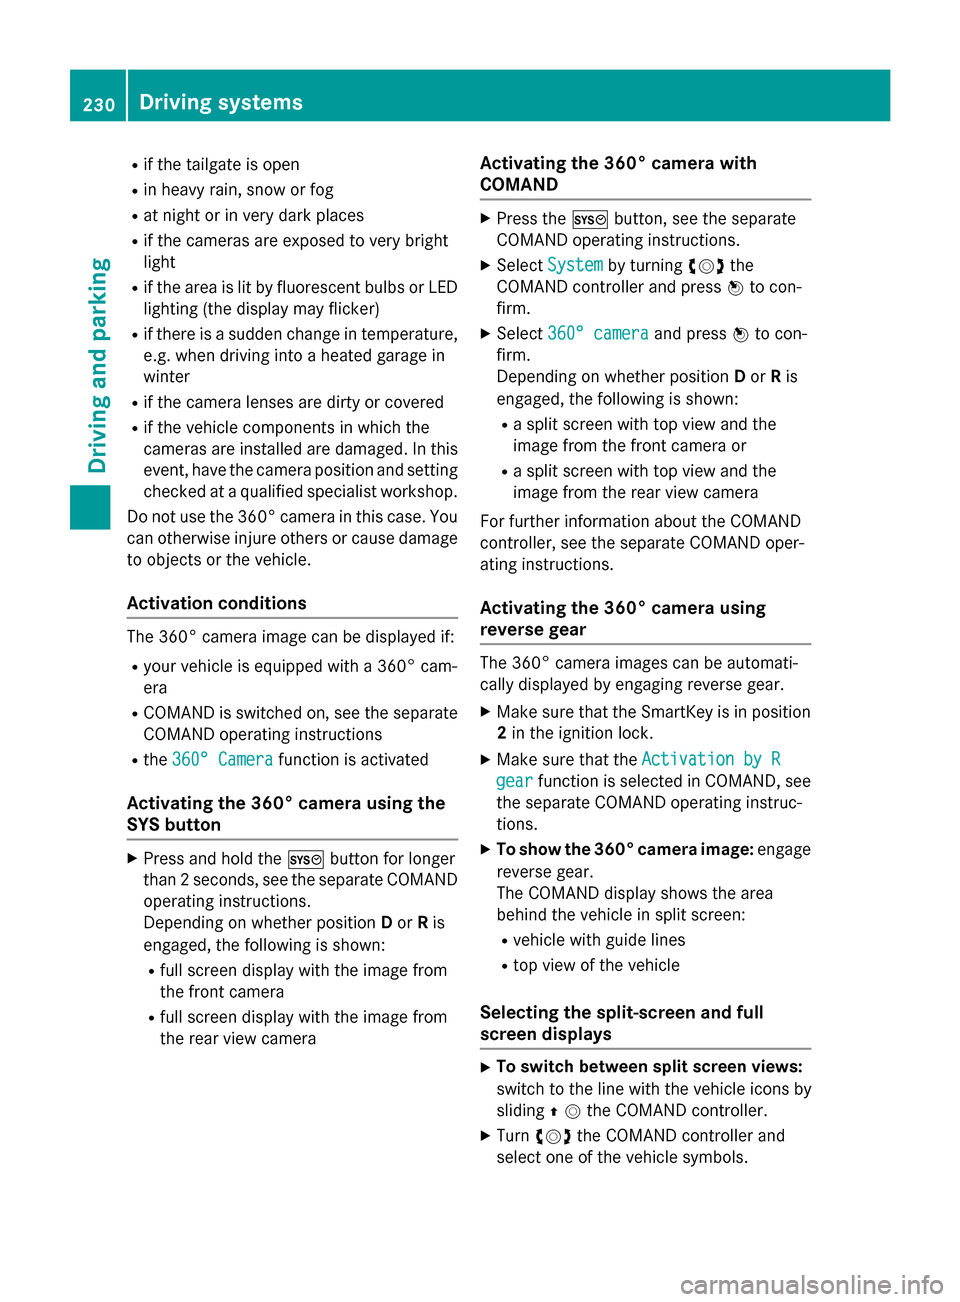
Depending on whether position Dor Ris
engaged, the following is shown:
R a split screen with top view and the
image from the front camera or
R a split screen with top view and the
image from the rear view camera
For further information about the COMAND
controller, see the separate COMAND oper-
ating instructions.
Activating the 360° camera using
reverse gear The 360° camera images can be automati-
cally displayed by engaging reverse gear.
X Make sure that the SmartKey is in position
2 in the ignition lock.
X Make sure that the Activation by R Activation by R
gear
gear function is selected in COMAND, see
the separate COMAND operating instruc-
tions.
X To show the 360° camera image: engage
reverse gear.
The COMAND display shows the area
behind the vehicle in split screen:
R vehicle with guide lines
R top view of the vehicle
Selecting the split-screen and full
screen displays X
To switch between split screen views:
switch to the line with the vehicle icons by
sliding 00970052the COMAND controller.
X Turn 00790052007A the COMAND controller and
select one of the vehicle symbols. 230
Driving systemsDriving an
d parking
Page 235 of 466
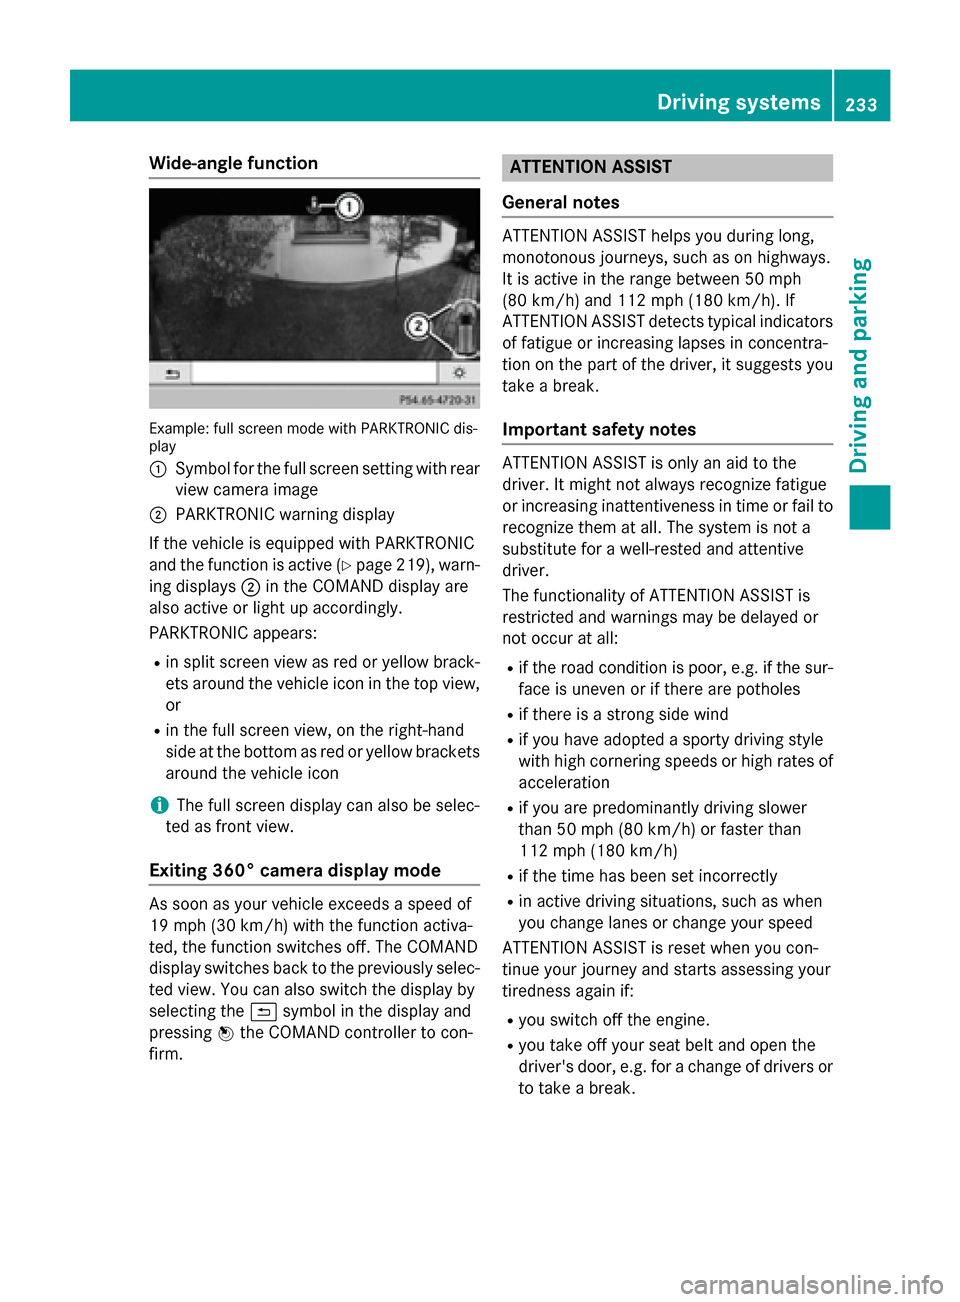
Wide-angle function
Example: full screen mode with PARKTRONIC dis-
play
0043 Symbol for the full screen setting with rear
view camera image
0044 PARKTRONIC warning display
If the vehicle is equipped with PARKTRONIC
and the function is active (Y page 219), warn-
ing displays 0044in the COMAND display are
also active or light up accordingly.
PARKTRONIC appears:
R in split screen view as red or yellow brack-
ets around the vehicle icon in the top view, or
R in the full screen view, on the right-hand
side at the bottom as red or yellow brackets
around the vehicle icon
i The full screen display can also be selec-
ted as front view.
Exiting 360° camera display mode As soon as your vehicle exceeds a speed of
19 mph (30 km/h) with the function activa-
ted, the function switches off. The COMAND
display switches back to the previously selec-
ted view. You can also switch the display by
selecting the 0039symbol in the display and
pressing 0098the COMAND controller to con-
firm. ATTENTION ASSIST
General notes ATTENTION ASSIST helps you during long,
monotonous journeys, such as on highways.
It is active in the range between 50 mph
(80 km/h) and 112 mph (180 km/h). If
ATTENTION ASSIST detects typical indicators
of fatigue or increasing lapses in concentra-
tion on the part of the driver, it suggests you
take a break.
Important safety notes ATTENTION ASSIST is only an aid to the
driver. It might not always recognize fatigue
or increasing inattentiveness in time or fail to
recognize them at all. The system is not a
substitute for a well-rested and attentive
driver.
The functionality of ATTENTION ASSIST is
restricted and warnings may be delayed or
not occur at all:
R if the road condition is poor, e.g. if the sur-
face is uneven or if there are potholes
R if there is a strong side wind
R if you have adopted a sporty driving style
with high cornering speeds or high rates of
acceleration
R if you are predominantly driving slower
than 50 mph (80 km/h) or faster than
112 mph (180 km/h)
R if the time has been set incorrectly
R in active driving situations, such as when
you change lanes or change your speed
ATTENTION ASSIST is reset when you con-
tinue your journey and starts assessing your
tiredness again if:
R you switch off the engine.
R you take off your seat belt and open the
driver's door, e.g. for a change of drivers or
to take a break. Driving systems
233Driving and parking Z
Page 236 of 466

Activating ATTENTION ASSIST
X
Activate ATTENTION ASSIST using the on-
board computer (Y page 276).
When ATTENTION ASSIST is deactivated, the 00D7 symbol appears in the multifunction
display in the assistance graphic display.
ATTENTION ASSIST is activated automatically
after the engine is started up.
Warning and display messages in the
multifunction display If fatigue or increasing lapses in concentra-
tion are detected, a warning appears in the
multifunction display: Attention Assist: Attention Assist:
Take a Break!
Take a Break!
In addition to the message shown in the mul-
tifunction display, you will then hear a warn-
ing tone.
X If necessary, take a break.
X Confirm the message by pressing the 0076
button on the steering wheel.
On long journeys, take regular breaks in good
time to allow yourself to rest properly. If you
do not take a break, you will be warned again
after 15 minutes at the earliest. The precon-
dition for this is that ATTENTION ASSIST still
detects typical indicators of fatigue or
increasing lapses in concentration. Night View Assist Plus
General notes In addition to the illumination provided by the
normal headlamps, Night View Assist Plus
uses infrared light to illuminate the road.
Night View Assist Plus camera 0043picks up the
infrared light and displays a monochrome
image in COMAND. The image displayed in
COMAND corresponds to a road lit up by high- beam headlamps. This enables you to see the
road's course and any obstacles in good time. If pedestrian recognition is activated, pedes-
trians recognized by the system are highligh-
ted in the Night View Assist Plus display.
Light from the headlamps of oncoming vehi-
cles does not affect the Night View Assist Plus
display in the multifunction display. This is
also the case if you cannot switch on the high-
beam headlamps due to oncoming traffic.
i Infrared light is not visible to the human
eye and therefore does not glare. Night
View Assist Plus can therefore remain
switched on even if there is oncoming traf- fic.
Important safety notes Night View Assist Plus is only an aid and is not
a substitute for attentive driving. Do not rely
on the Night View Assist Plus display. You are responsible for the distance to the vehicle in
front, for vehicle speed and for braking in
good time. Drive carefully and always adapt
your driving style to suit the prevailing road
and traffic conditions.
The system may be impaired or may not func-
tion if:
R there is poor visibility, e.g. due to snow,
rain, fog or spray
R the windshield is dirty, fogged up or cov-
ered, for instance by a sticker, in the vicinity
of the camera
R on bends, on uphill gradients or downhill
gradients 234
Driving systemsDriving and pa
rking