2015 MERCEDES-BENZ M-Class window
[x] Cancel search: windowPage 153 of 466

Problems with the rear window defroster
Problem
Possible causes/consequences and
0050
0050Solutions The rear window
defroster has deactiva-
ted prematurely or can-
not be activated. The battery has not been sufficiently charged.
X Switch off any consumers that are not required, e.g. reading
lamps, interior lighting or the seat heating.
When the battery is sufficiently charged, the rear window
defroster can be activated again. Activating/deactivating air-recircula-
tion mode
General notes You can deactivate the flow of fresh air if
unpleasant odors are entering the vehicle
from outside. The air already inside the vehi-
cle will then be recirculated.
If you switch on air-recirculation mode, the
windows can fog up more quickly, in particu-
lar at low temperatures. Only use air-recircu-
lation mode briefly to prevent the windows
from fogging up.
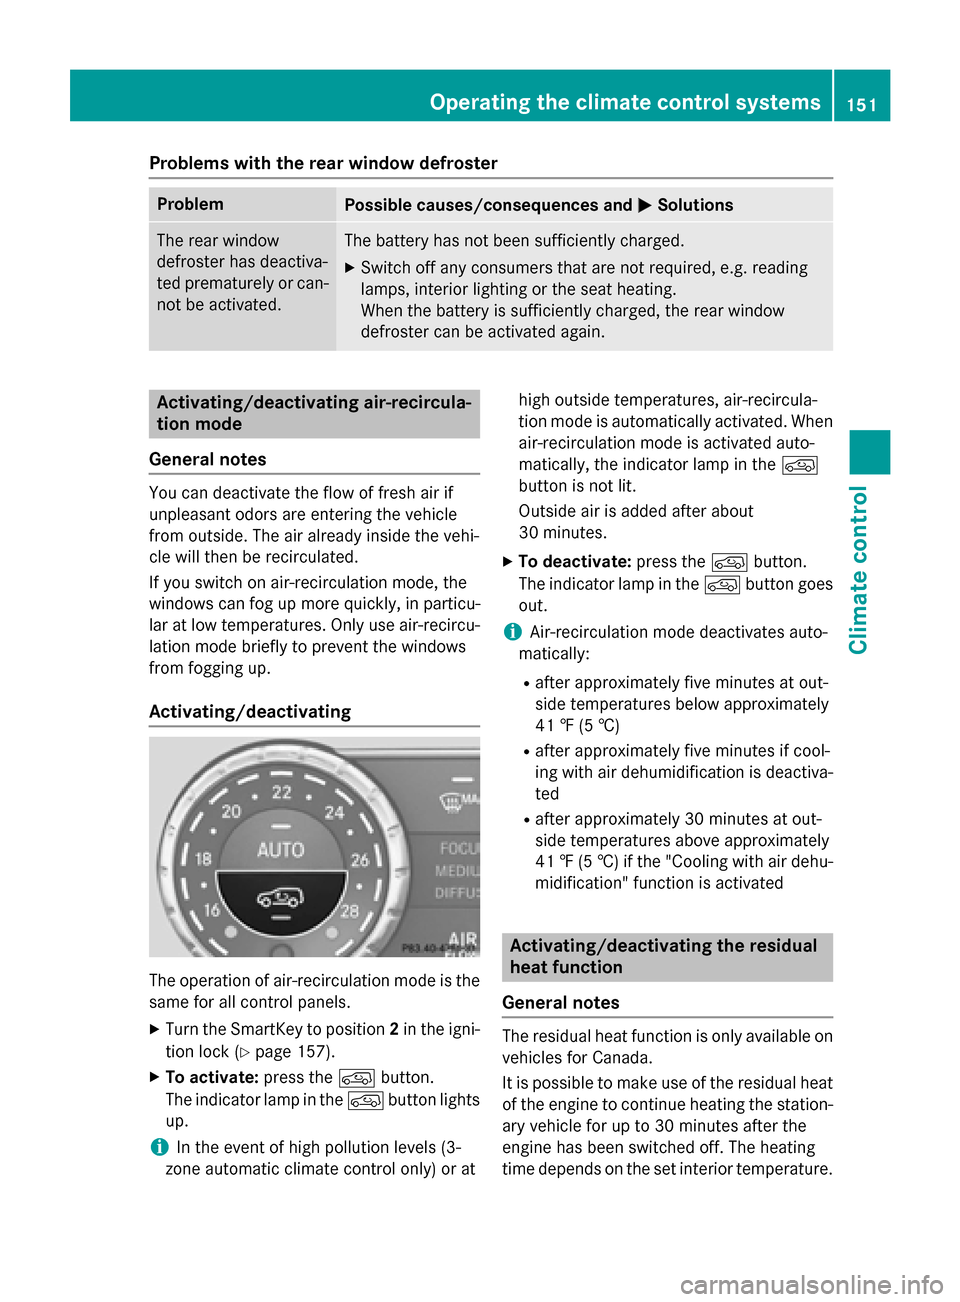
Activating/deactivating The operation of air-recirculation mode is the
same for all control panels.
X Turn the SmartKey to position 2in the igni-
tion lock (Y page 157).
X To activate: press the0089button.
The indicator lamp in the 0089button lights
up.
i In the event of high pollution levels (3-
zone automatic climate control only) or at high outside temperatures, air-recircula-
tion mode is automatically activated. When
air-recirculation mode is activated auto-
matically, the indicator lamp in the 0089
button is not lit.
Outside air is added after about
30 minutes.
X To deactivate: press the0089button.
The indicator lamp in the 0089button goes
out.
i Air-recirculation mode deactivates auto-
matically:
R after approximately five minutes at out-
side temperatures below approximately
41 ‡ (5 †)
R after approximately five minutes if cool-
ing with air dehumidification is deactiva-
ted
R after approximately 30 minutes at out-
side temperatures above approximately
41 ‡ (5 †) if the "Cooling with air dehu-
midification" function is activated Activating/deactivating the residual
heat function
General notes The residual heat function is only available on
vehicles for Canada.
It is possible to make use of the residual heat
of the engine to continue heating the station- ary vehicle for up to 30 minutes after the
engine has been switched off. The heating
time depends on the set interior temperature. Operating the climate control systems
151Climate control
Page 155 of 466

Setting the side air vents
0043
Side window defroster vent
0044 Side air vent
0087 Control for side air vent
X To open/close: turn thumbwheel 0087up or
down. Setting the glove box air vent
! Close the air vent when heating the vehi-
cle.
At high outside temperatures, open the air
vent and activate the "cooling with air dehu- midification" function. Otherwise, temper-
ature-sensitive items stored in the glove
box could be damaged. 0043
Air vent thumbwheel
0044 Air vent
When automatic climate control is activated,
the glove box can be ventilated, for instance
to cool its contents. The level of airflow
depends on the airflow and air distribution
settings. X
To open/close: turn thumbwheel 0043
clockwise or counter-clockwise. Setting the rear-compartment air
vents
Setting the center vents in the rear com-
partment Example: center vents with rear control panel
0043
Rear-compartment air vent thumbwheel
0044 Rear-compartment air vent, right
0087 Rear control panel
0085 Rear-compartment air vent, left
X To open/close: turn thumbwheel 0043up or
down.
Setting the B-pillar air vent 0043
B-pillar air vent
0044 Thumbwheel for B-pillar air vent
X To open/close: turn thumbwheel 0044to the
left or right. Setting the air vents
153Climate control Z
Page 193 of 466

Do not shift down for additional engine brak-
ing on a slippery road surface. G
DANGER
If the exhaust pipe is blocked or adequate
ventilation is not possible, poisonous gases
such as carbon monoxide (CO) may enter the vehicle. This is the case, e.g. if the vehicle
becomes trapped in snow. There is a risk of
fatal injury.
If you leave the engine or the auxiliary heating
running, make sure the exhaust pipe and area
around the vehicle are clear of snow. To
ensure an adequate supply of fresh air, open a window on the side of the vehicle that is not
facing into the wind.
Have your vehicle winter-proofed at a quali-
fied specialist workshop at the onset of win-
ter.
Drive particularly carefully on slippery road
surfaces. Avoid sudden acceleration, steering and braking maneuvers. Do not use the cruise
control or DISTRONIC PLUS.
If the vehicle threatens to skid or cannot be
stopped when moving at low speed:
X Shift the transmission to position N.
Vehicles with the ON&OFFROAD package:
if driving in snow or with snow chains, select
the snow program (Y page 248) with the off-
road program selector wheel in the center
console.
i Vehicles with a diesel engine:
do not
cover the radiator, e.g. with a protective
cover. The measuring function of the
onboard diagnosis system may otherwise
provide inaccurate values. Some of these
values are required by law and must there-
fore always be accurate.
The outside temperature indicator is not
designed to serve as an ice-warning device
and is therefore unsuitable for that purpose.
Changes in the outside temperature are dis-
played after a short delay. Indicated temperatures just above the freez-
ing point do not guarantee that the road sur-
face is free of ice. The road may still be icy,
especially in wooded areas or on bridges. You
should pay special attention to road condi-
tions when temperatures are around the
freezing point.
For more information on driving with snow
chains, see (Y page 403).
For more information on driving with summer
tires, see (Y page 402).
Observe the notes in the "Winter operation"
section (Y page 402). Off-road driving
Important safety notes G
WARNING
If you drive on a steep incline at an angle or
turn when driving on an incline, the vehicle
could slip sideways, tip and rollover. There is a risk of an accident.
Always drive on a steep incline in the line of
fall (straight up or down) and do not turn the
vehicle. G
WARNING
If the vehicle level is high, the vehicle center of gravity is raised. This could cause the vehicleto tip over more easily on uphill or downhill
gradients. There is a risk of an accident.
Select the lowest possible vehicle level.
When driving off-road, sand, mud and water,
possibly mixed with oil, for example, could get
into the brakes. This could result in a reduced braking effect or in total brake failure and also
in increased wear and tear. The braking char- acteristics change depending on the materialingressing the brakes. Clean the brakes after
driving off-road. If you detect a reduced brak- ing effect or grinding noises, have the brake
system checked in a qualified specialist work-shop as soon as possible. Adapt your driving
style to the different braking characteristics. Driving
tips
191Driving an d parking Z
Page 194 of 466

Driving off-road increases the likelihood of
damage to the vehicle, which, in turn, can lead to failure of the mechanical assembly or sys-
tems. Adapt your driving style to suit the ter- rain conditions. Drive carefully. Have damage
to the vehicle rectified immediately at a quali-
fied specialist workshop.
Do not switch to transmission position N
when driving off-road. You could lose control
of the vehicle if you attempt to brake using
the service brake. If the gradient is too steep, drive backwards in reverse gear.
General notes Read this section carefully before driving your
vehicle off-road. Practice by driving over more gentle off-road terrain first.
Familiarize yourself with the characteristics
of your vehicle and the gear shift operation
before driving through difficult terrain.
The following driving systems are specially
adapted to off-road driving:
R Off-road program 1 and 2 (vehicles with the
ON&OFFROAD package) (Y page 251)
R LOW RANGE off-road gear (vehicles with
the ON&OFFROAD package)
(Y page 253)
R Differential lock (vehicles with the
ON&OFFROAD package) (Y page 252)
R Off-road ABS (Y page 68)
R Off-road 4ETS (Y page 73)
R AIRMATIC package (vehicle level)
(Y page 211)
R DSR (Downhill Speed Regulation)
(Y page 250)
Observe the following notes:
R Stop the vehicle before starting to drive
along an off-road route.
R For vehicles with the AIRMATIC pack-
age: select a vehicle level that is suitable
for the off-road terrain. To avoid damaging
the vehicle, make sure there is always suf-
ficient ground clearance. R
Check that items of luggage and loads are
stowed safely and are well secured
(Y page 339).
R Always keep the engine running and in gear
when driving on a downhill gradient. Acti-
vate DSR (Y page 250).
R Always keep the doors, tailgate, windows
and sliding sunroof closed while driving.
R Adapt your speed to the terrain. The
rougher, steeper or more ruts on the ter-
rain, the slower your speed should be.
R Drive slowly and at an even speed through
the water. Ensure that a bow wave does not
form as you drive.
R Drive with extreme care on unfamiliar off-
road routes where visibility is poor. For
safety reasons, get out of the vehicle first
and survey the off-road route.
R Look out for obstacles, such as rocks,
holes, tree stumps and furrows.
R Check the depth of water before fording
rivers and streams.
R When fording, do not stop and do not
switch off the engine.
R On sand, drive quickly to overcome the roll-
ing resistance. Otherwise the vehicle's
wheels could become stuck in loose
ground.
R Do not jump with the vehicle as this will
interrupt the vehicle's propulsion.
R Always keep the engine running and in gear
when driving on a slope.
R Do not shift the automatic transmission to
transmission position N.
i Do not use the HOLD function when driv-
ing off-road, on steep uphill or downhill gra-
dients or on slippery or loose surfaces. The HOLD function cannot hold the vehicle on
such surfaces.
Checklist before driving off-road !
If the engine oil warning lamp lights up
while the vehicle is in motion, stop the vehi-
cle in a safe place as soon as possible. 192
Driving
tipsDriving an d parking
Page 263 of 466

using the brake controller and check
whether the brakes function correctly.
R Secure any objects on the trailer to prevent
the cargo from slipping when the vehicle is
in motion.
R When you couple up a trailer, check at reg-
ular intervals that the load is firmly secured.If the trailer is equipped with trailer lights
and brakes, check the trailer to ensure that
these are working.
R Bear in mind that the handling will be less
stable when towing a trailer than when driv- ing without one. Avoid sudden steering
movements.
R The vehicle/trailer combination is heavier,
accelerates more slowly, has a decreased
gradient climbing capability and a longer
braking distance.
It is more susceptible to side winds and
requires more careful steering.
R If possible, do not brake suddenly, but
instead depress the brake pedal moder-
ately at first so that the trailer can activate its brakes. Then increase the pressure on
the brake pedal.
R If the automatic transmission repeatedly
shifts between gears on uphill or downhill
gradients, shift to a lower gear using the
left-hand steering wheel paddle shifter.
A lower gear and lower speed reduce the
risk of engine failure.
R When driving downhill, shift to a lower gear
to utilize the engine's braking effect.
Avoid continuous brake application as this
may overheat the vehicle brakes and, if
installed, the trailer brakes.
R If the coolant temperature increases dra-
matically while the air-conditioning system
is switched on, switch off the air-condition-
ing system.
Coolant heat can also be dissipated by
opening the windows and switching the ventilation blower and the interior temper-
ature to the highest level.
R When overtaking, pay particular attention
to the extended length of your vehicle/
trailer combination.
Due to the length of the vehicle/trailer
combination, you require additional road
space in relation to the vehicle you are
overtaking before you can change back to
the original lane. Decoupling a trailer
G
WARNING
If you uncouple a trailer with the overrun
brake engaged, you could trap your hand
between the vehicle and the trailer drawbar.
There is a risk of injury.
Do not uncouple a trailer if the overrun brake is engaged. G
WARNING
Vehicles with level control:
The vehicle is lowered as soon as you discon-
nect the trailer cable. This could result in your limbs or those of other people that are
between the vehicle body and tires or under-
neath the vehicle being trapped. There is a
risk of injury.
Make sure that nobody is in the immediate
vicinity of the wheel housings or under the
vehicle when you disconnect the trailer cable.
! Do not disconnect a trailer with an
engaged overrun brake. Otherwise, your
vehicle could be damaged by the rebound- ing of the overrun brake.
X Make sure that the automatic transmission
is set to position P.
X Apply the vehicle's electric parking brake.
X Start the engine.
X Close all doors and the tailgate.
X Apply the trailer's parking brake. Towing a trailer
261Driving and parking Z
Page 296 of 466

Display messages
Possible causes/consequences and
0050
0050Solutions 0075
Front Front
Left
LeftMalfunc‐
Malfunc‐
tion Service
tion Service
Required Required orFront
Front
Right Malfunction
Right Malfunction
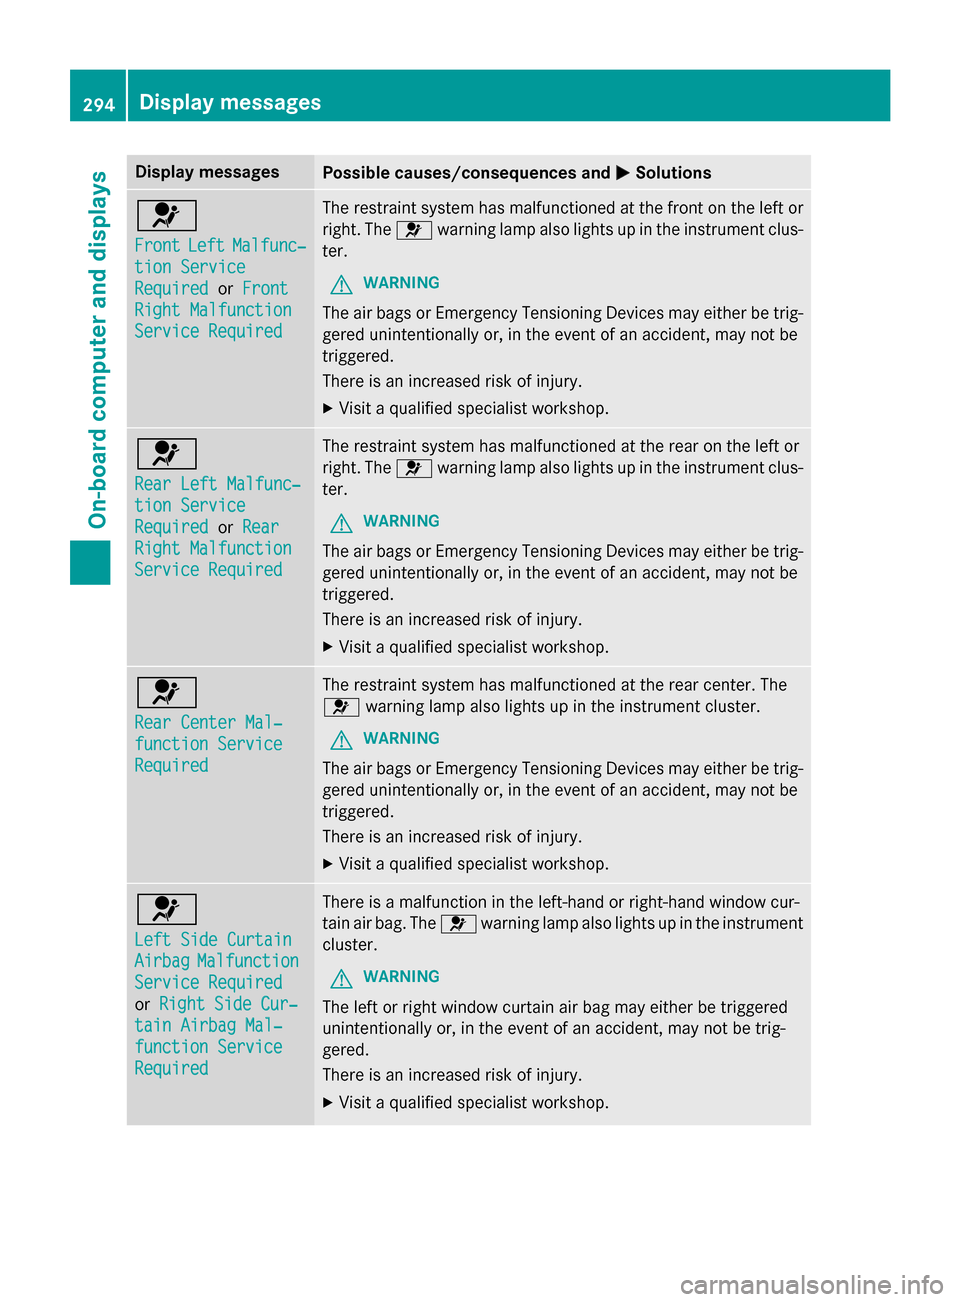
Service Required Service Required The restraint system has malfunctioned at the front on the left or
right. The 0075warning lamp also lights up in the instrument clus-
ter.
G WARNING
The air bags or Emergency Tensioning Devices may either be trig- gered unintentionally or, in the event of an accident, may not be
triggered.
There is an increased risk of injury.
X Visit a qualified specialist workshop. 0075
Rear Left Malfunc‐ Rear Left Malfunc‐
tion Service tion Service
Required Required
orRear
Rear
Right Malfunction
Right Malfunction
Service Required Service Required The restraint system has malfunctioned at the rear on the left or
right. The 0075warning lamp also lights up in the instrument clus-
ter.
G WARNING
The air bags or Emergency Tensioning Devices may either be trig- gered unintentionally or, in the event of an accident, may not be
triggered.
There is an increased risk of injury.
X Visit a qualified specialist workshop. 0075
Rear Center Mal‐ Rear Center Mal‐
function Service function Service
Required Required The restraint system has malfunctioned at the rear center. The
0075 warning lamp also lights up in the instrument cluster.
G WARNING
The air bags or Emergency Tensioning Devices may either be trig- gered unintentionally or, in the event of an accident, may not be
triggered.
There is an increased risk of injury.
X Visit a qualified specialist workshop. 0075
Left Side Curtain Left Side Curtain
Airbag Airbag
Malfunction
Malfunction
Service Required
Service Required
or Right Side Cur‐ Right Side Cur‐
tain Airbag Mal‐
tain Airbag Mal‐
function Service function Service
Required Required There is a malfunction in the left-hand or right-hand window cur-
tain air bag. The
0075warning lamp also lights up in the instrument
cluster.
G WARNING
The left or right window curtain air bag may either be triggered
unintentionally or, in the event of an accident, may not be trig-
gered.
There is an increased risk of injury. X Visit a qualified specialist workshop. 294
Display
messagesOn-board computer and displays
Page 342 of 466

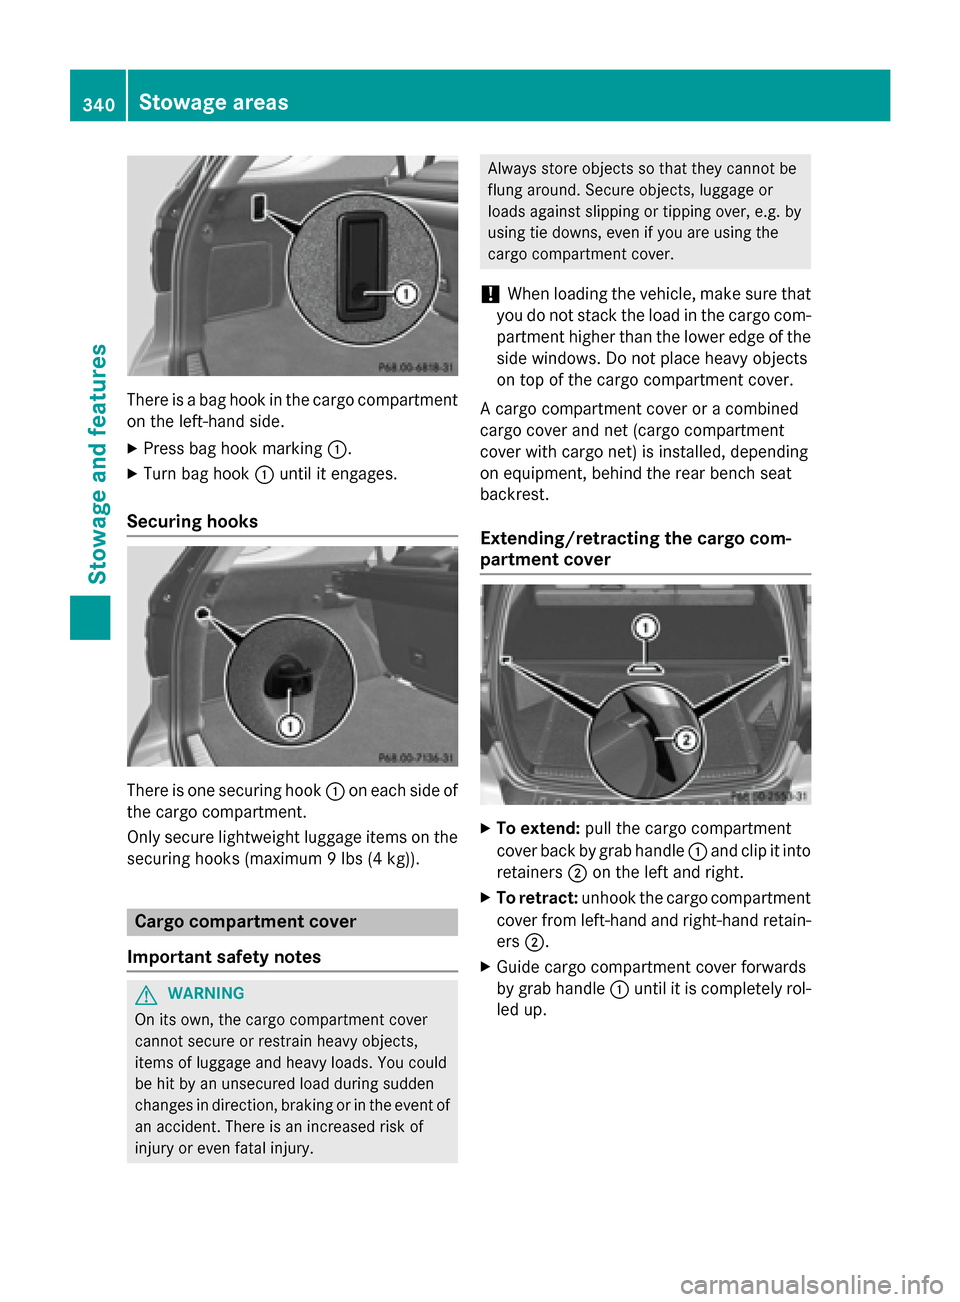
There is a bag hook in the cargo compartment
on the left-hand side.
X Press bag hook marking 0043.
X Turn bag hook 0043until it engages.
Securing hooks There is one securing hook
0043on each side of
the cargo compartment.
Only secure lightweight luggage items on the securing hooks (maximum 9 lbs (4 kg)). Cargo compartment cover
Important safety notes G
WARNING
On its own, the cargo compartment cover
cannot secure or restrain heavy objects,
items of luggage and heavy loads. You could
be hit by an unsecured load during sudden
changes in direction, braking or in the event of an accident. There is an increased risk of
injury or even fatal injury. Always store objects so that they cannot be
flung around. Secure objects, luggage or
loads against slipping or tipping over, e.g. by
using tie downs, even if you are using the
cargo compartment cover.
! When loading the vehicle, make sure that
you do not stack the load in the cargo com- partment higher than the lower edge of the
side windows. Do not place heavy objects
on top of the cargo compartment cover.
A cargo compartment cover or a combined
cargo cover and net (cargo compartment
cover with cargo net) is installed, depending
on equipment, behind the rear bench seat
backrest.
Extending/retracting the cargo com-
partment cover X
To extend: pull the cargo compartment
cover back by grab handle 0043and clip it into
retainers 0044on the left and right.
X To retract: unhook the cargo compartment
cover from left-hand and right-hand retain-
ers 0044.
X Guide cargo compartment cover forwards
by grab handle 0043until it is completely rol-
led up. 340
Stowage areasStowage and features
Page 349 of 466

Sun visors
Overview G
WARNING
If the mirror cover of the vanity mirror is folded up when the vehicle is in motion, you could be
blinded by incident light. There is a risk of an
accident.
Always keep the mirror cover folded down
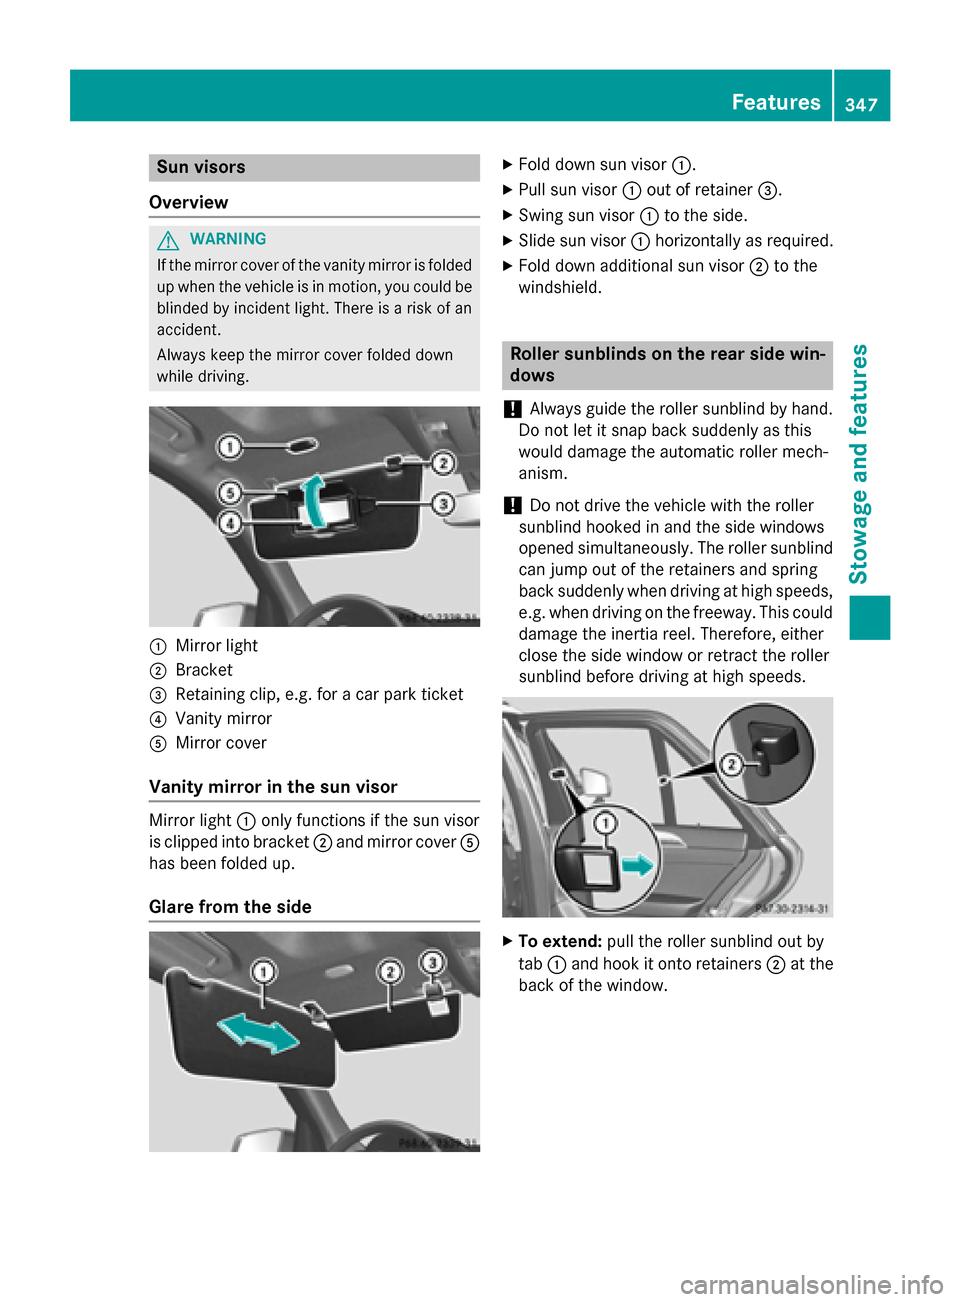
while driving. 0043
Mirror light
0044 Bracket
0087 Retaining clip, e.g. for a car park ticket
0085 Vanity mirror
0083 Mirror cover
Vanity mirror in the sun visor Mirror light
0043only functions if the sun visor
is clipped into bracket 0044and mirror cover 0083
has been folded up.
Glare from the side X
Fold down sun visor 0043.
X Pull sun visor 0043out of retainer 0087.
X Swing sun visor 0043to the side.
X Slide sun visor 0043horizontally as required.
X Fold down additional sun visor 0044to the
windshield. Roller sunblinds on the rear side win-
dows
! Always guide the roller sunblind by hand.
Do not let it snap back suddenly as this
would damage the automatic roller mech-
anism.
! Do not drive the vehicle with the roller
sunblind hooked in and the side windows
opened simultaneously. The roller sunblind can jump out of the retainers and spring
back suddenly when driving at high speeds,
e.g. when driving on the freeway. This could damage the inertia reel. Therefore, either
close the side window or retract the roller
sunblind before driving at high speeds. X
To extend: pull the roller sunblind out by
tab 0043and hook it onto retainers 0044at the
back of the window. Features
347Stowage and features Z