2015 MERCEDES-BENZ M-Class light
[x] Cancel search: lightPage 341 of 466
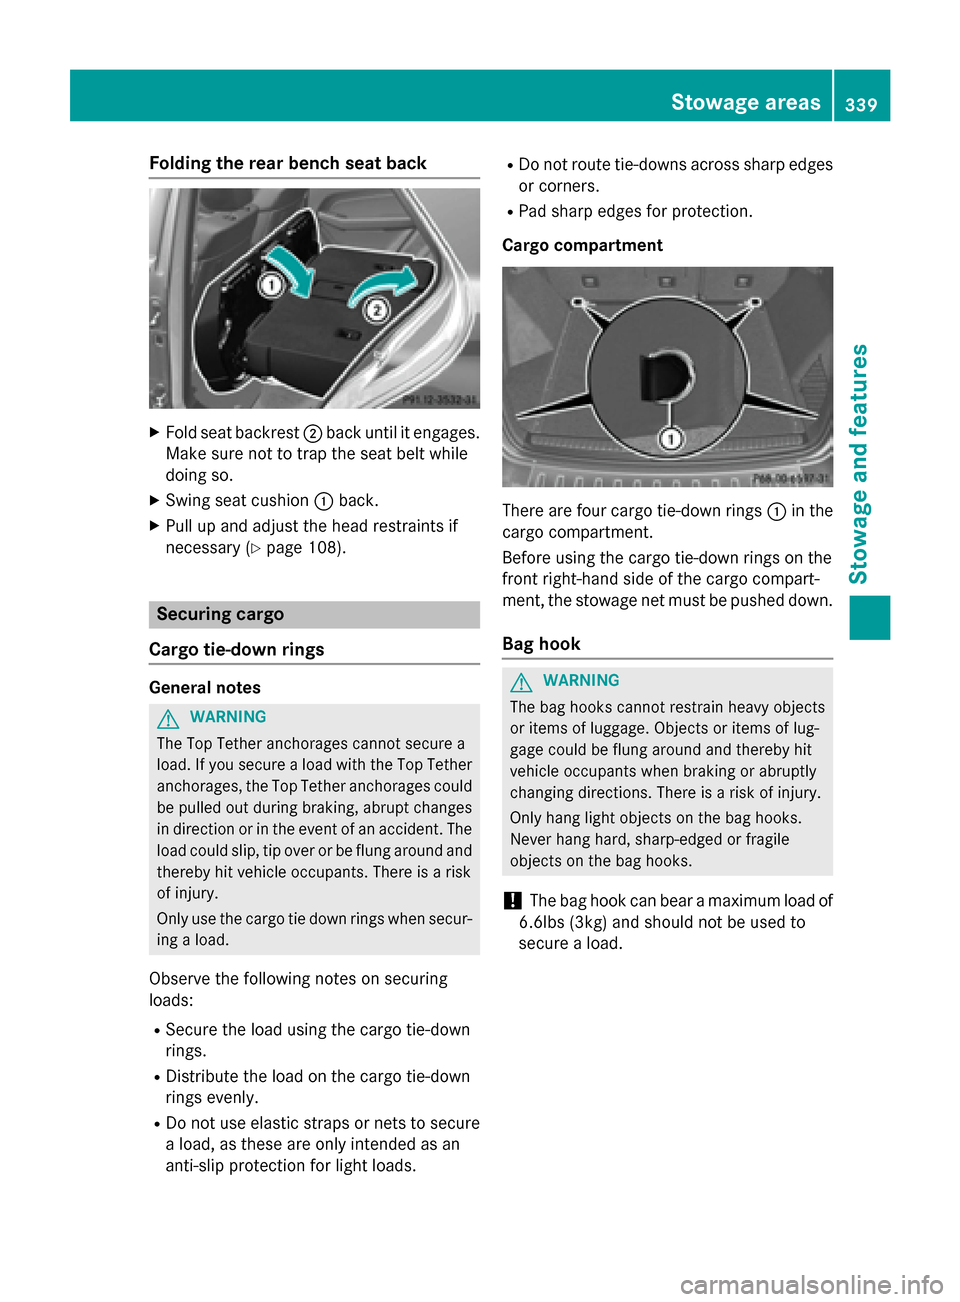
Folding the rear bench seat back
X
Fold seat backrest 0044back until it engages.
Make sure not to trap the seat belt while
doing so.
X Swing seat cushion 0043back.
X Pull up and adjust the head restraints if
necessary (Y page 108). Securing cargo
Cargo tie-down rings General notes
G
WARNING
The Top Tether anchorages cannot secure a
load. If you secure a load with the Top Tether
anchorages, the Top Tether anchorages could be pulled out during braking, abrupt changes
in direction or in the event of an accident. The load could slip, tip over or be flung around and
thereby hit vehicle occupants. There is a risk
of injury.
Only use the cargo tie down rings when secur-
ing a load.
Observe the following notes on securing
loads:
R Secure the load using the cargo tie-down
rings.
R Distribute the load on the cargo tie-down
rings evenly.
R Do not use elastic straps or nets to secure
a load, as these are only intended as an
anti-slip protection for light loads. R
Do not route tie-downs across sharp edges
or corners.
R Pad sharp edges for protection.
Cargo compartment There are four cargo tie-down rings
0043in the
cargo compartment.
Before using the cargo tie-down rings on the
front right-hand side of the cargo compart-
ment, the stowage net must be pushed down.
Bag hook G
WARNING
The bag hooks cannot restrain heavy objects
or items of luggage. Objects or items of lug-
gage could be flung around and thereby hit
vehicle occupants when braking or abruptly
changing directions. There is a risk of injury.
Only hang light objects on the bag hooks.
Never hang hard, sharp-edged or fragile
objects on the bag hooks.
! The bag hook can bear a maximum load of
6.6lbs (3kg)and should not be used to
secure a load. Stowage areas
339Stowage and features Z
Page 342 of 466
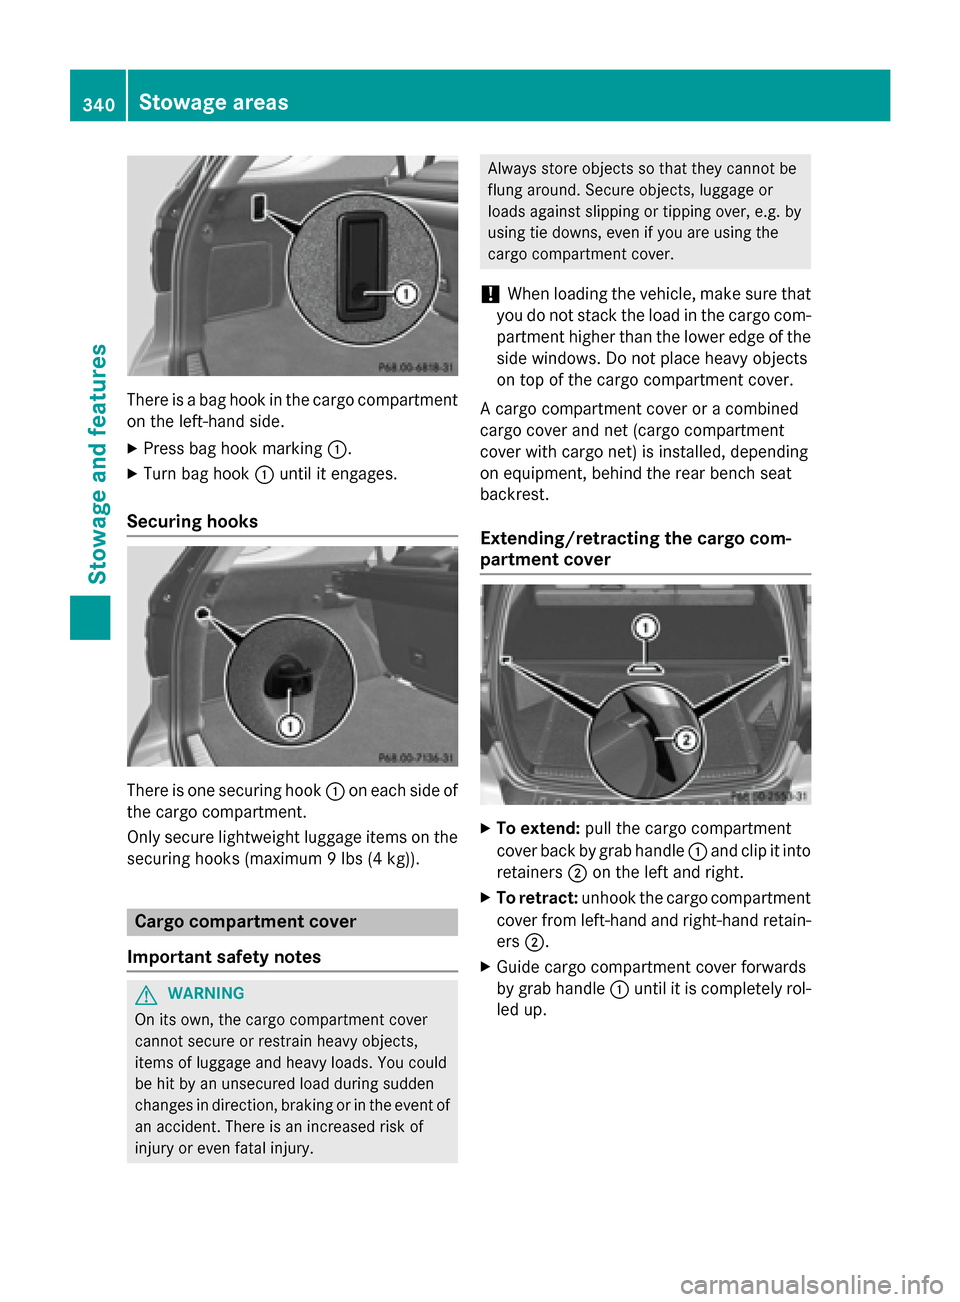
There is a bag hook in the cargo compartment
on the left-hand side.
X Press bag hook marking 0043.
X Turn bag hook 0043until it engages.
Securing hooks There is one securing hook
0043on each side of
the cargo compartment.
Only secure lightweight luggage items on the securing hooks (maximum 9 lbs (4 kg)). Cargo compartment cover
Important safety notes G
WARNING
On its own, the cargo compartment cover
cannot secure or restrain heavy objects,
items of luggage and heavy loads. You could
be hit by an unsecured load during sudden
changes in direction, braking or in the event of an accident. There is an increased risk of
injury or even fatal injury. Always store objects so that they cannot be
flung around. Secure objects, luggage or
loads against slipping or tipping over, e.g. by
using tie downs, even if you are using the
cargo compartment cover.
! When loading the vehicle, make sure that
you do not stack the load in the cargo com- partment higher than the lower edge of the
side windows. Do not place heavy objects
on top of the cargo compartment cover.
A cargo compartment cover or a combined
cargo cover and net (cargo compartment
cover with cargo net) is installed, depending
on equipment, behind the rear bench seat
backrest.
Extending/retracting the cargo com-
partment cover X
To extend: pull the cargo compartment
cover back by grab handle 0043and clip it into
retainers 0044on the left and right.
X To retract: unhook the cargo compartment
cover from left-hand and right-hand retain-
ers 0044.
X Guide cargo compartment cover forwards
by grab handle 0043until it is completely rol-
led up. 340
Stowage areasStowage and features
Page 345 of 466
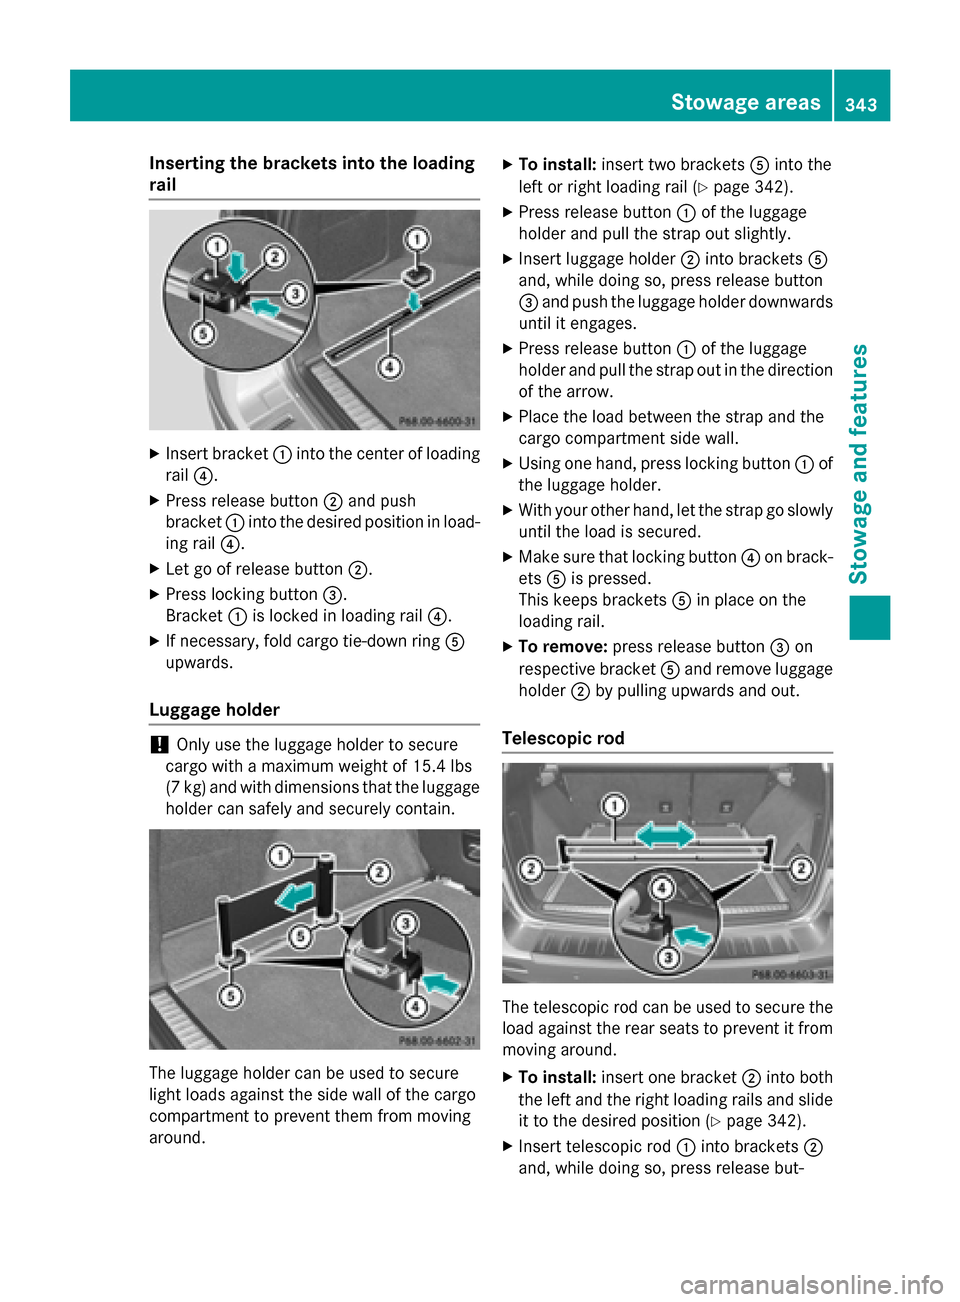
Inserting the brackets into the loading
rail X
Insert bracket 0043into the center of loading
rail 0085.
X Press release button 0044and push
bracket 0043into the desired position in load-
ing rail 0085.
X Let go of release button 0044.
X Press locking button 0087.
Bracket 0043is locked in loading rail 0085.
X If necessary, fold cargo tie-down ring 0083
upwards.
Luggage holder !
Only use the luggage holder to secure
cargo with a maximum weight of 15.4 lbs
(7 kg) and with dimensions that the luggage holder can safely and securely contain. The luggage holder can be used to secure
light loads against the side wall of the cargo
compartment to prevent them from moving
around. X
To install: insert two brackets 0083into the
left or right loading rail (Y page 342).
X Press release button 0043of the luggage
holder and pull the strap out slightly.
X Insert luggage holder 0044into brackets 0083
and, while doing so, press release button
0087 and push the luggage holder downwards
until it engages.
X Press release button 0043of the luggage
holder and pull the strap out in the direction
of the arrow.
X Place the load between the strap and the
cargo compartment side wall.
X Using one hand, press locking button 0043of
the luggage holder.
X With your other hand, let the strap go slowly
until the load is secured.
X Make sure that locking button 0085on brack-
ets 0083is pressed.
This keeps brackets 0083in place on the
loading rail.
X To remove: press release button 0087on
respective bracket 0083and remove luggage
holder 0044by pulling upwards and out.
Telescopic rod The telescopic rod can be used to secure the
load against the rear seats to prevent it from
moving around.
X To install: insert one bracket 0044into both
the left and the right loading rails and slide it to the desired position (Y page 342).
X Insert telescopic rod 0043into brackets 0044
and, while doing so, press release but- Stowage areas
343Stowage and featu res Z
Page 348 of 466

Cup holder in the front-compartment
center console 0043
Cup holder
0044 Cover
X To open: slide cover 0044to its foremost
position.
X To close: pull cover 0044back as far as it will
go.
You can remove the cup holder's rubber mat
for cleaning. Clean with clear, lukewarm
water only.
Temperature-controlled cup holder in
the front-compartment center console 0043
Cup holder
0044 Residual heat indicator lamp
0087 Switch
The temperature-controlled cup holder can
be used to keep cold drinks cool and warm
drinks warm. X
Turn the SmartKey to position 2in the igni-
tion lock.
X To switch on the cooling function: press
and hold button 0087until the blue indicator
lamp on the button lights up.
X To switch on the heating function: press
and hold button 0087until the red indicator
lamp on the button lights up.
X To switch off the function: press and hold
button 0087until the indicator lamp on the
button goes out.
When the heating function is used, the metal insert of the cup holder is heated. Once a cer-
tain temperature is reached, residual heat
indicator lamp 0044lights up. This means that
the metal insert of the cup holder is hot. For
this reason, you must not reach into the cup
holder metal insert.
Do not use hard or sharp objects to clean the cup holder. Use only a soft cloth to clean it.
Cup holder in the rear seat armrest !
Do not sit on or support your body weight
on the rear seat armrest when it is folded
down, as you could otherwise damage it. X
Fold down the rear seat armrest.
Cup holder 0043is located in the rear seat
armrest. 346
FeaturesStowage and features
Page 349 of 466
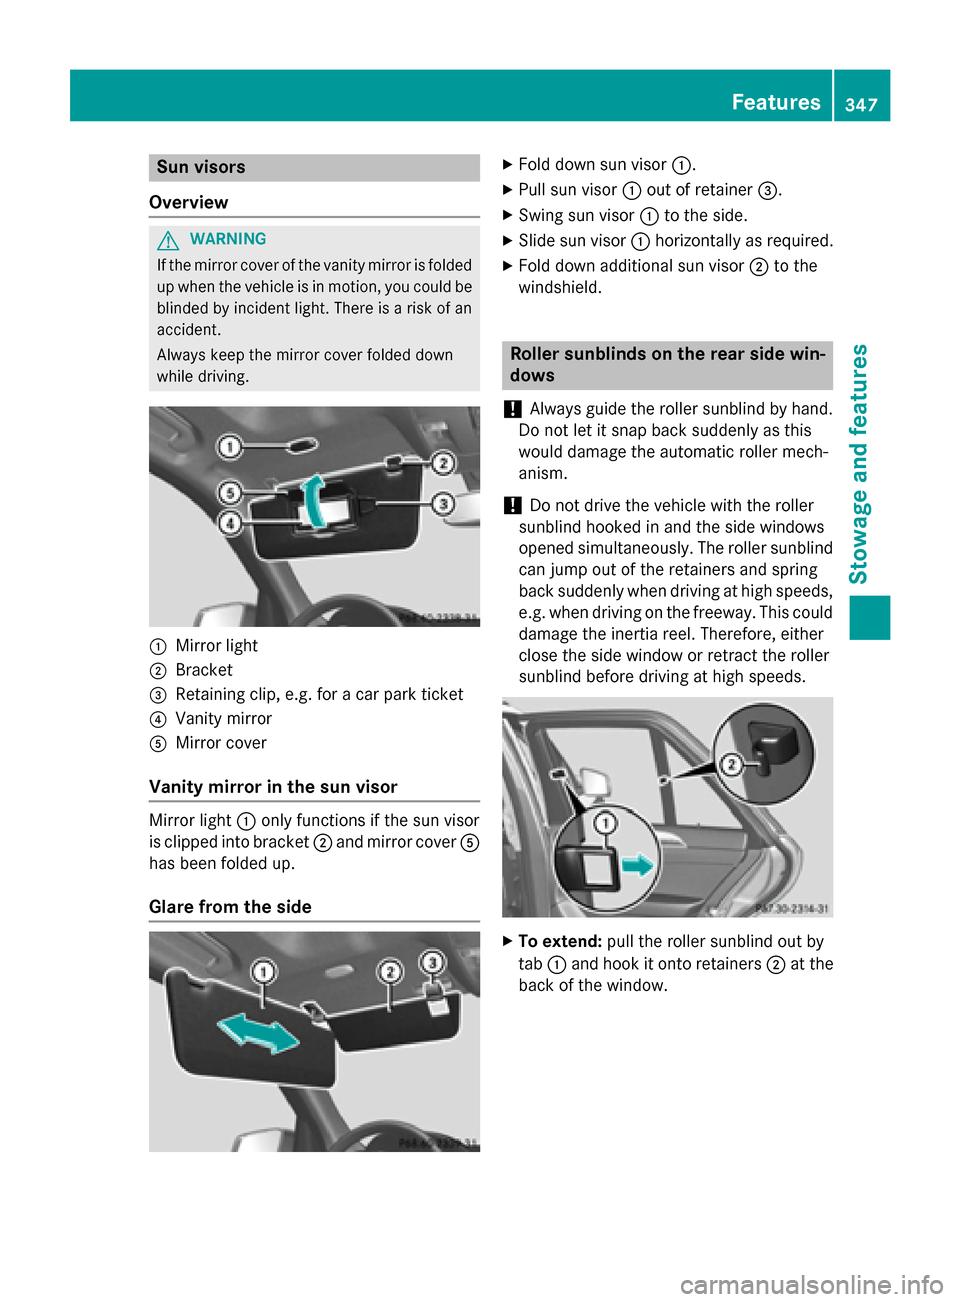
Sun visors
Overview G
WARNING
If the mirror cover of the vanity mirror is folded up when the vehicle is in motion, you could be
blinded by incident light. There is a risk of an
accident.
Always keep the mirror cover folded down
while driving. 0043
Mirror light
0044 Bracket
0087 Retaining clip, e.g. for a car park ticket
0085 Vanity mirror
0083 Mirror cover
Vanity mirror in the sun visor Mirror light
0043only functions if the sun visor
is clipped into bracket 0044and mirror cover 0083
has been folded up.
Glare from the side X
Fold down sun visor 0043.
X Pull sun visor 0043out of retainer 0087.
X Swing sun visor 0043to the side.
X Slide sun visor 0043horizontally as required.
X Fold down additional sun visor 0044to the
windshield. Roller sunblinds on the rear side win-
dows
! Always guide the roller sunblind by hand.
Do not let it snap back suddenly as this
would damage the automatic roller mech-
anism.
! Do not drive the vehicle with the roller
sunblind hooked in and the side windows
opened simultaneously. The roller sunblind can jump out of the retainers and spring
back suddenly when driving at high speeds,
e.g. when driving on the freeway. This could damage the inertia reel. Therefore, either
close the side window or retract the roller
sunblind before driving at high speeds. X
To extend: pull the roller sunblind out by
tab 0043and hook it onto retainers 0044at the
back of the window. Features
347Stowage and features Z
Page 350 of 466
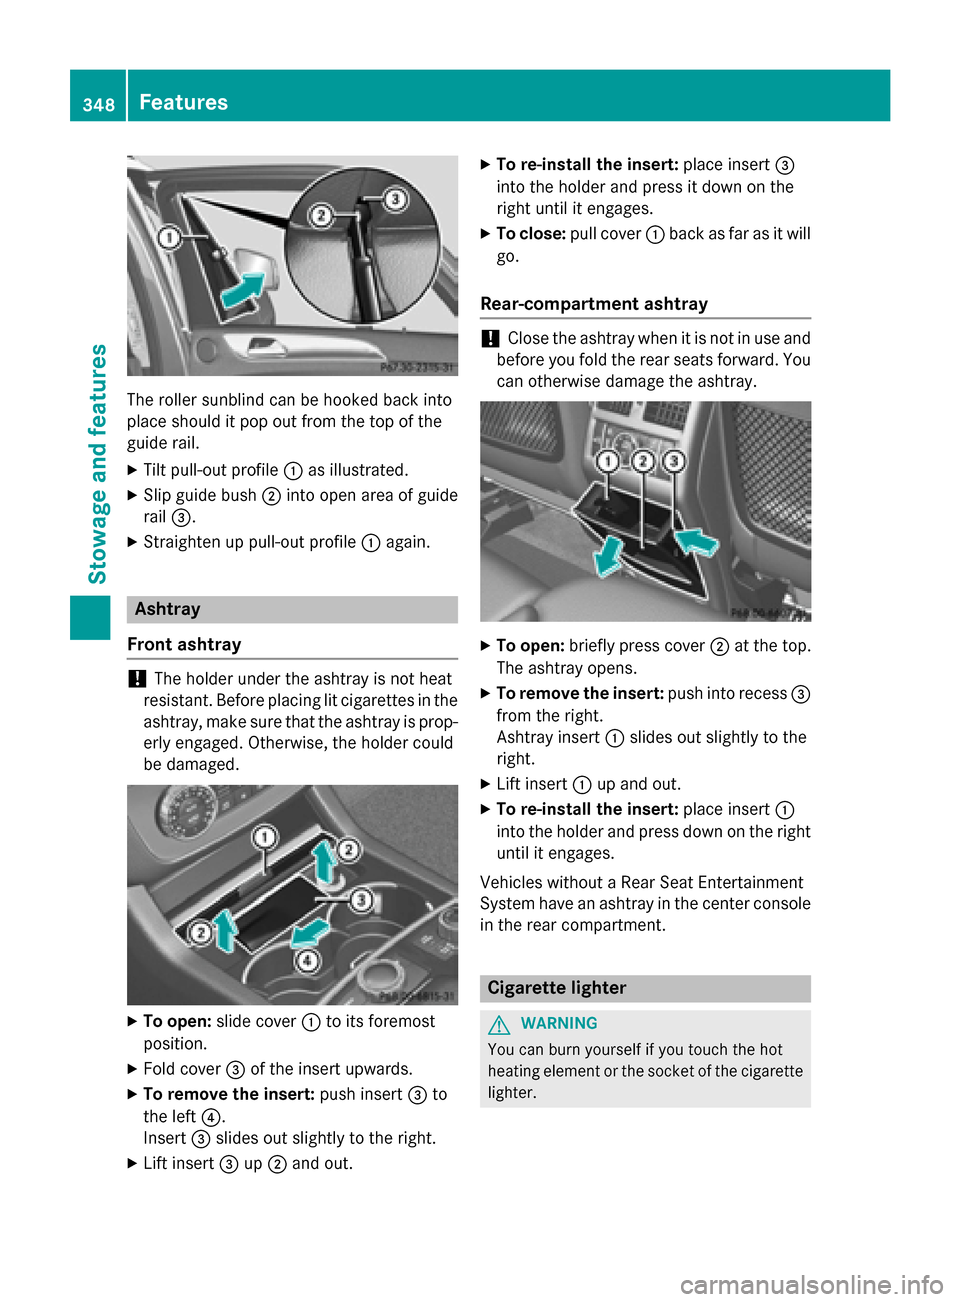
The roller sunblind can be hooked back into
place should it pop out from the top of the
guide rail.
X Tilt pull-out profile 0043as illustrated.
X Slip guide bush 0044into open area of guide
rail 0087.
X Straighten up pull-out profile 0043again. Ashtray
Front ashtray !
The holder under the ashtray is not heat
resistant. Before placing lit cigarettes in the
ashtray, make sure that the ashtray is prop- erly engaged. Otherwise, the holder could
be damaged. X
To open: slide cover 0043to its foremost
position.
X Fold cover 0087of the insert upwards.
X To remove the insert: push insert0087to
the left 0085.
Insert 0087slides out slightly to the right.
X Lift insert 0087up0044 and out. X
To re-install the insert: place insert0087
into the holder and press it down on the
right until it engages.
X To close: pull cover 0043back as far as it will
go.
Rear-compartment ashtray !
Close the ashtray when it is not in use and
before you fold the rear seats forward. You can otherwise damage the ashtray. X
To open: briefly press cover 0044at the top.
The ashtray opens.
X To remove the insert: push into recess0087
from the right.
Ashtray insert 0043slides out slightly to the
right.
X Lift insert 0043up and out.
X To re-install the insert: place insert0043
into the holder and press down on the right until it engages.
Vehicles without a Rear Seat Entertainment
System have an ashtray in the center console
in the rear compartment. Cigarette lighter
G
WARNING
You can burn yourself if you touch the hot
heating element or the socket of the cigarette lighter. 348
FeaturesStowage and features
Page 351 of 466
In addition, flammable materials can ignite if:
R the hot cigarette lighter falls
R a child holds the hot cigarette lighter to
objects, for example
There is a risk of fire and injury.
Always hold the cigarette lighter by the knob.
Always make sure that the cigarette lighter is
out of reach of children. Never leave children unsupervised in the vehicle.
! The cigarette lighter in the center console
in the front compartment is not intended
for operating the tire inflation compressor. Your attention must always be focused on the
traffic conditions. Only use the cigarette
lighter when road and traffic conditions per-
mit.
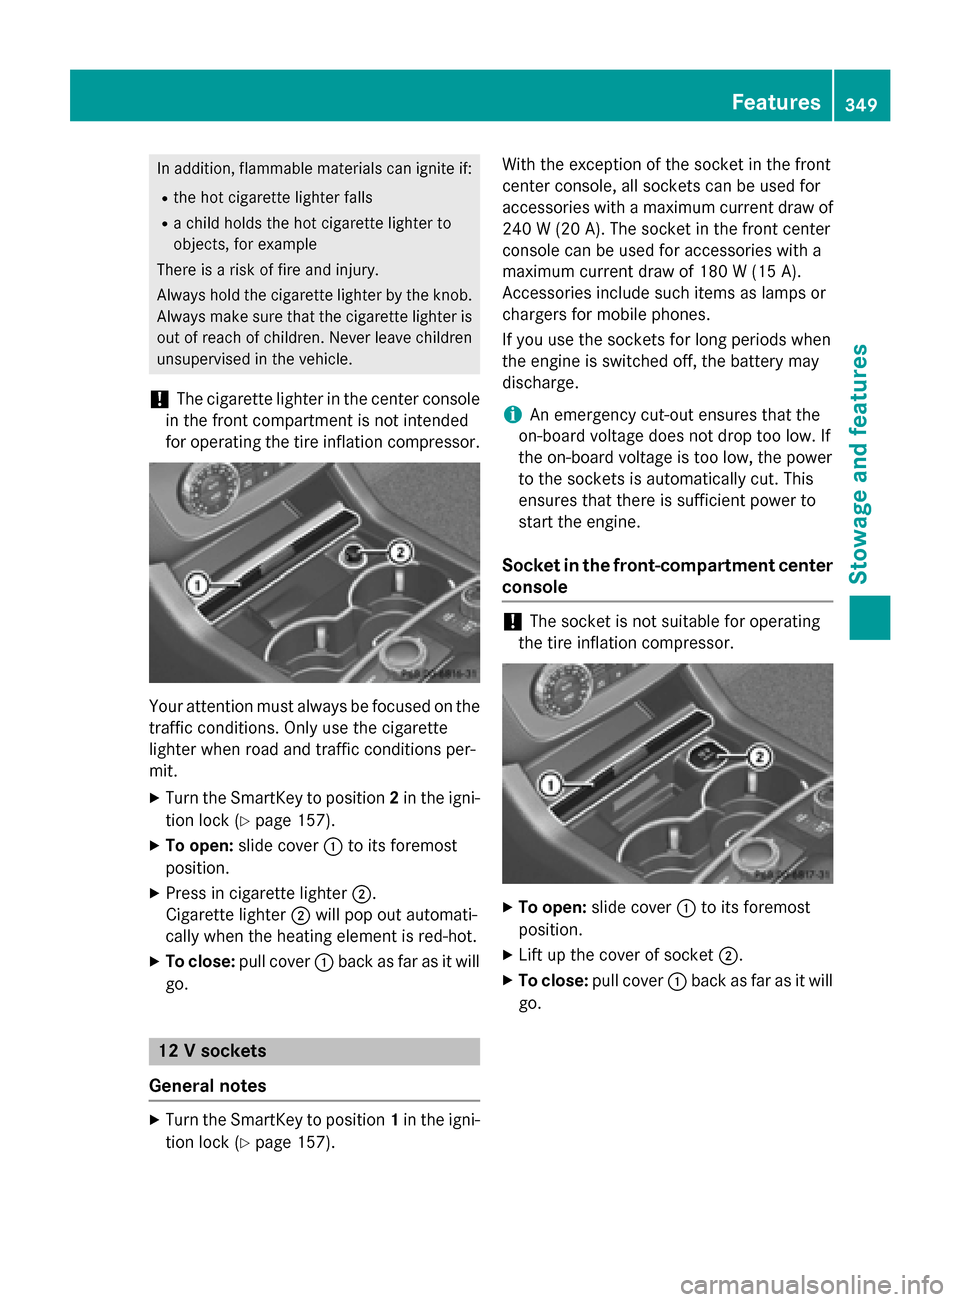
X Turn the SmartKey to position 2in the igni-
tion lock (Y page 157).
X To open: slide cover 0043to its foremost
position.
X Press in cigarette lighter 0044.
Cigarette lighter 0044will pop out automati-
cally when the heating element is red-hot.
X To close: pull cover 0043back as far as it will
go. 12 V sockets
General notes X
Turn the SmartKey to position 1in the igni-
tion lock (Y page 157). With the exception of the socket in the front
center console, all sockets can be used for
accessories with a maximum current draw of 240 W (20 A). The socket in the front center
console can be used for accessories with a
maximum current draw of 180 W (15 A).
Accessories include such items as lamps or
chargers for mobile phones.
If you use the sockets for long periods when
the engine is switched off, the battery may
discharge.
i An emergency cut-out ensures that the
on-board voltage does not drop too low. If
the on-board voltage is too low, the power
to the sockets is automatically cut. This
ensures that there is sufficient power to
start the engine.
Socket in the front-compartment center
console !
The socket is not suitable for operating
the tire inflation compressor. X
To open: slide cover 0043to its foremost
position.
X Lift up the cover of socket 0044.
X To close: pull cover 0043back as far as it will
go. Features
349Stowage and features Z
Page 353 of 466
Using the 115 V power socket
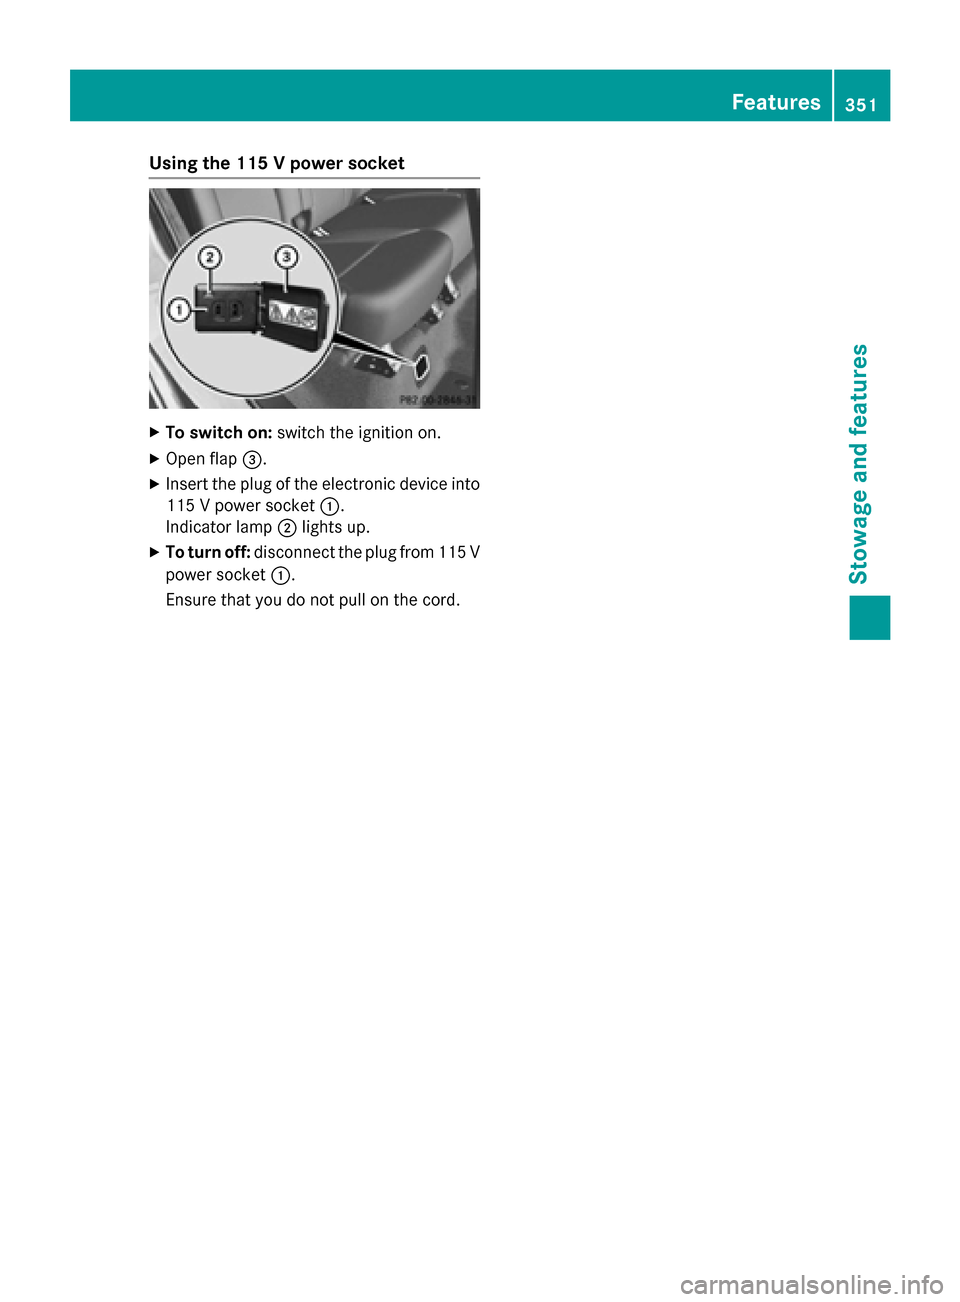
X
To switch on: switch the ignition on.
X Open flap 0087.
X Insert the plug of the electronic device into
115 V power socket 0043.
Indicator lamp 0044lights up.
X To turn off: disconnect the plug from 115 V
power socket 0043.
Ensure that you do not pull on the cord. Features
351Stowage and features Z