2015 MERCEDES-BENZ GLK-CLASS SUV weight
[x] Cancel search: weightPage 13 of 386

Fuse box in the engine compart-
ment .............................................. 329
Important safety notes .................. 328
G
Garage door opener
Clearing the memory ..................... 298
General notes ................................ 295
Important safety notes .................. 295
Opening/closing the garage door .. 297
Programming (button in the rear-
view mirror) ................................... 295
Synchronizing the rolling code ....... 296
Gear or selector lever (cleaning
guidelines) ......................................... 311
Genuine parts ...................................... 22
Glove box ........................................... 275
GTW (Gross Trailer Weight) (defini-
tion) ................................................... . 353
H
Hazard warning lamps ...................... 119
Head restraints
Adjusting ....................................... 102
Adjusting (electrically) ................... 103
Adjusting (manually) ...................... 103
Adjusting (rear) .............................. 103
Installing/removing (rear) .............. 104
Luxury ............................................ 1 03
see NECK-PRO head restraints/
NECK-PRO luxury head restraints
Headlamps
Adding fluid to cleaning system ..... 303
Cleaning system (function) ............ 119
Cleaning system (notes) ................ 379
Fogging up ..................................... 121
see Automatic headlamp mode
Heating
see Climate control
High-beam headlamps
Changing bulbs .............................. 124
Display message ............................ 245
Switching on/off ........................... 118
Hill start assist .................................. 152
HOLD function
Deactivating ................................... 185 Display message ............................ 250
Function/notes ............................. 184
Hood
Closing ........................................... 30 1
Display message ............................ 257
Important safety notes .................. 300
Opening ......................................... 300
Horn ................................................... ... 32
Hydroplaning ..................................... 173
I
Ignition lock
see Key positions
Immobilizer .......................................... 74
Indicator lamps
see Warning and indicator lamps
Indicators
see Turn signals
Instrument cluster
Overview .......................................... 33
Settings ......................................... 23 0
Warning and indicator lamps ........... 34
Instrument cluster lighting .............. 231
Interior lighting ................................. 121
Automatic control .......................... 122
Delayed switch-off (on-board
computer) ...................................... 232
Emergency lighting ........................ 122
Manual control ............................... 122
Overview ........................................ 121
Reading lamp ................................. 121
Setting the brightness of the dis-
play/switch (on-board computer) .. 231
J
Jack Storage location ............................ 314
Using ............................................. 357
Jump starting (engine) ...................... 323
K
Key positions
KEYLESS-GO .................................. 149
SmartKey ....................................... 149
KEYLESS-GO
Convenience closing feature ............ 94
Index11
Page 20 of 386

Vehicle remote unlocking .............. 292
Telephone
Accepting a call ............................. 227
Display message ............................ 258
Menu (on-board computer) ............ 227
Number from the phone book ........ 228
Redialing ........................................ 22 8
Rejecting/ending a call ................. 228
Temperature
Coolant .......................................... 22 0
Outside temperature ...................... 221
Setting (climate control) ................ 140
Time
see separate operating instructions
Tire pressure
Calling up (on-board computer) ..... 339
Checking manually ........................ 339
Display message ............................ 255
Important safety notes .................. 340
Maximum ....................................... 339
Not reached (TIREFIT) .................... 318
Notes ............................................. 33 8
Reached (TIREFIT) .......................... 318
Recommended ............................... 336
Tire pressure monitor
Checking the tire pressure elec-
tronically ........................................ 3 41
Function/notes ............................. 339
General notes ................................ 339
Important safety notes .................. 340
Radio type approval for the tire
pressure monitor ........................... 343
Restarting ...................................... 342
Warning lamp ................................. 271
Warning message .......................... 342
TIREFIT kit .......................................... 316
Tires
Aspect ratio (definition) ................. 354
Average weight of the vehicle
occupants (definition) .................... 352
Bar (definition) ............................... 352
Changing a wheel .......................... 355
Characteristics .............................. 352
Checking ........................................ 333
Curb weight (definition) ................. 353
Definition of terms ......................... 352
Direction of rotation ...................... 355
Display message ............................ 255 Distribution of the vehicle occu-
pants (definition) ............................ 355
DOT (Department of Transporta-
tion) (definition) ............................. 352
DOT, Tire Identification Number
(TIN) ..............................................
. 351
GAWR (Gross Axle Weight Rating)
(definition) ..................................... 35 3
General notes ................................ 360
GTW (Gross Trailer Weight) (defi-
nition) ............................................ 353
GVW (Gross Vehicle Weight) (def-
inition) ........................................... 353
GVWR (Gross Vehicle Weight Rat-
ing) (definition) .............................. 353
Important safety notes .................. 332
Increased vehicle weight due to
optional equipment (definition) ...... 352
Information on driving .................... 332
Kilopascal (kPa) (definition) ........... 353
Labeling (overview) ........................ 348
Load bearing index (definition) ...... 354
Load index ..................................... 351
Load index (definition) ................... 353
M+S tires ....................................... 335
Maximum load on a tire (defini-
tion) .............................................. . 354
Maximum loaded vehicle weight
(definition) ..................................... 35 3
Maximum permissible tire pres-
sure (definition) ............................. 353
Maximum tire load ......................... 346
Maximum tire load (definition) ....... 353
MOExtended tires .......................... 334
Optional equipment weight (defi-
nition) ............................................ 354
PSI (pounds per square inch) (def-
inition) ........................................... 354
Replacing ....................................... 355
Service life ..................................... 334
Sidewall (definition) ....................... 354
Speed rating (definition) ................ 353
Storing ........................................... 3 55
Structure and characteristics
(definition) ..................................... 35 2
Summer tires ................................. 334
Temperature .................................. 348
18Index
Page 21 of 386

TIN (Tire Identification Number)
(definition) ..................................... 354
Tire bead (definition) ...................... 354
Tire pressure (definition) ................ 354
Tire pressures (recommended) ...... 352
Tire size (data) ............................... 360
Tire size designation, load-bearing capacity, speed rating .................... 349
Tire tread ....................................... 333
Tire tread (definition) ..................... 354
Total load limit (definition) ............. 355
Traction ......................................... 34 7
Traction (definition) ....................... 354
Tread wear ..................................... 347
TWR (permissible trailer drawbar
noseweight) (definition) ................. 354
Uniform Tire Quality Grading
Standards ...................................... 347
Uniform Tire Quality Grading
Standards (definition) .................... 352
Wear indicator (definition) ............. 355
Wheel and tire combination ........... 362
Wheel rim (definition) .................... 352
see Flat tire
Top Tether ............................................ 65
Tow-starting
Emergency engine starting ............ 328
Important safety notes .................. 325
Towing a trailer
Active Parking Assist ..................... 193
Cleaning the trailer tow hitch ......... 310
Coupling up a trailer ...................... 214
Decoupling a trailer ....................... 216
Driving tips .................................... 212
Important safety notes .................. 212
Installing the ball coupling ............. 214
Lights display message .................. 243
Mounting dimensions .................... 381
Power supply ................................. 217
Removing the ball coupling ............ 217
Storing the ball coupling ................ 217
Trailer loads ................................... 381
Towing away
Important safety guidelines ........... 325
Installing the towing eye ................ 326
Removing the towing eye ............... 326
With both axles on the ground ....... 327
With the rear axle raised ................ 327 Trailer coupling
see Towing a trailer
Trailer loads and drawbar nose-
weights ............................................... 216
Trailer towing
Active Blind Spot Assist ................. 209
Active Lane Keeping Assist .... 206, 212
Blind Spot Assist ............................ 205
PARKTRONIC ................................. 188
Permissible trailer loads and
drawbar noseweights ..................... 216
Transfer case ..................................... 162
Transmission
see Automatic transmission
Transmission position display ......... 157
Transmission position display
(DIRECT SELECT lever) ...................... 157
Transporting the vehicle .................. 327
Trim pieces (cleaning instruc-
tions) .................................................. 3 11
Trip computer (on-board com-
puter) .................................................. 2 23
Trip odometer
Calling up ....................................... 223
Resetting (on-board computer) ...... 224
Turn signals
Changing bulbs (front) ................... 124
Display message ............................ 244
Switching on/off ........................... 118
TWR (Tongue Weight Rating) (defi-
nition) ................................................. 35 4
Type identification plate
see Vehicle identification plate
U
UnlockingEmergency unlocking ....................... 86
From inside the vehicle (central
unlocking button) ............................. 85
V
Vanity mirror (in the sun visor) ........ 283
Vehicle
Correct use ...................................... 27
Data acquisition ............................... 28
Display message ............................ 257
Index19
Page 24 of 386

Protection of the environment
General notes
HEnvironmental note
Daimler's declared policy is one of compre-
hensive environmental protection.
The objectives are for the natural resources
that form the basis of our existence on this
planet to be used sparingly and in a manner
that takes the requirements of both nature
and humanity into account.
You too can help to protect the environment
by operating your vehicle in an environmen-
tally responsible manner.
Fuel consumption and the rate of engine,
transmission, brake and tire wear are affected by these factors:
R operating conditions of your vehicle
R your personal driving style
You can influence both factors. You should
bear the following in mind:
Operating conditions:
R avoid short trips as these increase fuel con-
sumption.
R always make sure that the tire pressures
are correct.
R do not carry any unnecessary weight.
R remove roof racks once you no longer need
them.
R a regularly serviced vehicle will contribute
to environmental protection. You should
therefore adhere to the service intervals.
R always have service work carried out at a
qualified specialist workshop.
Personal driving style:
R do not depress the accelerator pedal when
starting the engine.
R do not warm up the engine when the vehicle
is stationary.
R drive carefully and maintain a safe distance
from the vehicle in front.
R avoid frequent, sudden acceleration and
braking.
R change gear in good time and use each gear
only up to Ô of its maximum engine speed.
R switch off the engine in stationary traffic.
R keep an eye on the vehicle's fuel consump-
tion.
Environmental concerns and recom-
mendations
Wherever the operating instructions require
you to dispose of materials, first try to regen-
erate or re-use them. Observe the relevant
environmental rules and regulations when
disposing of materials. In this way you will
help to protect the environment.
Genuine Mercedes-Benz parts
HEnvironmental note
Daimler AG also supplies reconditioned major
assemblies and parts which are of the same
quality as new parts. They are covered by the same Limited Warranty entitlements as new
parts.
! Air bags and Emergency Tensioning Devi-
ces, as well as control units and sensors for these restraint systems, may be installed in
the following areas of your vehicle:
R doors
R door pillars
R door sills
R seats
R cockpit
R instrument cluster
R center console
Do not install accessories such as audio
systems in these areas. Do not carry out
repairs or welding. You could impair the
operating efficiency of the restraint sys-
tems.
Have aftermarket accessories installed at a qualified specialist workshop.
22Introduction
Page 47 of 386

When the air bags are deployed, a small
amount of powder is released. The powder
generally does not constitute a health hazardand does not indicate that there is a fire in the
vehicle. In order to prevent potential breath-
ing difficulties, you should leave the vehicle as soon as it is safe to do so. If you have any
breathing difficulty but cannot get out of the
vehicle after the air bag inflates, then get fresh
air by opening a window or door.
GWARNING
In order to reduce the potential danger of
injuries caused during the deployment of the
front air bags, the driver and front passenger
must always be correctly seated and wear
their seat belts.
For maximum protection in the event of a col- lision, you must always be in the normal seat
position with your back against the backrest.
Fasten your seat belt and make sure that it is
correctly positioned on your body.
As the air bag inflates with considerable
speed and force, a proper seating position
and correct positioning of the hands on the
steering wheel will help to keep you at a safe distance from the air bag. Occupants who are
not wearing their seat belt, are not seated
properly or are too close to the air bag can be seriously injured or killed by an air bag, as it
inflates with great force instantaneously:
R sit with the seat belt fastened correctly and
in a position that is as upright as possible
with your back against the backrest.
R move the driver's seat as far back as pos-
sible, still permitting proper operation of
vehicle controls. The distance from the cen-
ter of the driver's chest to the center of the
air bag cover on the steering wheel must be
at least 10 inches (25 cm). You should be
able to accomplish this by adjusting the
seat and steering wheel. If you have any
difficulties, please contact an authorized
Mercedes-Benz Center.
R do not lean your head or chest close to the
steering wheel or dashboard.
R only hold the steering wheel on the outside.
Placing hands and arms inside the rim can
increase the risk and potential severity of
hand/arm injury if the driver front air bag
inflates.
R adjust the front-passenger seat as far back
as possible from the dashboard when the
seat is occupied.
R occupants, especially children, should
never place their bodies or lean their heads
in the area of the door where the side
impact air bag inflates. This could result in
serious or fatal injuries should the side
impact air bag be deployed. Always sit as
upright as possible, wear the seat belt prop-
erly and use an appropriately sized infant
restraint, toddler restraint or booster seat
recommended for the size and weight of the child.
Failure to follow these instructions can result in severe injuries to you or other occupants.
If you sell your vehicle, it is important that you
make the buyer aware of this safety informa-
tion. Be sure to give the buyer this Operator's
Manual.
If the air bags are deployed, you will hear a
bang, and a small amount of powder may also be released. Only in rare cases will the bang
affect your hearing. The powder that is
released generally does not constitute a
health hazard and does not indicate that thereis a fire in the vehicle. The dust might cause
some temporary breathing difficulty for peo-
ple with asthma or other breathing trouble. To
avoid this, you may wish to get out of the
vehicle or open the windows as soon as it is
safe to do so. The 6 SRS warning lamp
lights up.
The air bags are deployed if the air bag control
unit detects the need for deployment. Only in the event of such a situation will the air bags
provide their supplemental protection.
If the driver and front passenger do not wear their seat belts, it is not possible for the air
bags to provide their supplemental protec-
tion.
Occupant safety45
Safety
Z
Page 48 of 386

In the event of other types of impacts and
impacts below air bag deployment thresh-
olds, the air bags will not deploy. The driver
and passenger will then be protected to the
extent possible by a properly fastened seat
belt. A properly fastened seat belt is also nee-ded to provide the best possible protection in
a rollover.
Air bags provide additional protection; they
are not, however, a substitute for seat belts.
All vehicle occupants must fasten their seat
belts regardless of whether your vehicle is
equipped with air bags or not.
It is important for your safety and that of your passenger to have deployed air bags replaced
and to have any malfunctioning air bags
repaired. This will help to make sure the air
bags continue to perform their protective
function for the vehicle occupants in the
event of a crash.
iAfter an air bag has been deployed, have
the vehicle towed to the nearest qualified
specialist workshop, even if your vehicle is
ready to drive.
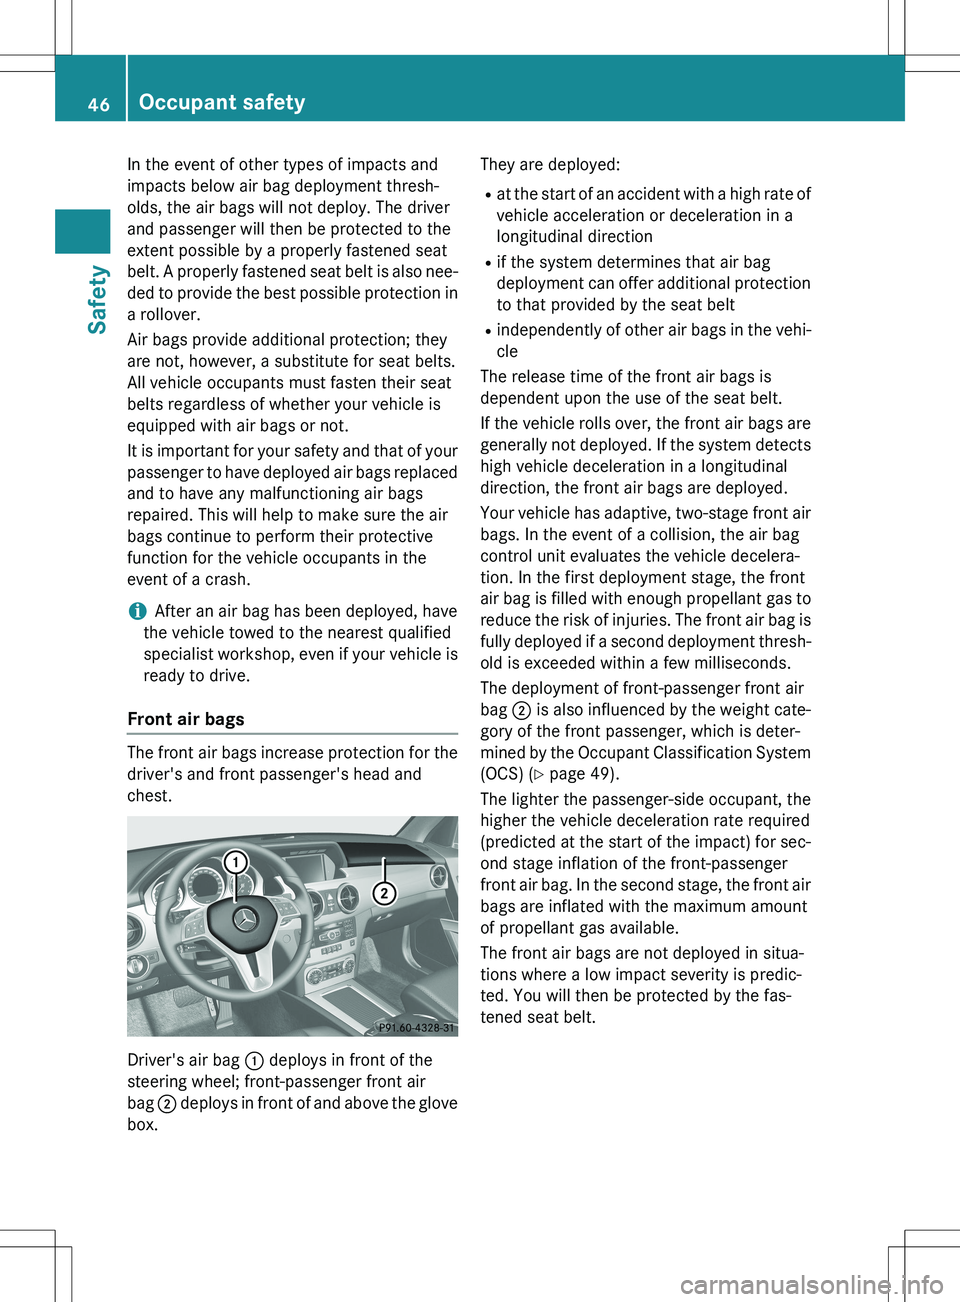
Front air bags
The front air bags increase protection for the driver's and front passenger's head and
chest.
Driver's air bag : deploys in front of the
steering wheel; front-passenger front air
bag ; deploys in front of and above the glove
box. They are deployed:
R at the start of an accident with a high rate of
vehicle acceleration or deceleration in a
longitudinal direction
R if the system determines that air bag
deployment can offer additional protection
to that provided by the seat belt
R independently of other air bags in the vehi-
cle
The release time of the front air bags is
dependent upon the use of the seat belt.
If the vehicle rolls over, the front air bags are
generally not deployed. If the system detects
high vehicle deceleration in a longitudinal
direction, the front air bags are deployed.
Your vehicle has adaptive, two-stage front air bags. In the event of a collision, the air bag
control unit evaluates the vehicle decelera-
tion. In the first deployment stage, the front
air bag is filled with enough propellant gas to
reduce the risk of injuries. The front air bag is fully deployed if a second deployment thresh-
old is exceeded within a few milliseconds.
The deployment of front-passenger front air
bag ; is also influenced by the weight cate-
gory of the front passenger, which is deter-
mined by the Occupant Classification System
(OCS) ( Y page 49).
The lighter the passenger-side occupant, the
higher the vehicle deceleration rate required
(predicted at the start of the impact) for sec- ond stage inflation of the front-passenger
front air bag. In the second stage, the front air
bags are inflated with the maximum amount
of propellant gas available.
The front air bags are not deployed in situa-
tions where a low impact severity is predic-
ted. You will then be protected by the fas-
tened seat belt.
46Occupant safety
Safety
Page 49 of 386

The front-passenger front air bag will only bedeployed if:
R the system, based on the OCS weight sen-
sor readings, detects that the front-
passenger seat is occupied
R the PASSENGER AIR BAG OFF indicator
lamp on the center console is not lit
(Y page 49)
R the air bag control unit predicts a high-
impact severity
Driver's knee bag
The driver's knee bag increases protection of
the driver against: R knee injuries
R thigh injuries
R lower leg injuries
Driver's knee bag : deploys under the steer-
ing column. If, during a frontal collision, the
system determines that air bag deployment
can offer additional protection to that provi-
ded by the seat belt, driver's knee bag : is
deployed along with the driver's air bag. Driv-
er's knee bag : operates best in conjunction
with correctly positioned and fastened seat
belts.
Side impact air bags
GWARNING
Using unsuitable seat covers could restrict or even prevent deployment of the air bags inte- grated into the seats. Consequently, the air
bags cannot protect vehicle occupants as
they are designed to do. In addition, the func- tion of the air bag deactivation system could
be restricted. This poses an increased risk of
injury or even fatal injury.
You should only use seat covers that have
been approved for the respective seat by
Mercedes-Benz.
GWARNING
Sensors to control the air bags are located inthe doors. Modifications or work not per-
formed correctly to the doors or door panel-
ing, as well as damaged doors, can lead to the
function of the sensors being impaired. The air bags might therefore not function properly
any more. Consequently, the air bags cannot
protect vehicle occupants as they are
designed to do. There is an increased risk of
injury.
Never modify the doors or parts of the doors.
Always have work on the doors or door pan-
eling carried out at a qualified specialist work- shop.
You should only use seat covers that have
been approved for your vehicle by Mercedes-
Benz. The seat covers must have a special
tear seam for side impact air bags. Otherwise, the side impact air bags cannot deploy cor-
rectly and therefore cannot provide the inten-
ded protection in the event of an accident.
When deployed, the side impact air bags offer additional protection for the thorax of the
vehicle occupants on the side of the vehicle
on which the impact occurs. However, they
do not protect the:
R head
R neck
R arms
Occupant safety47
Safety
Z
Page 51 of 386

mines that deployment can offer additional
protection to that provided by the seat belt.
Pelvis air bags : will not deploy in side
impacts which do not exceed the system's
preset deployment thresholds for lateral
acceleration/deceleration. You will then be
protected by the fastened seat belt.
The pelvis air bag on the front-passenger side is not deployed in the following situations:
R OCS has detected that the front-passenger
seat is unoccupied.
R the front-passenger seat belt is not fas-
tened.
The pelvis air bag on the front-passenger side will deploy if the front-passenger seat belt is
fastened, regardless of whether the front-
passenger seat is occupied or not.
Window curtain air bags
The window curtain air bags enhance the levelof protection for the head, but not chest or
arms, of the vehicle occupants on the side ofthe vehicle on which the impact occurs.
The window curtain air bags are integrated
into the side of the roof frame and deploy in
the area from the A-pillar to the C-pillar.
Window curtain air bags : are deployed:
R on the side on which an impact occurs
R at the start of an accident with a high rate of
lateral vehicle deceleration or acceleration,
e.g. in a side impact
R regardless of whether the front-passenger
seat is occupied
R independently of the use of the seat belt R
if the vehicle rolls over and the system
determines that window curtain air bag
deployment can offer additional protection
to that provided by the seat belt
R independently of the front air bags
Window curtain air bags : will not deploy in
the event of impacts which do not exceed the system's preset deployment thresholds for
vehicle acceleration/deceleration. You will
then be protected by the fastened seat belt.
Occupant Classification System
(OCS)
How the Occupant Classification Sys-
tem works
The Occupant Classification System (OCS)
categorizes the occupant on the front-
passenger seat using a weight sensor. The
front-passenger front air bag is deactivated
automatically for certain weight categories.
The PASSENGER AIR BAG OFF indicator lamp
shows you the current status. If the
PASSENGER AIR BAG OFF indicator lamp is
lit, the passenger air bag is disabled.
The system does not deactivate:
R the side impact air bag
R the pelvis air bag
R the window curtain air bag
R the Emergency Tensioning Devices
To be classified correctly, the front passenger
must sit:
R with the seat belt fastened correctly
R in a position that is as upright as possible
with their back against the seat backrest
R with their feet on the floor
The OCS weight sensor reading is affected if
the occupant's weight is transferred, e.g. by
leaning on the armrest.
If the front-passenger seat, the seat cover or the seat cushion are damaged, have the nec- essary repair work carried out at a qualified
specialist workshop.
Occupant safety49
Safety
Z