2015 MERCEDES-BENZ GLE SUV display
[x] Cancel search: displayPage 174 of 453
R
the type of road is suitable, e.g. no steep gra-
dients
R you are no longer depressing the accelerator
pedal
Gliding mode is deactivated under the following
conditions:
R you depress the accelerator pedal
R you depress the brake pedal
R you use the DIRECT SELECT lever to switch
the transmission position (Y page 168)
R you use the DYNAMIC SELECT controller to
change the drive program (Y page 166)
R you activate manual gearshifting
(Y page 172)
R you leave the suitable speed range
Mercedes-AMG vehicles Gliding mode is characterised by the following:
R the combustion engine is disconnected from
the drive train
R the engine speed is equal to the engine idling
speed
R in the multifunction display, the gliding sym-
bol appears in the drive program display
Gliding mode can be activated under the follow-
ing conditions:
R the Comfort drive program is activated or you
select the "Comfort" setting for the drive sys-
tem within the Individualdrive program. You
can find information about this in the Digital
Owner's Manual
R the ECO start/stop function is activated
R you are driving carefully with low acceleration
of the vehicle
R the engine is at normal operating temperature
R the speed is within a suitable range
R the type of road is suitable, e.g. no steep gra-
dients
R you are no longer depressing the accelerator
pedal
Gliding mode is deactivated under the following conditions:
R you have deactivated the ECO start/stop
function
R you depress the accelerator pedal
R you depress the brake pedal
R you use the DIRECT SELECT lever to switch
the transmission position (Y page 168)R
you use the DYNAMIC SELECT controller to
change the drive program (Y page 166)
R you activate manual gearshifting
(Y page 172)
R you leave the suitable speed range
Towing a trailer X
Drive in the middle of the engine speed range
on uphill gradients.
X Depending on the uphill or downhill gradient,
use left-hand steering wheel gearshift paddle
(Y page 172) to select a lower gear, even if
cruise control, DISTRONIC PLUS, or SPEED-
TRONIC are activated. Drive programs
Slippery drive program The
Slippery drive program has the following
characteristics:
R reduced engine and transmission settings for
optimum propulsion on slippery or snow-cov-
ered roads.
R optimised ESP ®
stability control on slippery
or snow-covered roads.
R the vehicle has improved driving stability on
slippery or snow-covered roads, for example.
Comfort drive program The
Comfort drive program has the following
characteristics:
R comfort-orientated engine and transmission
settings.
R optimal fuel consumption resulting from the
automatic transmission shifting up sooner.
R the vehicle pulling away more gently in
forward and reverse gears unless the accel-
erator pedal is depressed fully.
R the automatic transmission shifting up
sooner. This results in the vehicle being driven
at lower engine speeds and the wheels being less likely to spin. Automatic transmission
171Driving and parking Z
Page 175 of 453
Sport drive program
The
Sport drive program has the following char-
acteristics:
R sporty engine and transmission settings.
R the automatic transmission shifting up later.
As a result of the later automatic transmission
shift points, the fuel consumption possibly
being higher.
R the suspension exhibits sporty damping (vehi-
cles with AIRMATIC).
Drive program Sport Plus (Mercedes-
AMG vehicles) The
Sport Plus drive program has the following
characteristics:
R the vehicle exhibits particularly sporty driving
characteristics.
R the vehicle pulling away in first gear.
R the automatic transmission shifting up later.
As a result of the later automatic transmission
shift points, the fuel consumption possibly
being higher.
R the suspension exhibits particularly firm
springing and damping settings (vehicles with
AIRMATIC).
R the ECO start/stop function is deactivated, it
can, however, be activated again using the
ECO button (Y page 163).
Individual drive program In the
Individual drive program, the following
properties of the drive program can be selected:
R the drive (engine and transmission manage-
ment)
R the transmission
R the suspension
R all vehicles (except Mercedes-AMG vehicles):
the steering
R all vehicles (except Mercedes-AMG vehicles):
availability of the ECO start/stop function
To select the gears in the Individualdrive pro-
gram permanently using the steering wheel pad- dles, select the permanent manual gearshift
program.
Information about configuring the Individual
drive program with the multimedia system can
be found in the Digital Owner's Manual. Manual gearshifting
General notes You can change gear yourself using the steering
wheel gearshift paddles. The transmission must be in position D.
Depending on which gearshift paddle is pulled,
the automatic transmission immediately shifts
into the next gear up or down, if permitted.
To use manual shifting, you have two options:
R temporary setting
R permanent setting
If you activate manual gearshifting, the multi-
function display will show the current gear
instead of transmission position D.
If manual gearshifting is deactivated, the gears
will be selected automatically.
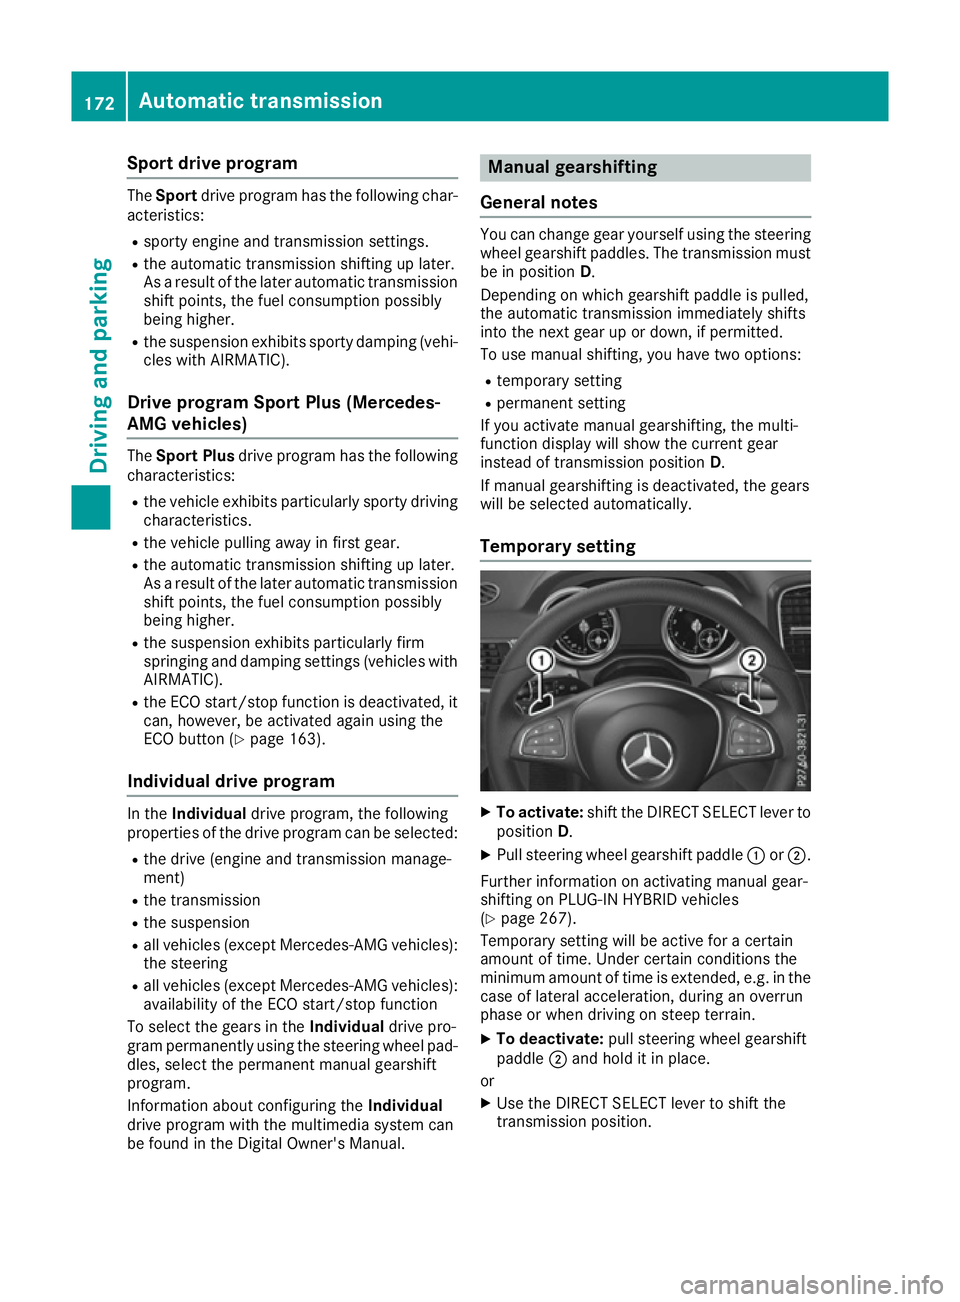
Temporary setting X
To activate: shift the DIRECT SELECT lever to
position D.
X Pull steering wheel gearshift paddle :or;.
Further information on activating manual gear-
shifting on PLUG-IN HYBRID vehicles
(Y page 267).
Temporary setting will be active for a certain
amount of time. Under certain conditions the
minimum amount of time is extended, e.g. in the case of lateral acceleration, during an overrun
phase or when driving on steep terrain.
X To deactivate: pull steering wheel gearshift
paddle ;and hold it in place.
or X Use the DIRECT SELECT lever to shift the
transmission position. 172
Automatic transmissionDriving and parking
Page 177 of 453
Gearshift recommendation
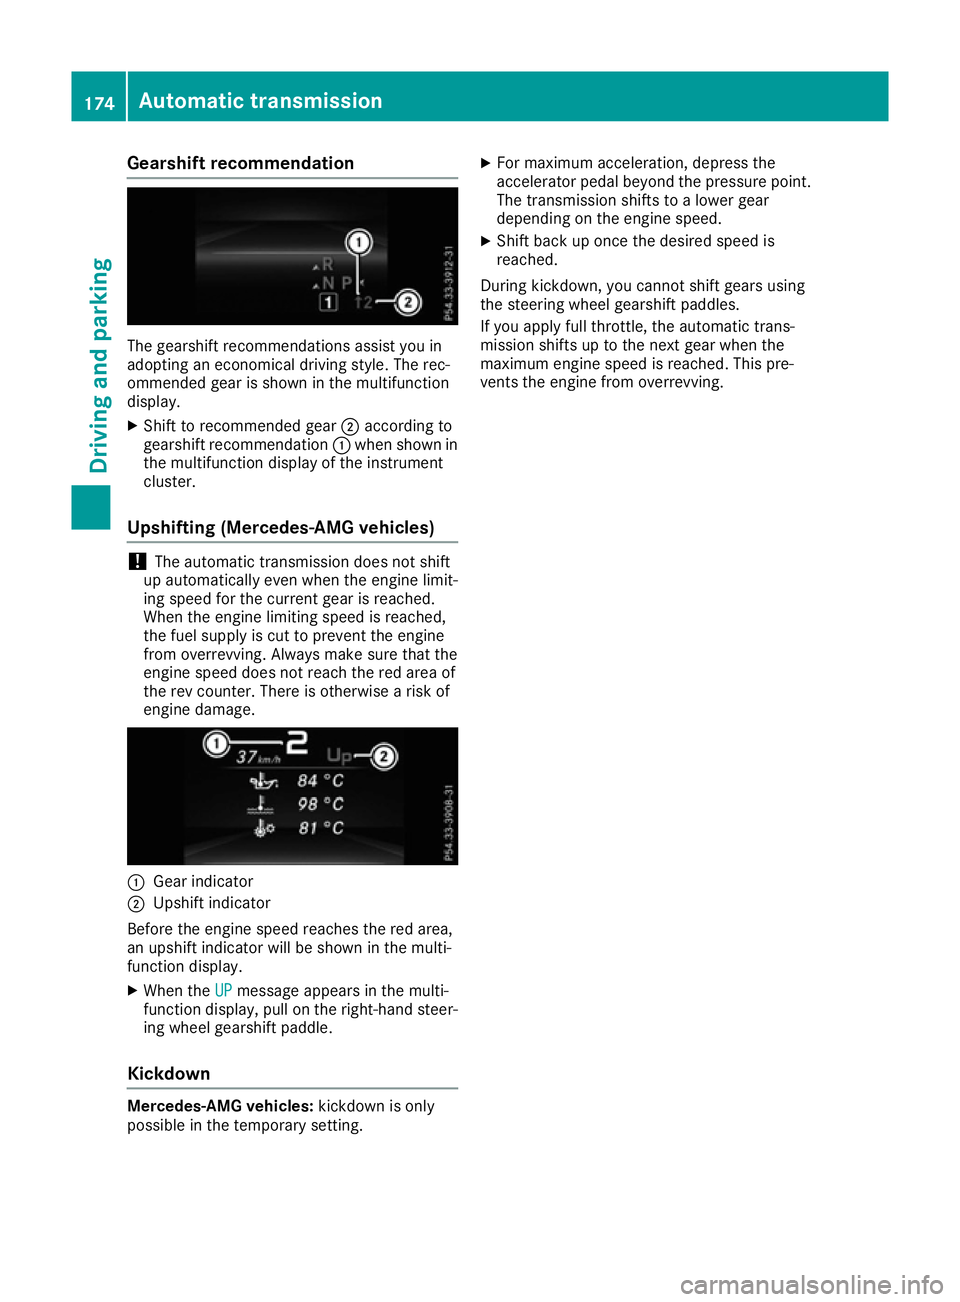
The gearshift recommendations assist you in
adopting an economical driving style. The rec-
ommended gear is shown in the multifunction
display.
X Shift to recommended gear ;according to
gearshift recommendation :when shown in
the multifunction display of the instrument
cluster.
Upshifting (Mercedes-AMG vehicles) !
The automatic transmission does not shift
up automatically even when the engine limit-
ing speed for the current gear is reached.
When the engine limiting speed is reached,
the fuel supply is cut to prevent the engine
from overrevving. Always make sure that the
engine speed does not reach the red area of
the rev counter. There is otherwise a risk of
engine damage. :
Gear indicator
; Upshift indicator
Before the engine speed reaches the red area,
an upshift indicator will be shown in the multi-
function display.
X When the UP
UP message appears in the multi-
function display, pull on the right-hand steer- ing wheel gearshift paddle.
Kickdown Mercedes-AMG vehicles:
kickdown is only
possible in the temporary setting. X
For maximum acceleration, depress the
accelerator pedal beyond the pressure point.
The transmission shifts to a lower gear
depending on the engine speed.
X Shift back up once the desired speed is
reached.
During kickdown, you cannot shift gears using
the steering wheel gearshift paddles.
If you apply full throttle, the automatic trans-
mission shifts up to the next gear when the
maximum engine speed is reached. This pre-
vents the engine from overrevving. 174
Automatic transmissionDriving and parking
Page 180 of 453
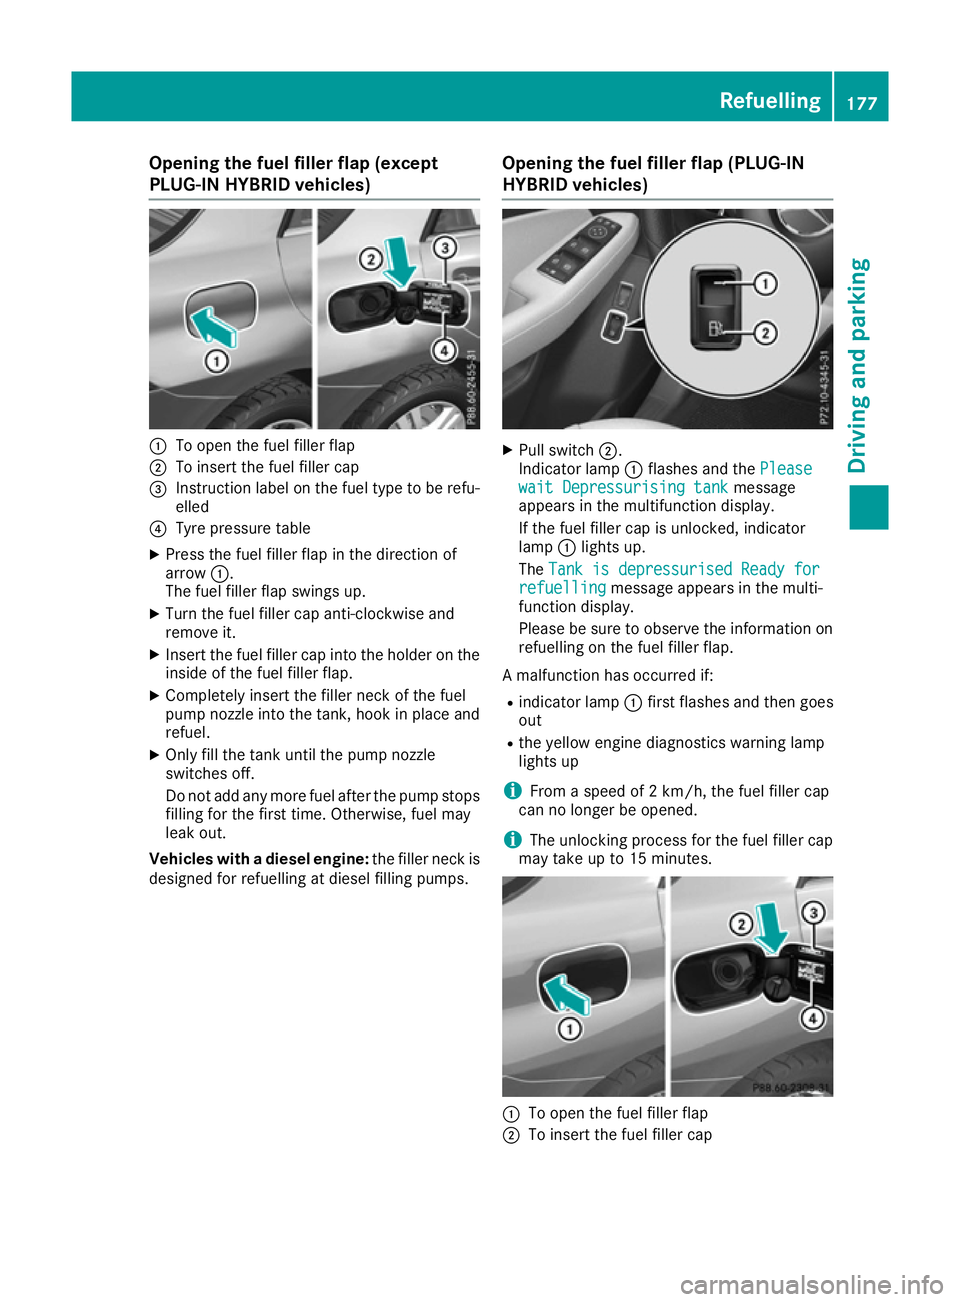
Opening the fuel filler flap (except
PLUG-IN HYBRID vehicles)
:
To open the fuel filler flap
; To insert the fuel filler cap
= Instruction label on the fuel type to be refu-
elled
? Tyre pressure table
X Press the fuel filler flap in the direction of
arrow :.
The fuel filler flap swings up.
X Turn the fuel filler cap anti-clockwise and
remove it.
X Insert the fuel filler cap into the holder on the
inside of the fuel filler flap.
X Completely insert the filler neck of the fuel
pump nozzle into the tank, hook in place and
refuel.
X Only fill the tank until the pump nozzle
switches off.
Do not add any more fuel after the pump stops filling for the first time. Otherwise, fuel may
leak out.
Vehicles with a diesel engine: the filler neck is
designed for refuelling at diesel filling pumps. Opening the fuel filler flap (PLUG-IN
HYBRID vehicles) X
Pull switch ;.
Indicator lamp :flashes and the Please Please
wait Depressurising tank
wait Depressurising tank message
appears in the multifunction display.
If the fuel filler cap is unlocked, indicator
lamp :lights up.
The Tank is depressurised Ready for Tank is depressurised Ready for
refuelling
refuelling message appears in the multi-
function display.
Please be sure to observe the information on refuelling on the fuel filler flap.
A malfunction has occurred if:
R indicator lamp :first flashes and then goes
out
R the yellow engine diagnostics warning lamp
lights up
i From a speed of 2 km/h, the fuel filler cap
can no longer be opened.
i The unlocking process for the fuel filler cap
may take up to 15 minutes. :
To open the fuel filler flap
; To insert the fuel filler cap Refuelling
177Driving and parking Z
Page 181 of 453
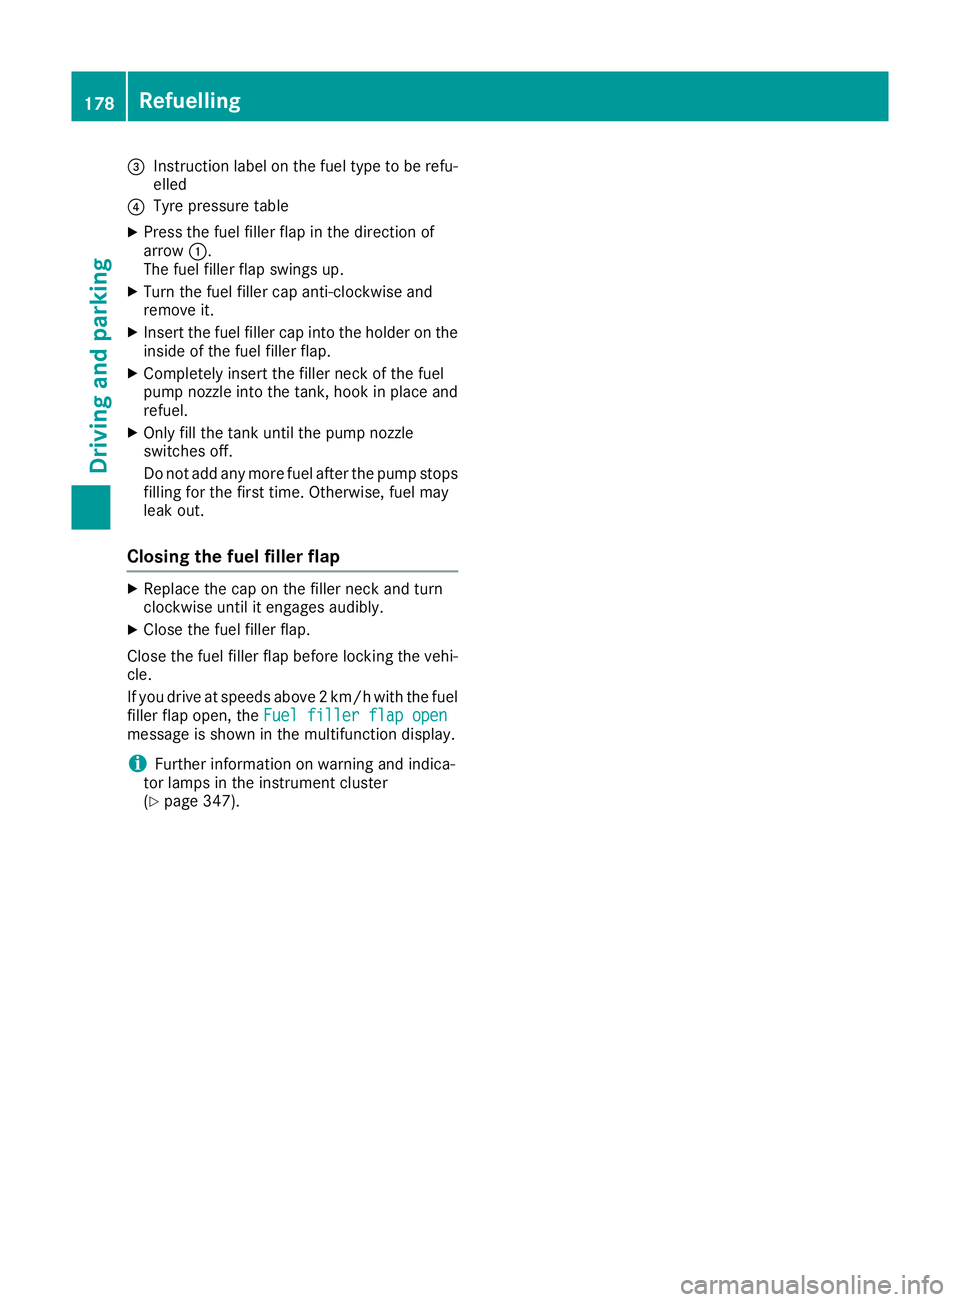
=
Instruction label on the fuel type to be refu-
elled
? Tyre pressure table
X Press the fuel filler flap in the direction of
arrow :.
The fuel filler flap swings up.
X Turn the fuel filler cap anti-clockwise and
remove it.
X Insert the fuel filler cap into the holder on the
inside of the fuel filler flap.
X Completely insert the filler neck of the fuel
pump nozzle into the tank, hook in place and
refuel.
X Only fill the tank until the pump nozzle
switches off.
Do not add any more fuel after the pump stops
filling for the first time. Otherwise, fuel may
leak out.
Closing the fuel filler flap X
Replace the cap on the filler neck and turn
clockwise until it engages audibly.
X Close the fuel filler flap.
Close the fuel filler flap before locking the vehi-
cle.
If you drive at speeds above 2 km/h with the fuel
filler flap open, the Fuel filler flap open
Fuel filler flap open
message is shown in the multifunction display.
i Further information on warning and indica-
tor lamps in the instrument cluster
(Y page 347). 178
RefuellingDriving and parking
Page 183 of 453
AdBlue
®
(BlueTEC vehicles only)
General notes To function properly, BlueTEC exhaust gas after-
treatment must be operated with the reducing
agent AdBlue ®
. Topping up AdBlue ®
is part of
the maintenance work. Under normal operating
conditions, a full tank of AdBlue ®
should last
until the next service due date.
When the supply of AdBlue ®
is down to approx-
imately 3.8 l, the Refill AdBlue See Own‐
Refill AdBlue See Own‐
er's Manual er's Manual message is shown in the multi-
function display.
X Add at least 3.8 l of AdBlue ®
.
X Switch on the ignition for at least 60 seconds.
X Start the engine.
i You can also have the AdBlue ®
tank refilled
at a qualified specialist workshop.
Before driving your vehicle outside Europe, have
the AdBlue ®
supply checked at a qualified spe-
cialist workshop.
Further information about BlueTEC exhaust gas
aftertreatment and about AdBlue ®
can
be obtained from any Mercedes-Benz Service
Centre.
Important safety notes AdBlue
®
is a water-soluble fluid for the exhaust
gas aftertreatment of diesel engines. It is:
R non-toxic
R colourless and odourless
R non-flammable
If you open the AdBlue ®
tank, small amounts of
ammonia vapour may be released.
Ammonia vapours have a pungent odour and are
particularly irritating to the skin, to mucous
membranes and to the eyes. You may experi-
ence a burning sensation in your eyes, nose and throat. You may also experience coughing and
watery eyes.
Do not inhale any ammonia vapours that may be
released. Only fill the AdBlue ®
tank in well-ven-
tilated areas.
Do not swallow AdBlue ®
or let it come into con-
tact with skin, eyes or clothing. Keep AdBlue ®
away from children. If you or others come into contact with AdBlue
®
,
observe the following:
R immediately rinse AdBlue ®
off your skin with
soap and water.
R if AdBlue ®
comes into contact with your eyes,
immediately rinse them thoroughly with clean water. Seek medical attention immediately.
R if AdBlue ®
is swallowed, immediately rinse
your mouth out thoroughly. Drink plenty of
water. Seek medical attention immediately.
R change immediately out of clothing that has
come into contact with AdBlue ®
.
! Only use AdBlue ®
in accordance with
ISO 22241. Do not mix any additives with
AdBlue ®
, and do not dilute AdBlue ®
with
water. This may destroy the BlueTEC exhaust
gas aftertreatment system.
! In order to fill the AdBlue ®
tank, the vehicle
must be parked on a level surface. The
AdBlue ®
tank can only be filled as intended
with the vehicle parked on a level surface.
Fluctuations in capacity will thus be avoided.
Filling a vehicle standing on an uneven sur-
face is not permitted. There is a danger of
overfilling, which can cause damage to Blue-
TEC exhaust gas aftertreatment components.
! Surfaces which have come into contact with
AdBlue ®
while refilling should be rinsed
immediately with water, or remove AdBlue ®
with a moist cloth and cold water. If AdBlue ®
has already crystallised, use a sponge and
cold water to clean the area. AdBlue ®
residue
crystallises after a certain amount of time and soils the affected surfaces.
! AdBlue ®
is not a fuel additive and must not
be added to the fuel tank. If AdBlue ®
is added
to the fuel tank, this can lead to engine dam-
age.
Have the AdBlue ®
tank refilled at a qualified
specialist workshop. However, you can also top
up the AdBlue ®
tank:
R at a filling station with an AdBlue ®
filling pump
R with AdBlue ®
refill bottles
R with an AdBlue ®
refill canister
When the pump nozzle switches off automati-
cally during filling at a filling pump, the AdBlue ®
tank has been completely filled. Do not fill the 180
RefuellingDriving and pa
rking
Page 185 of 453
Centre. AdBlue
®
refill canisters are often sold
with a filler hose. A filler hose that does not
exactly fit the vehicle's AdBlue ®
tank offers no
protection against overfilling. AdBlue ®
may leak
out as a result of overfilling. Mercedes-Benz
offers a special disposable hose with overfill
protection. You can obtain this from any
Mercedes-Benz Service Centre. AdBlue ®
is
available in a variety of containers and recepta- cles. Only use the disposable hose with the
Mercedes-Benz AdBlue ®
refill canisters.
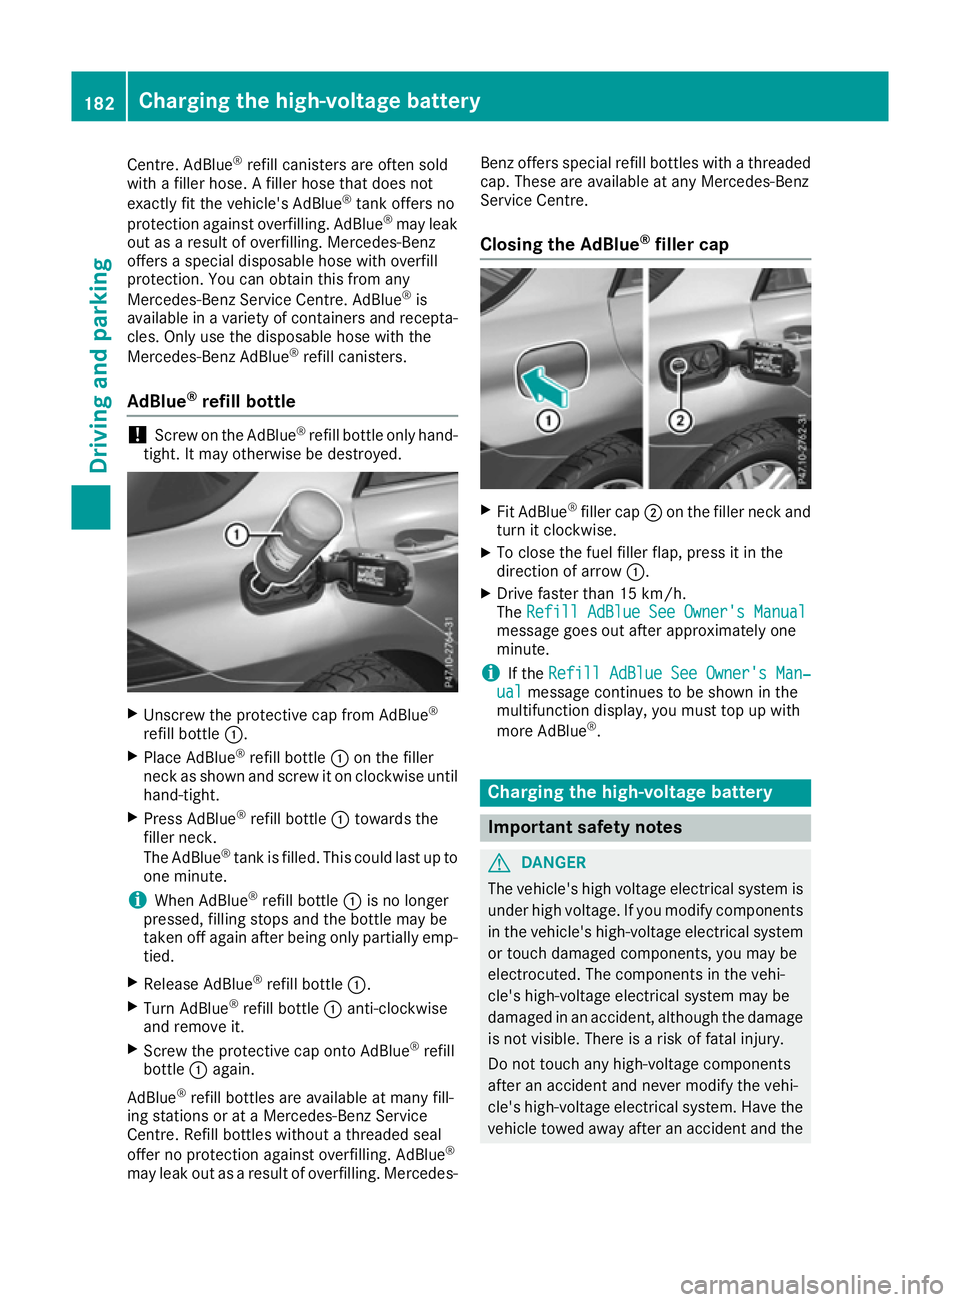
AdBlue ®
refill bottle !
Screw on the AdBlue ®
refill bottle only hand-
tight. It may otherwise be destroyed. X
Unscrew the protective cap from AdBlue ®
refill bottle :.
X Place AdBlue ®
refill bottle :on the filler
neck as shown and screw it on clockwise until hand-tight.
X Press AdBlue ®
refill bottle :towards the
filler neck.
The AdBlue ®
tank is filled. This could last up to
one minute.
i When AdBlue ®
refill bottle :is no longer
pressed, filling stops and the bottle may be
taken off again after being only partially emp- tied.
X Release AdBlue ®
refill bottle :.
X Turn AdBlue ®
refill bottle :anti-clockwise
and remove it.
X Screw the protective cap onto AdBlue ®
refill
bottle :again.
AdBlue ®
refill bottles are available at many fill-
ing stations or at a Mercedes-Benz Service
Centre. Refill bottles without a threaded seal
offer no protection against overfilling. AdBlue ®
may leak out as a result of overfilling. Mercedes- Benz offers special refill bottles with a threaded
cap. These are available at any Mercedes-Benz
Service Centre.
Closing the AdBlue ®
filler cap X
Fit AdBlue ®
filler cap ;on the filler neck and
turn it clockwise.
X To close the fuel filler flap, press it in the
direction of arrow :.
X Drive faster than 15 km/h.
The Refill AdBlue See Owner's Manual Refill AdBlue See Owner's Manual
message goes out after approximately one
minute.
i If the
Refill AdBlue See Owner's Man‐ Refill AdBlue See Owner's Man‐
ual
ual message continues to be shown in the
multifunction display, you must top up with
more AdBlue ®
. Charging the high-voltage battery
Important safety notes
G
DANGER
The vehicle's high voltage electrical system is under high voltage. If you modify components
in the vehicle's high-voltage electrical system or touch damaged components, you may be
electrocuted. The components in the vehi-
cle's high-voltage electrical system may be
damaged in an accident, although the damage
is not visible. There is a risk of fatal injury.
Do not touch any high-voltage components
after an accident and never modify the vehi-
cle's high-voltage electrical system. Have the vehicle towed away after an accident and the 182
Charging the high-voltage batteryDriving and parking
Page 187 of 453
the energy needed to operate the electric motor
and releases it again.
The electric motor uses energy that has been
stored in the high-voltage battery when pulling
away, accelerating and during the journey.
In overrun mode, kinetic energy is converted by
means of energy recuperation into electrical
energy and stored in the high-voltage battery.
Information on overrun mode (Y page 269).
The high-voltage battery can be charged as fol-
lows:
R through energy recuperation while the vehicle
is in motion
R during the journey by the combustion engine
in CHARGE operating mode (Y page 262)
R with the relevant charging cable at a mains
socket while the vehicle is stationary
R with the relevant charging cable at a wallbox
while the vehicle is stationary
R with the relevant charging cable at a charging
station while the vehicle is stationary
The high-voltage battery can be charged in a
nominal voltage range from 100 Vto 240 V.
You can view the charge status of the high-volt-
age battery in the multifunction display. You can
find information in "PLUG-IN HYBRID opera-
tion", section "Menus and submenus" under
"Energy flow display" (Y page 263).
High and low outside temperatures Low outside temperatures
The maximum performance of the high-voltage
battery is significantly reduced at very low out-
side temperatures. The high-voltage battery is
then no longer able to provide the normal elec-
trical power output.
High outside temperatures
To prevent damage to the high-voltage battery
due to very high outside temperatures, the max- imum power output of the high-voltage battery
is reduced by the vehicle.
Energy consumption and electrical
range The maximum electrical range is generally
reduced by:
R high and low outside temperatures
R operating the climate control system
R switching on consumers The battery's physical characteristics are such,
that leaving the vehicle parked for long periods
at low outdoor temperatures without charging it
can lead to:
R a reduction in battery performance
R longer charge times
Notes on battery care Avoid storing or transporting the vehicle at
excessively high or low temperatures over a long
period.
If you park the vehicle and leave it stationary for
long periods:
R check the charge status of the high-voltage
battery more often
R connect the vehicle to a power supply.
This prevents self-discharge and damage to the
high-voltage battery.
Terms of use Please note the information on exceptions and
limitations in the warranty documentation and
in the Service Booklet.
Handling the charging cable and charg- ing cable controls Do not leave the charging cable controls
(Y
page 185) hanging loose from a mains
socket. Otherwise, this could result in a poor
contact with the mains socket and malfunctions
when charging the vehicle.
To ensure that the brackets within the charging
cable controls are not subjected to incorrect
loads, observe the following:
R never lift or carry the controls by the charging
cable connector or the mains plug
R to transport the charging cable, the charging
cable can be:
- charging cable variant 1: wrapped around
the controls or secured to the control hous-
ing.
- charging cable variant 2: wrapped around
the controls and secured with a strap
Information on charging cable variants can be
found under "Charging cable for mains sockets"
(Y page 185). 184
Charging the high-voltage batteryDriving and parking