2015 MERCEDES-BENZ GLE COUPE lock
[x] Cancel search: lockPage 177 of 393
Driving on flooded roads
!
Bear in mind that vehicles travelling in front
or in the opposite direction create waves. This may cause the maximum permissible water
depth to be exceeded.
These notes must be observed under all cir-
cumstances. You could otherwise damage
the engine, the electronics or the transmis-
sion.
If you must drive on stretches of road on which
water has collected, please bear in mind that:
R in the case of standing water, the water level
must be no higher than the lower edge of the vehicle body
R you should drive no faster than walking pace
Off-road fording !
Under no circumstances should you accel-
erate before entering the water. The bow
wave could cause water to enter and damage the engine and neighbouring assemblies.
! Do not open any of the vehicle's doors while
fording. Otherwise, water could get into the
vehicle interior and damage the vehicle's
electronics and interior equipment.
R Establish how deep the water is and the char-
acteristics of the body of water before ford-
ing.
R Select the highest possible vehicle level.
R Shift to a lower gear using the left-hand steer-
ing wheel gearshift paddle.
R Avoid high engine speeds.
R Enter and exit the water at a flat place and at
a steady walking pace.
R Drive slowly and at a constant speed through
the water.
R Ensure that a bow wave does not form as you
drive.
R Do not stop and do not switch off the engine.
Water offers a high degree of resistance, the
ground is slippery and, in some cases, unsta-
ble. Therefore, it is difficult and dangerous to pull away in the water.
R Clean any mud from the tyre tread after ford-
ing.
R Apply the brakes to dry them after fording.
Always observe the fording depth values
(Y page 383). Winter driving
G
WARNING
If you shift down on a slippery road surface in an attempt to increase the engine's braking
effect, the drive wheels could lose their grip.
This increases the risk of skidding and having
an accident.
Do not shift down for additional engine brak-
ing on a slippery road surface. G
DANGER
If the exhaust pipe is blocked or adequate
ventilation is not possible, poisonous gases
such as carbon monoxide (CO) may enter the vehicle. This is the case, e.g. if the vehicle
becomes trapped in snow. There is a risk of
fatal injury.
If you leave the engine or the auxiliary heating
running, make sure the exhaust pipe and area
around the vehicle are clear of snow. To
ensure an adequate supply of fresh air, open a window on the side of the vehicle that is not
facing into the wind.
! Take care not to damage the sealing strip
and the moulding on the side of the rear win- dow when scraping ice off the rear window.
Have your vehicle winterproofed at a qualified
specialist workshop at the onset of winter.
You should drive particularly carefully on slip-
pery road surfaces. Avoid sudden acceleration,
steering and braking manoeuvres. Do not use
cruise control or DISTRONIC PLUS.
If the vehicle threatens to skid or cannot be
stopped when moving at low speed:
X Shift the transmission to position N.
X Try to bring the vehicle under control by using
corrective steering.
When driving in snow with or without snow
chains, select driving program Slippery
(Y page 153).
The outside temperature indicator is not
designed to serve as an ice-warning device and
is therefore unsuitable for that purpose.
Changes in the outside temperature are dis-
played after a short delay. 174
Driving tipsDriving and pa
rking
Page 181 of 393
R
Avoid high engine speeds, except when driv-
ing on sandy and muddy routes with high driv-
ing resistance.
R Use the left-hand steering wheel gearshift
paddle to shift to a lower gear appropriate to the gradient.
R Use the left-hand gearshift paddle to shift to a
lower gear on long and steep downhill gradi-
ents.
Hill start assist will aid you when pulling away on
a hill. Further information on hill start assist
(Y page 149).
Do not shift into transmission position Nwhen
driving off-road. You could lose control of the
vehicle if you attempt to brake the vehicle using
the service brake. If the gradient is too steep for
your vehicle, back up in reverse gear.
Always observe the approach/departure angle
values (Y page 383).
Maximum gradient-climbing capability Always observe the maximum gradient climbing
ability values (Y page 384).
Hilltops When driving up an uphill gradient, slightly
reduce pressure on the accelerator immediately
before reaching the brow of the hill. Make use of the vehicle's own impetus to travel over the
brow.
This style of driving prevents:
R the vehicle from lifting off the ground on the
brow of a hill
R the vehicle from travelling too quickly down
the other side
Driving downhill R
Drive slowly.
R Do not drive at an angle down steep inclines.
Steer into the line of fall and drive with the
front wheels aligned straight. Otherwise, the
vehicle could slip sideways, tip and overturn.
R Before tackling steep downhill gradients, use
the left-hand steering wheel gearshift paddle
to shift to a lower gear.
R Activate DSR. If this is not sufficient, brake
gently. When doing so, make sure that the vehicle is facing in the direction of the line of
fall.
R Check that the brakes are working normally
after a long downhill stretch.
i Off-road ABS is activated when the off-road
program is selected.
At speeds below 30 km/h the front wheels
lock cyclically during braking. The digging-in
effect achieved in the process reduces the
stopping distance when driving off-road. The
steerability of the vehicle is considerably
reduced if the wheels lock. Driving systems
Intelligent Drive
Mercedes-Benz Intelligent Drive stands for inno- vative driver assistance and safety systems
which enhance comfort and support the driver in
critical situations. With these intelligent co-ordi- nated systems Mercedes-Benz has set a mile-
stone on the path towards autonomous driving.
Mercedes-Benz Intelligent Drive embraces all
elements of active and passive safety in one well thought-out system – for the safety of the vehi-
cle occupants and that of other road users.
Further information on driving safety systems
(Y page 64). Cruise control
General notes Cruise control maintains a constant road speed
for you. It brakes automatically in order to avoid
exceeding the set speed. You must select a
lower gear in good time on long and steep down-
hill gradients, especially if the vehicle is laden or towing a trailer. By doing so, you will make use of
the braking effect of the engine. This relieves the load on the brake system and prevents the
brakes from overheating and wearing too
quickly.
Use cruise control only if road and traffic con-
ditions are appropriate for maintaining a steady
speed for a prolonged period. You can store any road speed above 30 km/h. 178
Driving systemsDriving an
d parking
Page 198 of 393
When lowering the vehicle, make sure no one
is underneath the vehicle or in the immediate
vicinity of the wheel arches.
If you unlock the vehicle or open a door, the
vehicle begins to compensate for load discrep-
ancies while still parked. However, for signifi-
cant level changes, e.g. after the vehicle has
been stationary for a long period, the engine
must be running. For safety reasons, the vehicle
is only lowered when the doors are closed. Low-
ering is interrupted if a door is opened; it con-
tinues once the door has been closed.
ADS PLUS (Adaptive Damping System) General notes
ADS PLUS automatically controls the calibration of the dampers. The damping characteristics
adapt to the current operating and driving sit-
uation.
The damping is tuned individually to each wheel
and depends on:
R your driving style, e.g. sporty
R the road surface conditions
R the drive program selected
R the vehicle level setting
Selecting Comfort mode In the
Comfort drive program, the driving char-
acteristics of your vehicle are more comforta-
ble. Therefore, select this drive program if you
prefer a more comfortable driving style. Also
select the Comfortdrive program when driving
fast on straight roads, e.g. on straight stretches
of motorway.
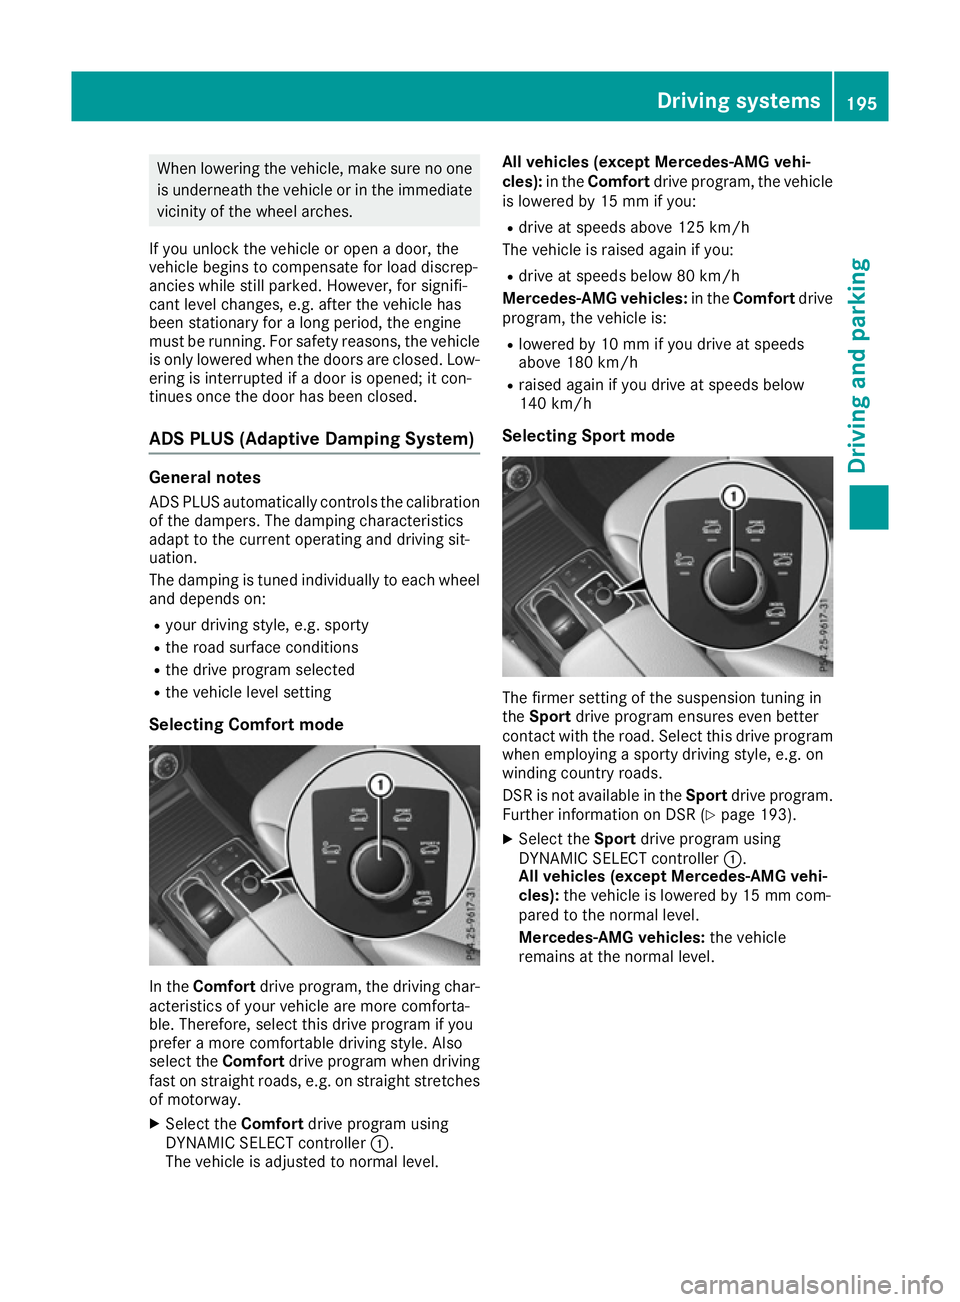
X Select the Comfortdrive program using
DYNAMIC SELECT controller :.
The vehicle is adjusted to normal level. All vehicles (except Mercedes-AMG vehi-
cles):
in theComfort drive program, the vehicle
is lowered by 15 mm if you:
R drive at speeds above 125 km/h
The vehicle is raised again if you:
R drive at speeds below 80 km/h
Mercedes-AMG vehicles: in theComfort drive
program, the vehicle is:
R lowered by 10 mm if you drive at speeds
above 180 km/h
R raised again if you drive at speeds below
140 km/h
Selecting Sport mode The firmer setting of the suspension tuning in
the
Sport drive program ensures even better
contact with the road. Select this drive program when employing a sporty driving style, e.g. on
winding country roads.
DSR is not available in the Sportdrive program.
Further information on DSR (Y page 193).
X Select the Sportdrive program using
DYNAMIC SELECT controller :.
All vehicles (except Mercedes-AMG vehi-
cles): the vehicle is lowered by 15 mm com-
pared to the normal level.
Mercedes-AMG vehicles: the vehicle
remains at the normal level. Driving systems
195Driving and parking Z
Page 200 of 393
If this vehicle is not driven in a safe manner, it
can lead to an accident, to the vehicle over-
turning as well as serious or even fatal inju-
ries.
R In the event of an accident with the vehicle
overturning, passengers who are not wearing
their seat belt are considerably more likely to die than passengers wearing their seat belt.
You and all vehicle occupants should always
wear your seat belts.
General notes
Only select raised level if this is appropriate for
the road conditions. Otherwise, fuel consump-
tion may increase and handling may be affected.
Make changes to the vehicle level while the
vehicle is in motion. This enables the vehicle to
adjust to the new level as quickly as possible.
The vehicle level may change visibly if you park
the vehicle and the outside temperature
changes. If the temperature drops, the vehicle
level lowers; with an increase in temperature,
the vehicle level rises.
If you unlock the vehicle or open a door, the
vehicle begins to compensate for load discrep-
ancies while still parked. However, for signifi-
cant level changes, e.g. after the vehicle has
been stationary for a long period, the engine
must be running. For safety reasons, the vehicle is only lowered when the doors are closed. Low-
ering is interrupted if a door is opened; it con-
tinues once the door has been closed.
Vehicles without a trailer coupled: below a
speed of 65 km/h, you can select between the
normal and raised vehicle level. Select the nor-
mal vehicle level for normal road conditions and
the raised vehicle level when using snow chains or if the road conditions are very poor. Your
selection remains stored even if you remove the
key from the ignition lock. If you try to select
raised level at a speed above 65 km/h, the
Please
Please reduce reducespeed
speedmessage appears in the
multifunction display.
Vehicles with a trailer coupled: below a speed
of 30 km/h, you can select between the normal
and raised vehicle level. Setting the raised vehicle level X
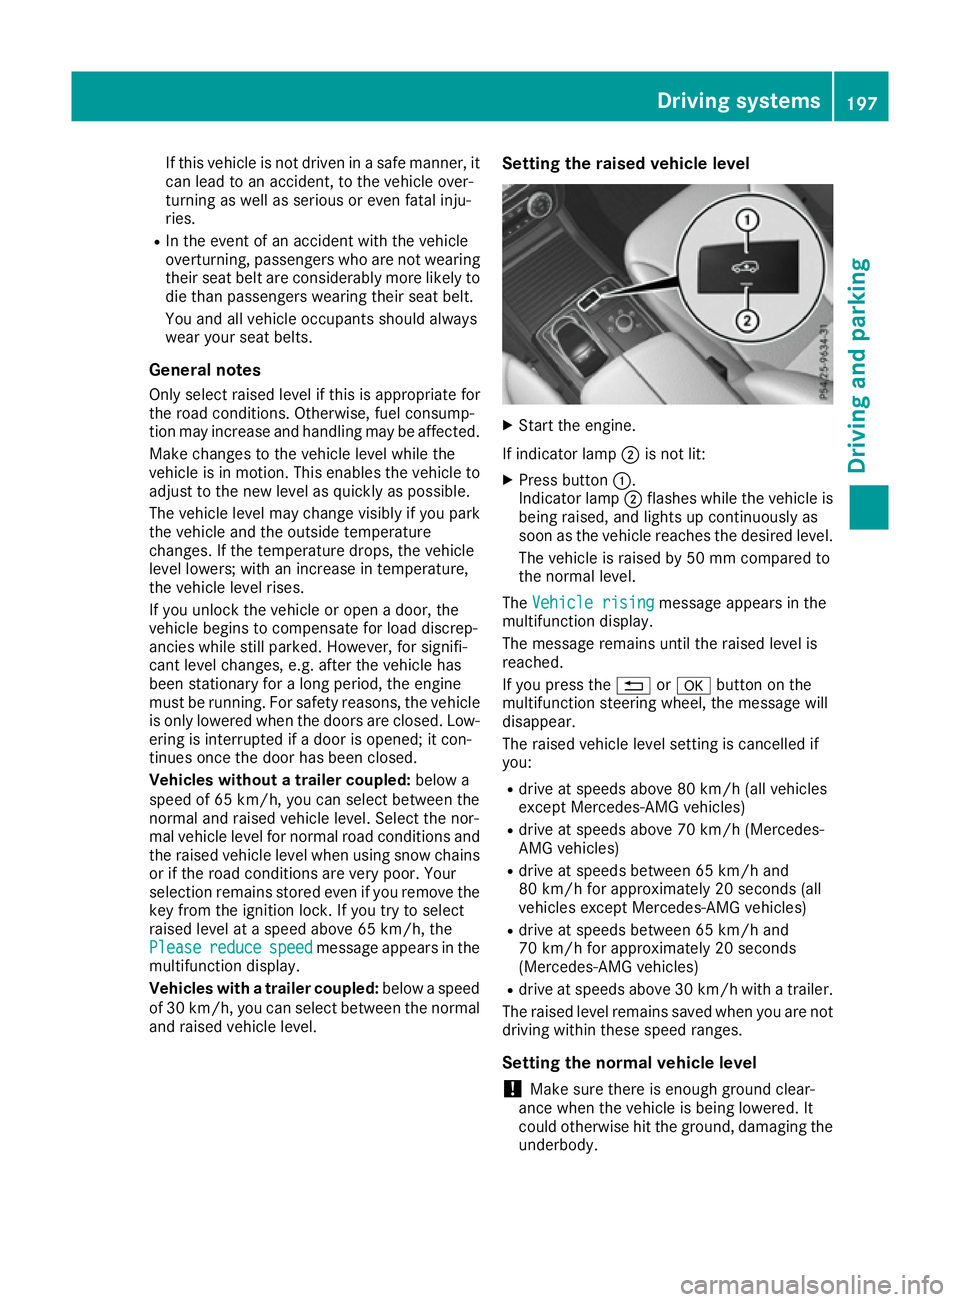
Start the engine.
If indicator lamp ;is not lit:
X Press button :.
Indicator lamp ;flashes while the vehicle is
being raised, and lights up continuously as
soon as the vehicle reaches the desired level.
The vehicle is raised by 50 mm compared to
the normal level.
The Vehicle rising Vehicle rising message appears in the
multifunction display.
The message remains until the raised level is
reached.
If you press the %ora button on the
multifunction steering wheel, the message will
disappear.
The raised vehicle level setting is cancelled if
you:
R drive at speeds above 80 km/h (all vehicles
except Mercedes-AMG vehicles)
R drive at speeds above 70 km/h (Mercedes-
AMG vehicles)
R drive at speeds between 65 km/h and
80 km/h for approximately 20 seconds (all
vehicles except Mercedes-AMG vehicles)
R drive at speeds between 65 km/h and
70 km/h for approximately 20 seconds
(Mercedes-AMG vehicles)
R drive at speeds above 30 km/h with a trailer.
The raised level remains saved when you are not driving within these speed ranges.
Setting the normal vehicle level ! Make sure there is enough ground clear-
ance when the vehicle is being lowered. It
could otherwise hit the ground, damaging the underbody. Driving systems
197Driving and parking Z
Page 204 of 393
This indicates that you have now reached the
minimum distance.
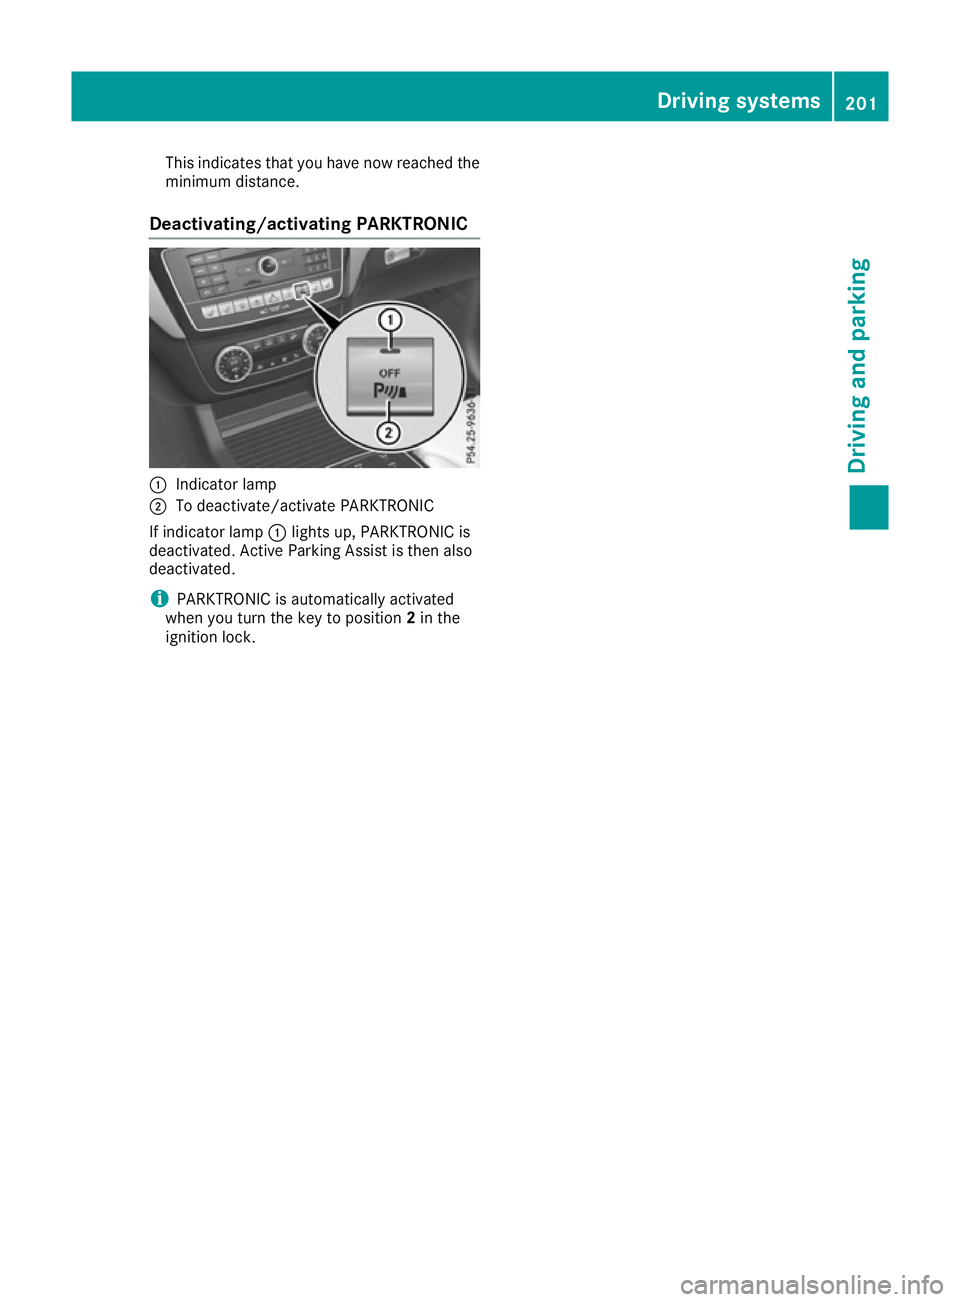
Deactivating/activating PARKTRONIC :
Indicator lamp
; To deactivate/activate PARKTRONIC
If indicator lamp :lights up, PARKTRONIC is
deactivated. Active Parking Assist is then also
deactivated.
i PARKTRONIC is automatically activated
when you turn the key to position 2in the
ignition lock. Driving systems
201Driving and parking Z
Page 206 of 393
R
snowfall or heavy rain may lead to a parking
space being measured inaccurately
R pay attention to the PARKTRONIC
(Y page 200) warning messages during the
parking procedure
R at any time, you can intervene in the steering
procedure to correct it. Active Parking Assist will then be cancelled.
R when transporting a load which protrudes
from your vehicle, you should not use Active
Parking Assist.
R never use Active Parking Assist when snow
chains are fitted.
R make sure that the tyre pressures are always
correct. This has a direct influence on the
parking characteristics of the vehicle.
Use Active Parking Assist for parking spaces
that are:
R parallel or at right angles to the direction of
travel
R on straight roads, not bends
R on the same level as the road, e.g. not on the
pavement
Detecting parking spaces Objects located above the height range of Active
Parking Assist will not be detected when the
parking space is measured. These are not taken into account when the parking procedure is cal-culated, e.g. overhanging loads, tail sections or
loading ramps of goods vehicles. G
WARNING
If there are objects above the detection range:
R Active Park Assist may steer too early
R the vehicle may not stop in front of these
objects
This could cause a collision. There is a risk of
an accident.
If objects are located above the detection
range, stop and deactivate Active Parking
Assist.
For further information on the detection range
(Y page 199). Active Parking Assist does not assist you park-
ing in spaces at right angles to the direction of
travel if:
R two parking spaces are located directly next
to one another
R the parking space is directly next to a low
obstacle such as a low kerb
R you forward park
Active Parking Assist does not assist you park-
ing in spaces that are parallel or at right angles
to the direction of travel if:
R the parking space is on a kerb
R the system reads the parking space as being
blocked, for example by foliage or grass pav-
ing blocks
R the area is too small for the vehicle to
manoeuvre into
R the parking space is bordered by an obstacle,
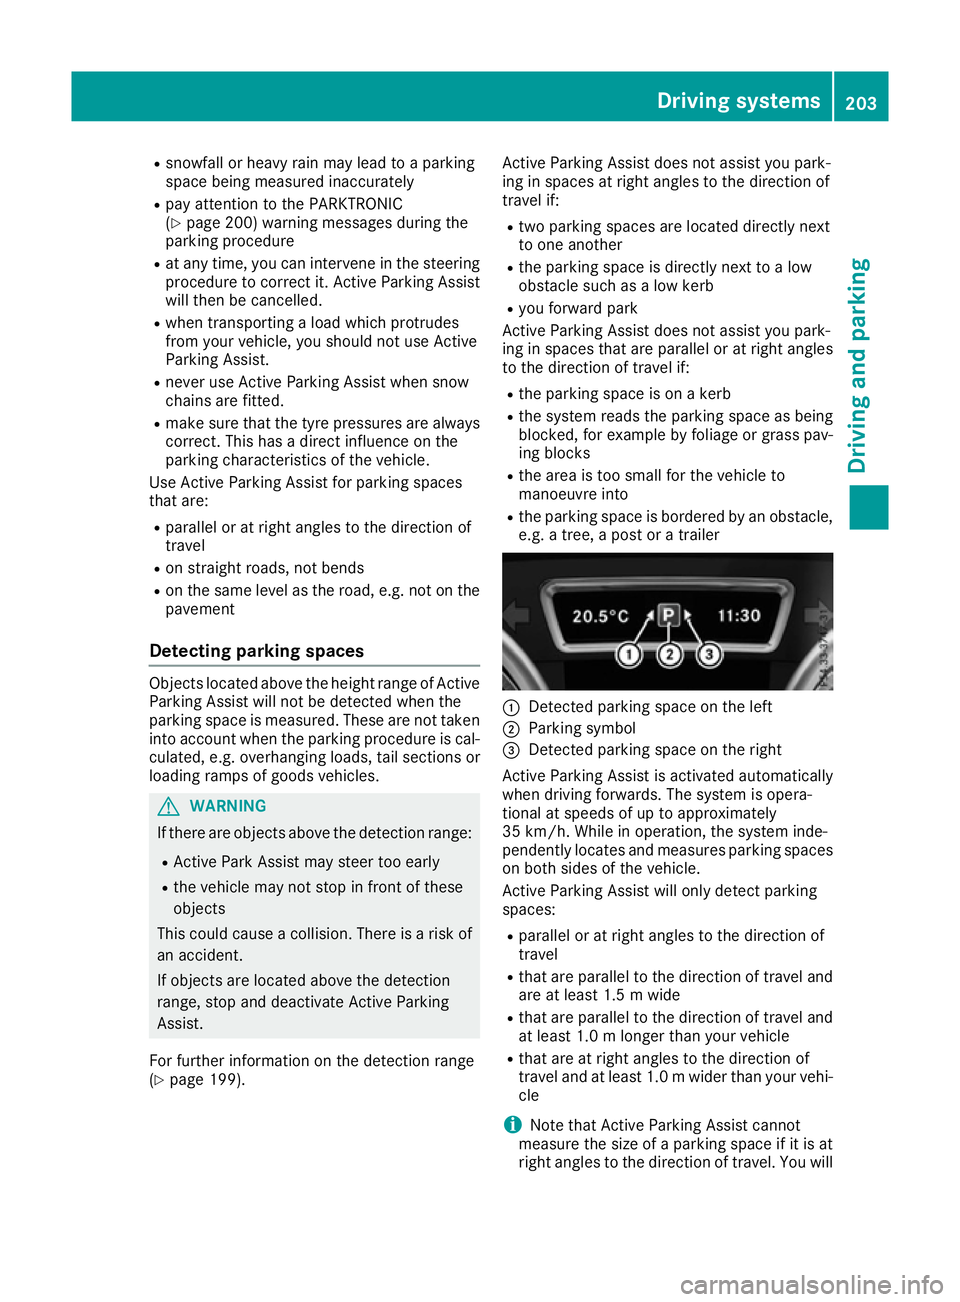
e.g. a tree, a post or a trailer :
Detected parking space on the left
; Parking symbol
= Detected parking space on the right
Active Parking Assist is activated automatically
when driving forwards. The system is opera-
tional at speeds of up to approximately
35 km/h. While in operation, the system inde-
pendently locates and measures parking spaces on both sides of the vehicle.
Active Parking Assist will only detect parking
spaces:
R parallel or at right angles to the direction of
travel
R that are parallel to the direction of travel and
are at least 1.5 m wide
R that are parallel to the direction of travel and
at least 1.0 m longer than your vehicle
R that are at right angles to the direction of
travel and at least 1.0 mwider than your vehi-
cle
i Note that Active Parking Assist cannot
measure the size of a parking space if it is at
right angles to the direction of travel. You will Driving systems
203Driving and parking Z
Page 210 of 393
The emblem closes again when:
R you have finished the manoeuvring process
R you switch off the engine
R you open the boot
See the notes on cleaning (Y page 328).
For technical reasons, the emblem may
remain open briefly after the reversing cam-
era has been deactivated.
Activating/deactivating the reversing
camera X
To activate: make sure that the key is in
position 2in the ignition lock.
X Make sure that the Activation by R gear
Activation by R gear
function is selected in the multimedia system; see the Digital Owner's Manual.
X Engage reverse gear.
The reversing camera flap opens. The multi-
media system shows the area behind the vehi-
cle with guide lines.
The image from the reversing camera is avail-
able throughout the manoeuvring process.
X To switch the function mode for vehicles
with trailer tow hitch: using the controller,
select symbol :for the "Reverse parking"
function or symbol ;for "Coupling up a
trailer".
The symbol of the selected function is high-
lighted.
To deactivate: the reversing camera deacti-
vates if you shift the transmission to Por after
driving forwards a short distance. Displays in the multimedia system The reversing camera may show a distorted view
of obstacles or show them incorrectly or not at
all. Obstacles are not shown by the reversing
camera in the following locations:
R very close to the rear bumper
R under the rear bumper
R in the area immediately above the tailgate
handle
! Objects not at ground level may appear to
be further away than they actually are, e.g.:
R the bumper of a parked vehicle
R the drawbar of a trailer
R the ball coupling of a trailer tow hitch
R the rear section of an HGV
R a slanted post
Use the guidelines only for orientation.
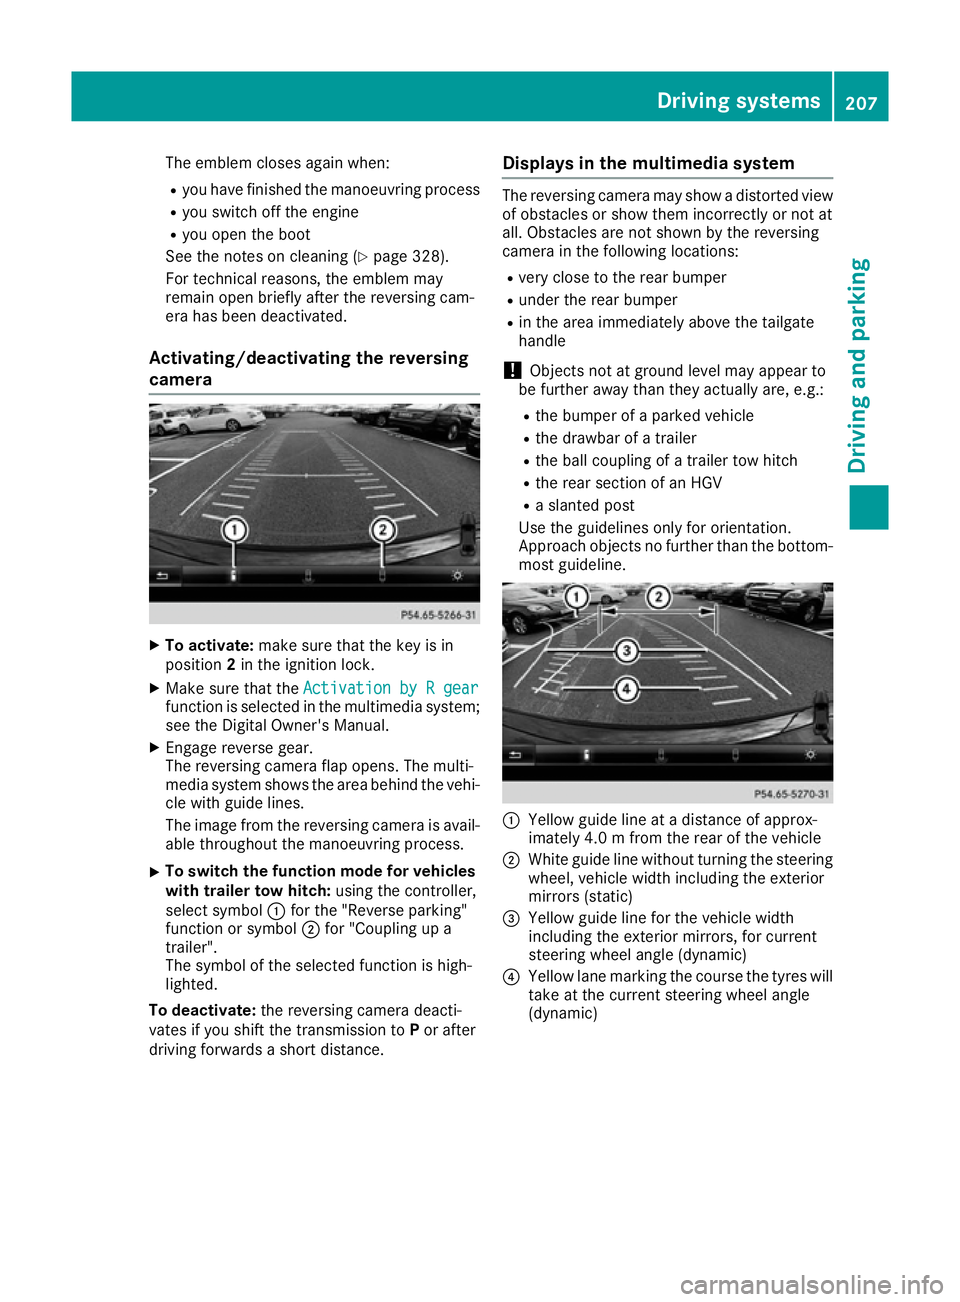
Approach objects no further than the bottom- most guideline. :
Yellow guide line at a distance of approx-
imately 4.0 m from the rear of the vehicle
; White guide line without turning the steering
wheel, vehicle width including the exterior
mirrors (static)
= Yellow guide line for the vehicle width
including the exterior mirrors, for current
steering wheel angle (dynamic)
? Yellow lane marking the course the tyres will
take at the current steering wheel angle
(dynamic) Driving systems
207Driving and parking Z
Page 215 of 393
Do not use the 360° camera under such cir-
cumstances. You could otherwise injure others
or damage objects when parking the vehicle.
Guide lines are always shown at road level. In
trailer mode, the guide lines are shown at the
level of the trailer coupling.
The field of vision and other functions of the
camera system may be restricted due to addi-
tional accessories on the rear of the vehicle (e.g.
licence plate holder, bicycle rack).
On vehicles with height-adjustable suspension,
due to the technical conditions, leaving the
standard height can result in:
R inaccuracies in the guide lines
R inaccuracies in the display of generated
images (top view)
Activation conditions The 360° camera image can be displayed if:
R your vehicle is equipped with a 360° camera
R the key is in position 2in the ignition lock
R the multimedia system is switched on
Activating the 360° camera X
Press the Øbutton in the centre console
for longer than two seconds.
The following appears depending on whether transmission position Dor Ris selected:
R a split-screen with top view and the image
from the front camera or
R a split-screen with top view and the image
from the reversing camera
or
X Press the Øbutton in the centre console.
The vehicle menu appears.
X Select 360°
360° camera camera and press 7to confirm.
The following appears depending on whether transmission position Dor Ris selected:
R a split-screen with top view and the image
from the front camera or
R a split-screen with top view and the image
from the reversing camera
Switching on the 360° camera using
reverse gear You can show images from the 360° camera
automatically by engaging reverse gear. X
Make sure that the key is in position 2in the
ignition lock.
X Make sure that the Activation by R gear
Activation by R gear
function is selected in the multimedia system (see the separate operating instructions).
X To show the 360° camera image: engage
reverse gear.
The multimedia system shows the area
behind the vehicle in split-screen mode. You
see the top view of the vehicle and the image from the reversing camera.
Selecting the split-screens or 180° view Selecting split-screen view
X To switch to the line with the vehicle icons:
slide 5the controller.
X To select one of the vehicle icons: turn 3
the controller.
X To switch to 180° view
180° view :turn 3 the con-
troller to select 180° view
180° view and press7to
confirm.
i The
180° 180° view
viewoption is only available in the
following views:
R Top view with image from the reversing
camera
R Top view with image from the front camera
Displays in the multimedia system Important safety notes
The camera system may show a distorted view
of obstacles or show them incorrectly or not at
all. Obstacles are not shown by the system in the
following locations:
R under the front and rear bumpers
R very close to the front and rear bumpers
R in the area immediately above the tailgate
handle
R very close to the exterior mirrors
R in the transitional areas between the various
cameras in the virtual top view
! Objects not at ground level may appear to
be further away than they actually are, e.g.:
R the bumper of a parked vehicle
R the drawbar of a trailer
R the ball coupling of a trailer tow hitch 212
Driving systemsDriving an
d parking