2015 MERCEDES-BENZ G-CLASS SUV reset
[x] Cancel search: resetPage 185 of 274

Selecting/setting Internet access data
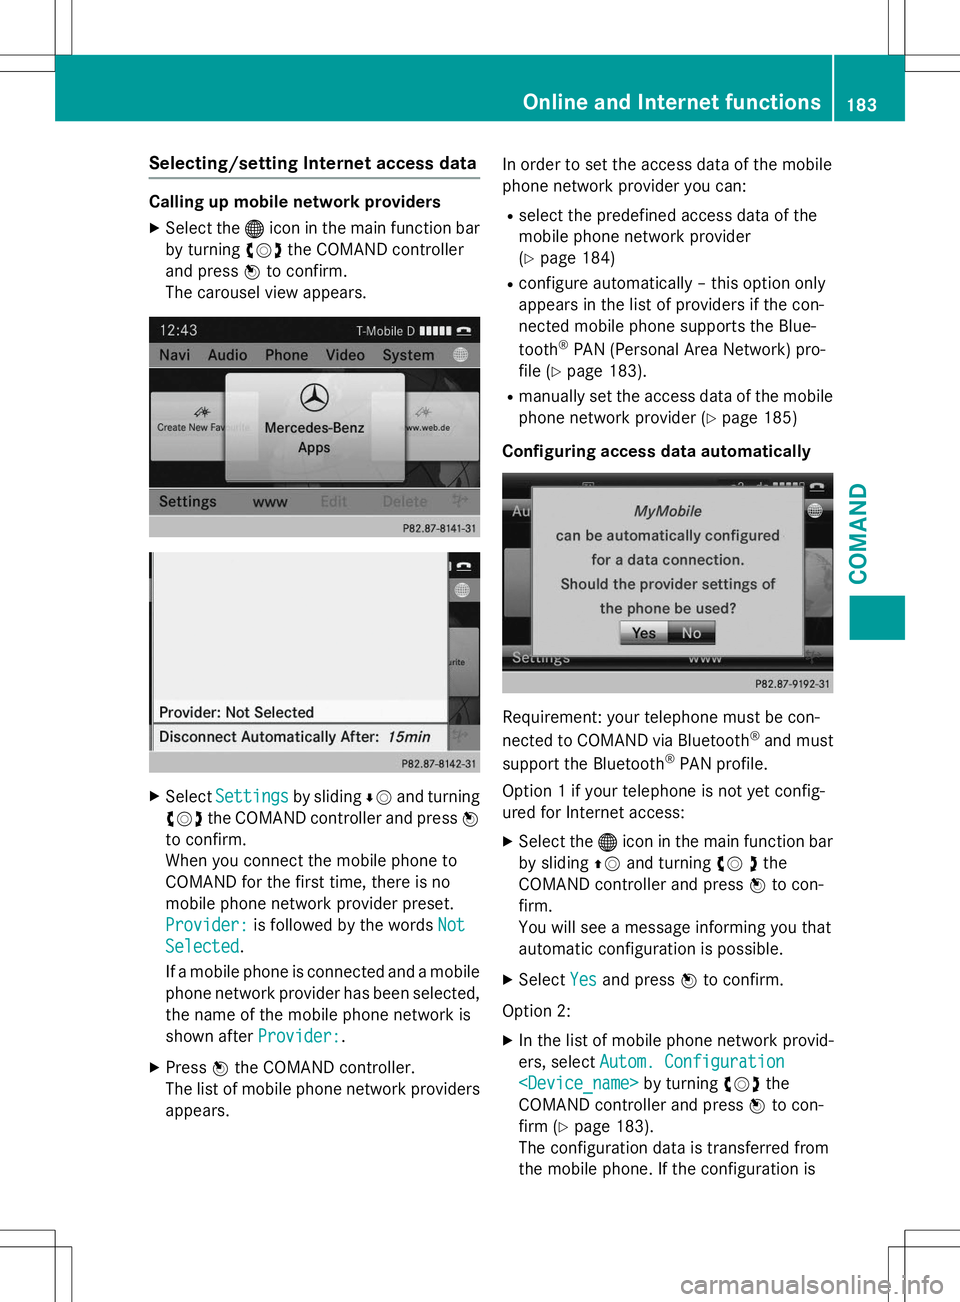
Calling up mobile network providersX Select the ®icon in the main function bar
by turning cVdthe COMAND controller
and press Wto confirm.
The carousel view appears.
X SelectSettingsby sliding ÆV and turning
cVd the COMAND controller and press W
to confirm.
When you connect the mobile phone to
COMAND for the first time, there is no
mobile phone network provider preset.
Provider:is followed by the wordsNot
Selected.
If a mobile phone is connected and a mobile
phone network provider has been selected, the name of the mobile phone network is
shown after
Provider:.
X Press Wthe COMAND controller.
The list of mobile phone network providers appears. In order to set the access data of the mobile
phone network provider you can:
R select the predefined access data of the
mobile phone network provider(Y page 184)
R configure automatically – this option only
appears in the list of providers if the con-
nected mobile phone supports the Blue- tooth ®
PAN (Personal Area Network) pro-
file ( Ypage 183).
R manually set the access data of the mobile
phone network provider ( Ypage 185)
Configuring access data automatically
Requirement: your telephone must be con-
nected to COMAND via Bluetooth ®
and must
support the Bluetooth ®
PAN profile.
Option 1 if your telephone is not yet config-
ured for Internet access: X Select the ®icon in the main function bar
by sliding ZVand turning cV dthe
COMAND controller and press Wto con-
firm.
You will see a message informing you that
automatic configuration is possible.
X Select
Yesand press Wto confirm.
Option 2: X In the list of mobile phone network provid-
ers, select
Autom. Configuration
COMAND controller and press Wto con-
firm ( Ypage 183).
The configuration data is transferred from
the mobile phone. If the configuration is
Online and Internet functions183
COMAND
Z
Page 186 of 274

successful, a#dot appears in front of
Autom. configuration
Selecting access data of the mobile phone
network provider
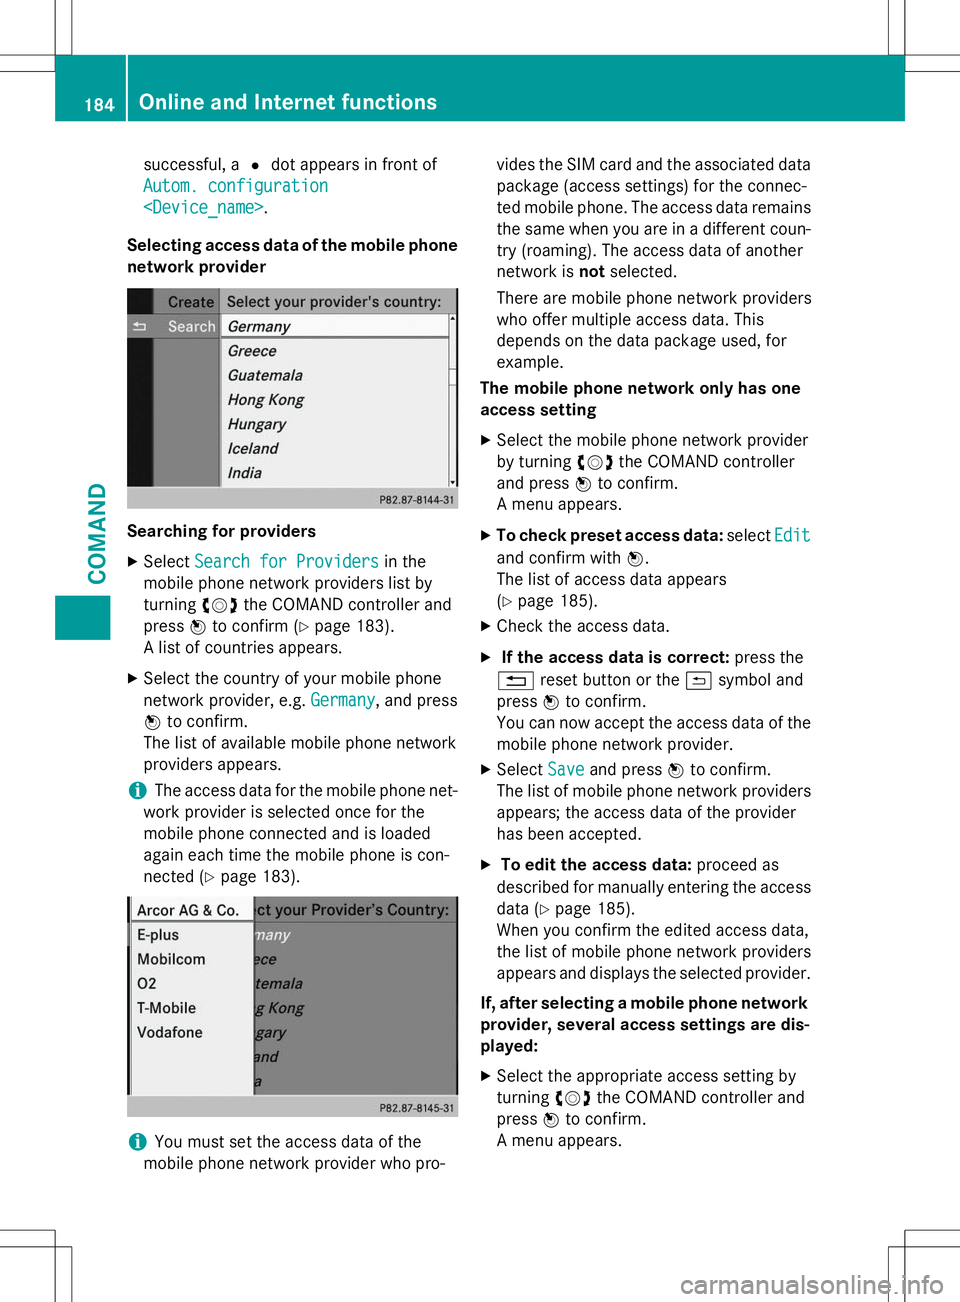
Searching for providers X Select
Search for Providersin the
mobile phone network providers list by turning cVdthe COMAND controller and
press Wto confirm ( Ypage 183).
A list of countries appears.
X Select the country of your mobile phone
network provider, e.g.
Germany, and press
W to confirm.
The list of available mobile phone network
providers appears.
iThe access data for the mobile phone net-
work provider is selected once for the
mobile phone connected and is loaded
again each time the mobile phone is con-
nected ( Ypage 183).
iYou must set the access data of the
mobile phone network provider who pro- vides the SIM card and the associated data
package (access settings) for the connec-
ted mobile phone. The access data remains
the same when you are in a different coun-
try (roaming). The access data of another
network is notselected.
There are mobile phone network providers
who offer multiple access data. This
depends on the data package used, forexample.
The mobile phone network only has one
access setting
X Select the mobile phone network provider
by turning cVdthe COMAND controller
and press Wto confirm.
A menu appears.
X To check preset access data: select
Edit
and confirm withW.
The list of access data appears ( Y page 185).
X Check the access data.
X If the access data is correct: press the
% reset button or the &symbol and
press Wto confirm.
You can now accept the access data of the
mobile phone network provider.
X Select
Saveand press Wto confirm.
The list of mobile phone network providers
appears; the access data of the provider
has been accepted.
X To edit the access data: proceed as
described for manually entering the access
data ( Ypage 185).
When you confirm the edited access data,
the list of mobile phone network providers
appears and displays the selected provider.
If, after selecting a mobile phone network provider, several access settings are dis-played:
X Select the appropriate access setting byturning cVdthe COMAND controller and
press Wto confirm.
A menu appears.
184Online and Internet functions
COMAND
Page 187 of 274

XTo check access settings: selectEdit
and pressWto confirm.
The list of access data appears ( Y page 185).
X Check the access data.
X If the access data is correct: press the
% reset button or the &symbol and
press Wto confirm.
You can now accept the access data of the
mobile phone network provider.
X Select
Saveand press Wto confirm.
The list of mobile phone network providers
appears; the access data of the provider
has been accepted.
X To edit the access data: proceed as
described in "Manually setting the access
data of the mobile phone network provider" ( Y page 185).
When you confirm the edited access data,
the list of mobile phone network providers
appears and displays the selected provider.
The currently selected access settings ( #dot
in front of the entry) are used for the connec- ted mobile phone.
X To return to the carousel view: press the
% back button twice.
or
X Press Wthe COMAND controller and then
the % back button. Manually setting the access data of the
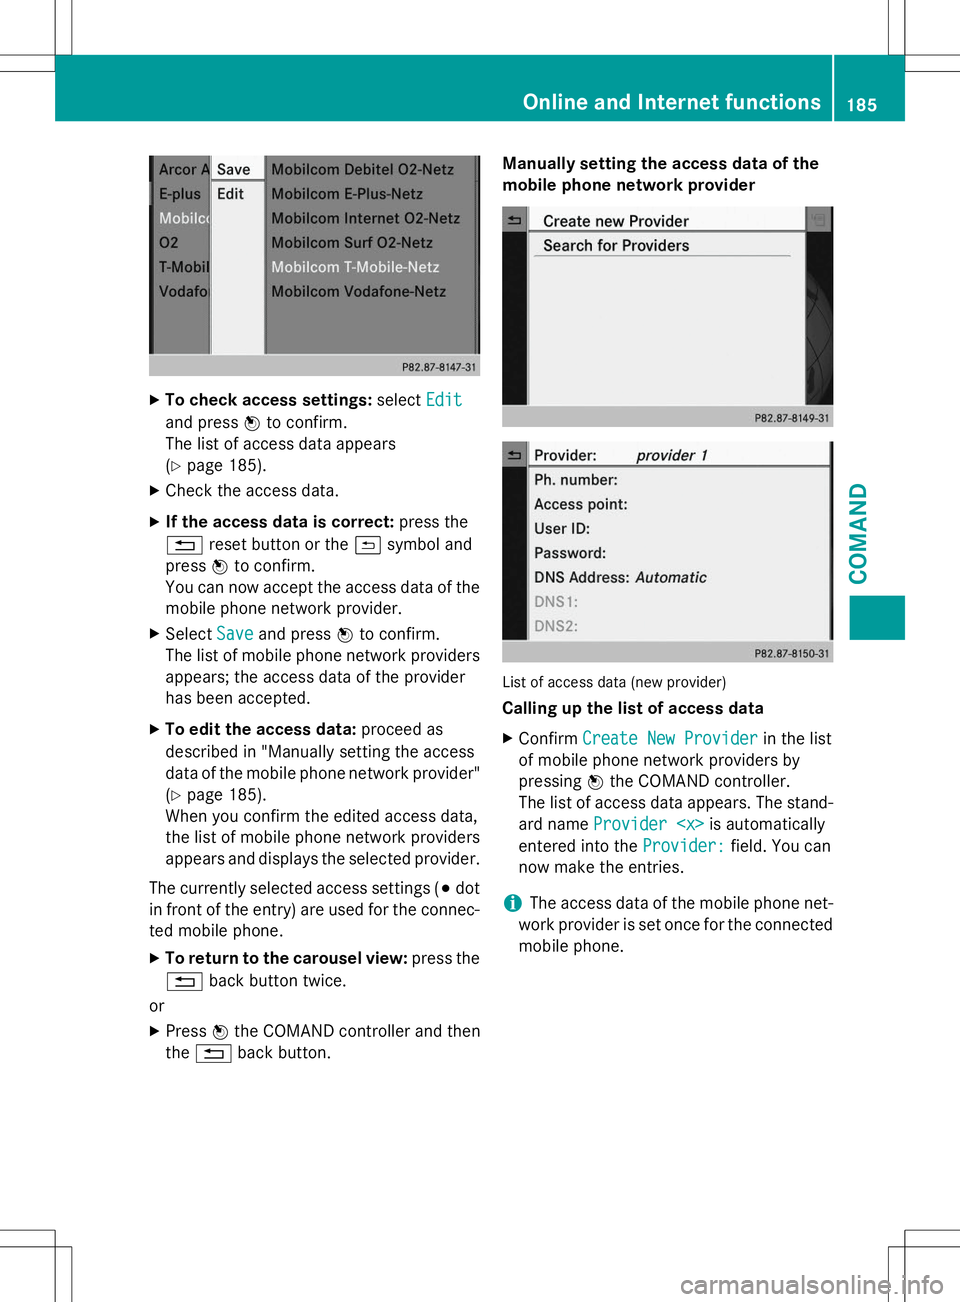
mobile phone network provider
List of access data (new provider)
Calling up the list of access data X
Confirm
Create New Providerin the list
of mobile phone network providers by
pressing Wthe COMAND controller.
The list of access data appears. The stand-
ard name
Provider
entered into the
Provider:field. You can
now make the entries.
iThe access data of the mobile phone net-
work provider is set once for the connected
mobile phone.
Online and Internet functions185
COMAND
Z
Page 221 of 274

little energy, thus conserving battery power.
iIf the power supply has been interrupted,
e.g. due to a discharged battery, you will
have to: R set the clock. Information on setting the
clock can be found in the Digital Opera-
tor's Manual.
On vehicles with COMAND and a naviga-
tion system, the clock is set automati- cally.
R reset the head restraints on the front
seats. Information on resetting the head
restraints can be found in the Digital
Operator's Manual.
R reset the function for folding the exterior
mirrors in/out automatically, by folding
the mirrors out once ( Ypage 87).
Charging the battery
GWARNING
During charging and jump-starting, explosive
gases can escape from the battery. There is a
risk of an explosion.
Particularly avoid fire, open flames, creating
sparks and smoking. Ensure there is sufficient
ventilation while charging and jump-starting.
Do not lean over a battery.
GWARNING
Battery acid is caustic. There is a risk of injury.
Avoid contact with skin, eyes or clothing. Do
not inhale any battery gases. Do not lean over
the battery. Keep children away from batter-
ies. Wash away battery acid immediately with
plenty of clean water and seek medical atten- tion.
GWARNING
A discharged battery can freeze at tempera-
tures below freezing point. When jump-start-
ing the vehicle or charging the battery, gases can escape from the battery. There is a risk of
an explosion.
Allow the frozen battery to thaw out before
charging it or jump-starting.
!Only charge the battery using the jump-
starting connection point.
!Only use battery chargers with a maxi-
mum charging voltage of 14.8 V.
!Only charge the installed battery with a
battery charger which has been tested and
approved by Mercedes-Benz. These battery
chargers allow the battery to be charged
while still installed in the vehicle.
If, at low temperatures, the indicator lamps/
warning lamps in the instrument cluster do
not light up, it is highly likely that the dis-
charged battery has frozen. In this case you
may neither jump-start the vehicle nor charge the battery. The service life of a thawed-out
battery may be shorter. The starting charac-
teristics can be impaired, particularly at low
temperatures. Have the thawed-out battery
checked at a qualified specialist workshop.
A battery charger unit specially adapted for
Mercedes-Benz vehicles and tested and
approved by Mercedes-Benz is available as an
accessory. Contact an authorized Mercedes-
Benz Center for information and availability.
Charge the battery in accordance with the
operating instructions for the battery
charger.
The jump-starting connection point is in the
engine compartment ( Ypage 220).
X Read the operating instructions for the bat-
tery charger.
X Open the hood ( Ypage 205).
X Connect the battery charger to the positive
terminal and ground point in the same
order as when connecting the donor bat-
tery in the jump-starting procedure( Y page 220).
Battery (vehicle)219
Roadside Assistance
Z
Page 225 of 274

!When towing, pull away slowly and
smoothly. If the tractive power is too high,
the vehicles could be damaged.
!Your vehicles is equipped with an auto-
matic transmission. Therefore, you must
not have the vehicle tow-started. The trans-
mission may otherwise be damaged.
iDetails on the permissible gross vehicle
weight of your vehicle can be found on the
vehicle identification plate ( Ypage 258).
It is better to have the vehicle transported
than to have it towed away.
If the transfer case can be shifted into neutral N , you can tow the vehicle.
If the transfer case cannot be shifted into neutral N, you can tow the vehicle with one
axle raised. Please bear the following in mind:
R remove the propeller shaft between the
transfer case and the rolling axle.
R turn the SmartKey to position 1in the igni-
tion lock ( Ypage 103).
The battery must be connected and charged.
Otherwise, you:
R cannot turn the SmartKey to position 2in
the ignition lock ( Ypage 103).
R cannot shift the automatic transmission to
position N.
iDisarm the automatic locking feature
before the vehicle is towed ( Ypage 75). You
could otherwise be locked out when push-
ing or towing the vehicle.
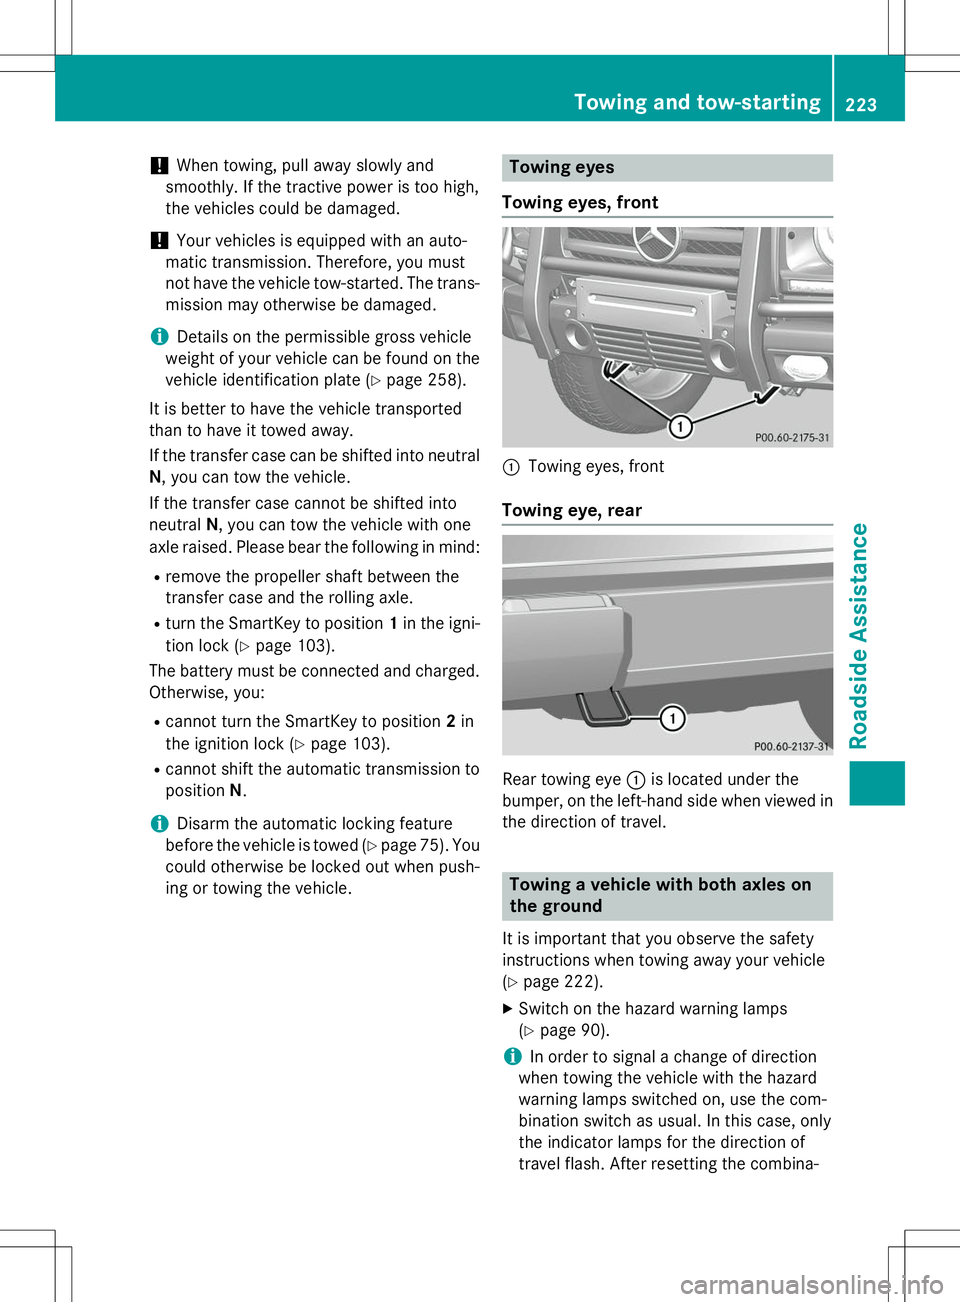
Towing eyes
Towing eyes, front
:Towing eyes, front
Towing eye, rear
Rear towing eye :is located under the
bumper, on the left-hand side when viewed in
the direction of travel.
Towing a vehicle with both axles on
the ground
It is important that you observe the safety
instructions when towing away your vehicle( Y page 222).
X Switch on the hazard warning lamps(Y page 90).
iIn order to signal a change of direction
when towing the vehicle with the hazard
warning lamps switched on, use the com-
bination switch as usual. In this case, only
the indicator lamps for the direction of
travel flash. After resetting the combina-
Towing and tow-starting223
Roadside Assistance
Z
Page 235 of 274

The Tire and Loading Information placard is
on the B-pillar on the driver's side(Y page 238).
The Tire and Loading Information placard con- tains the recommended tire pressures for
cold tires. The recommended tire pressures
are valid for the maximum permissible load
and up to the maximum permissible vehiclespeed.
Tire pressure table
Example: tire pressure table for all tires permitted
for this vehicle by the factory
The tire pressure table is on the inside of thefuel filler flap.
The tire pressure table contains the recom-
mended pressures for cold tires for various
operating conditions, i.e. differing load and
speed conditions.
If a tire size precedes a tire pressure, the tirepressure information following is only valid
for that tire size. The load conditions "partially
laden" and "fully laden" are defined in the
table for different numbers of occupants and amounts of luggage. The actual number of
seats may differ.
Some tire pressure tables only show the rim
diameter instead of the complete tire size,e.g. R16 . Rim diameter is part of the tire size
and can be found on the tire sidewall( Y page 244). If the tire pressures have been set to the
lower values for lighter loads and/or lower
road speeds, the pressures should be reset to
the higher values:
R if you want to drive with an increased loadand/or
R if you want to drive at higher road speeds
iThe tire pressures for increased loads
and/or higher road speeds, shown in the
tire pressure table, may have a negative
effect on driving comfort.
If the tire pressure is not set correctly, this
can lead to an excessive build-up of heat and a sudden loss of pressure.
For more information, contact a qualified spe-
cialist workshop.
Important notes on tire pressure
GWARNING
If the tire pressure drops repeatedly, the
wheel, valve or tire may be damaged. Tire
pressure that is too low may result in a tire
blow-out. There is a risk of an accident.
R Check the tire for foreign objects.
R Check whether the wheel is losing air or the
valve is leaking.
If you are unable to rectify the damage, con-
tact a qualified specialist workshop.
GWARNING
If you fit unsuitable accessories onto tire
valves, the tire valves may be overloaded and malfunction, which can cause tire pressure
loss. Due to their design, retrofitted tire pres- sure monitors keep the tire valve open. This
can also result in tire pressure loss. There is a
risk of an accident.
Only screw the standard valve cap or other
valve caps approved by Mercedes-Benz for
your vehicle onto the tire valve.
Use a suitable pressure gauge to check the
tire pressure. The outer appearance of a tire
does not permit any reliable conclusion about
Tire pressure233
Wheels and tires
Z