2015 MERCEDES-BENZ G-CLASS SUV center console
[x] Cancel search: center consolePage 87 of 274

interrupted, e.g. if the battery has been com-pletely discharged or disconnected.
X Make sure that the cup holder on the center
console is folded down ( Ypage 197).
X Move the seat as far forward as possible
and the head restraint in as far as possible.
Rear seat head restraints
Important safety notes
GWARNING
If head restraints are not installed and adjus-
ted correctly, they cannot provide protection
as intended. There is an increased risk of
injury in the head and neck area, e.g. in the
event of an accident or when braking.
Always drive with the head restraints instal-
led. Before driving off, make sure for every
vehicle occupant that the center of the head
restraint supports the back of the head at
about eye level.
Observe the following when adjusting the
head restraints: X Do not rotate the head restraints of the
front and rear seats.
Otherwise, you cannot adjust the height
and angle of the head restraints correctly.
X Adjust the head restraint so that it is as
close as possible to your head.
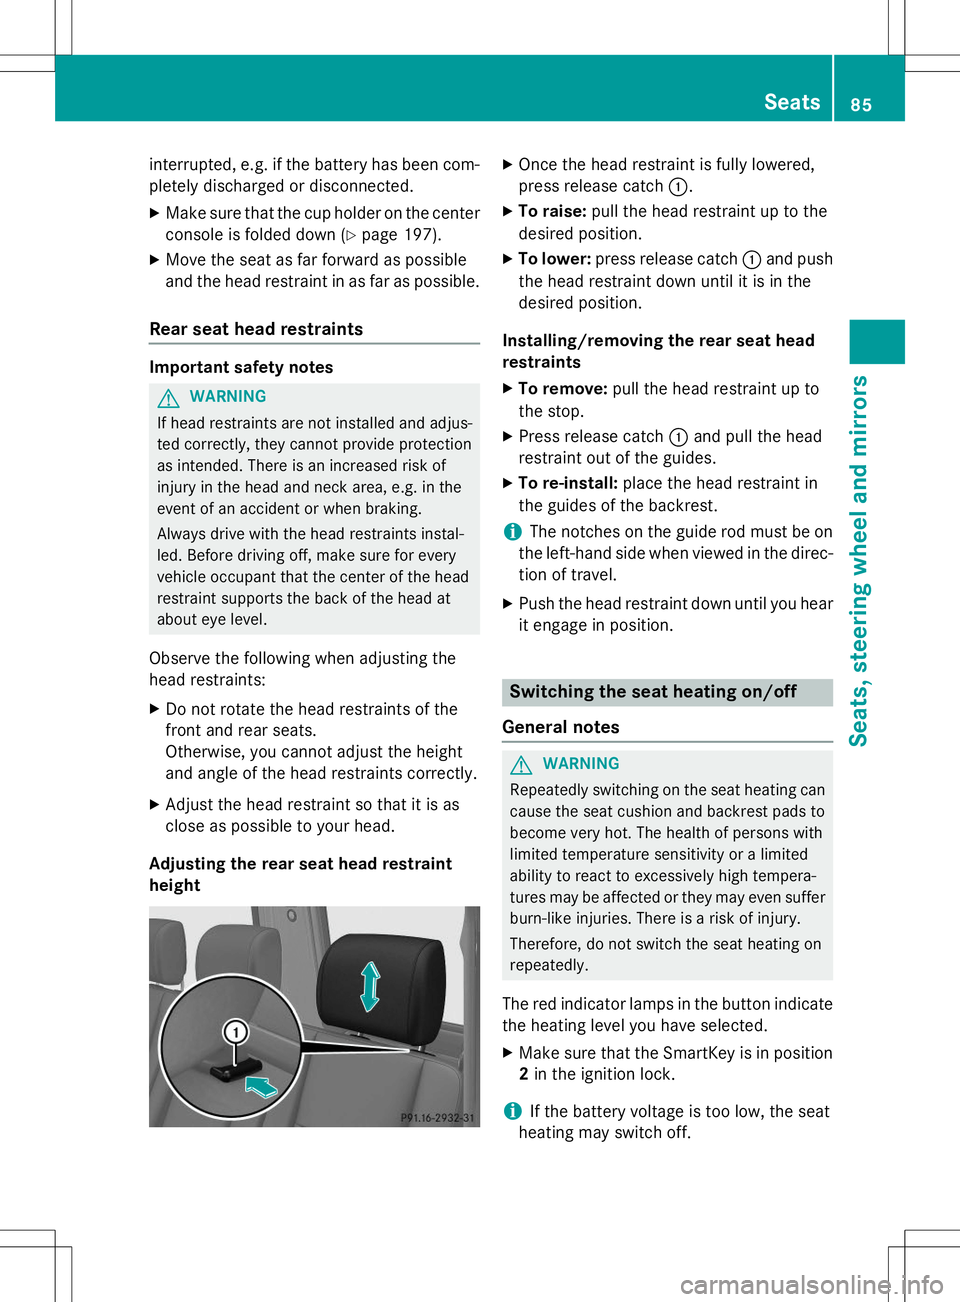
Adjusting the rear seat head restraintheight
X Once the head restraint is fully lowered,
press release catch :.
X To raise: pull the head restraint up to the
desired position.
X To lower: press release catch :and push
the head restraint down until it is in the
desired position.
Installing/removing the rear seat head
restraints
X To remove: pull the head restraint up to
the stop.
X Press release catch :and pull the head
restraint out of the guides.
X To re-install: place the head restraint in
the guides of the backrest.
iThe notches on the guide rod must be on
the left-hand side when viewed in the direc- tion of travel.
X Push the head restraint down until you hear
it engage in position.
Switching the seat heating on/off
General notes
GWARNING
Repeatedly switching on the seat heating can
cause the seat cushion and backrest pads to
become very hot. The health of persons with
limited temperature sensitivity or a limited
ability to react to excessively high tempera-
tures may be affected or they may even suffer burn-like injuries. There is a risk of injury.
Therefore, do not switch the seat heating on
repeatedly.
The red indicator lamps in the button indicate the heating level you have selected.
X Make sure that the SmartKey is in position
2 in the ignition lock.
iIf the battery voltage is too low, the seat
heating may switch off.
Seats85
Seats, steering wheel and mirrors
Z
Page 137 of 274

The disadvantage of a differential is that the
wheels that have the least grip, get the most
drive. An example: a wheel of a driven axle is
on a snow-covered surface and therefore
does not have any traction. The differential
sends most of the drive force to this wheel
because the force takes the route of the low-
est resistance. The opposite wheel on this
axle, however, which stands on firm ground
and could therefore allow propulsion,
receives no driving power. 4ETS compen-
sates for this disadvantage. 4ETS provides
good steerability by automatically braking the
spinning wheel. 4ETS provides the wheel on
the firm surface with more drive force, which in turn provides propulsion. ESP ®
and 4ETS are traction systems that are
ideal for road driving and suitable for light off-
road driving. The LOW RANGEoff-road gear
also improves off-road capability.
More challenging off-road conditions require
additional measures such as locking one or
more differential. Your vehicle is equipped
with three differential locks:
R a central differential lock for the transfercase
R a differential lock for the front axle and
R a differential lock for the rear axle
Each differential lock can be engaged with the corresponding switch on the center console.
If the differential in the transfer case is
locked, the front and rear wheels rotate at the same speed. If the differential for the rear axle
is locked, both rear wheels rotate at the same
speed, regardless of their respective torque.
Note, engaging the differential lock greatly
impairs the vehicle's steerability.
Note, it is imperative to use the differential
function when driving on firm road surfaces.
Under no circumstances should the differen-
tial be locked when driving on firm road sur-
faces. Otherwise, the vehicle may not be
steerable and you could lose control of the
vehicle. Therefore, only engage the differen-
tial lock when driving off-road. You should
only engage the differential lock if activating 4ETS and ESP
®
driving systems and LOW
RANGE off-road gear prove to be insufficient.
Engaging the differential locks
Important safety notes
GWARNING
When differential locks are engaged on a firm,
high-grip surface, the vehicle's steerability is
greatly impaired. In particular, engaging the
differential locks when cornering could lead
to you losing control of the vehicle. There is a
risk of an accident.
Disengage the differential locks immediately
on firm surfaces with good grip.
GWARNING
When the differential locks are engaged, ABS,
4ETS, ESP ®
and BAS are deactivated. As a
result, the wheels could lock when braking
and the braking distance is increased. There is
a risk of an accident.
Disengage the differential locks immediately
on firm surfaces with good grip.
!Only engage the differential locks when:
R you are driving at walking pace.
R the driven wheels are not spinning.
R you are not driving on a firm road surface.
General notes
The switches are located on the center con- sole.
:Function indicator lamps (red)
;Differential lock for the front axle
Off-road driving systems135
Driving and parking
Z
Page 195 of 274

Further information can be found in the
"Loading the vehicle" section (Ypage 238).
Observe the following notes when transport-
ing a load:
R Position heavy loads as far forwards as pos-
sible and as low down in the cargo com-
partment as possible.
iTransport loads when possible in the
cargo compartment. You should only use
the cargo compartment enlargement if the
load does not fit in the cargo compartment.
R Always place the load against the backrests
of the front seats or rear seats.
R Use the cargo tie-down rings and the parcel
nets to transport loads and luggage.
R Use cargo tie-down rings and fastening
materials appropriate for the weight and
size of the load.
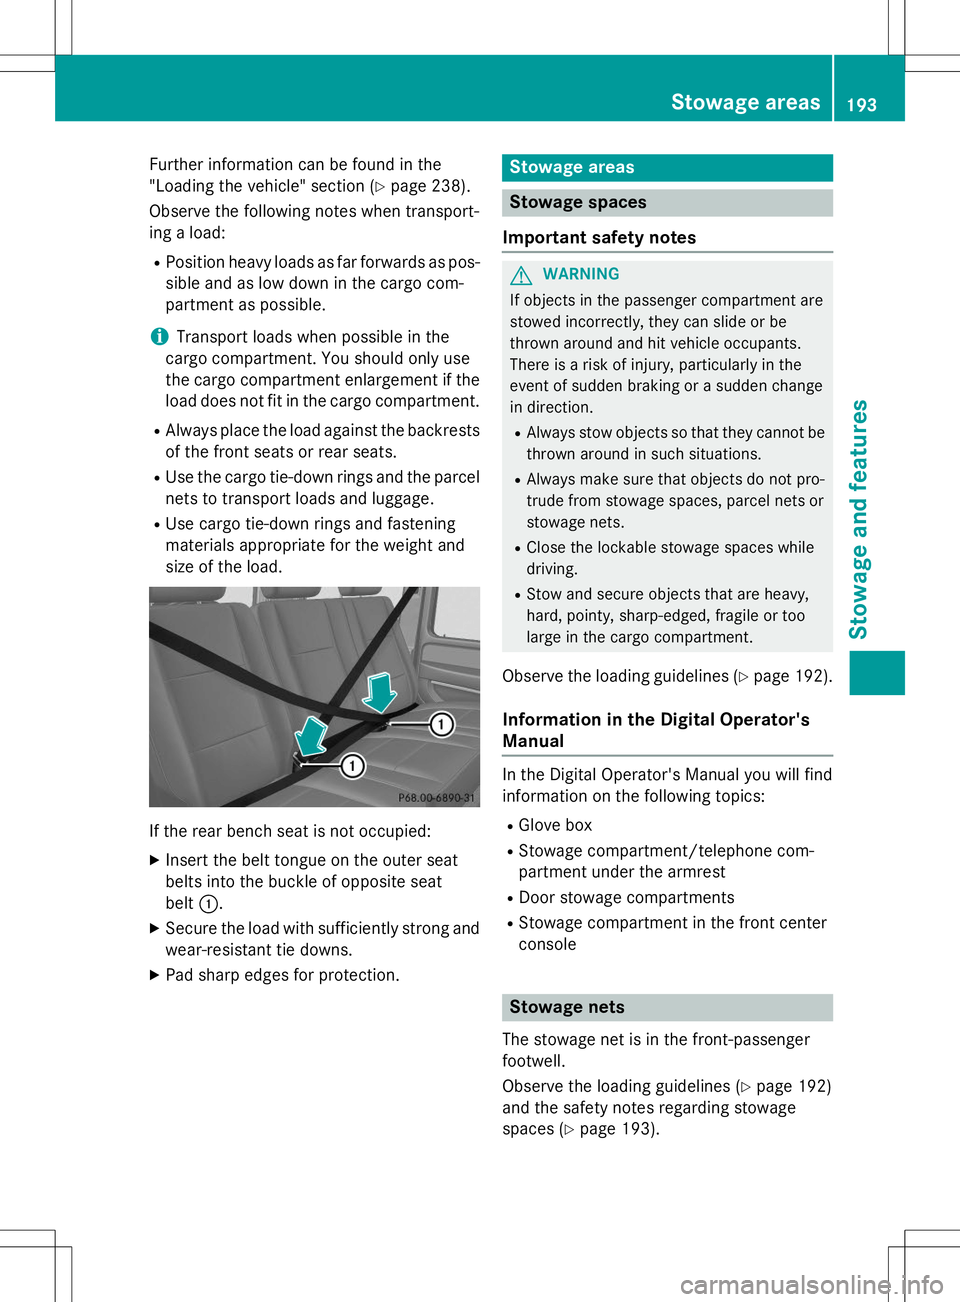
If the rear bench seat is not occupied: XInsert the belt tongue on the outer seat
belts into the buckle of opposite seat
belt :.
X Secure the load with sufficiently strong and
wear-resistant tie downs.
X Pad sharp edges for protection.
Stowage areas
Stowage spaces
Important safety notes
GWARNING
If objects in the passenger compartment are
stowed incorrectly, they can slide or be
thrown around and hit vehicle occupants.
There is a risk of injury, particularly in the
event of sudden braking or a sudden change
in direction. R Always stow objects so that they cannot be
thrown around in such situations.
R Always make sure that objects do not pro-
trude from stowage spaces, parcel nets or
stowage nets.
R Close the lockable stowage spaces while
driving.
R Stow and secure objects that are heavy,
hard, pointy, sharp-edged, fragile or too
large in the cargo compartment.
Observe the loading guidelines ( Ypage 192).
Information in the Digital Operator'sManual
In the Digital Operator's Manual you will find
information on the following topics: R
Glove box
R Stowage compartment/telephone com-
partment under the armrest
R Door stowage compartments
R Stowage compartment in the front center
console
Stowage nets
The stowage net is in the front-passenger
footwell.
Observe the loading guidelines ( Ypage 192)
and the safety notes regarding stowage
spaces ( Ypage 193).
Stowage areas193
Stowage and features
Z
Page 229 of 274

XFold down the cup holder on the center
console ( Ypage 197).
X Adjust the front-passenger seat to its fore-
most position ( Ypage 84).
X To open :remove screws :.
X Remove cover ;in the direction of the
arrow.
X To close: clip in cover ;.
X Install cover ;with screws :.
Fuse box in the battery case
The fuses in the battery case do not usually
need to be replaced. If a fuse change is nec-
essary, consult a qualified specialist work-
shop.
Fuse box in the cargo compartment
!
Make sure that no moisture can enter the
fuse box when the cover is open.
!When closing the cover, make sure that it
is lying correctly on the fuse box. Moisture seeping in or dirt could otherwise impair
the operation of the fuses.
X Open the rear door.
X To open: pull cover :in the direction of
the arrow and remove it.
Fuses227
Roadside Assistance
Z