2015 MERCEDES-BENZ E-CLASS SALOON ECU
[x] Cancel search: ECUPage 276 of 497
X
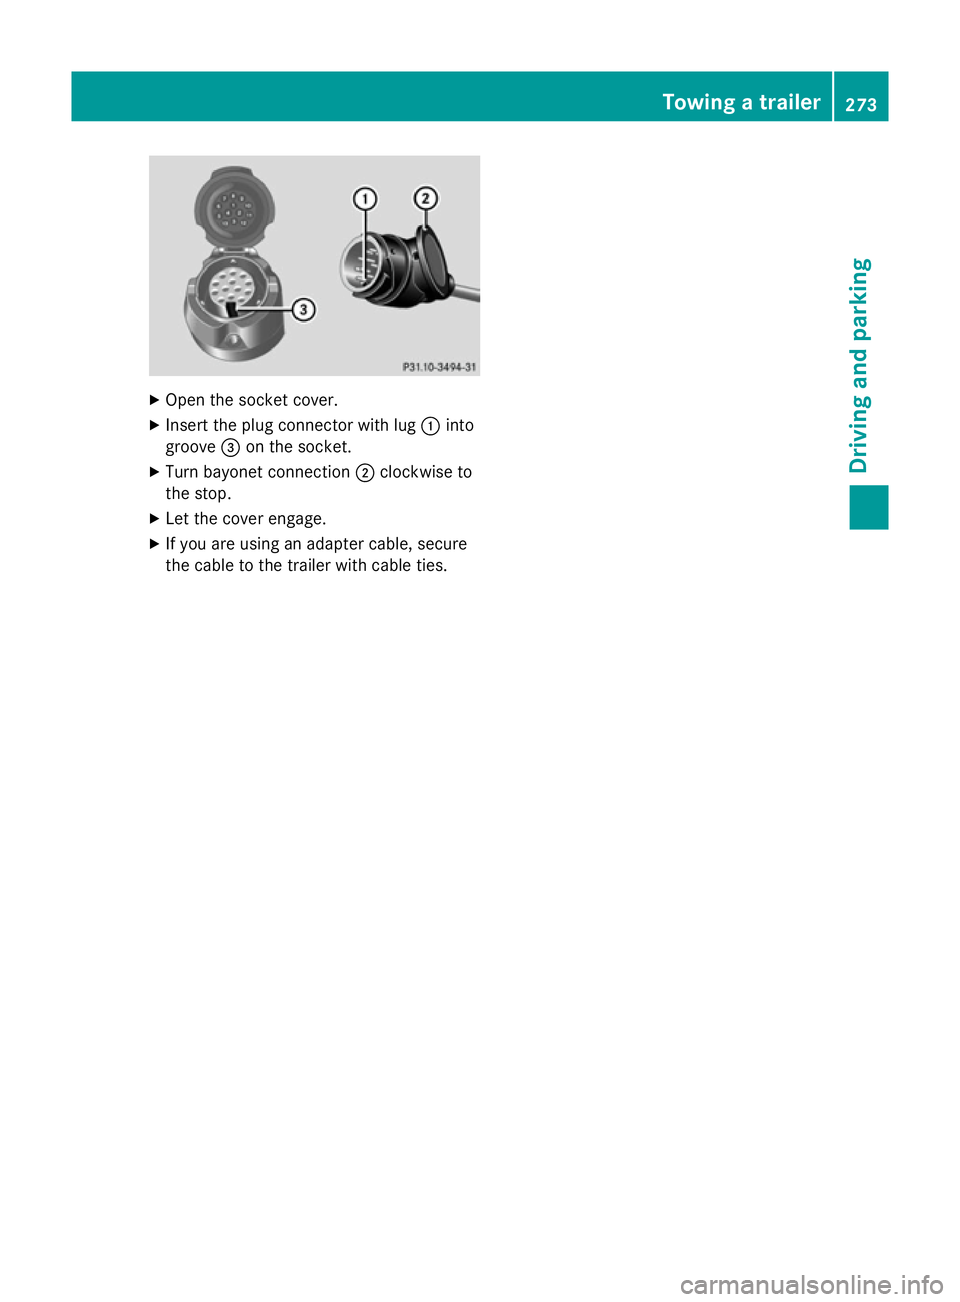
Open the socket cover.
X Insert the plug connector with lug :into
groove =on the socket.
X Turn bayonet connection ;clockwise to
the stop.
X Let the cover engage.
X If you are using an adapter cable, secure
the cable to the trailer with cable ties. Towing
atrailer
273Driving and parking Z
Page 287 of 497
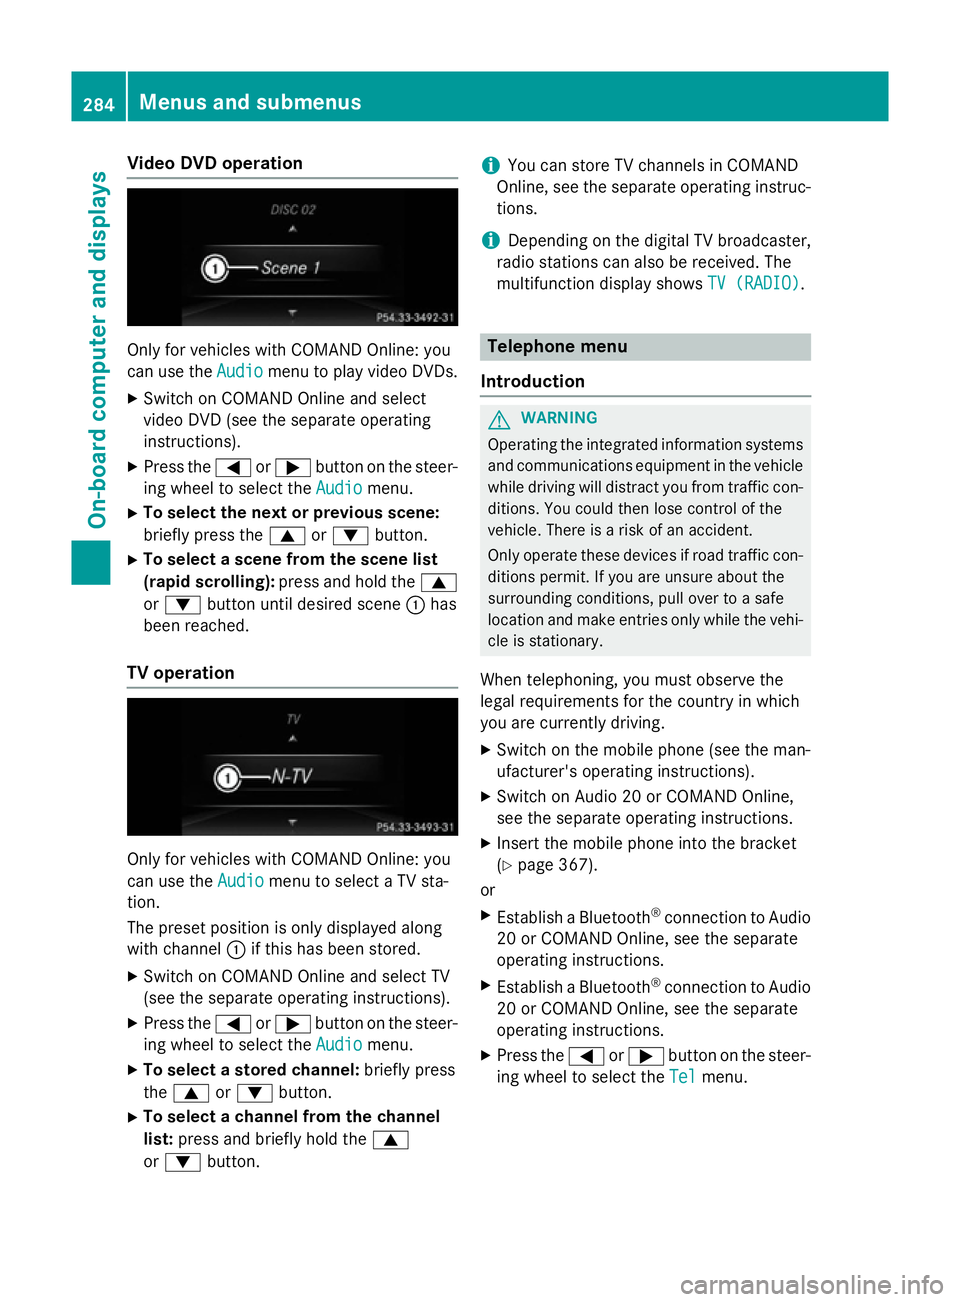
Vide
oDVD operation Onl
yfor vehicles with COMAND Online :you
can us ethe Audio
Audio menu to play video DVDs.
X Switch on COMAND Online and select
video DVD (se ethe separate operating
instructions).
X Press the =or; button on the steer-
ing whee ltoselect the Audio
Audio menu.
X To select the next or previous scene:
briefl ypress the 9or: button.
X To select ascene from the scen elist
(rapi dscrolling): press and hol dthe 9
or : button unti ldesir ed scene :has
been reached.
TV operation Onl
yfor vehicles with COMAND Online :you
can us ethe Audio
Audio menu to select aTVsta-
tion.
The preset positio niso nlyd isplayed along
with channel :if this ha sbeens tored.
X Switch on COMAND Online and select TV
(se ethe separate operating instructions).
X Press the =or; button on the steer-
ing whee ltoselect the Audio
Audio menu.
X To select astored channel: brieflypress
the 9 or: button.
X To select achannel from the channel
list: press and briefl yholdt he 9
or : button. i
Yo
uc an stor eTVchannel sinCOMAND
Online ,see the separate operating instruc-
tions.
i Depending on the digital TV broadcaster,
radi ostations can also be received. The
multifunctio ndisplay shows TV (RADIO)
TV (RADIO). Telephone menu
Introduction G
WARNING
Operating the integrated informatio nsystems
and communications equipment in the vehicle
whil edriving will distract yo ufrom traffic con-
ditions. Yo ucould then lose contro lofthe
vehicle. There is ariskofana ccident.
Onl yoperate thes edevice sifr oadt raffic con-
ditions permit. If yo uare unsur eabout the
surrounding conditions, pull ove rtoasafe
location and make entries onl ywhile the vehi-
cle is stationary.
Whe ntelephoning, yo umusto bserve the
lega lrequirements for the country in which
yo ua recurrentl ydriving.
X Switch on the mobil ephone (se ethe man-
ufacturer' soperating instructions).
X Switch on Audio 20 or COMAND Online,
see the separate operating instructions.
X Insert the mobil ephone into the bracket
(Y page 367).
or
X Establis haBluetooth ®
connectio ntoAudio
20 or COMAND Online ,see the separate
operating instructions.
X Establis haBluetooth ®
connectio ntoAudio
20 or COMAND Online ,see the separate
operating instructions.
X Press the =or; button on the steer-
ing whee ltoselect the Tel Telmenu. 284
Menus and submenusOn-board computer and displays
Page 300 of 497
You can star
tthe RACETIME Rwhen the
engin eisrunning or if the key is in position 2
in the ignition lock.
X Press the =or; button on the steer-
ing wheel to selec tthe AMG
AMG menu.
X Press the 9button repeatedly until the
RACETIME Risshown.
X To start: press the abutton to star tthe
RACETIMER.
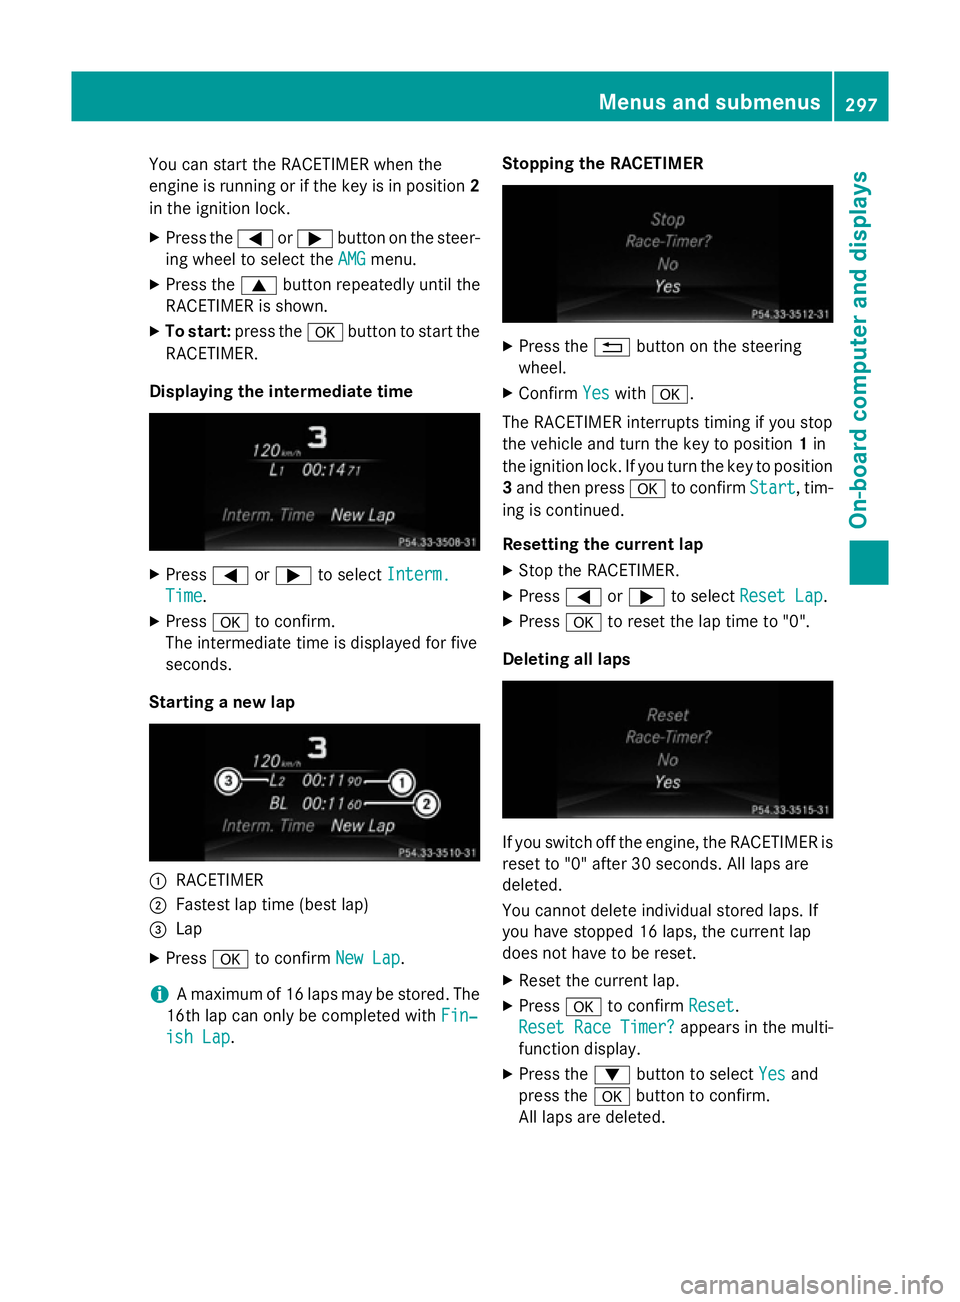
Displaying th eintermediat etime X
Press =or; to select Interm.
Interm.
Time
Time .
X Press ato confirm.
The intermediate tim eisdisplayed for five
seconds.
Starting anew lap :
RACETIMER
; Fastest lap tim e(best lap)
= Lap
X Press ato confirm New Lap
New Lap.
i Am
aximum of 16 laps may be stored. The
16t hlap can only be complete dwithFin‐
Fin‐
ish Lap
ish Lap. Stopping th
eRACETIMER X
Press the %button on the steering
wheel.
X Confirm Yes
Yeswith a.
The RACETIME Rinterrupt stiming if you stop
the vehicle and turn the key to position 1in
the ignition lock .Ifyou turn the key to position
3 and the npress a to confirm Start
Start,tim-
ing is continued.
Resetting th ecurrent lap
X Stop the RACETIMER.
X Press =or; to select ResetLap
Rese tLap.
X Press ato reset the lap tim eto"0".
Deleting all laps If you switc
hoff the engine, the RACETIME Ris
reset to "0" after 30 seconds .All laps are
deleted.
You cannot delet eindividual stored laps. If
you have stopped 16 laps, the current lap
does not have to be reset.
X Reset the current lap.
X Press ato confirm Reset
Reset.
Rese tRace Timer?
Rese tRace Timer? appears in the multi-
function display.
X Press the :button to select Yes Yesand
press the abutton to confirm.
All laps are deleted. Menus and submenus
297On-board computer and displays Z
Page 333 of 497
Problem
Possible causes/consequences and
M
MSolutions ü
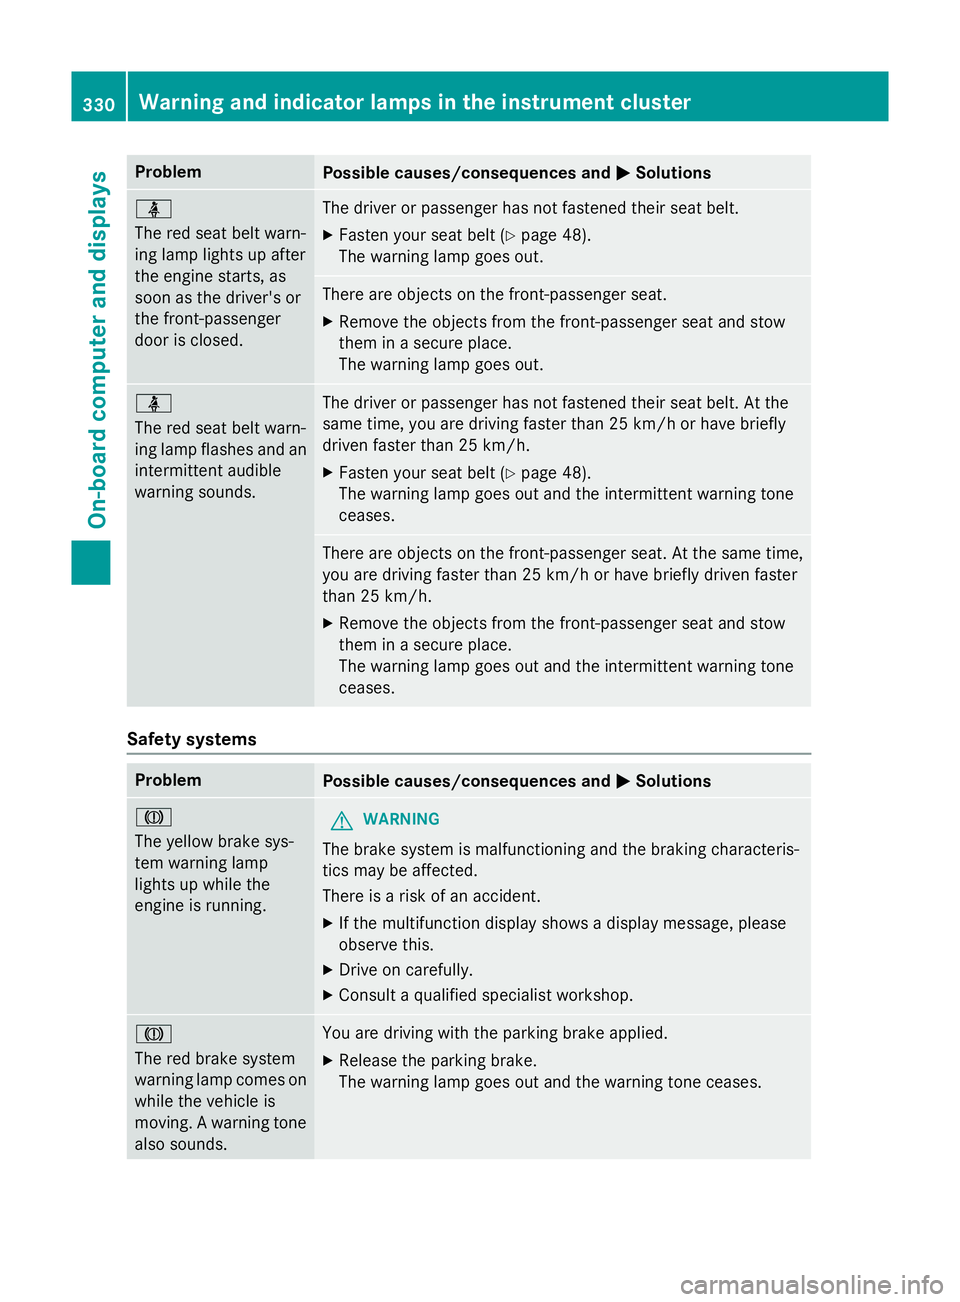
The red seat belt warn-
ing lamp lights up after
the engine starts, as
soon as the driver's or
the front-passenger
door is closed.
The driver or passenger has not fastened their seat belt.
X Fasten your seat belt (Y page 48).
The warning lamp goes out. There are objectsont
he front-passenger seat.
X Remove the objectsf rom the front-passenger seat and stow
them in asecure place.
The warning lamp goes out. ü
The red seat belt warn-
ing lamp flashes and an
intermittenta udible
warning sounds. The driver or passenger has not fastened their seat belt. At the
same time, you are driving faster than 25 km/ho rhave briefly
driven faster than 25 km/h.
X Fasten your seat belt (Y page 48).
The warning lamp goes out and the intermittentw arning tone
ceases. There are objectsont
he front-passenger seat. At the same time,
you are driving faster than 25 km/ho rhave briefly driven faster
than 25 km/h.
X Remove th eobjects from th efront-pa ssenger seat and stow
them in asecure place.
The warnin glamp goe sout and th eintermitten twarnin gtone
ceases. Safet
ysystems Problem
Possible causes/consequences and
M MSolutions J
The yellow brak
esys-
te mw arnin glamp
lights up while the
engin eisrunning. G
WARNING
The brak esystem is malfunctionin gand th ebrakin gcharacteris-
tics may be affected.
There is ariskofana ccident.
X If th emultifunction display shows adisplay message ,please
observ ethis.
X Drive on carefully.
X Consult aqualified specialist workshop. J
The red brak
esystem
warnin glamp comes on
while th evehicl eis
moving. Awarnin gtone
also sounds. You are drivin
gwitht he parkin gbrak eapplied.
X Releas ethe parkin gbrake.
The warnin glamp goe sout and th ewarnin gtonec eases. 330
Wa
rning an dindicator la mpsint he instrument clusterOn-board computera nd displays
Page 342 of 497
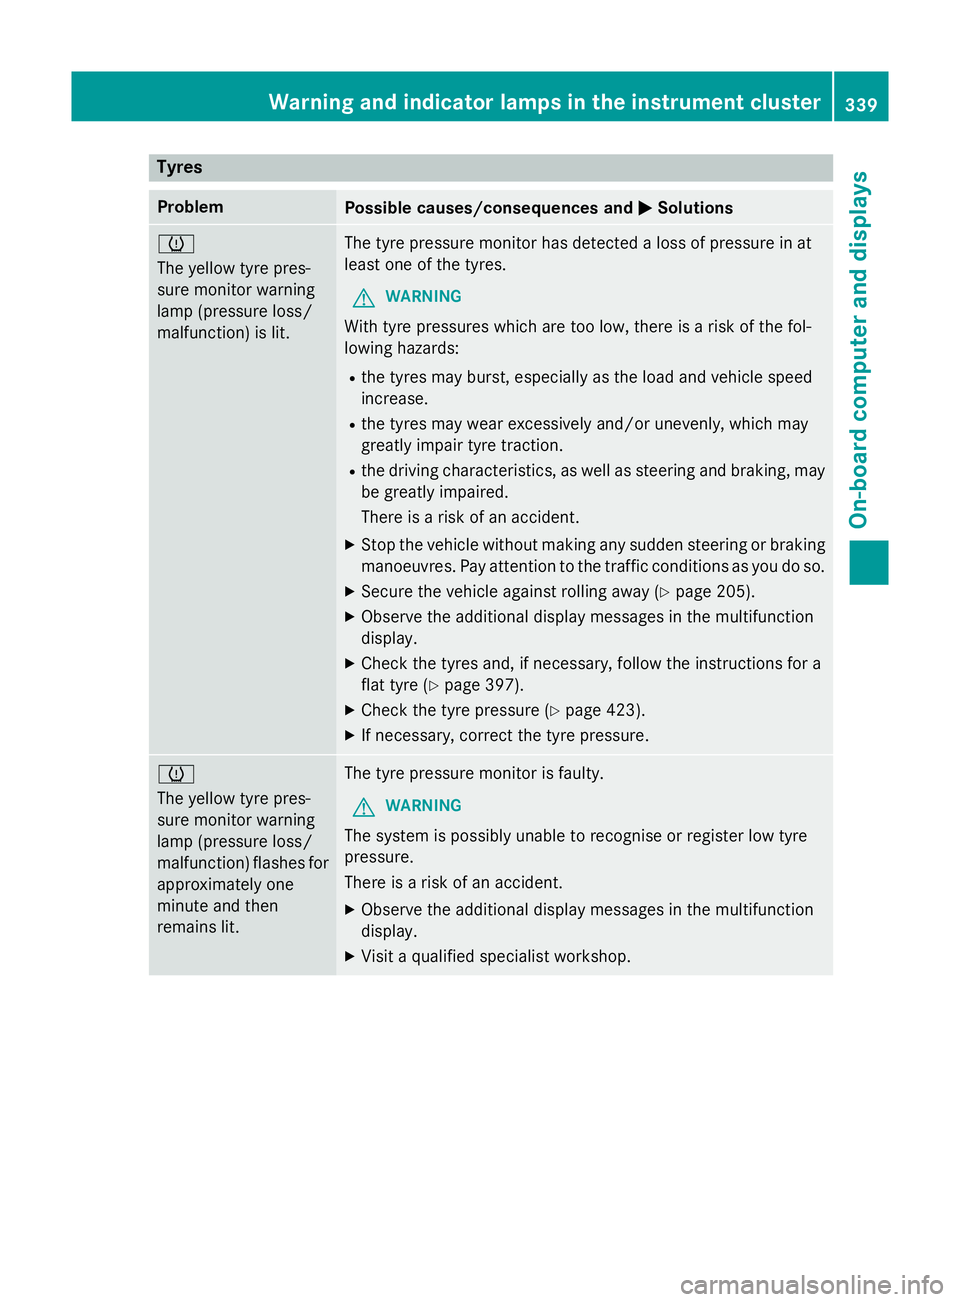
Tyres
Problem
Possible causes/consequence
sand M
MSolutions h
The yellow tyr
epres-
sure monitor warning
lamp (pressure loss/
malfunction) is lit. The tyr
epressure monitor ha sdetecte dalossofp ressure in at
leas tone of the tyres.
G WARNING
With tyr epressures which ar etoo low, ther eisariskoft he fol-
lowing hazards:
R the tyres ma yburst, especiall yasthe load and vehicl espeed
increase.
R the tyres ma yweare xcessivel yand/or unevenly, which may
greatl yimpai rtyret raction.
R the driving characteristics, as well as steering and braking ,may
be greatl yimpaired.
There is ariskofana ccident.
X Stop the vehicl ewithou tmaking any sudden steering or braking
manoeuvres .Pay attentio ntothe traffi cconditions as yo udoso.
X Secure the vehicl eagain st rolling away (Y page 205).
X Observe the additional displa ymessage sinthe multifunction
display.
X Check the tyres and ,ifnecessary ,follo wthe instructions for a
fla ttyre( Ypage 397).
X Check the tyr epressure (Y page 423).
X If necessary ,correct the tyr epressure. h
The yellow tyr
epres-
sure monitor warning
lamp (pressure loss/
malfunction) flashe sfor
approximately one
minute and then
remains lit. The tyr
epressure monitor is faulty.
G WARNING
The system is possibl yunabl etor ecognise or register lo wtyre
pressure.
There is ariskofana ccident.
X Observe the additional displa ymessage sinthe multifunction
display.
X Visi taq ualified specialis tworkshop. Warning and indicator lamps in the instrument cluster
339On-board computer and displays Z
Page 345 of 497
Useful information
i This Owner's Manual describes all mod-
els, series and optional equipment for your
vehicle that were available at the time of
going to press. National variation sare pos-
sible. Not ethat your vehicle may not be
equipped with all of the function sdescri-
bed. This is also the case for system sand
function srelevan ttosafety.
i Read the information on qualified special-
ist workshops: (Y page 27). Stowage areas
Loading guidelines
G
WARNING
If objects, luggage or loads are not secured or not secured sufficiently, they could slip, tip
over or be flung around and thereby hit vehicle
occupants .There is arisk of injury, especially
when brakin gorabruptly changing directions.
Always stor eobjects so that they cannot be
flung around. Secure objects, luggage or
loads against slipping or tippin gbefore the
journey. G
WARNING
Combustion engines emit poisonous exhaust
gases such as carbon monoxide. Exhaust
gases can enter the vehicle interior if the boot
lid/tailgat eisopen when the engin eisrun-
ning, especially if the vehicle is in motion.
There is arisk of poisoning.
Always switc hoff the engin ebefore opening
the boot lid/tailgate. Never drive with the
boot lid/tailgat eopen. G
WARNING
The exhaust tail pipe and tail pipe trim can
becom every hot. If you come int ocontact
with thes eparts of the vehicle, you could burn
yourself. There is arisk of injury. Always be particularly careful around the
exhaust tail pipe and the tail pipe trim .Allow
thes ecomponents to cool down before touch-
ing them.
The handling characteristic sofaladen vehi-
cle are dependen tonthe distribution of the
load within the vehicle. For this reason ,you
should observ ethe following notes when
transporting aload:
R neve rexceed the maximum permissible
gross vehicle weight or the permissible axle loads for the vehicle (includin goccupants).
R the boot/luggage compartment is the pre-
ferred place to stor eobjects.
R position heavy loads as far forwards as pos-
sible and as low down in the boot/luggagecompartment as possible.
R the load must not protrude above the upper
edge of the seat backrests.
R always place the load against the rear or
fron tseat backrests .Make sure that the
seat backrests are securely locked into
place.
R always place the load behind unoccupied
seats if possible.
R use the lashing eyelets and the luggage
net stot ransport loads and luggage.
R only use lashing eyelets and fastenin gcom-
ponents that are suitable for the weight and size of the load.
R when transporting objects in the luggage
compartment,t he combined luggage cover
and net must always be installed (luggage
compartment cove rand safet ynet).
R secure the load with sufficiently strong and
wear-resistan tlashing material. Pad sharp
edges for protection.
i Load restraint
sare available at any quali-
fied specialist workshop, e.g. aMercedes-
Ben zService Centre. 342
Stowage areasStowing and features
Page 346 of 497
Stowage compartments
Important safety notes G
WARNING
If objectsint he passenger compartmen tare
stowed incorrectly, they can slide or be
thrown around and hit vehicle occupants.
There is arisk of injury, particularly in the
event of sudden braking or asudden change
in direction.
R Always stow objectssot hat they cannot be
thrown around in such situations.
R Always make sure that objectsdon ot pro-
trude from stowage spaces, luggage nets or stowage nets.
R Close the lockable stowage spaces while
driving.
R Always stow and secure heavy, hard, poin-
ted, sharp-edged, fragile or bulky objectsin
the boot/luggage compartment.
Observe the loading guidelines (Y page 342).
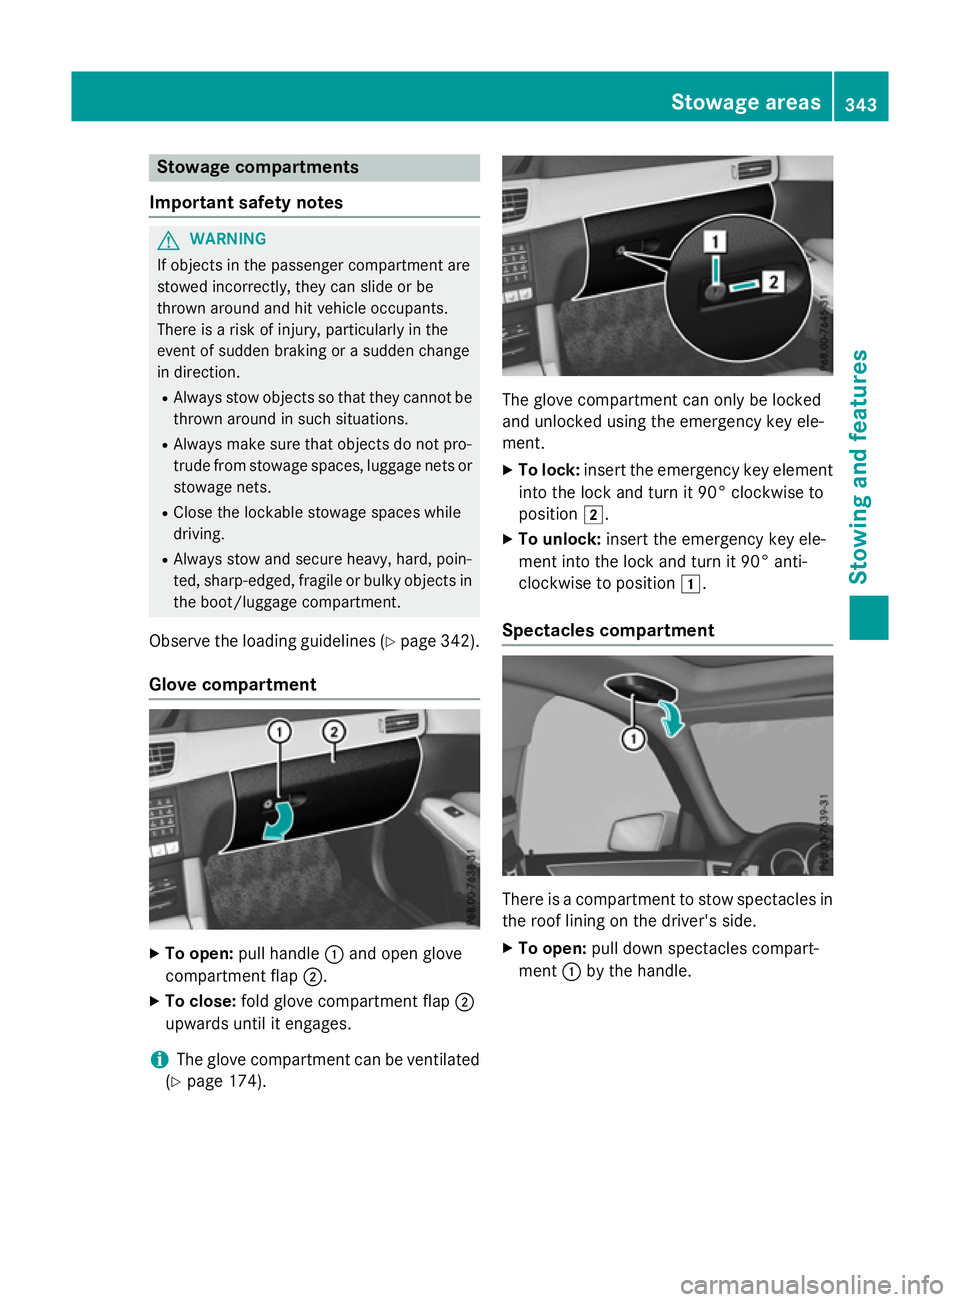
Glove compartment X
To open: pull handle :and open glove
compartmen tflap ;.
X To close: fold glove compartmen tflap ;
upwards until it engages.
i The glove compartmen
tcan be ventilated
(Y page 174). The glove compartmen
tcan only be locked
and unlocked using the emergency key ele-
ment.
X To lock: insert the emergency key element
into the lock and turn it 90° clockwise to
position 2.
X To unlock: insert the emergency key ele-
ment into the lock and turn it 90° anti-
clockwise to position 1.
Spectacles compartment There is
acompartmen ttostow spectacles in
the roof lining on the driver's side.
X To open: pull down spectacles compart-
ment :by the handle. Stowage areas
343Stowing and features Z
Page 348 of 497
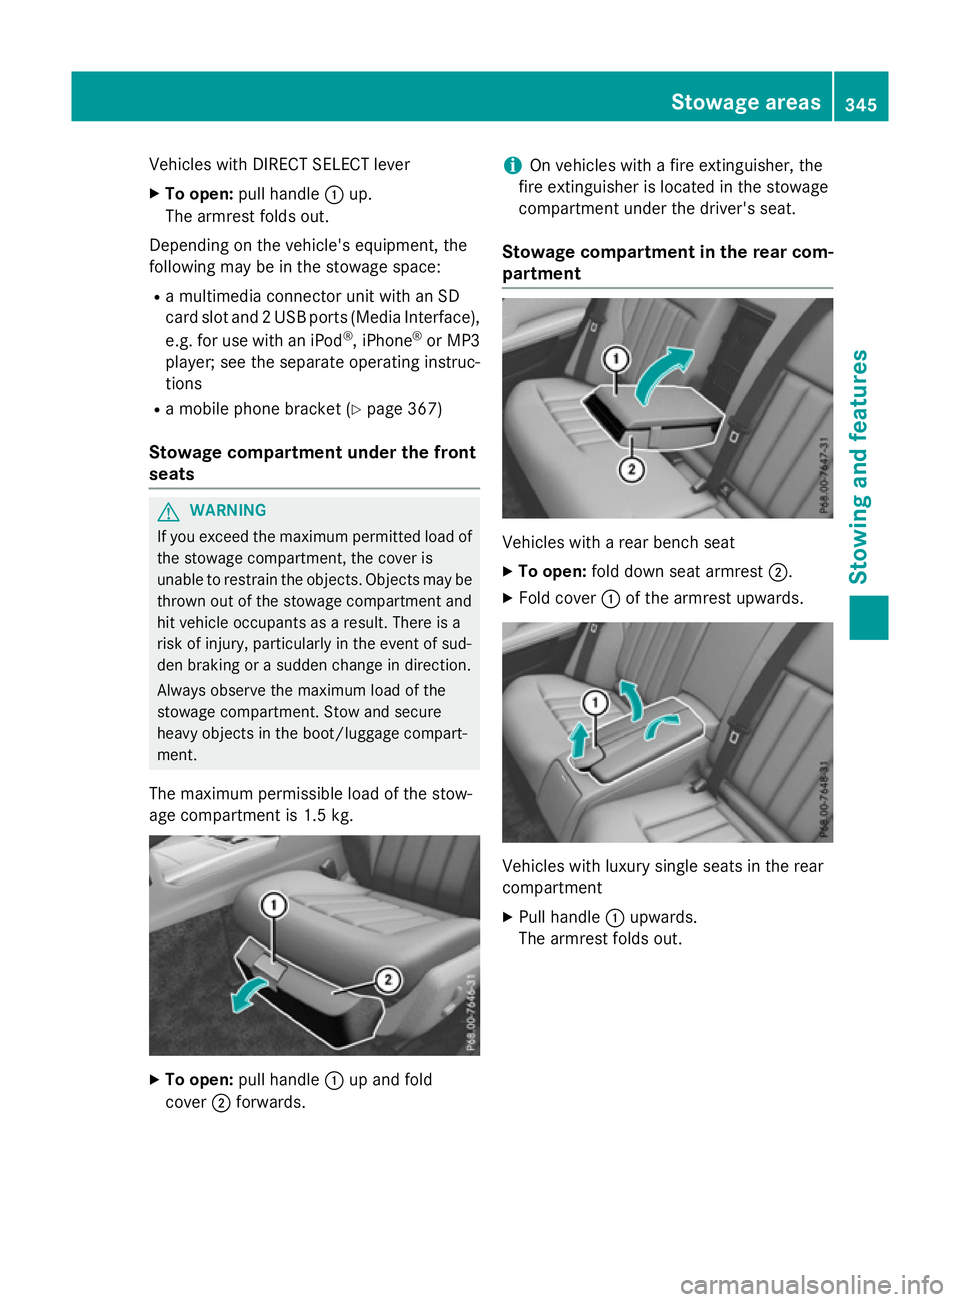
Vehicles with DIRECT SELECT lever
X To open: pull handle :up.
The armrest folds out.
Depending on the vehicle's equipment, the
following may be in the stowage space:
R am ultimediac onnector unit with an SD
card slot and 2USB ports (MediaI nterface),
e.g. for use with an iPod ®
,i Phone ®
or MP3
player; see the separate operating instruc-
tions
R am obile phone bracket (Y page 367)
Stowage compartment under the front
seats G
WARNING
If you exceed the maximum permitted load of the stowage compartment, the cover is
unable to restrain the objects. Objects may be
thrown out of the stowage compartment and
hit vehicle occupants as aresult. There is a
risk of injury, particularly in the event of sud-
den braking or asuddenc hange in direction.
Alwayso bserve the maximum load of the
stowage compartment. Stow and secure
heavy objects in the boot/luggage compart-
ment.
The maximum permissible load of the stow-
age compartment is 1.5 kg. X
To open: pull handle :up and fold
cover ;forwards. i
On vehicles with
afire extinguisher, the
fire extinguisher is located in the stowage
compartment under the driver's seat.
Stowage compartment in the rear com-
partment Vehicles with
arear bench seat
X To open: fold down seat armrest ;.
X Fold cover :of the armrest upwards. Vehicles with luxury single seats in the rear
compartment
X Pull handle :upwards.
The armrest folds out. Stowage areas
345Stowing and features Z