2015 MERCEDES-BENZ E-CLASS SALOON ad blue
[x] Cancel search: ad bluePage 200 of 497
Manual drive program M
General notes
In this drive program, you can briefly change
geary
ourself by using the steering wheel
gearshift paddles. The transmission must be
in position D.
You can activate manua ldrive program Min
the E,E+ (E 300 BlueTEC and E350 BlueTEC)
and Sautomatic drive programs.
i As wellast
emporary drive program M,
you can alsoa ctivate permanent drive pro-
gram M(Y page1 94).
Further information about permanent drive program M(Y page1 98).
Activating
X Shift the transmission to position D.
X Pullt he left-hand or right-hand steering
whee lgearshift paddle (Y page195).
Manual drive program Mis temporarily acti-
vated. The selected geara ndMappear in
the multifunction display.
Shiftin ggears
If you pullont he left or right-hand steering
whee lgearshift paddle,t he automatic trans-
mission switches to manua ldrive program M
for alimited amount of time. Depending on
which gearshift paddle is pulled,t he auto-
matic transmission immediatel yshifts into
the next gearupord own, if permitted.
X To shift up: pullthe right-hand steering
whee lgearshift paddle (Y page195).
The automatic transmission shifts up to the
next gear.
i If the maximu
mengine spee donthe cur-
rently engaged gearisr eachedand you
continue to accelerate, the automatic
transmission automatically shifts up in
order to prevent engine damage.
X To shift down: pullonthe left-hand steer-
ing whee lgearshift paddle (Y page195).
The automatic transmission shifts downto
the next gear. i
If the engine exceeds the maximum
engine spee dwhen shifting down, the auto-
matic transmission protects against engine
damage by not shifting down.
i Automatic downshifting occurs when
coasting.
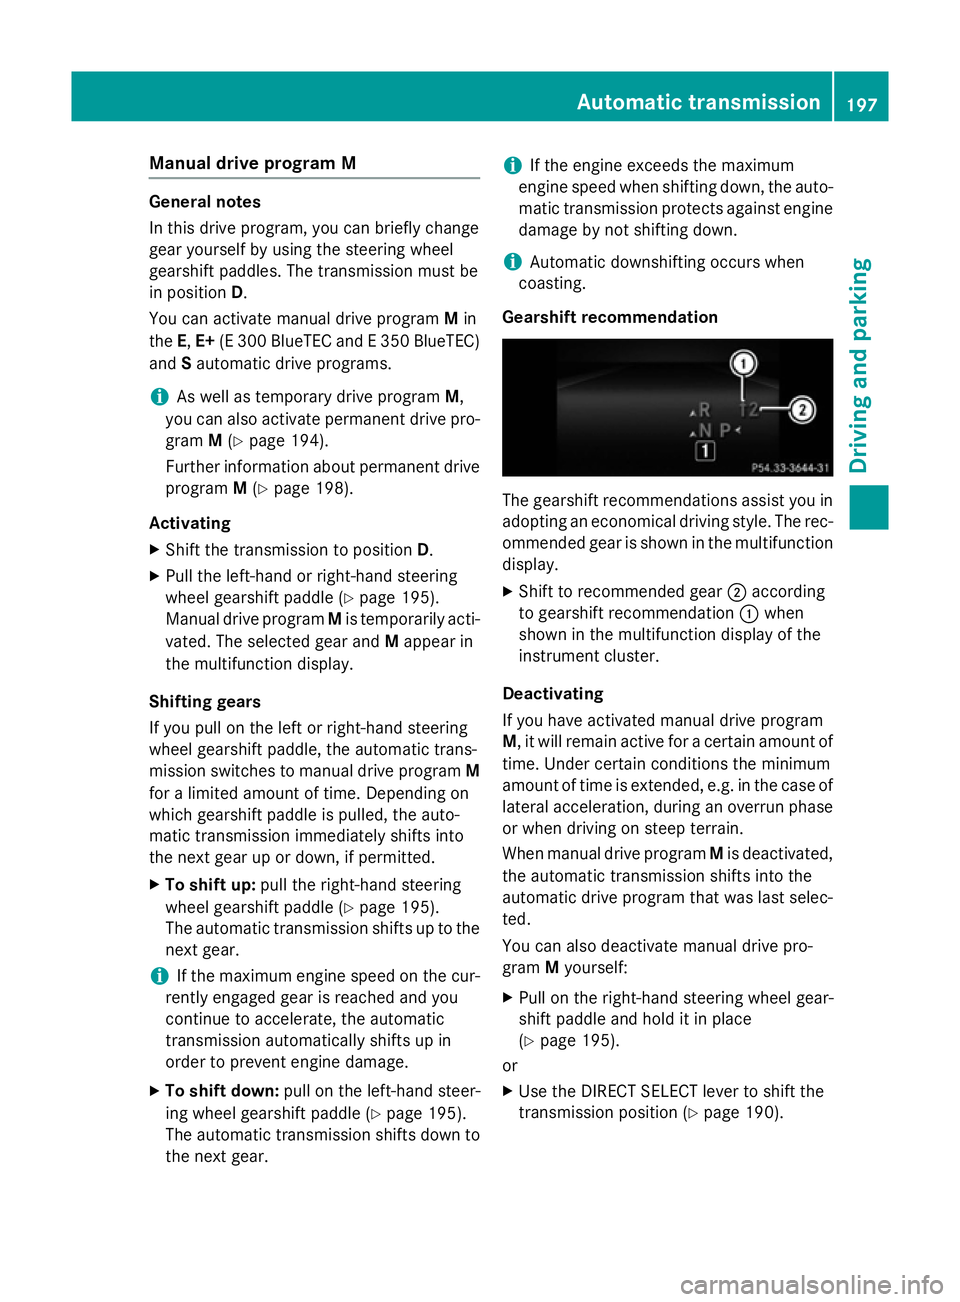
Gearshift recommendation The gearshift recommendations assist you in
adopting an economica ldriving style .The rec-
ommended geariss hownint he multifunction
display.
X Shift to recommende dgear ;according
to gearshift recommendation :when
show ninthe multifunction display of the
instrument cluster.
Deactivating
If you have activated manua ldrive program
M,i twillr emai nactive for acertain amount of
time. Under certain conditions the minimum
amount of time is extended, e.g. in the case of latera lacceleration, during an overru nphase
or when driving on steep terrain.
When manua ldrive program Mis deactivated,
the automatic transmission shifts into the
automatic drive progra mthat wasl asts elec-
ted.
You can alsod eactivate manua ldrive pro-
gram Myourself:
X Pullont he right-hand steering whee lgear-
shift paddle and hold it in place
(Y page1 95).
or
X Use the DIRECT SELECT leve rtoshift the
transmission position (Y page190). Automatic transmission
197Driving and parking Z
Page 270 of 497

To avoid hazardous situations:
R make sure to check the noseweight before
each journey
R use adrawbar noseweight as close as pos-
sible to the maximum noseweight
R do not exceed the maximum permissible
noseweight
R do not use anoseweight lower than the
minimum noseweight
When reversin gthe vehicle towards the
trailer, make sure there is nobody between
the trailer and the vehicle.
Couple and uncouple the trailer carefully. If
you do not couple the trailer to the towing
vehicle correctly, the trailer could become
detached.
Make sure that the following values are not
exceeded:
R the permissible trailer drawbar noseweight
R the permissible trailer load
R the permissible rear axle load of the towing
vehicle
R the maximum permissible gross vehicle
weight of both the towing vehicle and the
trailer
You will find the applicable permissible val-
ues, which must not be exceeded, in the vehi-
cle documents.
You will find the values approved by the man- ufacturer on the vehicle identification plates
and those for the towing vehicle under "Tech-
nical data" (Y page 484).
When towing atrailer, your vehicle's handling
characteristics will be different in comparison to when driving without atrailer.
The vehicle/trailer combination:
R is heavier
R is restricted in its acceleration and gradi-
ent-climbin gcapability
R has an increased braking distance
R is affected more by stron gcrosswinds
R demands more sensitive steering
R has alarger turnin gcircle This can impair the vehicle's handling char-
acteristics. Adapt your driving style accord-
ingly. Maintain
asafe distance. Drive care-
fully.
When towing atrailer, alway sadjust your
speed to the curren troad and weather con-
ditions. Do not exceed the maximum permis- sible speed for your vehicle/trailer combina-
tion. Notes on towing
atrailer
General notes Trailer towing is not permissible on the fol-
lowing models:
R E2 20 BlueTEC BlueEFFICIENCY Edition
R E1 80
R E63A MG
R E63A MG S-MODEL
R E63A MG 4MATIC
R E63A MG S-MODEL4 MATIC
i When towing
atrailer, set the tyre pres-
sure on the rear axle of the towing vehicle
for am aximum load; see the tyre pressure
table in the fuel filler flap (Y page 420).
Please notet hat when towing atrailer,
PARKTRONIC (Y page 235), Active Parking
Assist (Y page 239) and Blind Spot Assist
(Y page 257) are only available with limita-
tions, or not at all.
i On vehicles without level control, the
height of the ball coupling will alter accord-
ing to the load placed on the vehicle. If nec- essary, use atrailer with aheight-adjusta-
ble drawbar.
You will find fitting dimensions and loads
under "Technical data" (Y page 482).
Driving tips i
Observe the notes on ESP ®
trailer stabi-
lisation (Y page 86). Towing
atrailer
267Driving and parking Z
Page 287 of 497
Vide
oDVD operation Onl
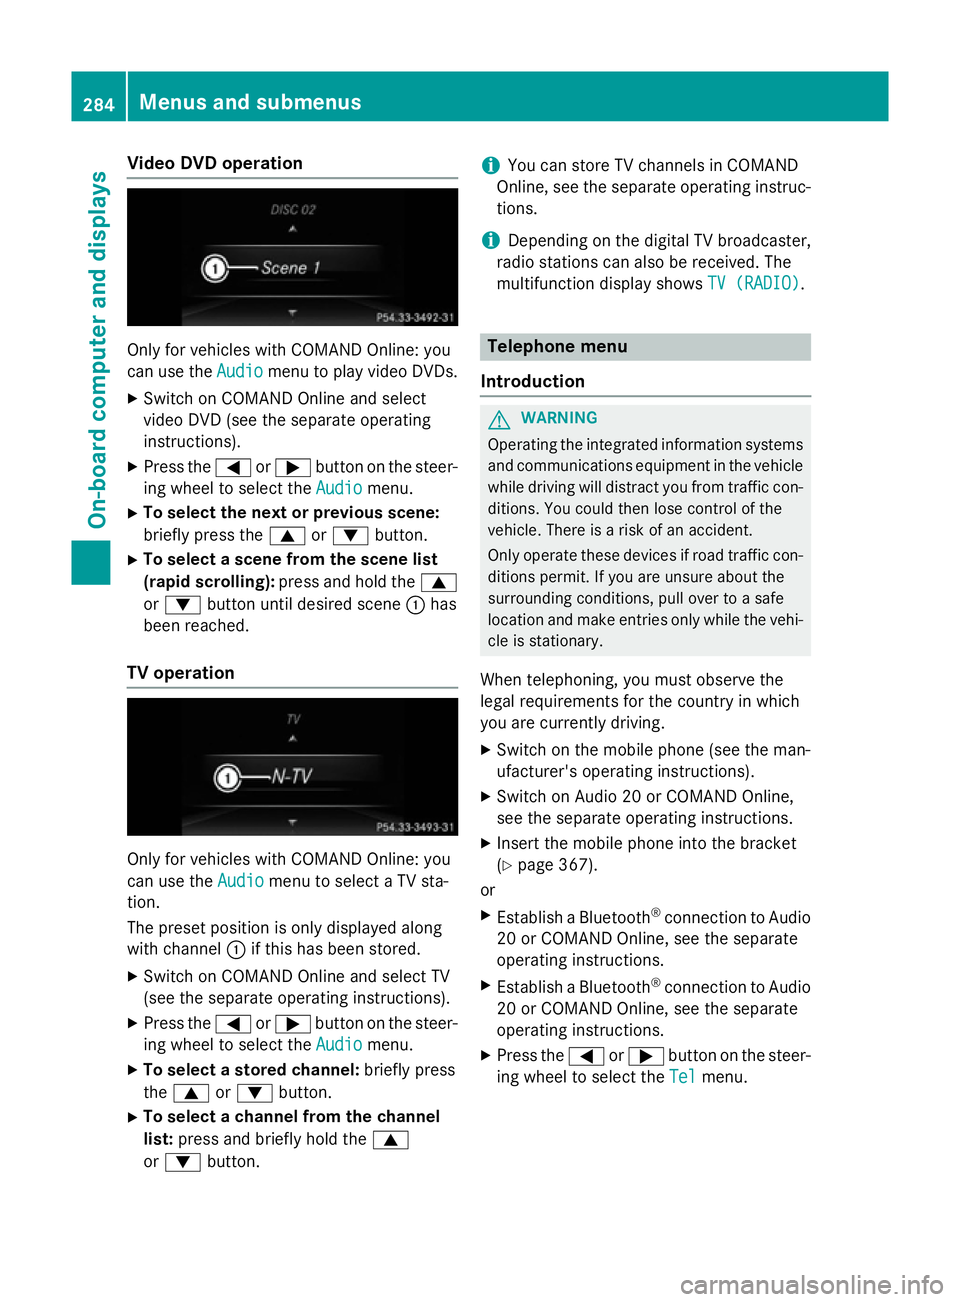
yfor vehicles with COMAND Online :you
can us ethe Audio
Audio menu to play video DVDs.
X Switch on COMAND Online and select
video DVD (se ethe separate operating
instructions).
X Press the =or; button on the steer-
ing whee ltoselect the Audio
Audio menu.
X To select the next or previous scene:
briefl ypress the 9or: button.
X To select ascene from the scen elist
(rapi dscrolling): press and hol dthe 9
or : button unti ldesir ed scene :has
been reached.
TV operation Onl
yfor vehicles with COMAND Online :you
can us ethe Audio
Audio menu to select aTVsta-
tion.
The preset positio niso nlyd isplayed along
with channel :if this ha sbeens tored.
X Switch on COMAND Online and select TV
(se ethe separate operating instructions).
X Press the =or; button on the steer-
ing whee ltoselect the Audio
Audio menu.
X To select astored channel: brieflypress
the 9 or: button.
X To select achannel from the channel
list: press and briefl yholdt he 9
or : button. i
Yo
uc an stor eTVchannel sinCOMAND
Online ,see the separate operating instruc-
tions.
i Depending on the digital TV broadcaster,
radi ostations can also be received. The
multifunctio ndisplay shows TV (RADIO)
TV (RADIO). Telephone menu
Introduction G
WARNING
Operating the integrated informatio nsystems
and communications equipment in the vehicle
whil edriving will distract yo ufrom traffic con-
ditions. Yo ucould then lose contro lofthe
vehicle. There is ariskofana ccident.
Onl yoperate thes edevice sifr oadt raffic con-
ditions permit. If yo uare unsur eabout the
surrounding conditions, pull ove rtoasafe
location and make entries onl ywhile the vehi-
cle is stationary.
Whe ntelephoning, yo umusto bserve the
lega lrequirements for the country in which
yo ua recurrentl ydriving.
X Switch on the mobil ephone (se ethe man-
ufacturer' soperating instructions).
X Switch on Audio 20 or COMAND Online,
see the separate operating instructions.
X Insert the mobil ephone into the bracket
(Y page 367).
or
X Establis haBluetooth ®
connectio ntoAudio
20 or COMAND Online ,see the separate
operating instructions.
X Establis haBluetooth ®
connectio ntoAudio
20 or COMAND Online ,see the separate
operating instructions.
X Press the =or; button on the steer-
ing whee ltoselect the Tel Telmenu. 284
Menus and submenusOn-board computer and displays
Page 288 of 497
You will see one of the followin
gdisplay mes-
sages in the multifunction display:
R Telephon eready
Telephon eready or the name of the net-
work provider: the mobile phon ehas found
an etwork and is ready to receive.
R Telephon eNoservice
Telephon eNoservice:t here is no net-
work available or the mobile phon eis
searching for anetwork.
i You can obtain further information about
suitable mobile phones and connecting
mobile phones via Bluetooth ®
:
R fro ma ny Mercedes-Ben zService Centre
R on the Internet at http://
www.mercedes-benz.com/connect
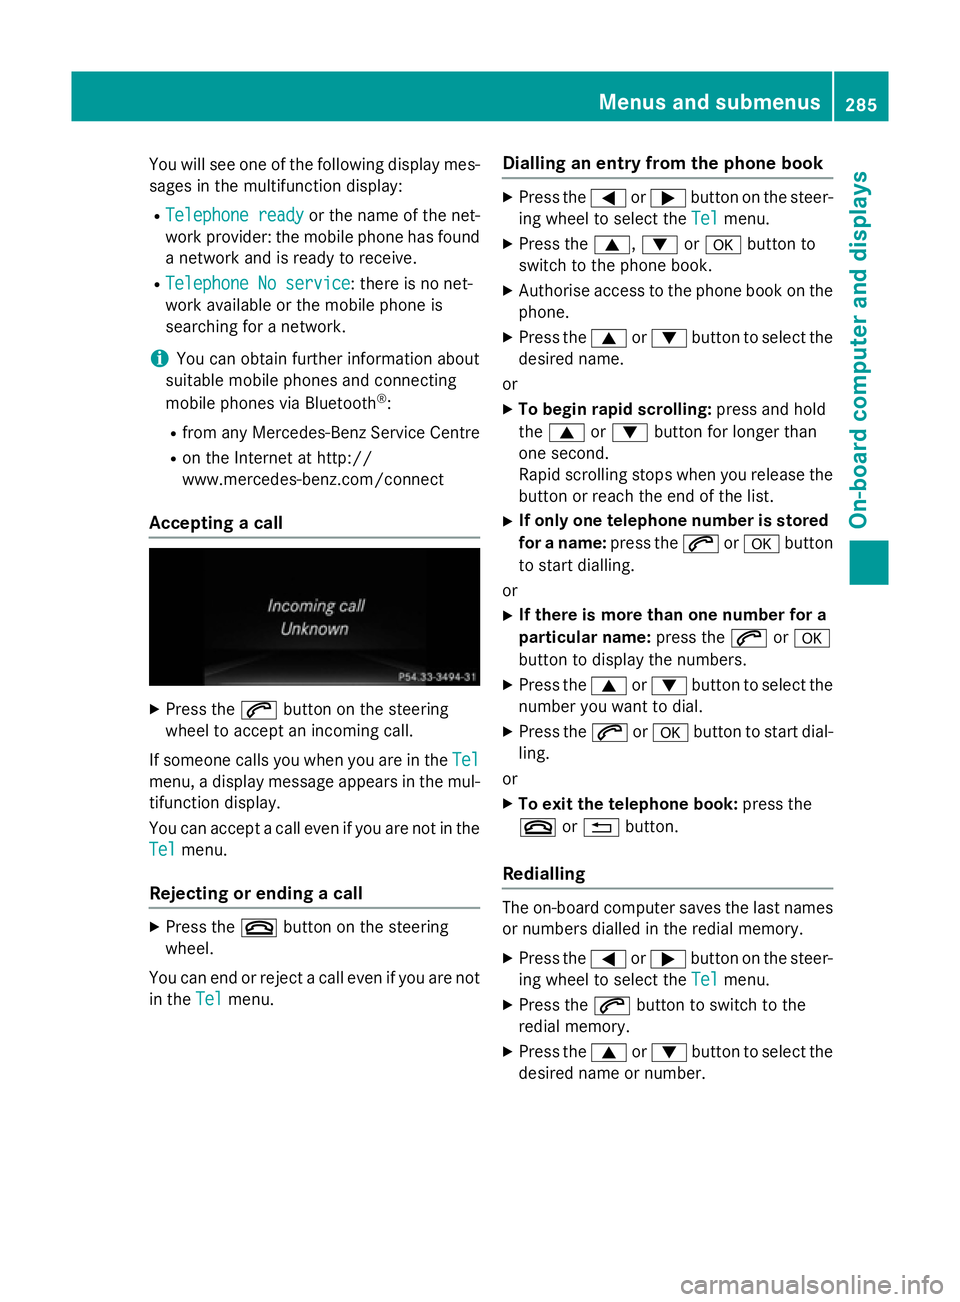
Accepting acall X
Press the 6button on the steering
wheel to accept an incomin gcall.
If someone calls you when you are in the Tel Tel
menu, adisplay message appears in the mul-
tifunction display.
You can accept acall even if you are not in the
Tel
Tel menu.
Rejecting or ending acall X
Press the ~button on the steering
wheel.
You can end or reject acall even if you are not
in the Tel
Tel menu. Dialling an entr
yfromt hephone book X
Press the =or; button on the steer-
ing wheel to selec tthe Tel Tel menu.
X Press the 9,:ora button to
switc htot he phon ebook.
X Authoris eaccess to the phon ebook on the
phone.
X Press the 9or: button to selec tthe
desired name.
or
X To begin rapid scrolling: press and hold
the 9 or: button for longer than
one second.
Rapid scrolling stops when you release the
button or reach the end of the list.
X If only one telephone number is stored
for aname: press the 6ora button
to star tdialling.
or
X If there is mor ethano ne number for a
particular name: press the6ora
button to display the numbers.
X Press the 9or: button to selec tthe
number you want to dial.
X Press the 6ora button to star tdial-
ling.
or
X To exit th etelephone book: press the
~ or% button.
Redialling The on-board computer saves the last names
or numbers dialled in the redial memory.
X Press the =or; button on the steer-
ing wheel to selec tthe Tel Tel menu.
X Press the 6button to switc htothe
redial memory.
X Press the 9or: button to selec tthe
desired name or number. Menus and submenus
285On-board computer and displays Z
Page 299 of 497
AMG men
uinAMG vehicles
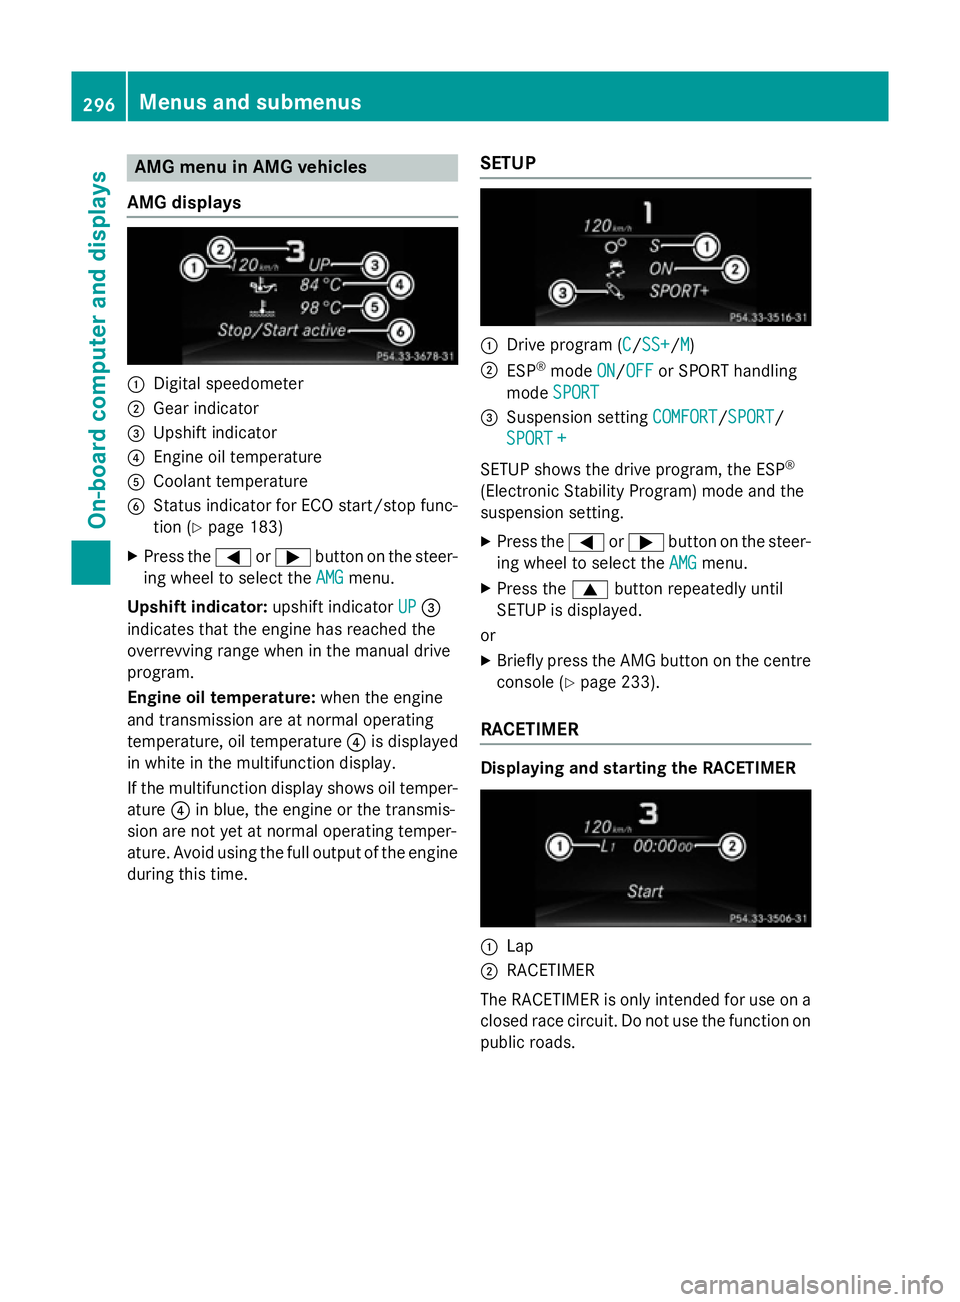
AMG displays :
Digital speedometer
; Gear indicator
= Upshif tindicator
? Engin eoil temperature
A Coolan ttem perature
B Status indicator for ECO start/sto pfunc-
tion (Y page 183)
X Press the =or; buttononthesteer-
ing whee ltos elect the AMG
AMG menu.
Upshift indicator: upshift indicatorUP
UP=
indicates that th eengineh as reached the
overrevving range when in th emanual drive
program.
Engin eoil temperature: when theengine
and transmission are at normal operating
temperature, oil temperature ?is displayed
in whit einthemultifunction display.
If th emultifunction display shows oil temper-
ature ?in blue, th eengineort hetransmis-
sion are no tyet at normal operating temper-
ature. Avoid usin gthe full output of th eengine
during this time. SETUP :
Drive program (C C/SS+ SS+ /MM)
; ESP ®
mode ON
ON/OFF
OFF or SPORT handling
mode SPORT
SPORT
= Suspension setting COMFORT
COMFORT/SPORT
SPORT/
SPORT +
SPORT +
SETUP shows th edrivep rogram ,the ESP ®
(Electronic Stabilit yProgram )modea nd the
suspension setting.
X Press the =or; buttononthesteer-
ing whee ltos elect the AMG
AMG menu.
X Press the 9buttonrepeatedly until
SETUP is displayed.
or
X Briefly press th eAMG butto nont hecentre
console (Y page 233).
RACETIMER Displaying and starting th
eRACETIMER :
Lap
; RACETIMER
The RACETIMER is only intended for use on a closed rac ecircuit .Don otuse th efunction on
public roads. 296
Menu
sand sub menusOn-boardcomputer an ddisplays
Page 317 of 497
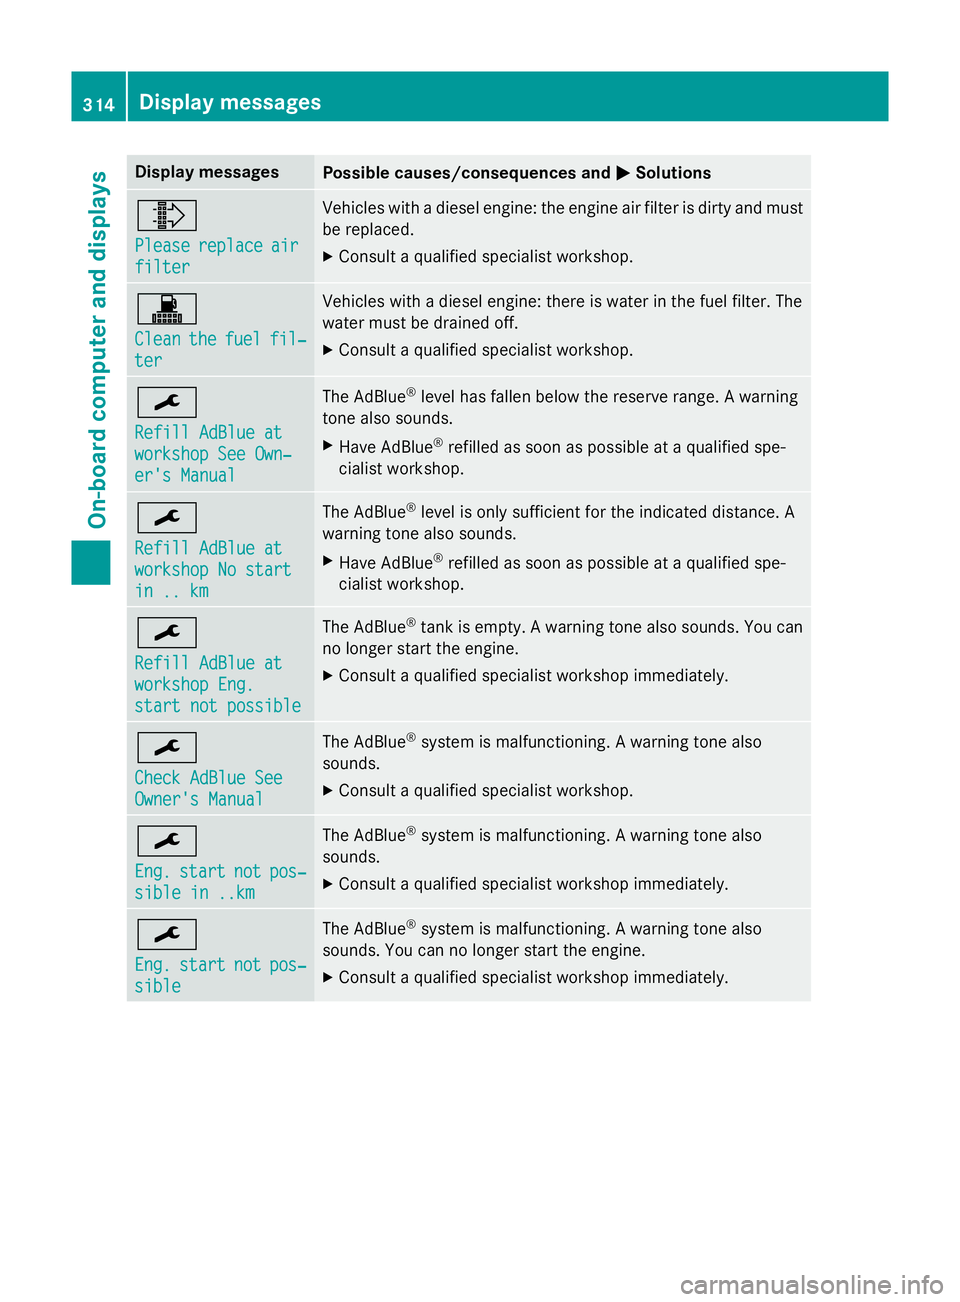
Display messages
Possible causes/consequences and
M
MSolutions ¸
Please Please
replace
replace air
air
filter
filter Vehicles wit
hadiesel engine: th eenginea ir filte risdirty and must
be replaced.
X Consult aqualified specialist workshop. !
Clean Clean
the
thefuel
fuel fil‐
fil‐
ter
ter Vehicles wit
hadiesel engine: there is water in th efuel filter. The
water mus tbedrainedoff.
X Consult aqualified specialist workshop. ¯
Refill AdBlue at Refill AdBlue at
workshop See Own‐ workshop See Own‐
er'
sM anual
er' sM anual The AdBlue
®
level has fallen belo wthe reserv erange. Awarning
tone also sounds.
X Hav eAdBlue ®
refilled as soo naspossibleataq ualified spe-
cialist workshop. ¯
Refill AdBlue at Refill AdBlue at
workshop No start workshop No start
in .. km in .. km The AdBlue
®
level is only sufficien tfor thei nd icate ddistance. A
warnin gtonea lso sounds.
X Hav eAdBlue ®
refilled as soo naspossibleataq ualified spe-
cialist workshop. ¯
Refill AdBlue at Refill AdBlue at
workshop Eng. workshop Eng.
start not possible start not possible The AdBlue
®
tan kise mpty. Awarnin gtonea lso sounds. You can
no longer start th eengine.
X Consult aqualified specialist workshop immediately. ¯
Check AdBlue See Check AdBlue See
Owner'
sManual
Owner' sManual The AdBlue
®
system is malfunctioning. Awarnin gtonea lso
sounds.
X Consult aqualified specialist workshop. ¯
Eng. Eng.
start
start not
notpos‐
pos‐
sible in ..km
sible in ..km The AdBlue
®
system is malfunctioning. Awarnin gtonea lso
sounds.
X Consult aqualified specialist workshop immediately. ¯
Eng. Eng.
start
start not
notpos‐
pos‐
sible
sible The AdBlue
®
system is malfunctioning. Awarnin gtonea lso
sounds. You can no longer start th eengine.
X Consult aqualified specialist workshop immediately. 314
Display
messagesOn-boardcomputer an ddisplays
Page 371 of 497
More information on suitable mobile phones,
mobile phone brackets and on connecting
Bluetooth ®
-capable mobile phones to
COMAND Online/Audio 20 can be obtained:
R at your Mercedes-Ben zService Centre
R on the Internet at http://www.mercedes-
benz.com/connect
The functions and services available when
you use the phone depend on your mobile
phone model and service provider.
Using amobile phone To connect
amobile phone to the exterior
aerial and charge it, insert it into the mobile
phone bracket.
X Open the telephone compartment
(Y page 344).
X Place the mobile phone bracket into the
pre-installed fitting; see the separate instal-
lation instructions for the mobile phone fit-
ting.
X Insert the mobile phone into the mobile
phone bracket; see the separate installa-
tion instructions for the mobile phone fit-
ting.
i The mobile phone can also be operated
without being in the bracket. However, the charging function and aerial function are
not available.
In order to use Bluetooth ®
(SAP profile) on
your telephone module, you must first insert
the telephone module into the pre-installed
fitting. This connects it to the exterior aerial.
If you wish to charge the mobile phone, then
you must connect it to aUSB port.
Further information on the telephone module
with Bluetooth ®
(SAP profile) can be found in
the Digital Owner's Manual.
Operating the mobile phone You can operate the telephone using the
6 and~ buttons on the multifunction
steering wheel. You can operate other mobile phone functions via the on-board computer
(Y page 284).
When you remove the key from the ignition
lock, the mobile phone is disconnected from
the hands-free system. Active calls will first
be transferred to the mobile phone directly.
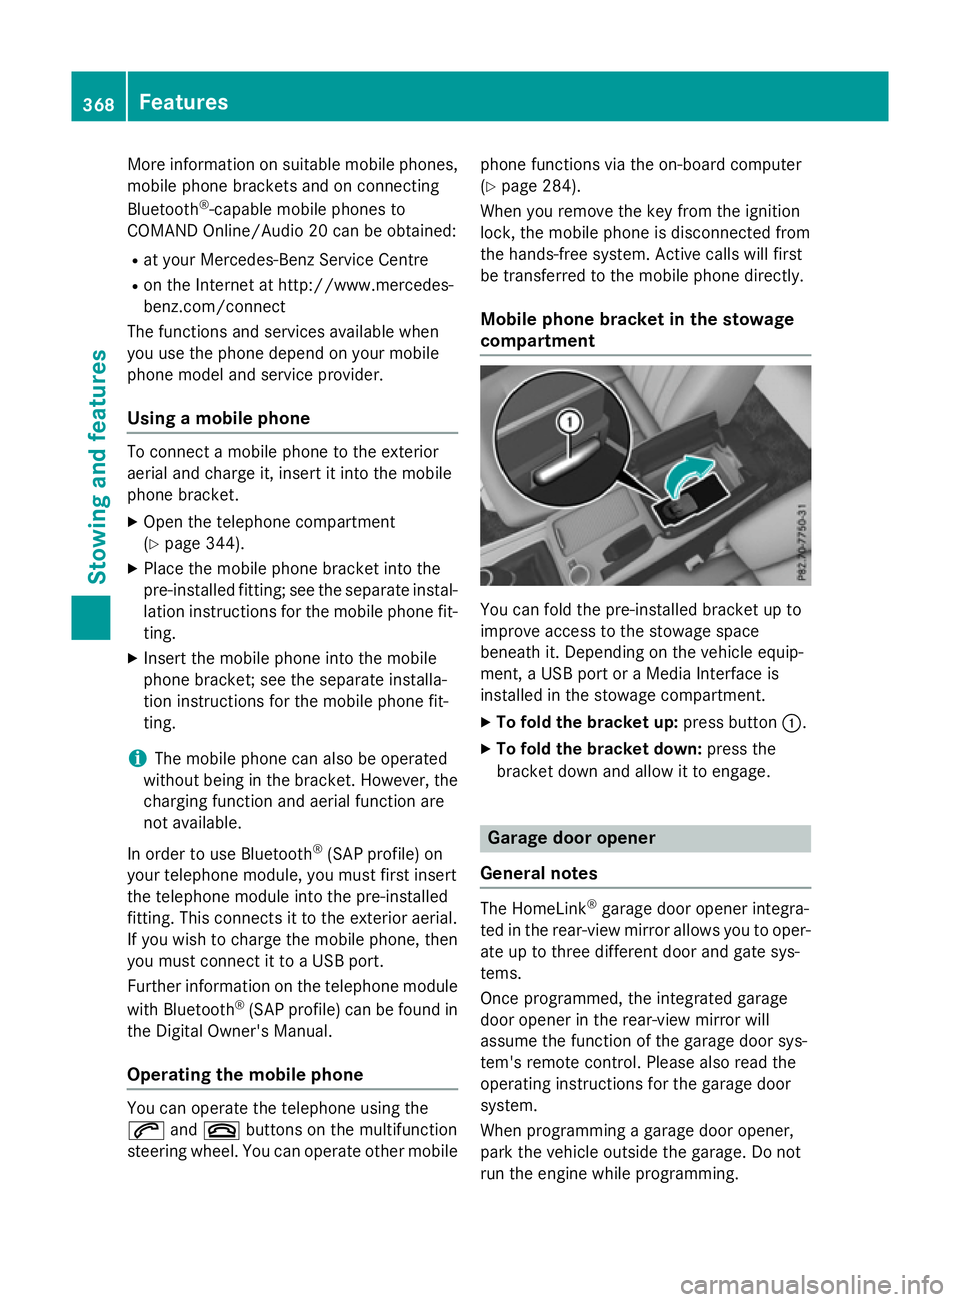
Mobile phone bracket in the stowage
compartment You can fold the pre-installed bracket up to
improve access to the stowage space
beneath it. Depending on the vehicle equip-
ment,aU
SB port or aMedia Interface is
installed in the stowage compartment.
X To fold the bracket up: press button:.
X To fold the bracket down: press the
bracket down and allow it to engage. Garage door opener
General notes The HomeLink
®
garage door opener integra-
ted in the rear-view mirror allowsy ou to oper-
ate up to three different door and gate sys-
tems.
Once programmed, the integrated garage
door opener in the rear-view mirror will
assume the function of the garage door sys-
tem's remote control. Please also read the
operating instructions for the garage door
system.
When programming agarage door opener,
park the vehicle outside the garage. Do not
run the engine while programming. 368
FeaturesStowing and features
Page 388 of 497
Special service requirements
The prescribed service interval is based on
normal operation of the vehicle. Service work
will need to be performed more often if the
vehicle is operated under arduousc onditions
or increased loads, for example:
R regular city driving with frequent intermedi-
ate stops
R if the vehicle is primarily used to travel
short distances
R for frequent operation in mountainous ter-
rain or on poor road surfaces
R if the engine is often left idling for long peri-
ods
In these or similar operating conditions, have,
for example, the air filter, engine oil and oil
filter changed more frequently. The tyres
must be checked more frequently if the vehi-
cle is operated under increased loads. Fur-
ther information can be obtained at aquali-
fied specialist workshop, e.g. aMercedes-
Benz Service Centre.
Driving abroad
An extensive Mercedes-Benz Service network is also available in other countries. You can
obtain further information from any
Mercedes-Benz Service Centre. AdBlue
®
service indicator
i For BlueTEC vehicles only.
To function properly, BlueTEC exhaust gas
aftertreatment must be operated with the
reducing agent AdBlue ®
.A dBlue ®
is topped
up as part of the service. Under normal oper-
ating conditions, afull tank of AdBlue ®
should
last until the next service due date.
Depending on how and where the vehicle is
used, there may be an increase in the
AdBlue ®
consumption, resulting in the next
service due date being brought forward.
Certain display messages show that AdBlue ®
must be topped up, e.g.: Refill AdBlue at workshop See Own‐ Refill AdBlue at workshop See Own‐
er's Manual er's Manual
Refill AdBlue at workshop No start Refill AdBlue at workshop No start
in .. km in .. km
Aw
arning signal also sounds.
You can no longer start the vehicle when the
AdBlue ®
supply has been used up
(Y page 314).
! Have the AdBlue ®
tank topped up at a
qualified specialist workshop only. The
vehicle may otherwise be damaged or
soiled.
Before driving your vehicle outside Europe,
have the AdBlue ®
supply checked at aquali-
fied specialist workshop. If necessary, have
AdBlue ®
topped up. Before aprolonged stay
outside of Europe, consult aqualified special-
ist workshop.
Observe the notes on AdBlue ®
(Y page 477).
Further information about BlueTEC exhaust
gas aftertreatment and AdBlue ®
can be
obtained at aqualified specialist workshop,
e.g. aMercedes-Benz Service Centre. Care
General notes
H
Environmental note
Dispose of empty packaging and cleaning
cloths in an environmentally responsible man- ner.
! For cleaning your vehicle, do not use any
of the following:
R dry, rough or hard cloths
R abrasive cleaning agents
R solvents
R cleaning agents containing solvents
Do not scrub.
Do not touch the surfaces or protective
films with hard objects, e.g. aring or ice
scraper. You could otherwise scratchor
damage the surfaces and protective film. Care
385Maintenance and care Z