2015 MERCEDES-BENZ E-CLASS COUPE ECO mode
[x] Cancel search: ECO modePage 137 of 345
General notes
i
Vehicles with a petrol engine:
the cata-
lytic converter is preheated for up 30 seconds
after a cold start. The sound of the engine may change during this time.
Manual transmission X
Depress the brake pedal and keep it
depressed.
X Fully depress the clutch pedal.
X Shift to neutral N.
Automatic transmission X
Shift the transmission to position P.
The transmission position indicator in the
multifunction display shows P.
i You can start the engine in transmission
position Pand N.
Starting procedure with the key i
To start the engine using the key instead of
KEYLESS-GO, pull the Start/Stop button out
of the ignition lock.
X Vehicles with diesel engine: turn the key to
position 2in the ignition lock (Y page 132).
The % preglow indicator lamp in the instru-
ment cluster lights up.
X Turn the key to position 3in the ignition lock
and release it as soon as the engine is running (Y page 132).
i Vehicles with a diesel engine:
you can
start the engine without preglow if the engine
is warm.
Using KEYLESS-GO to start the engine i
The Start/Stop button can be used to start
the vehicle manually without inserting the key into the ignition lock. The key must be in the
vehicle and the Start/Stop button must be
inserted in the ignition lock. This mode for
starting the engine operates independently of the ECO start/stop automatic engine start
function. X
Depress the brake pedal and keep it
depressed.
X Press the Start/Stop button once
(Y page 132).
Vehicles with a petrol engine: the engine
starts.
Vehicles with a diesel engine: preglow is
activated and the engine starts. Pulling away
General notes G
WARNING
Vehicles with automatic transmission:
If the engine speed is above the engine idling speed and you then engage transmission
position Dor R, the vehicle may accelerate
suddenly. There is a risk of an accident.
When engaging transmission position Dor R,
always keep the brake pedal firmly depressed
and do not depress the accelerator pedal at
the same time.
! Vehicles with manual transmission:
change gear in good time and avoid spinning
the wheels. You could otherwise damage the
vehicle.
! If a warning tone sounds and the
Release Release
park. brake
park. brake message appears in the multi-
function display, the parking brake is still
applied. Release the parking brake.
Depress the accelerator carefully when pulling
away.
The vehicle locks centrally once you have pulled
away. The locking knobs in the doors drop down.
You can open the doors from the inside at any
time.
You can also deactivate the automatic locking
feature (Y page 218).
Vehicles with automatic transmission: it is
only possible to shift the transmission from posi-
tion Pto the desired position if you depress the
brake pedal. If you do not depress the brake
pedal, the DIRECT SELECT lever can still be
moved but the parking lock remains engaged.
i Vehicles with automatic transmission:
upshifts take place at higher engine speeds 134
DrivingDriving and parking
Page 146 of 345
Double-clutch function
E 500 only:
when shifting down, the double-
clutch function is active regardless of the cur-
rently selected drive program. The double-
clutch function reduces load change reactions
and is conducive to a sporty driving style. The
sound generated by the double-clutch function
depends on the drive program selected.
Kickdown Use kickdown for maximum acceleration:
X Depress the accelerator pedal beyond the
pressure point.
The transmission shifts to a lower gear
depending on the engine speed.
X Ease off the accelerator pedal once the
desired speed is reached.
The automatic transmission shifts back up.
Towing a trailer Towing a trailer is not possible with all models.
For further information, see (Y page 202).
X Drive in the middle of the engine speed range
on uphill gradients.
X Manual drive program: depending on the
uphill or downhill gradient, shift into a gear
(Y page 144) in which the engine will run in
the middle of the engine speed range. This
also applies if cruise control, DISTRONIC
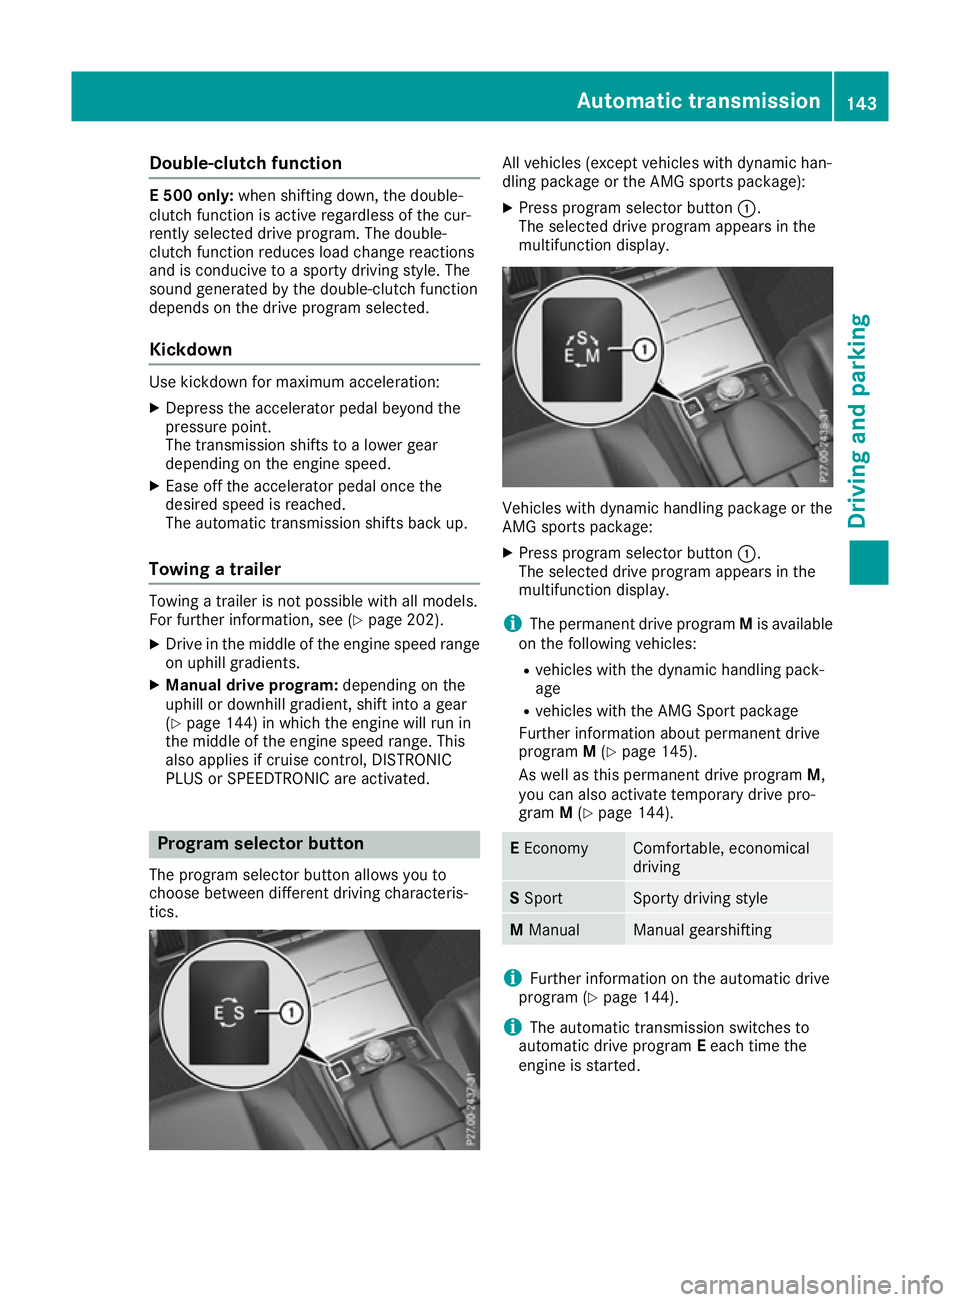
PLUS or SPEEDTRONIC are activated. Program selector button
The program selector button allows you to
choose between different driving characteris-
tics. All vehicles (except vehicles with dynamic han-
dling package or the AMG sports package):
X Press program selector button :.
The selected drive program appears in the
multifunction display. Vehicles with dynamic handling package or the
AMG sports package:
X Press program selector button :.
The selected drive program appears in the
multifunction display.
i The permanent drive program Mis available
on the following vehicles:
R vehicles with the dynamic handling pack-
age
R vehicles with the AMG Sport package
Further information about permanent drive
program M(Y page 145).
As well as this permanent drive program M,
you can also activate temporary drive pro-
gram M(Y page 144). E
Economy Comfortable, economical
driving
S
Sport Sporty driving style
M
Manual Manual gearshifting
i
Further information on the automatic drive
program (Y page 144).
i The automatic transmission switches to
automatic drive program Eeach time the
engine is started. Automatic transmission
143Driving and parking Z
Page 150 of 345

Problems with the transmission
Problem
Possible causes/consequences and
M
MSolutions The transmission has
problems shifting gear. The transmission is losing oil.
X Have the transmission checked at a qualified specialist workshop
immediately. 7G-TRONIC:
The acceleration ability
is deteriorating.
The transmission no lon-
ger changes gear. The transmission is in emergency mode.
It is only possible to shift into
secondgear and reverse gear.
X Stop.
X Shift the transmission to position P.
X Switch off the engine.
X Wait at least ten seconds before restarting the engine.
X Shift the transmission to position Dor R.
If D is selected, the transmission shifts into secondgear; ifRis
selected, the transmission shifts into reverse gear.
X Have the transmission checked at a qualified specialist workshop
immediately. 9G-TRONIC:
The acceleration ability
is deteriorating.
The transmission no lon-
ger changes gear. The transmission is in emergency mode.
It is only partly possible to engage the gears or the transmission is in
position N.
X Stop.
X Shift the transmission to position P.
X Switch off the engine.
X Wait at least ten seconds before restarting the engine.
X Shift the transmission to position Dor R.
X Have the transmission checked at a qualified specialist workshop
immediately. Refuelling
Important safety notes
G
WARNING
Fuel is highly flammable. If you handle fuel
incorrectly, there is a risk of fire and explo-
sion.
You must avoid fire, naked flames, creating
sparks and smoking. Switch off the engine
and, if applicable, the auxiliary heating before refuelling. G
WARNING
Fuels are poisonous and hazardous to health. There is a danger of injury. Do not swallow fuel or let it come into contact
with skin, eyes or clothing. Do not inhale fuel
vapours. Keep fuels out of the reach of chil-
dren.
If you or others come into contact with fuel,
observe the following:
R Wash the fuel off any affected areas of skin
with water and soap immediately.
R If you get fuel in your eyes, rinse them thor-
oughly with clean water immediately. Seek
immediate medical attention.
R If fuel is swallowed, seek immediate medi-
cal attention. Do not induce vomiting.
R Change any clothing that has come into
contact with fuel immediately. Refuelling
147Driving and parking Z
Page 156 of 345
ECO display assists you in achieving the most
economical driving style for the selected set-
tings and prevailing conditions. Consumption
can be significantly influenced by your driving
style.
The ECO display consists of three bars:
R Acceleration Acceleration
R Constant
Constant
R Coasting
Coasting
The percentage count is the mean value of the
three bar values. The three bars and the mean
value begin at the value of 50%. A higher per-
centage count indicates a more economical
driving style.
The ECO display does not indicate the actual fuel
consumption. A fixed percentage count in the
ECO display does not indicate a fixed consump- tion.
In addition to driving style, the consumption is
affected by many other factors, such as:
R load
R tyre pressure
R cold start
R choice of route
R the use of electrical consumers
These factors are not included in the ECO dis-
play.
The evaluation of your driving style takes the
following three categories into consideration:
R Acceleration
Acceleration (evaluation of all acceleration
processes):
- the bar fills up: moderate acceleration,
especially at higher speeds
- the bar empties: sporty acceleration
R Constant
Constant (assessment of driving behaviour
at all times):
- the bar fills up: constant speed and avoid-
ance of unnecessary acceleration and
deceleration
- the bar empties: fluctuations in speed
R Coasting Coasting (assessment of all deceleration
processes):
- the bar fills up: anticipatory driving, keep-
ing your distance and early release of the
accelerator. The vehicle can coast without
use of the brakes.
- the bar empties: frequent braking
i An economical driving style involves driving
at a moderate engine speed. To achieve a higher value in the categories
Acceleration Acceleration andConstant
Constant:
R observe the gearshift recommendation
R drive the vehicle in drive program E(vehi-
cles with automatic transmission)
i On long journeys at a constant speed, e.g.
on the motorway, only the bar for Constant
Constant
will change.
i The ECO display summarises the driving
characteristics from the start of the journey to
its completion. Therefore, there are dynamic
changes in the bars at the start of a journey.
During a prolonged driving time, these
changes are smaller. For more dynamic
changes, perform a manual reset.
Further information on the ECO display
(Y page 209). Brakes
Important safety notes G
WARNING
If you shift down on a slippery road surface in an attempt to increase the engine's braking
effect, the drive wheels could lose their grip.
This increases the risk of skidding and having
an accident.
Do not shift down for additional engine brak-
ing on a slippery road surface.
Downhill gradients Do not depress the brake pedal continuously
while the vehicle is in motion, e.g. never cause
the brakes to rub by constantly applying light
pressure to the pedal. This results in excessive
and premature wear to the brake pads.
Change into a lower gear in good time on long
and steep downhill gradients.
Take particular note of this when driving a laden vehicle and when towing a trailer.
i This also applies if you have activated cruise
control, SPEEDTRONIC or DISTRONIC PLUS.
This will use the braking effect of the engine, so
less braking will be required to maintain vehicle
speed. This relieves the load on the brake sys-
tem and prevents the brakes from overheating
and wearing too quickly. Driving
tips
153Driving an d parking Z
Page 157 of 345
Heavy and light loads
G
WARNING
The braking system can overheat if you leave your foot on the brake pedal while driving.
This increases the braking distance and could
even cause the braking system to fail. There is
a risk of an accident.
Never use the brake pedal as a footrest. Do
not simultaneously depress both the brake
pedal and the accelerator pedal while driving.
! Depressing the brake pedal constantly
results in excessive and premature wear to
the brake pads.
If the brakes have been subjected to a heavy
load, do not stop the vehicle immediately, but
drive on for a short while. This allows the airflow
to cool the brakes more quickly.
If the brakes have been used only moderately,
you should occasionally test their effectiveness.
To do this, brake more firmly from a higher
speed while paying attention to the traffic con-
ditions. This improves the grip of the brakes.
Wet road surfaces If you have driven for a long time in heavy rain
without braking, there may be a delayed reac-
tion from the brakes when braking for the first
time. This may also occur after a car wash or
after driving through deep water.
You will have to depress the brake pedal more
firmly. Maintain a greater distance to the vehicle in front.
After driving on a wet road or having the vehicle
washed, brake firmly while paying attention to
the traffic conditions. This will warm up the
brake discs, thereby drying them more quickly
and protecting them against corrosion.
Limited braking performance on salt-
treated roads If you drive on salt-treated roads, a layer of salt
may form on the brake discs and pads. This can increase the braking distance considerably. R
In order to prevent any salt build-up, apply the
brakes occasionally while paying attention to
the traffic conditions.
R Carefully depress the brake pedal at the end
of the journey and when starting the next
journey.
R Maintain a much greater distance to the vehi-
cle in front.
New brake pads/linings Brake pads/linings and discs that are either new
or have been replaced only achieve optimum
braking effect after several hundred kilometres
of driving. Compensate for the reduced braking
effect by applying greater force to the brake
pedal.
For safety reasons, Mercedes-Benz recom-
mends that you only have brake pads/linings
fitted to your vehicle which have been approved
for Mercedes-Benz vehicles or which corre-
spond to an equivalent quality standard. Brake
pads/linings which have not been approved for Mercedes-Benz vehicles or which are not of an
equivalent quality could affect your vehicle's
operating safety. Driving on wet roads
Aquaplaning If water has accumulated to a certain depth on
the road surface, there is a danger of aquaplan-
ing occurring, even if:
R you are driving at low speeds
R the tyres have adequate tread depth
For this reason, drive in the following manner in the event of heavy rain or in conditions in which
aquaplaning can occur:
R lower your speed
R avoid tyre ruts
R avoid sudden steering movements
R brake carefully
Driving on flooded roads !
Bear in mind that vehicles travelling in front
or in the opposite direction create waves. This may cause the maximum permissible water
depth to be exceeded. 154
Driving tipsDriving and parking
Page 173 of 345
DISTRONIC PLUS Steering Assist does not pro-
vide assistance:
R on very sharp corners
R if a loss of tyre pressure or a defective tyre has
been detected and displayed
Pay attention also to the important safety notes
for DISTRONIC PLUS (Y page 161).
The steering interventions are carried out with a limited steering moment. The system requires
the driver to keep his hands on the steering
wheel and to steer himself.
If you do not steer yourself or if you take your
hands off the steering wheel for a prolonged
period of time, the system will first alert you with a visual warning. A steering wheel symbol
appears in the multifunction display. If you have
still not started to steer and have not taken hold
of the steering wheel after five seconds at the
latest, a warning tone also sounds to remind you to take control of the vehicle. Steering Assist
and Stop&Go Pilot switch to passive mode.
DISTRONIC PLUS remains active.
Activating Steering Assist and Stop&Go
Pilot X Activate the DISTRONIC PLUS with Steering
Assist and Stop&Go Pilot function using the
on-board computer (Y page 215).
The DTR+: steering assistant On DTR+: steering assistant On mes-
sage appears in the multifunction display.
Steering Assist and Stop&Go Pilot are active.
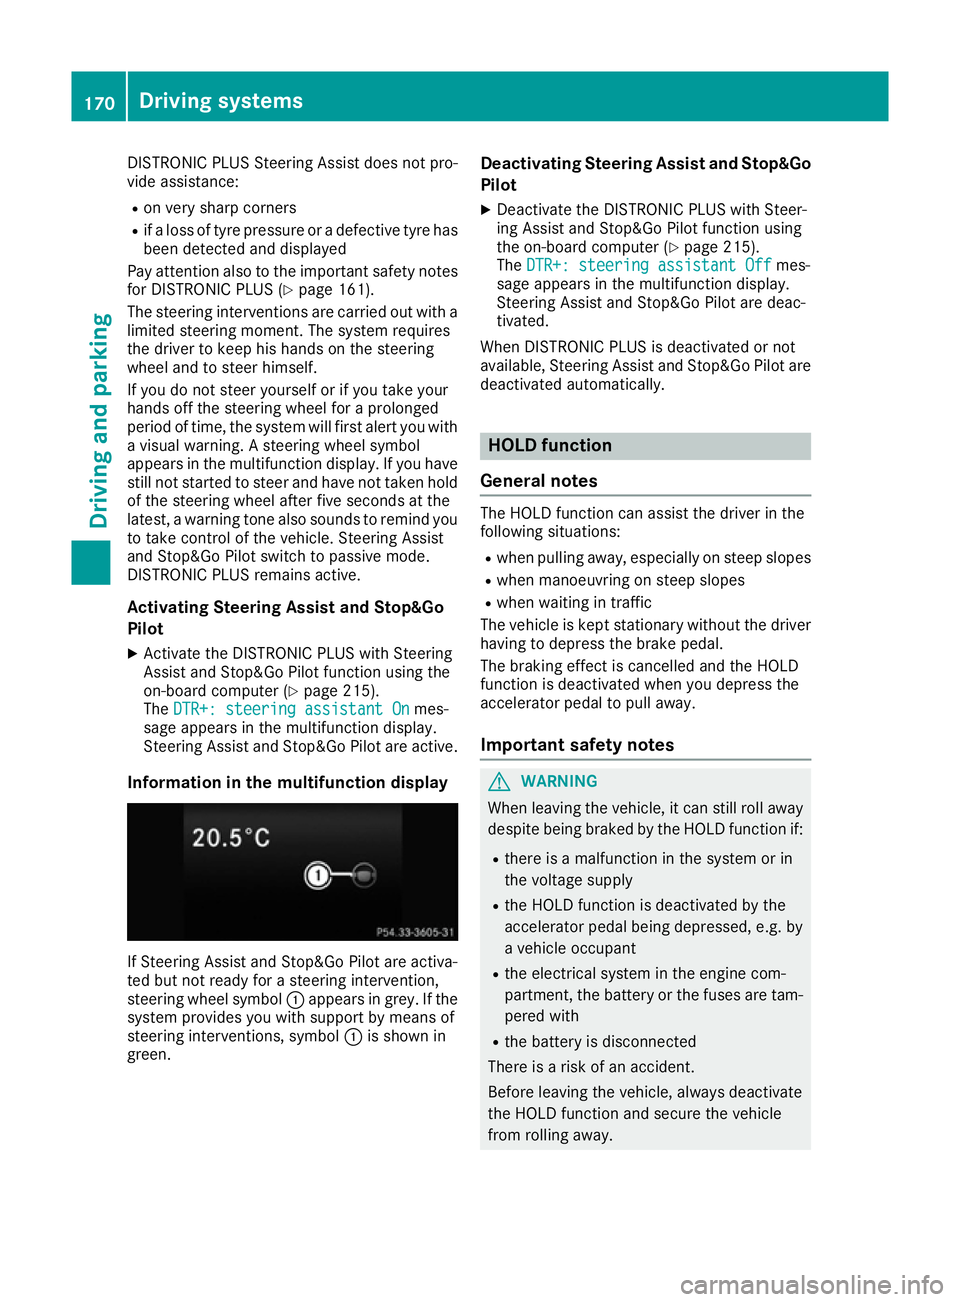
Information in the multifunction display If Steering Assist and Stop&Go Pilot are activa-
ted but not ready for a steering intervention,
steering wheel symbol :appears in grey. If the
system provides you with support by means of
steering interventions, symbol :is shown in
green. Deactivating Steering Assist and Stop&Go
Pilot
X Deactivate the DISTRONIC PLUS with Steer-
ing Assist and Stop&Go Pilot function using
the on-board computer (Y page 215).
The DTR+: steering assistant Off DTR+: steering assistant Off mes-
sage appears in the multifunction display.
Steering Assist and Stop&Go Pilot are deac-
tivated.
When DISTRONIC PLUS is deactivated or not
available, Steering Assist and Stop&Go Pilot are deactivated automatically. HOLD function
General notes The HOLD function can assist the driver in the
following situations:
R when pulling away, especially on steep slopes
R when manoeuvring on steep slopes
R when waiting in traffic
The vehicle is kept stationary without the driver
having to depress the brake pedal.
The braking effect is cancelled and the HOLD
function is deactivated when you depress the
accelerator pedal to pull away.
Important safety notes G
WARNING
When leaving the vehicle, it can still roll away despite being braked by the HOLD function if:
R there is a malfunction in the system or in
the voltage supply
R the HOLD function is deactivated by the
accelerator pedal being depressed, e.g. by
a vehicle occupant
R the electrical system in the engine com-
partment, the battery or the fuses are tam-
pered with
R the battery is disconnected
There is a risk of an accident.
Before leaving the vehicle, always deactivate
the HOLD function and secure the vehicle
from rolling away. 170
Driving systemsDriving an
d parking
Page 189 of 345

R
Top view and image from the reversing cam-
era (130° viewing angle)
R Top view and image from the front camera
(130° viewing angle without displaying the
maximum steering wheel angle)
R Top view and enlarged rear view
R Top view and enlarged front view
R Top view and trailer view (vehicles with trailer
tow hitch)
R Top view and images from the rear-facing side
cameras (rear wheel view)
R Top view and images from the forward-facing
side cameras (front wheel view)
When the function is active and you shift the
transmission from Dor Rto N, the dynamic
guide lines are hidden.
When you change between transmission posi-
tions Dand R, you see the previously selected
front or rear view.
Distances measured by PARKTRONIC will also
be optically displayed:
R as red or yellow brackets around the vehicle
symbol in top view in split-screen mode or
R at the bottom right as red or yellow brackets
around the vehicle symbol in full-screen mode
The line thickness and colour of the brackets
show how far the vehicle is from an object.
R yellow brackets with thin lines: PARKTRONIC
is active
R yellow brackets with normal lines: an object is
present in close range of the vehicle
R red line: an object is present in the immediate
close range of the vehicle
Important safety notes The 360° camera is only an aid and may show a
distorted view of obstacles, show them incor-
rectly or not at all. The 360° camera is not a
substitute for attentive driving.
The responsibility for safe manoeuvring and
parking remains with you. Make sure that there are no persons, animals or objects in range
while manoeuvring and parking.
You are always responsible for safety, and must
always pay attention to your surroundings when parking and manoeuvring. This applies to the
areas behind, in front of and beside the vehicle.
You could otherwise endanger yourself and oth- ers. The 360° camera will not function or will func-
tion only in a limited manner:
R if the doors are open
R if the exterior mirrors are folded in
R if the boot lid is open
R in heavy rain, snow or fog
R at night or in very dark places
R if the cameras are exposed to very bright light
R if the area is lit by fluorescent bulbs or LED
lighting (the display may flicker)
R if there is a sudden change in temperature,
e.g. when driving into a heated garage in win-
ter
R if the camera lenses are dirty or covered
R if the vehicle components in which the cam-
eras are fitted are damaged. In this event,
have the camera position and setting checked at a qualified specialist workshop.
Do not use the 360° camera under such cir-
cumstances. You could otherwise injure others
or damage objects when parking the vehicle.
Guide lines are always shown at road level. In
trailer mode, the guide lines are shown at the
level of the trailer coupling.
The field of vision and other functions of the
camera system may be restricted due to addi-
tional accessories on the rear of the vehicle (e.g.
licence plate holder, bicycle rack).
On vehicles with height-adjustable suspension,
due to the technical conditions, leaving the
standard height can result in:
R inaccuracies in the guide lines
R inaccuracies in the display of generated
images (top view)
Activation conditions The 360° camera image can be displayed if:
R your vehicle is equipped with a 360° camera
R the key is in position 2in the ignition lock
R the multimedia system is switched on
R the 360° camera
360° camera function is switched on
Activating the 360° camera X
Press the Øbutton in the centre console
for longer than two seconds.
The following appears depending on whether
transmission position Dor Ris selected: 186
Driving systemsDriving and parking
Page 214 of 345

Other status indicators of the naviga-
tion system The navigation system displays additional infor-
mation and the vehicle status.
Possible displays
R New route...
New route... orCalculating route Calculating route
A new route is calculated.
R Road not mapped
Road not mapped
The vehicle position is inside the area of the
digital map but the road is not recognised, e.g.
new roads, car parks or private land.
R No route
No route
No route could be calculated to the selected
destination.
R O: you have reached the destination or an
intermediate destination. Audio menu
Selecting a radio station :
Active station list
; Station with preset position
The menu shows station ;with station fre-
quency or station name. The preset position is
only displayed along with station ;if this has
been saved.
X Switch on the multimedia system and select
radio (see the separate operating instruc-
tions).
X Press the =or; button on the steering
wheel to select the Audio
Audio menu.
X To select a preset list or station list: press
and briefly hold the 9or: button until the preset list or station list in the desired
frequency range is shown.
X To select a station: briefly press9
or :.
i DAB radio mode (Digital
AudioBroadcast-
ing) is an optimised digital transmission
standard designed for the mobile reception of
radio transmissions.
Audio player or audio media operation Audio files from various audio players or media
can be played, depending on the equipment fit-
ted in the vehicle.
X Switch on the multimedia system and select
audio CD or MP3 mode (see the separate
operating instructions).
X Press the =or; button on the steering
wheel to select the Audio Audiomenu.
X To select the next/previous track: briefly
press the 9or: button.
X To select a track from the track list (rapid
scrolling): press and hold the 9or:
button until desired track :appears.
If you press and hold the 9or: button,
the rapid scrolling speed is increased. Not all audio players or media support this function. If track information is stored on the audio
player or media, the multifunction display will
show the number and title of the track.
Video DVD operation Only for vehicles with a COMAND Online multi-
media system: you can use the
Audio Audiomenu to
play video DVDs. Menus and submenus
211On-board computer and displays Z