2015 MERCEDES-BENZ E-CLASS CABRIOLET turn signal
[x] Cancel search: turn signalPage 206 of 349

R
the lane markings are worn away, dark or cov-
ered up, e.g. by dirt or snow
R the distance to the vehicle in front is too small
and the lane markings thus cannot be detec-
ted
R the lane markings change quickly, e.g. lanes
branch off, cross one another or merge
R the road is narrow and winding
R there are highly variable shade conditions on
the road
Activating Lane Keeping Assist X Activate Lane Keeping Assist using the on-
board computer; to do so, select Standard
Standard or
Adaptive Adaptive (Ypage 222).
If you drive at speeds above 60 km/h and lane
markings are detected, the lines in the assis- tance graphic display (Y page 220) are
shown in green. Lane Keeping Assist is ready for use.
Standard
If Standard
Standard is selected, no warning vibration
occurs if:
R you have switched on the turn signals. In this
case, the warnings are suppressed for a cer-
tain period of time.
R a driving safety system intervenes, such as
ABS, BAS or ESP ®
.
Adaptive
When Adaptive
Adaptive is selected, no warning vibra-
tion occurs if:
R you have switched on the turn signals. In this
case, the warnings are suppressed for a cer-
tain period of time.
R a driving safety system intervenes, such as
ABS, BAS or ESP ®
.
R you accelerate hard, e.g. kickdown.
R you brake hard.
R you steer actively, e.g. swerve to avoid an
obstacle or change lane quickly.
R you cut the corner on a sharp bend.
In order that you are warned only when neces-
sary and in good time if you cross the lane mark-
ing, the system detects certain conditions and
warns you accordingly. The warning vibration occurs earlier if:
R you approach the outer lane marking on a
bend
R the road has very wide lanes, e.g. a motorway
R the system detects solid lane markings
The warning vibration occurs later if:
R the road has narrow lanes
R you cut the corner on a bend Active Driving Assistance package
General notes The Active Driving Assistance package consists
of DISTRONIC PLUS (Y page 168), Active Blind
Spot Assist (Y page 203)and Active Lane Keep-
ing Assist (Y page 206).
Active Blind Spot Assist General notes
Active Blind Spot Assist monitors the areas on
either side of the vehicle that are not visible to
the driver with two lateral, rear-facing radar sen-
sors. A warning display in the exterior mirrors
draws your attention to vehicles detected in the monitored area. If you then switch on the cor-
responding turn signal to change lanes, you willalso receive a visual and audible collision warn-
ing. If a risk of side impact is detected, correc-
tive braking may help you avoid a collision.
Active Blind Spot Assist evaluates the free
space in the direction of travel and to the side
before making a course-correcting brake appli-
cation. For this, Active Blind Spot Assist uses
the forward-facing radar sensors.
Active Blind Spot Assist supports you from a
speed of approximately 30 km/h.
Important safety notes Active Blind Spot Assist is only an aid and is not
a substitute for attentive driving. G
WARNING
Active Blind Spot Assist does not react to
vehicles:
R overtaking too closely on the side, placing
them in the blind spot area
R if the difference in the speed of approach
and overtaking is too great Driving systems
203Driving and parking
Z
Page 208 of 349
The yellow indicator lamp goes out if reverse
gear is engaged. Active Blind Spot Assist is not
operational.
The brightness of the warning lamps is auto-
matically adapted to the brightness of the sur-
roundings.
Visual and acoustic collision warning
If you switch on the turn signals to change lanes
and a vehicle is detected in the side monitoring range, you receive a visual and acoustic collision
warning. You then hear a double warning tone
and red warning lamp :flashes. If the turn sig-
nal remains on, detected vehicles are indicated
by the flashing of red warning lamp :. There are
no further warning tones.
Course-correcting brake application
If Active Blind Spot Assist detects a risk of a side
impact in the monitoring range, a course-cor-
recting brake application is carried out. This is
designed to help you avoid a collision. G
WARNING
A course-correcting brake application cannot always prevent a collision. There is a risk of an
accident.
Always steer, brake or accelerate yourself,
especially if Active Blind Spot Assist warns
you or makes a course-correcting brake appli-
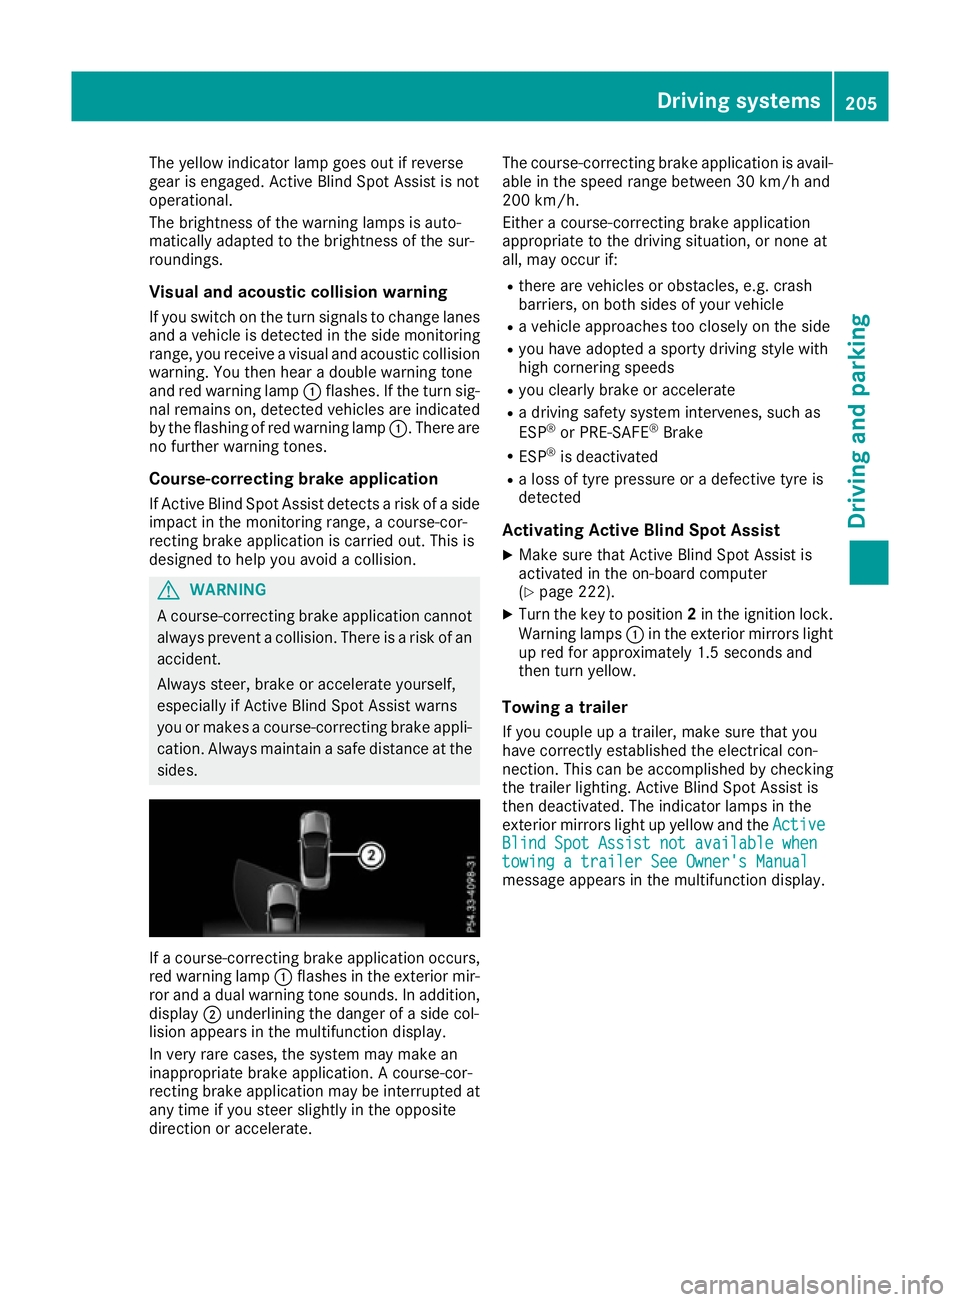
cation. Always maintain a safe distance at the sides. If a course-correcting brake application occurs,
red warning lamp :flashes in the exterior mir-
ror and a dual warning tone sounds. In addition, display ;underlining the danger of a side col-
lision appears in the multifunction display.
In very rare cases, the system may make an
inappropriate brake application. A course-cor-
recting brake application may be interrupted at
any time if you steer slightly in the opposite
direction or accelerate. The course-correcting brake application is avail-
able in the speed range between 30 km/h and
200 km/h.
Either a course-correcting brake application
appropriate to the driving situation, or none at
all, may occur if:
R there are vehicles or obstacles, e.g. crash
barriers, on both sides of your vehicle
R a vehicle approaches too closely on the side
R you have adopted a sporty driving style with
high cornering speeds
R you clearly brake or accelerate
R a driving safety system intervenes, such as
ESP ®
or PRE-SAFE ®
Brake
R ESP ®
is deactivated
R a loss of tyre pressure or a defective tyre is
detected
Activating Active Blind Spot Assist
X Make sure that Active Blind Spot Assist is
activated in the on-board computer
(Y page 222).
X Turn the key to position 2in the ignition lock.
Warning lamps :in the exterior mirrors light
up red for approximately 1.5 seconds and
then turn yellow.
Towing a trailer
If you couple up a trailer, make sure that you
have correctly established the electrical con-
nection. This can be accomplished by checking
the trailer lighting. Active Blind Spot Assist is
then deactivated. The indicator lamps in the
exterior mirrors light up yellow and the Active
Active
Blind Spot Assist not available when Blind Spot Assist not available when
towing a trailer See Owner's Manual towing a trailer See Owner's Manual
message appears in the multifunction display. Driving systems
205Driving and parking Z
Page 210 of 349
Lane-correcting brake application
G
WARNING
A lane-correcting brake application cannot
always bring the vehicle back into the original lane. There is a risk of an accident.
Always steer, brake or accelerate yourself,
especially if Active Lane Keeping Assist warns
you or makes a lane-correcting brake appli-
cation. G
WARNING
Active Lane Keeping Assist only detects traf-
fic conditions or road users to a limited
extent. In very rare cases, the system may
make an inappropriate brake application, e.g. after intentionally driving over a solid lane
marking. There is a risk of an accident.
An inappropriate brake application may be
interrupted at any time if you steer slightly in
the opposite direction. Always make sure that
there is sufficient distance to the side for
other traffic or obstacles. If you leave your lane under certain circumstan-
ces, the vehicle will brake briefly on one side.
This is intended to help you return the vehicle to
the original lane.
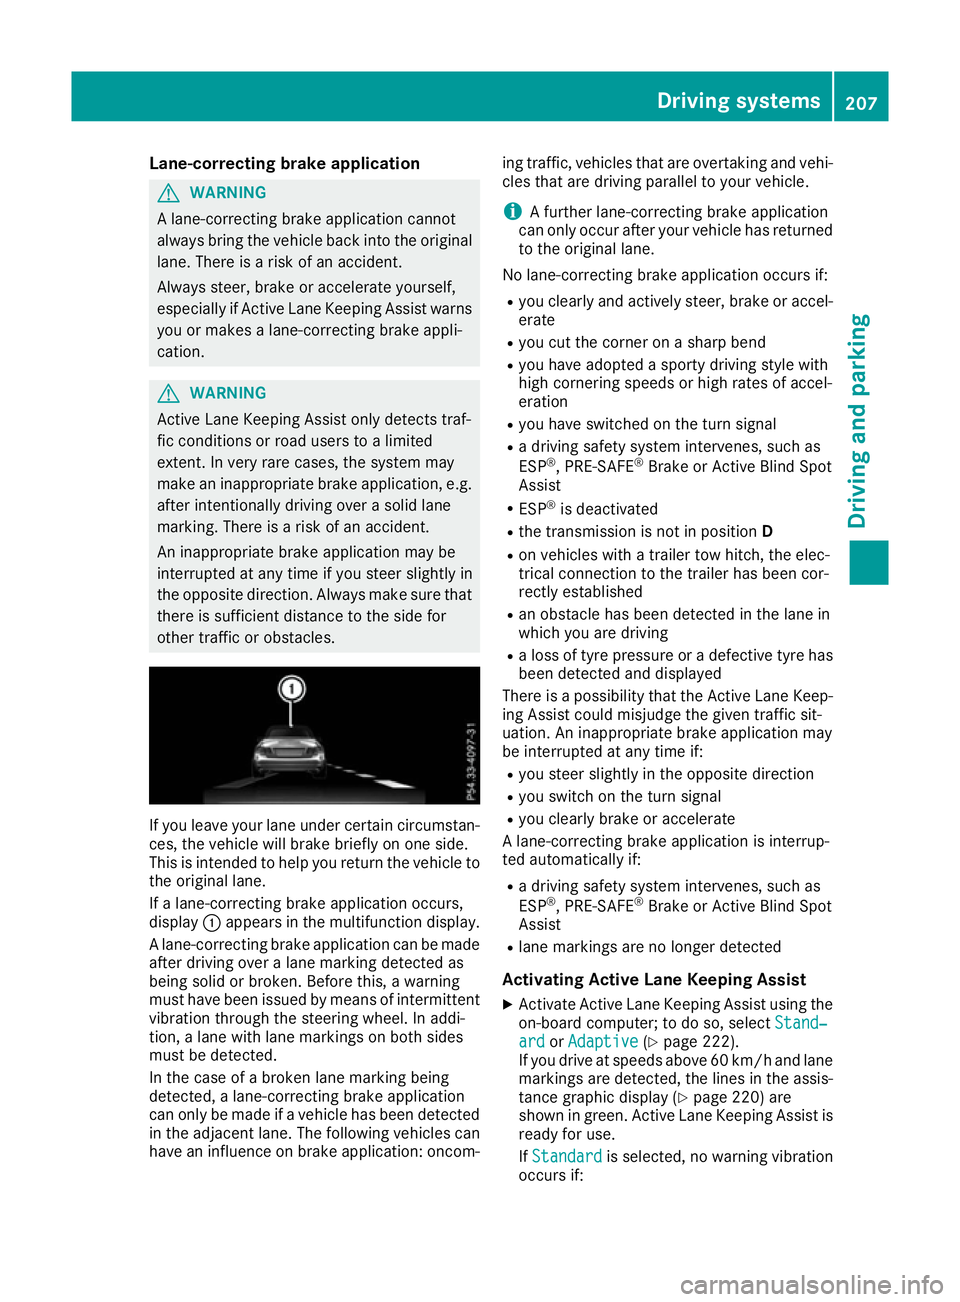
If a lane-correcting brake application occurs,
display :appears in the multifunction display.
A lane-correcting brake application can be made
after driving over a lane marking detected as
being solid or broken. Before this, a warning
must have been issued by means of intermittent
vibration through the steering wheel. In addi-
tion, a lane with lane markings on both sides
must be detected.
In the case of a broken lane marking being
detected, a lane-correcting brake application
can only be made if a vehicle has been detected
in the adjacent lane. The following vehicles can have an influence on brake application: oncom- ing traffic, vehicles that are overtaking and vehi-
cles that are driving parallel to your vehicle.
i A further lane-correcting brake application
can only occur after your vehicle has returned
to the original lane.
No lane-correcting brake application occurs if: R you clearly and actively steer, brake or accel-
erate
R you cut the corner on a sharp bend
R you have adopted a sporty driving style with
high cornering speeds or high rates of accel-
eration
R you have switched on the turn signal
R a driving safety system intervenes, such as
ESP ®
, PRE-SAFE ®
Brake or Active Blind Spot
Assist
R ESP ®
is deactivated
R the transmission is not in position D
R on vehicles with a trailer tow hitch, the elec-
trical connection to the trailer has been cor-
rectly established
R an obstacle has been detected in the lane in
which you are driving
R a loss of tyre pressure or a defective tyre has
been detected and displayed
There is a possibility that the Active Lane Keep-
ing Assist could misjudge the given traffic sit-
uation. An inappropriate brake application may
be interrupted at any time if:
R you steer slightly in the opposite direction
R you switch on the turn signal
R you clearly brake or accelerate
A lane-correcting brake application is interrup-
ted automatically if:
R a driving safety system intervenes, such as
ESP ®
, PRE-SAFE ®
Brake or Active Blind Spot
Assist
R lane markings are no longer detected
Activating Active Lane Keeping Assist
X Activate Active Lane Keeping Assist using the
on-board computer; to do so, select Stand‐
Stand‐
ard ard orAdaptive
Adaptive (Ypage 222).
If you drive at speeds above 60 km/h and lane
markings are detected, the lines in the assis- tance graphic display (Y page 220) are
shown in green. Active Lane Keeping Assist is
ready for use.
If Standard Standard is selected, no warning vibration
occurs if: Driving systems
207Driving and parking Z
Page 211 of 349
R
you have switched on the turn signal. In this
case, the warnings are suppressed for a
certain period of time.
R a driving safety system intervenes, such as
ABS, BAS or ESP ®
.
When Adaptive
Adaptive is selected, no warning vibra-
tion occurs if:
R you have switched on the turn signal. In this
case, the warnings are suppressed for a
certain period of time.
R a driving safety system intervenes, such as
ABS, BAS or ESP ®
.
R you accelerate hard, e.g. kickdown.
R you brake hard.
R you steer actively, e.g. swerve to avoid an
obstacle or change lane quickly.
R you cut the corner on a sharp bend.
In order that you are warned only when neces-
sary and in good time if you cross the lane mark-
ing, the system detects certain conditions and
warns you accordingly.
The warning vibration occurs earlier if:
R you approach the outer lane marking on a
bend
R the road has very wide lanes, e.g. a motorway
R the system detects solid lane markings
The warning vibration occurs later if:
R the road has narrow lanes
R you cut the corner on a bend
Towing a trailer If you couple up a trailer, make sure that you
have correctly established the electrical con-
nection. This can be accomplished by checking
the trailer lighting. Towing a trailer
Important safety notes
G
WARNING
You could lose control of the vehicle/trailer
combination if it begins to swerve. The vehi-
cle/trailer combination could even overturn.
There is a risk of an accident.
On no account should you attempt to
straighten out the vehicle/trailer combina-
tion by increasing speed. Decrease your speed and do not countersteer. Brake if nec-
essary. G
WARNING
If the maximum permissible load for a carrier system is exceeded, the carrier could come
loose from the vehicle and endanger other
road users. There is a risk of an accident and injury.
Never exceed the maximum permissible load
when using a carrier.
Exceeding the maximum permissible nose-
weight of the trailer drawbar on the ball coupling
may cause damage to the following:
R your vehicle
R trailer
R the ball coupling
R trailer tow hitch
The vehicle/trailer combination could become
unstable.
If the noseweight used is lower than the mini-
mum permissible noseweight, the vehicle/
trailer combination could also become unstable.
To avoid hazardous situations:
R make sure to check the noseweight before
each journey
R use a drawbar noseweight as close as possi-
ble to the maximum noseweight
R do not exceed the maximum permissible
noseweight
R do not use a noseweight lower than the min-
imum noseweight
When reversing the vehicle towards the trailer,
make sure there is nobody between the trailer
and the vehicle.
Couple and uncouple the trailer carefully. If you do not couple the trailer to the towing vehicle
correctly, the trailer could become detached.
Make sure that the following values are not
exceeded:
R the permissible trailer drawbar noseweight
R the permissible trailer load
R the permissible rear axle load of the towing
vehicle
R the maximum permissible gross vehicle
weight of both the towing vehicle and the
trailer 208
Towing a trailerDriving and pa
rking
Page 287 of 349
Several attempts may be required. You
should test every position for at least
25 seconds before trying another position.
Synchronising the rolling code
Observe the "Important safety notes"
(Y page 283).
If the garage door system uses a rolling code,
you will also have to synchronise the garage
door system with the integrated garage door
opener in the rear-view mirror. To do this, you
will need to use the programming button on the
door drive control panel. The programming but-
ton may be placed at different locations depend- ing on the manufacturer. It is usually located on
the door drive unit on the garage ceiling.
Familiarise yourself with the garage door drive
operating instructions, e.g. under "Program-
ming of additional remote controls", before car-
rying out the following steps.
Your vehicle must be within range of the garage
door or gate opener drive. Make sure that nei-
ther your vehicle nor any persons/objects are
present within the sweep of the door or gate.
X Turn the key to position 2in the ignition lock
(Y page 139).
X Get out of the vehicle.
X Press the programming button on the door
drive unit.
Usually, you now have 30 seconds to initiate
the next step.
X Get into the vehicle.
X Press previously programmed button ;,=
or ? of the integrated garage door opener
until the door closes.
The rolling code synchronisation is then com- plete.
Problems when programming
If you have problems when programming the
integrated garage door opener, please note the following:
R Check the transmitter frequency used by
garage door drive remote control Aand
whether it is supported. The transmitter fre-
quency can usually be found on the back of
the garage door drive remote control.
R Replace the batteries in garage door remote
control A. This increases the likelihood that
garage door remote control Awill transmit a
strong and precise signal to the integrated
garage door opener in the rear-view mirror. R
When programming, hold remote control A
at varying distances and angles from the but-
ton which you are programming. Try various
angles at a distance between 5and 20cm or
at the same angle but at varying distances.
R If there is another remote control for the same
garage door drive, perform the programming
steps again using this remote control. Before
performing these steps, make sure that new
batteries have been fitted in garage door drive remote control A.
R Note that some remote controls transmit only
for a limited period (the indicator lamp on theremote control goes out). Press button Bon
remote control Aagain before transmission
ends.
R Align the aerial cable of the garage door
opener unit. This can improve signal recep-
tion/transmission.
Opening or closing the garage door Once programmed, the integrated garage door
opener will assume the function of the garage
door system's remote control. Please also read
the operating instructions for the garage door
system.
X Turn the key to position 2in the ignition lock
(Y page 139).
X Press button ;,=or? which you have
programmed to operate the garage door.
Garage door system with a fixed code: indi-
cator lamp :lights up green.
Garage door system with a rolling code: indi-
cator lamp :flashes green.
The transmitter will transmit a signal for as
long as the button is pressed. The transmis-
sion is halted after a maximum of ten seconds
and indicator lamp :lights up yellow.
X Press button ;,=or? again if necessary.
Clearing the memory Make sure that you clear the memory of the
integrated garage door opener before selling the
vehicle. 284
FeaturesStowing and features
Page 303 of 349

!
Do not pull on the wiper blade. Otherwise,
the wiper blade could be damaged.
! Do not clean wiper blades too often and do
not rub them too hard. Otherwise, the graph- ite coating could be damaged. This could
cause wiper noise.
! Hold the wiper arm securely when folding
back. The windscreen could be damaged if
the wiper arm hits against it suddenly.
X Fold the wiper arms away from the wind-
screen.
X Clean the wiper blades carefully using a damp
cloth.
X Fold the windscreen wipers back again before
switching on the ignition.
Cleaning the exterior lighting !
Only use cleaning agents or cleaning cloths
that are suitable for plastic lenses. Unsuitable
cleaning agents or cleaning cloths could
scratch or damage the plastic lenses of the
exterior lighting.
X Clean the plastic lenses of the exterior light-
ing using a wet sponge and a mild cleaning
agent, e.g. Mercedes-Benz car shampoo or
cleaning cloths.
Mirror turn signals !
Only use cleaning agents or cleaning cloths
that are suitable for plastic lenses. Unsuitable
cleaning agents or cleaning cloths could
scratch or damage the plastic lenses of the
mirror turn signals.
X Clean the plastic lenses of the mirror turn sig-
nals in the exterior mirror housing using a wet sponge and mild cleaning agent, e.g.
Mercedes-Benz car shampoo or cleaning
cloths.
Cleaning the sensors !
If you clean the sensors with a high-pressure
cleaner, make sure that you keep a distance
of at least 30 cm between the vehicle and the high-pressure cleaner nozzle. Information
about the correct distance is available from
the equipment manufacturer. X
Clean sensors :of the driving systems with
water, car shampoo and a soft cloth.
Cleaning the reversing camera !
Do not clean the camera lens and the area
around the reversing camera with a high-pres-
sure cleaner. X
Use clear water and a soft cloth to clean cam-
era lens :.
Cleaning the 360° camera !
Do not clean the camera lens and the area
around the 360° camera with a high-pressure cleaner.360 300
CareMaintenance and care
Page 320 of 349
X
Remove cover :from the opening.
X Screw in the towing eye clockwise as far as it
will go and tighten it.
Vehicles with a trailer tow hitch do not have a
bracket at the back for the screw-in towing eye.
Connect the towbar to the trailer tow hitch
(Y page 209).
Removing the towing eye X
Loosen the towing eye and unscrew it.
X Position cover :on top of the bumper and
press it in at the bottom until it engages.
X Place the towing eye in the vehicle tool kit. Towing the vehicle with both axles on
the ground
It is important that you observe the safety
instructions when towing away your vehicle
(Y page 315).
X Turn the key to position 2in the ignition lock.
X When the vehicle is stationary, depress the
brake pedal and keep it depressed.
X Vehicles with manual transmission:
depress the clutch pedal fully and engage
neutral.
or X Vehicles with automatic transmission:
shift the transmission to position N.
X Release the brake pedal.
X Release the parking brake.
In order to signal a change of direction when
towing the vehicle with the hazard warning
lamps switched on, use the combination switch as usual. In this case, only the turn signals for
the desired direction flash. When you reset the
combination switch, the hazard warning lamps
start flashing again. Towing the vehicle away with the rear
axle raised
! Vehicles with automatic transmission must
not be towed with the rear axle raised. The
car/trailer combination may otherwise
swerve or even overturn.
! The ignition must be switched off if you are
towing the vehicle with the rear axle raised. Intervention by ESP
®
could otherwise dam-
age the brake system.
X Switch on the hazard warning lamps
(Y page 116).
X Move the front wheels to the straight-ahead
position.
X Turn the key in the ignition lock to position 0
and remove the key from the ignition lock.
X When leaving the vehicle, take the key with
you.
When towing your vehicle away with the rear
axle raised, it is important that you observe the
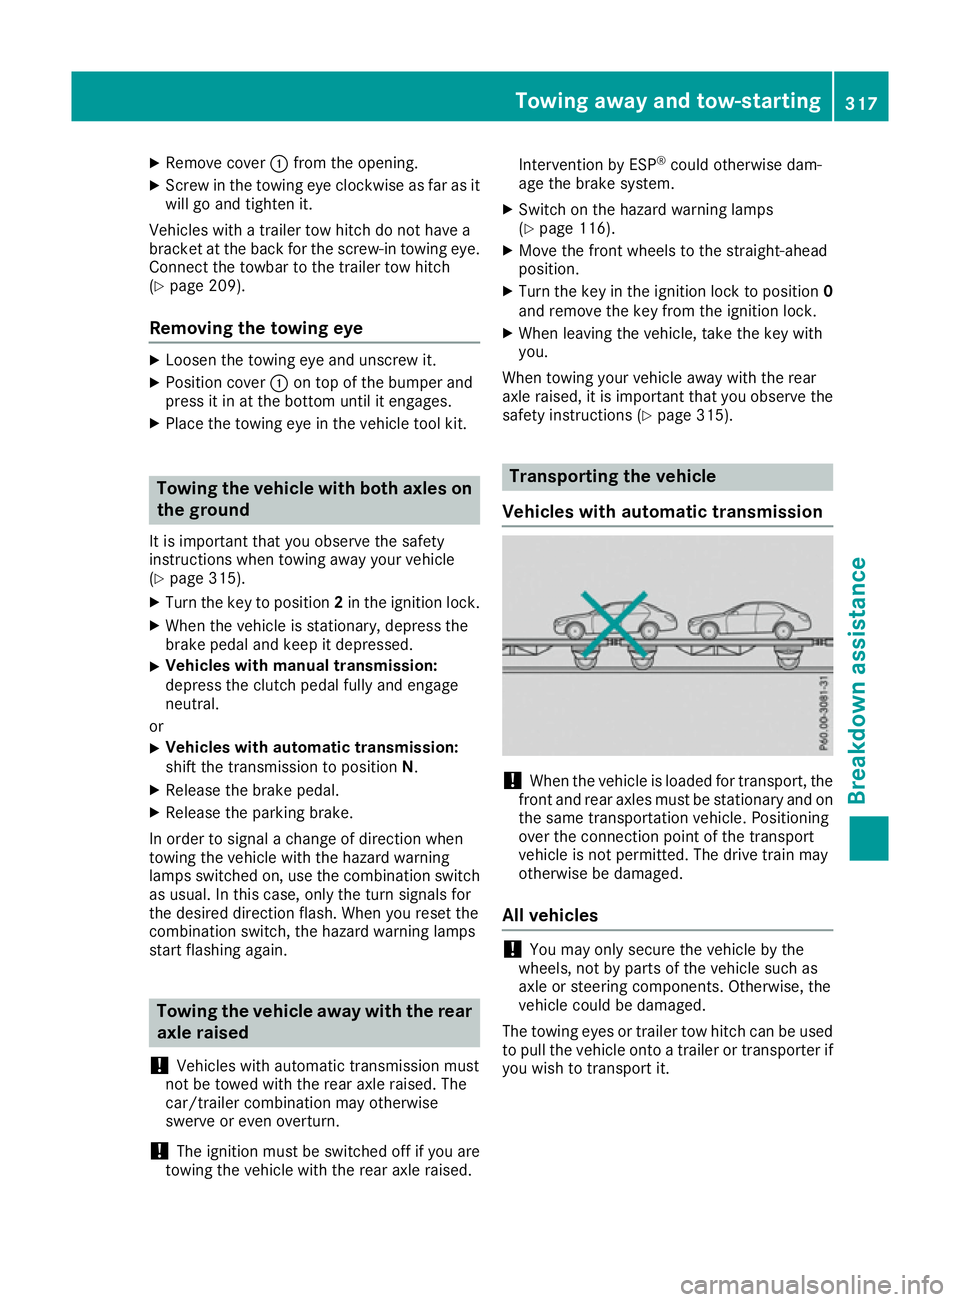
safety instructions (Y page 315). Transporting the vehicle
Vehicles with automatic transmission !
When the vehicle is loaded for transport, the
front and rear axles must be stationary and on
the same transportation vehicle. Positioning
over the connection point of the transport
vehicle is not permitted. The drive train may
otherwise be damaged.
All vehicles !
You may only secure the vehicle by the
wheels, not by parts of the vehicle such as
axle or steering components. Otherwise, the
vehicle could be damaged.
The towing eyes or trailer tow hitch can be used to pull the vehicle onto a trailer or transporter if
you wish to transport it. Towing away and tow-starting
317Breakdown assistance Z