2015 MERCEDES-BENZ CLA SHOOTING BRAKE steering wheel
[x] Cancel search: steering wheelPage 267 of 421
3
and then press ato confirm Start
Start, tim-
ing is continued.
Resetting the current lap
X Stop the RACETIMER.
X Press the =or; button to select
Reset Lap
Reset Lap .
X Press ato reset the lap time to "0".
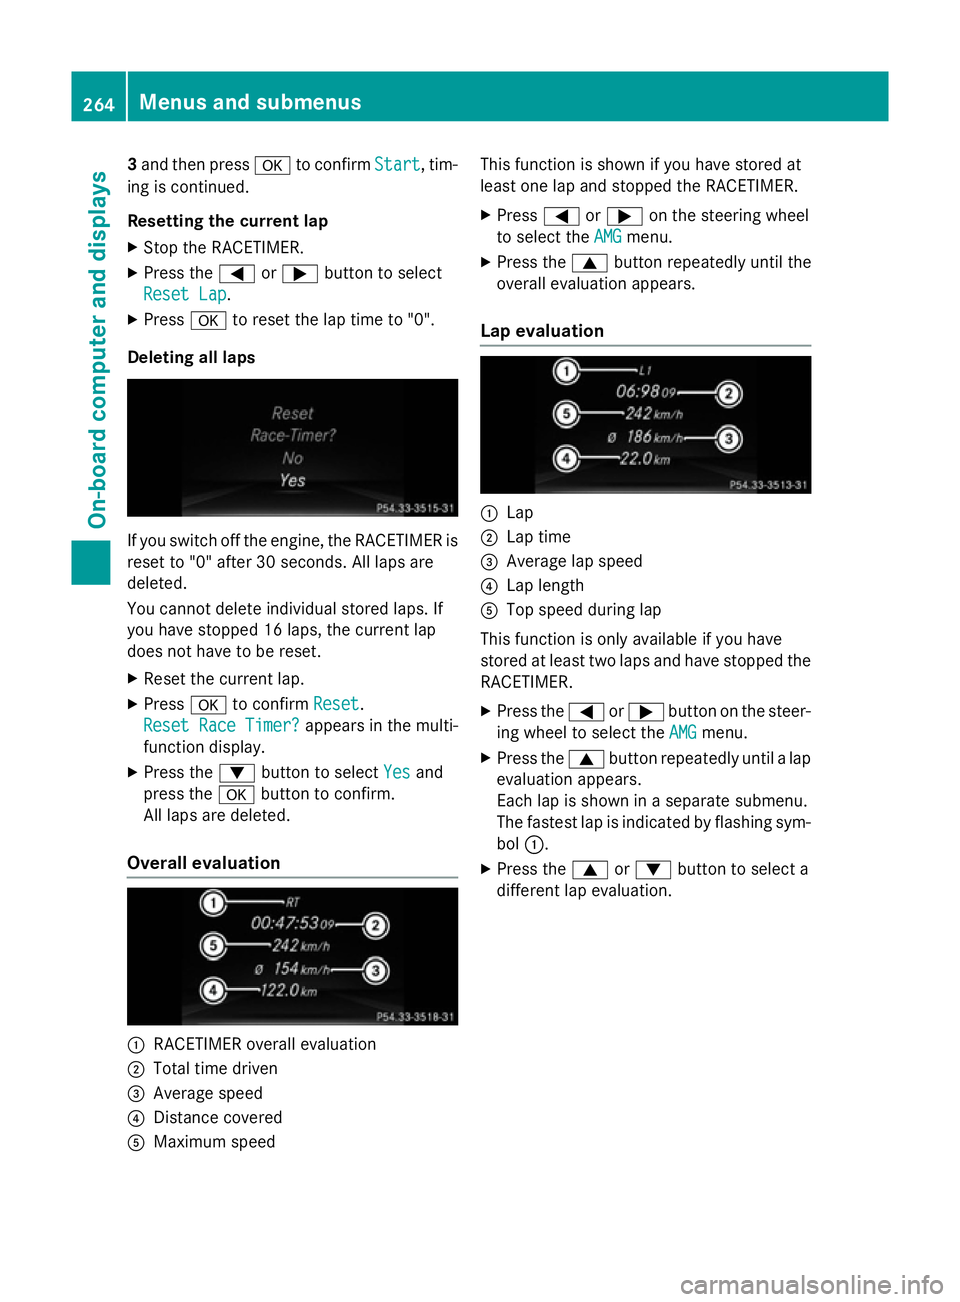
Deleting all laps If you switch off the engine, the RACETIMER is
reset to "0" after 30 seconds. All laps are
deleted.
You cannot delete individual stored laps. If
you have stopped 16 laps, the current lap
does not have to be reset.
X Reset the current lap.
X Press ato confirm Reset Reset.
Reset Race Timer?
Reset Race Timer? appears in the multi-
function display.
X Press the :button to select Yes
Yesand
press the abutton to confirm.
All laps are deleted.
Overall evaluation :
RACETIMER overall evaluation
; Total time driven
= Average speed
? Distance covered
A Maximum speed This function is shown if you have stored at
least one lap and stopped the RACETIMER.
X Press =or; on the steering wheel
to select the AMG AMGmenu.
X Press the 9button repeatedly until the
overall evaluation appears.
Lap evaluation :
Lap
; Lap time
= Average lap speed
? Lap length
A Top speed during lap
This function is only available if you have
stored at least two laps and have stopped the
RACETIMER.
X Press the =or; button on the steer-
ing wheel to select the AMG
AMG menu.
X Press the 9button repeatedly until a lap
evaluation appears.
Each lap is shown in a separate submenu.
The fastest lap is indicated by flashing sym- bol :.
X Press the 9or: button to select a
different lap evaluation. 264
Menus and submenusOn-board computer and displays
Page 268 of 421
Display messages
Introduction
General notes Display messages appear in the multifunction display.
Display messages with graphic symbols are simplified in the Owner's Manual and may differ
from the symbols in the multifunction display.
Please respond in accordance with the display messages and follow the additional notes in this Owner's Manual.
Certain display messages are accompanied by an audible warning tone or a continuous tone.
When the ignition is switched off, all display messages are deleted apart from some high-
priority display messages. Once the causes of the high-priority display messages have been
rectified, these display messages are deleted as well.
When you stop and park the vehicle, please observe the notes on:
R HOLD function (Y page 211)
R Parking (Y page 192)
Hiding display messages X
Press the aor% button on the steering wheel.
The multifunction display hides the display message.
The multifunction display shows high-priority display messages in red. Some high-priority dis- play messages cannot be hidden.
The multifunction display shows these messages continuously until the causes for the mes-
sages have been remedied.
Message memory The on-board computer saves certain display messages in the
message memory. You can call
up the display messages:
X Press the =or; button on the steering wheel to select the Service Servicemenu.
If there are display messages, the multifunction display shows 2 messages
2 messages, for example.
X Press the 9or: button to select the entry, e.g. 2 messages
2 messages.
X Press ato confirm.
X Press the 9or: button to scroll through the display messages. Display
messages
265On-board computer and displays Z
Page 291 of 421

Display messages
Possible causes/consequences and
M
MSolutions Blind Spot Assist
Blind Spot Assist
currently unavail‐ currently unavail‐
able See Owner's able See Owner's
Manual Manual Blind Spot Assist is temporarily inoperative.
Possible causes:
R the radar sensor system is temporarily inoperative, e.g. due to
electromagnetic radiation emitted by nearby TV or radio sta-
tions or other sources of electromagnetic radiation
R the radar sensor system is outside the operating temperature
range
The yellow 9indicator lamps also light up in the exterior mir-
rors.
Once the causes listed above no longer apply, the display message goes out.
Blind Spot Assist is operational again.
If the display message does not disappear:
X Pull over and stop the vehicle safely as soon as possible, paying
attention to road and traffic conditions.
X Safeguard the vehicle against rolling away (Y page 192).
X Restart the engine. Active Blind Spot Active Blind Spot
Assist not availa‐ Assist not availa‐
ble when towing a ble when towing a
trailer See Own‐ trailer See Own‐
er's Manual er's Manual
. Blind Spot Assist is deactivated while towing a trailer.
You have established the electrical connection between the trailer
and your vehicle.
X Press aon the steering wheel to confirm the display mes-
sage. Blind Spot Assist Blind Spot Assist
inoperative inoperative Blind Spot Assist is faulty.
The yellow
9indicator lamps also light up in the exterior mir-
rors.
X Consult a qualified specialist workshop. Park Park
Assist
Assist cancel‐
cancel‐
led
led The driver's door is open and the driver's seat belt has not been
fastened.
X Repeat the parking process with the seat belt fastened and the
driver's door closed. You inadvertently touched the multifunction steering wheel while
steering intervention was active.
X While steering intervention is active, make sure not to touch the
multifunction steering wheel. The vehicle has started to skid and ESP
®
has intervened.
X Use Active Parking Assist again later (Y page 220).288
Display
messagesOn-board computer and displays
Page 295 of 421

Tyres
Display messages
Possible causes/consequences and
M
MSolutions Tyre pressure
Tyre pressure
Check tyre(s) Check tyre(s) The tyre pressure loss warning system has detected a significant
loss in pressure.
A warning tone also sounds.
Possible causes:
R you have changed the positions of the wheels and tyres or fitted
new wheels and tyres
R the tyre pressure in one or more tyres has dropped
G WARNING
Underinflated tyres pose the following risks:
R the tyres may burst, especially as the load and vehicle speed
increase
R the tyres may wear excessively and/or unevenly, which may
greatly impair tyre traction
R the driving characteristics, as well as steering and braking, may
be greatly impaired
There is a risk of an accident.
X Stop the vehicle without making any sudden steering or braking
manoeuvres. Pay attention to the traffic conditions as you do so.
X Safeguard the vehicle against rolling away (Y page 192).
X Check the tyres and, if necessary, follow the instructions for a
flat tyre (Y page 352).
X Check the tyre pressures and, if necessary, correct the tyre
pressure.
X Restart the tyre pressure loss warning system when the tyre
pressure is correct (Y page 376).Check tyre pres‐ Check tyre pres‐
sures sures
then
thenrestart
restart
Run Flat Indicator
Run Flat Indicator The tyre pressure loss warning system generated a display mes-
sage and has not been restarted since.
X Set the correct tyre pressure in all four tyres.
X Restart the tyre pressure loss warning system (Y page 376).Run Run
Flat
Flat Indicator
Indicator
inoperative
inoperative The tyre pressure loss warning system is faulty.
X Consult a qualified specialist workshop. Rectify tyre pres‐
Rectify tyre pres‐
sure sure The tyre pressure is too low in at least one of the tyres, or the tyre
pressure difference between the wheels is too great.
X Check the tyre pressures at the next opportunity (Y page 376).
X If necessary, correct the tyre pressure.
X Restart the tyre pressure monitor (Y page 378).292
Display
messagesOn-board computer and displays
Page 296 of 421
Display messages
Possible causes/consequences and
M
MSolutions Check tyre(s)
Check tyre(s) The tyre pressure in one or more tyres has dropped significantly.
The wheel position appears in the multifunction display.
A warning tone also sounds.
G WARNING
Underinflated tyres pose the following risks:
R the tyres may burst, especially as the load and vehicle speed
increase
R the tyres may wear excessively and/or unevenly, which may
greatly impair tyre traction
R the driving characteristics, as well as steering and braking, may
be greatly impaired
There is a risk of an accident.
X Stop the vehicle without making any sudden steering or braking
manoeuvres. Pay attention to the traffic conditions as you do so.
X Safeguard the vehicle against rolling away (Y page 192).
X Check the tyres and, if necessary, follow the instructions for a
flat tyre (Y page 352).
X Check the tyre pressure (Y page 376).
X If necessary, correct the tyre pressure. Warning Warning
tyre
tyredefect
defect The tyre pressure in one or more tyres has dropped suddenly. The
wheel position appears in the multifunction display.
G WARNING
If you drive with a flat tyre, there is a risk of the following hazards:
R a flat tyre affects the ability to steer or brake the vehicle
R you could lose control of the vehicle
R continued driving with a flat tyre will cause excessive heat build-
up and possibly a fire
There is a risk of an accident.
X Stop the vehicle without making any sudden steering or braking
manoeuvres. Pay attention to the traffic conditions as you do so.
X Safeguard the vehicle against rolling away (Y page 192).
X Check the tyres and, if necessary, follow the instructions for a
flat tyre (Y page 352). Display
messages
293On-board computer and displays Z
Page 302 of 421
Display messages
Possible causes/consequences and
M
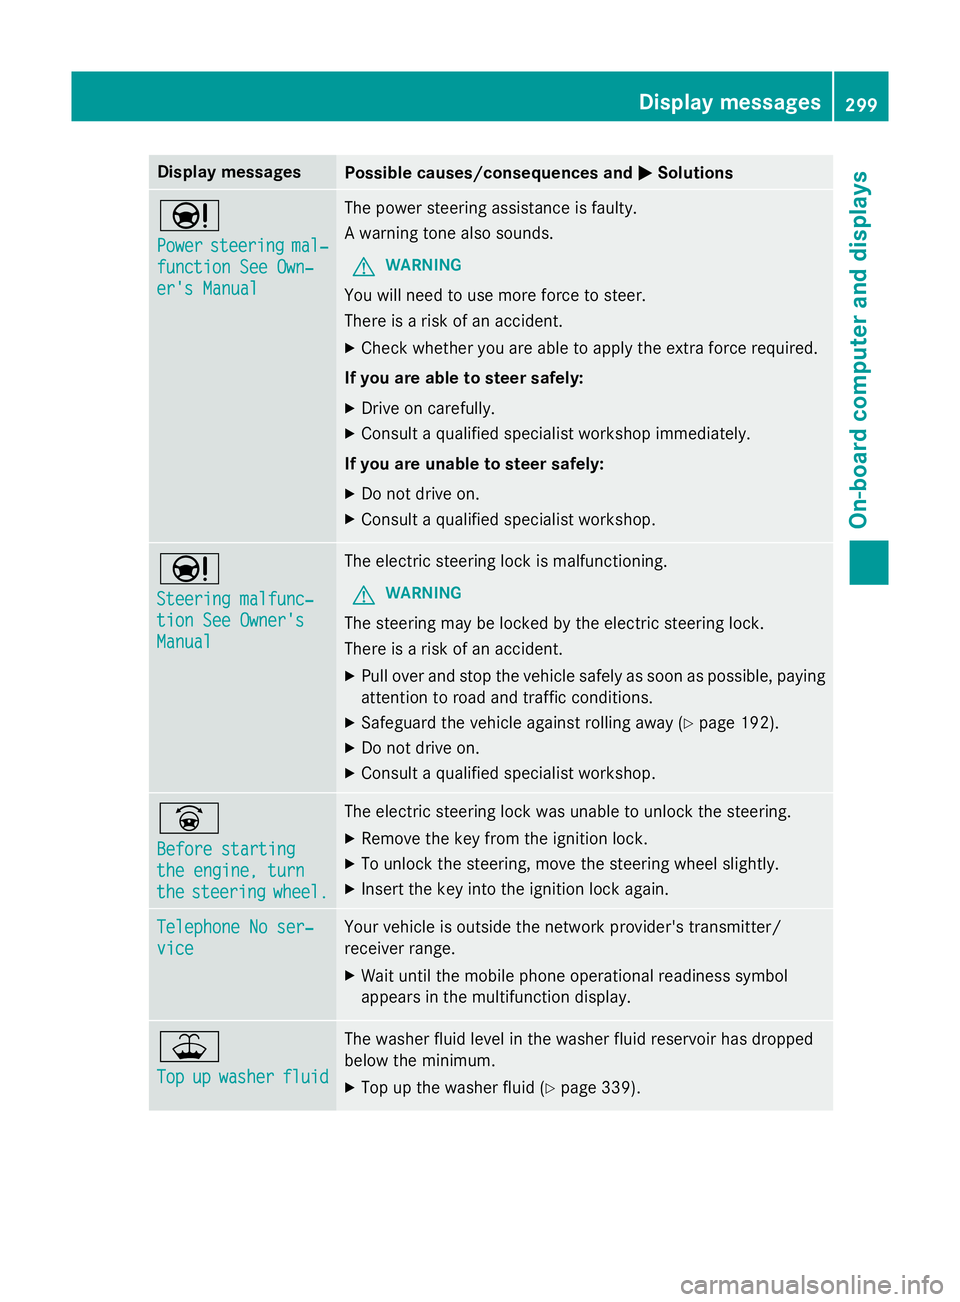
MSolutions Ð
Power Power
steering
steering mal‐
mal‐
function See Own‐
function See Own‐
er's Manual er's Manual The power steering assistance is faulty.
A warning tone also sounds.
G WARNING
You will need to use more force to steer.
There is a risk of an accident. X Check whether you are able to apply the extra force required.
If you are able to steer safely: X Drive on carefully.
X Consult a qualified specialist workshop immediately.
If you are unable to steer safely:
X Do not drive on.
X Consult a qualified specialist workshop. Ð
Steering malfunc‐ Steering malfunc‐
tion See Owner's tion See Owner's
Manual Manual The electric steering lock is malfunctioning.
G WARNING
The steering may be locked by the electric steering lock.
There is a risk of an accident. X Pull over and stop the vehicle safely as soon as possible, paying
attention to road and traffic conditions.
X Safeguard the vehicle against rolling away (Y page 192).
X Do not drive on.
X Consult a qualified specialist workshop. _
Before starting Before starting
the engine, turn the engine, turn
the the
steering
steering wheel.
wheel. The electric steering lock was unable to unlock the steering.
X Remove the key from the ignition lock.
X To unlock the steering, move the steering wheel slightly.
X Insert the key into the ignition lock again. Telephone No ser‐
Telephone No ser‐
vice vice Your vehicle is outside the network provider's transmitter/
receiver range.
X Wait until the mobile phone operational readiness symbol
appears in the multifunction display. ¥
Top Top
up
upwasher
washer fluid
fluid The washer fluid level in the washer fluid reservoir has dropped
below the minimum.
X Top up the washer fluid (Y page 339). Display
messages
299On-board computer and displays Z
Page 333 of 421
You must observe the legal requirements for
the country in which you are currently driving when operating mobile communications
equipment in the vehicle.
If it is permitted by law to operate communi-
cations equipment while the vehicle is in
motion, you may only do so if the traffic sit-
uation permits. You may otherwise be dis-
tracted from the traffic conditions, cause an
accident and injure yourself and others.
Excessive levels of electromagnetic radiation
may cause damage to your health and to the
health of others. The use of an exterior aerial
takes into consideration the scientific discus- sion surrounding the possible health risk
posed by electromagnetic fields.
Mercedes-Benz recommends the use of an
approved exterior aerial. This ensures:
R optimal mobile phone reception quality in
the vehicle
R that mutual interference between the vehi-
cle electronics and mobile phones is mini-
mised
An exterior aerial has the following advan-
tages:
R it conducts the electromagnetic fields gen-
erated by a wireless device to the exterior
R the field strength in the vehicle interior is
lower than in a vehicle that does not have
an exterior aerial
Information on retrofitting two-way radios
and mobile phones (RF transmitters)
(Y page 400).
General notes There are various mobile phone brackets that
may be fitted in your vehicle; in some cases,
these are country-specific. More information on suitable mobile phones,
mobile phone brackets and on connecting
Bluetooth ®
-capable mobile phones to
COMAND Online/Audio 20 can be obtained:
R at your Mercedes-Benz Service Centre
R on the Internet at http://www.mercedes-
benz.com/connect
The functions and services available when
you use the phone depend on your mobile
phone model and service provider.
Using a mobile phone To connect a mobile phone to the exterior
aerial and charge it, insert it into the mobile
phone bracket.
X Open the telephone compartment
(Y page 318).
X Place the mobile phone bracket into the
pre-installed fitting; see the separate instal-
lation instructions for the mobile phone fit-
ting.
X Insert the mobile phone into the mobile
phone bracket; see the separate installa-
tion instructions for the mobile phone fit-
ting.
i The mobile phone can also be operated
without being in the bracket. However, the charging function and aerial function are
not available.
In order to use Bluetooth ®
(SAP profile) on
your telephone module, you must first insert
the telephone module into the pre-installed
fitting. This connects it to the exterior aerial.
If you wish to charge the mobile phone, then
you must connect it to a USB port.
Further information on the telephone module
with Bluetooth ®
(SAP profile) can be found in
the Digital Owner's Manual.
Operating the mobile phone You can operate the telephone using the
6 and~ buttons on the multifunction
steering wheel. You can operate other mobile 330
FeaturesStowing and features
Page 349 of 421
carried out by a qualified specialist work-
shop. Interior care
Cleaning the display !
For cleaning, do not use any of the fol-
lowing:
R alcohol-based thinner or petrol
R abrasive cleaning agents
R commercially-available household clean-
ing agents
These may damage the display surface. Do not put pressure on the display surface
when cleaning. This could lead to irrepara-
ble damage to the display.
X Before cleaning the display, make sure that
it is switched off and has cooled down.
X Clean the display surface using a commer-
cially available microfibre cloth and
TFT/LCD display cleaner.
X Dry the display surface using a dry micro-
fibre cloth.
Cleaning the plastic trim G
WARNING
Care products and cleaning agents containing solvents can cause surfaces in the cockpit to
become porous. This could result in plastic
parts breaking away when the airbags are
deployed. There is a danger of injury.
Do not use care products and cleaning agents containing solvents to clean the cockpit.
! Do not affix the following to plastic surfa-
ces:
R stickers
R films
R scented oil bottles or similar items
You could otherwise damage the plastic.
! Do not allow cosmetics, insect repellent
or sunscreen to come in contact with the plastic trim. This maintains the high-quality
look of the surfaces.
X Wipe the plastic trim with a damp, lint-free
cloth, e.g. a microfibre cloth.
X Heavy soiling: use car care and cleaning
products recommended and approved by
Mercedes-Benz.
The surface may change colour tempora-
rily. Wait until the surface is dry again.
Cleaning the steering wheel and gear or selector lever X
Thoroughly wipe with a damp cloth or use
leather care agents that have been recom-
mended and approved by Mercedes-Benz.
Cleaning wooden trim and trim ele-
ments !
Do not use solvent-based cleaning agents
such as tar remover, wheel cleaners, pol-
ishes or waxes. There is otherwise a risk of damaging the surface.
X Wipe the wooden trim and trim elements
with a damp, lint-free cloth, e.g. a microfi-
bre cloth.
X Heavy soiling: use car care and cleaning
products recommended and approved by
Mercedes-Benz.
Cleaning the seat covers General notes
! Do not use a microfibre cloth to clean
covers made out of real leather, artificial
leather or DINAMICA. If used frequently,
this can damage the cover.
Note that regular care is essential to make
sure that the appearance and comfort of the
covers are retained over time. 346
CareMaintenance and care