2015 MERCEDES-BENZ CLA-Class park assist
[x] Cancel search: park assistPage 119 of 362

Do not use a bulb that has been dropped or if
its glass tube has been scratched.
The bulb may explode if:
R you touch it
R it is hot
R you drop it
R you scratch it
Only operate bulbs in enclosed lamps
designed for that purpose. Only install spare
bulbs of the same type and the specified volt- age.
Marks on the glass tube reduce the service
life of the bulbs. Do not touch the glass tube
with your bare hands. If necessary, clean the
glass tube when cold with alcohol or spirit and
rub it off with a lint-free cloth.
Protect bulbs from moisture during opera-
tion. Do not allow bulbs to come into contact
with liquids.
There are bulbs other than the Xenon bulbs
that you cannot replace. Replace only the
bulbs listed (Y page 117). Have the bulbs that
you cannot replace yourself changed at a
qualified specialist workshop.
If you require assistance changing bulbs, con-
sult a qualified specialist workshop.
If the new bulb still does not light up, consult
a qualified specialist workshop.
Bulbs and lamps are an important aspect of
vehicle safety. You must therefore make sure that these function correctly at all times.
Have the headlamp setting checked regularly. Overview: changing bulbs/bulb types
You can change the following bulbs. The bulb
type can be found in the legend. Vehicles with halogen headlamps
:
Turn signal lamp: PY 21 W
; Low-beam headlamp/daytime running
lamp/parking lamp/standing lamp:
H15 55 W/15 W
= Low-beam headlamp: H7 55 W Vehicles with Bi-Xenon headlamps
:
Cornering lamp: H7 55 W Tail lamps (vehicles with halogen headlamps)
: Rear fog lamp: P 21 W
; Brake lamp: W 16 W
= Brake lamp: W 16 W
? Turn signal lamp: PY 21 W
A Backup lamp: W 16 W Replacing bulbs
117Lights andwindshield wipers Z
Page 147 of 362
Hill start assist
Hill start assist helps you when pulling away
forwards or in reverse on an uphill gradient. It
holds the vehicle for a short time after you
have removed your foot from the brake pedal.
This gives you enough time to move your foot from the brake pedal to the accelerator pedal and to depress it before the vehicle begins to
roll. G
WARNING
After a short time, hill start assist will no lon-
ger brake your vehicle and it could roll away.
There is a risk of an accident and injury.
Therefore, quickly move your foot from the
brake pedal to the accelerator pedal. Never
leave the vehicle when it is held by hill start
assist.
Hill start assist is not active if: R you are pulling away on a level road or on a
downhill gradient.
R the transmission is in position N.
R the electric parking brake is applied.
R ESP ®
is malfunctioning.
Further information on holding the vehicle
stationary on uphill gradients (Y page 153).ECO start/stop function
Introduction The ECO start/stop function switches the
engine off automatically if the vehicle is stop- ped under certain conditions.
The engine starts automatically when the
driver wants to pull away again. The ECO
start/stop function thereby helps you to
reduce the fuel consumption and emissions
of your vehicle.
Important safety notes G
WARNING
If the engine is switched off automatically and you exit the vehicle, the engine is restarted automatically. The vehicle may begin moving.
There is a risk of accident and injury.
If you wish to exit the vehicle, always turn off
the ignition and secure the vehicle against
rolling away.
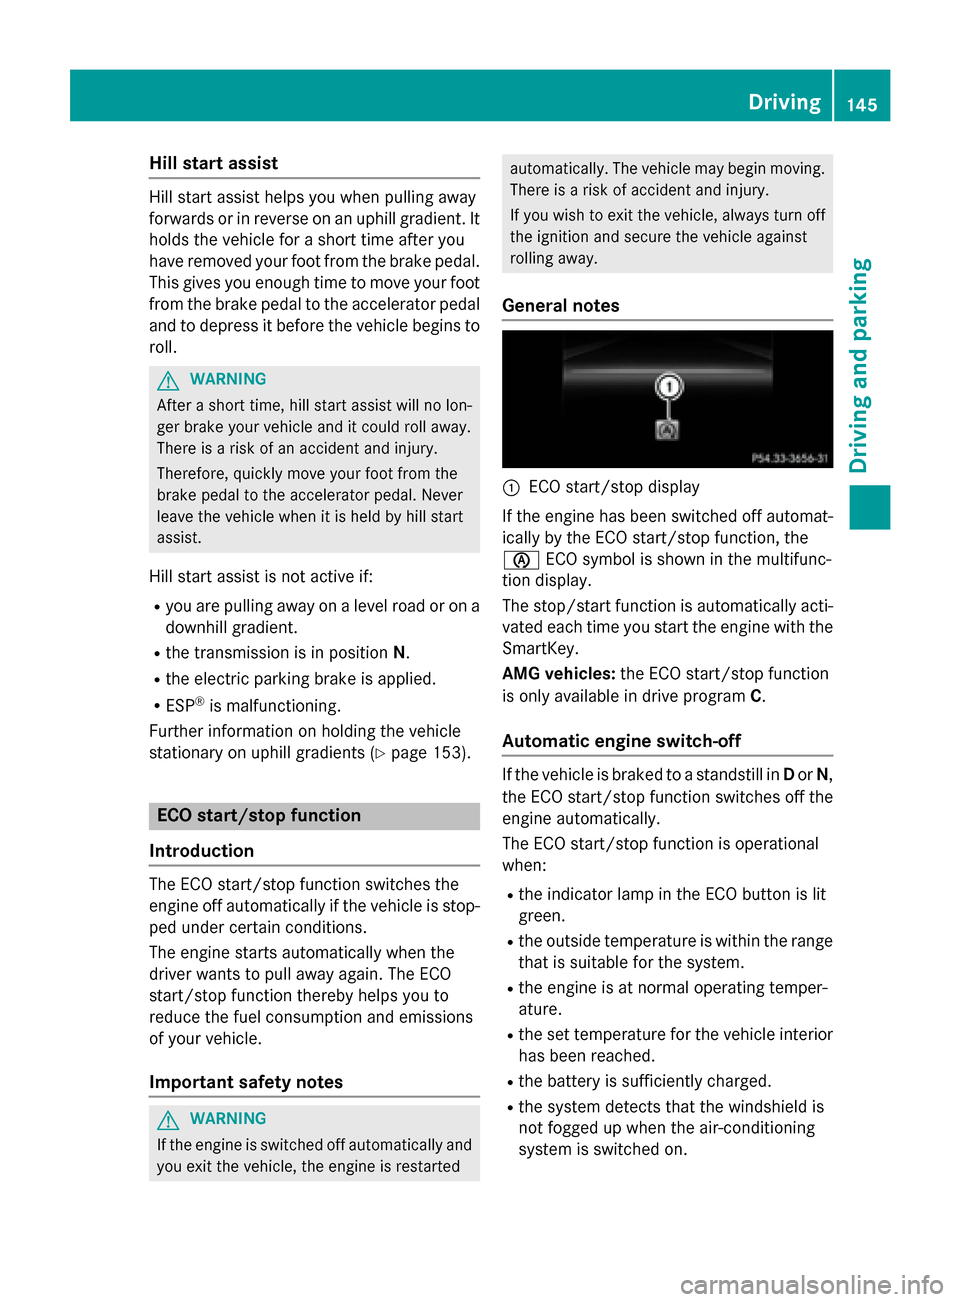
General notes :
ECO start/stop display
If the engine has been switched off automat-
ically by the ECO start/stop function, the
è ECO symbol is shown in the multifunc-
tion display.
The stop/start function is automatically acti- vated each time you start the engine with the
SmartKey.
AMG vehicles: the ECO start/stop function
is only available in drive program C.
Automatic engine switch-off If the vehicle is braked to a standstill in
Dor N,
the ECO start/stop function switches off the engine automatically.
The ECO start/stop function is operational
when:
R the indicator lamp in the ECO button is lit
green.
R the outside temperature is within the range
that is suitable for the system.
R the engine is at normal operating temper-
ature.
R the set temperature for the vehicle interior
has been reached.
R the battery is sufficiently charged.
R the system detects that the windshield is
not fogged up when the air-conditioning
system is switched on. Driving
145Driving and parking Z
Page 158 of 362

Upshifting
X
Pull the right-hand steering wheel paddle
shifter (Y page 154).
The automatic transmission shifts up to the
next gear.
All vehicles (except AMG vehicles): in
order to prevent engine damage the auto-
matic transmission automatically shifts up:
R if the maximum engine speed on the cur-
rently engaged gear is reached and
R you continue to accelerate.
AMG vehicles:
! In manual drive program
M, the automatic
transmission does not shift up automati-
cally even when the engine limiting speed
for the current gear is reached. When the
engine limiting speed is reached, the fuel
supply is cut to prevent the engine from
overrevving. Always make sure that the
engine speed does not reach the red area of
the tachometer. There is otherwise a risk of
engine damage.
Shift recommendation The gearshift recommendations assist you in
adopting an economical driving style. The rec- ommended gear is shown in the multifunctiondisplay.
X Shift to recommended gear ;according
to gearshift recommendation :when
shown in the multifunction display of the
instrument cluster.
AMG vehicles !
In manual drive program
M, the automatic
transmission does not shift up automati-
cally even when the engine limiting speed for the current gear is reached. When the
engine limiting speed is reached, the fuel
supply is cut to prevent the engine from
overrevving. Always make sure that the
engine speed does not reach the red area of
the tachometer. There is otherwise a risk of
engine damage. :
Gear indicator
; Upshift indicator
Before the engine speed reaches the red area, an upshift indicator will be shown in the mul-
tifunction display.
X If the color in the speedometer multifunc-
tion display changes to red and the UP UPdis-
play message is shown, shift up a gear.
Downshifting X
Pull the left-hand steering wheel paddle
shifter (Y page 154).
The automatic transmission shifts down to
the next gear.
If you slow down or stop without shifting
down, the automatic transmission automati-
cally shifts down.
For maximum acceleration, pull the left-hand
steering wheel paddle shifter until the trans-
mission selects the optimum gear for the cur- rent speed.
If the engine exceeds the maximum engine
speed when shifting down, the automatic
transmission protects against engine damage
by not shifting down. 156
Automatic transmissionDriving and parking
Page 160 of 362
Problems with the transmission
Problem
Possible causes/consequences and
M
MSolutions The transmission has
problems shifting gear. The transmission is losing oil.
X Have the transmission checked at a qualified specialist work-
shop immediately. The acceleration ability
is deteriorating.
The transmission no
longer shifts into all of
the gears.
Reverse gear can no
longer be engaged. The transmission is in emergency mode.
X Stop the vehicle.
X Shift the transmission to position P.
X Switch off the engine.
X Wait at least ten seconds before restarting the engine.
X Shift the transmission to position D.
X Have the transmission checked at a qualified specialist work-
shop immediately. Refueling
Important safety notes
G
WARNING
Fuel is highly flammable. If you handle fuel
incorrectly, there is a risk of fire and explo-
sion.
You must avoid fire, open flames, creating
sparks and smoking. Switch off the engine
and, if applicable, the auxiliary heating before refueling. G
WARNING
Fuel is poisonous and hazardous to health.
There is a risk of injury.
You must make sure that fuel does not come into contact with your skin, eyes or clothing
and that it is not swallowed. Do not inhale fuel
vapors. Keep fuel away from children.
If you or others come into contact with fuel,
observe the following:
R Wash away fuel from skin immediately
using soap and water.
R If fuel comes into contact with your eyes,
immediately rinse them thoroughly with clean water. Seek medical assistance with-
out delay.
R If fuel is swallowed, seek medical assis-
tance without delay. Do not induce vomit-
ing.
R Immediately change out of clothing which
has come into contact with fuel. G
WARNING
Electrostatic buildup can create sparks and
ignite fuel vapors. There is a risk of fire and
explosion.
Always touch the vehicle body before opening the fuel filler flap or touching the fuel pump
nozzle. Any existing electrostatic buildup is
thereby discharged.
! Do not use diesel to refuel vehicles with a
gasoline engine. Do not switch on the igni- tion if you accidentally refuel with the
wrong fuel. Otherwise, the fuel will enter
the fuel system. Even small amounts of the
wrong fuel could result in damage to the
fuel system and the engine. Notify a quali-
fied specialist workshop and have the fuel
tank and fuel lines drained completely. 158
RefuelingDriving and parking
Page 165 of 362

The electric parking brake is also engaged
automatically if:
R DISTRONIC PLUS brings the vehicle to a
standstill or
R the HOLD function is keeping the vehicle
stationary
R Active Parking Assist is keeping the vehicle
stationary
In addition, at least one of the following con-
ditions must be fulfilled:
R there is a system malfunction.
R the power supply is insufficient.
R the vehicle is stationary for a lengthy
period.
The red F(USA only) or !(Canada
only) indicator lamp in the instrument cluster goes out.
The electric parking brake is not automati-
cally engaged if the engine is switched off by
the ECO start/stop function.
Releasing automatically Your vehicle's electric parking brake is auto-
matically released if all of the following con-
ditions are met:
R the engine is running.
R the transmission is in position Dor R.
R the seat belt has been fastened.
R you depress the accelerator pedal.
If the transmission is in position R, the trunk
lid must be closed.
If your seat belt is not fastened, the following conditions must be fulfilled to automatically
release the electric parking brake:
R the driver's door is closed.
R you have shifted out of transmission posi-
tion Por you have previously driven faster
than 2 mph (3 km/h).
Ensure that you do not depress the acceler-
ator pedal unintentionally. Otherwise the
parking brake will be released and the vehicle will start to move. Emergency braking The vehicle can also be braked during an
emergency by using the electric parking
brake.
X While driving, push handle :of the electric
parking brake (Y page 162).
The vehicle is braked as long as you keep
handle :of the electric parking brake
pressed. The longer the electric parking
brake handle :is depressed, the greater
the braking force.
During braking:
R a warning tone sounds
R the Release park. brake
Release park. brake message
appears
R the red F(USA only) or !(Canada
only) indicator lamp in the instrument clus- ter flashes
When the vehicle has been braked to a stand- still, the electric parking brake is engaged. Parking the vehicle for a long period
If you leave the vehicle parked for longer than
four weeks, the battery may be damaged by
exhaustive discharging.
If you leave the vehicle parked for longer than
six weeks, the vehicle may suffer damage as a result of lack of use.
X Visit a qualified specialist workshop and
seek advice.
i You can obtain information about trickle
chargers from a qualified specialist work-
shop. Driving tips
General notes
Important safety notes G
WARNING
If you switch off the ignition while driving,
safety-relevant functions are only available Driving tips
163Driving and parking
Z
Page 167 of 362

ECO display
The ECO display provides feedback on how
economical your driving characteristics are.
The ECO display assists you in achieving the
most economical driving style for the selec-
ted settings and prevailing conditions. Your
driving style can significantly influence the
vehicle's consumption.
The ECO display consists of three bars:
R Acceleration
Acceleration
R Constant Constant
R Coasting
Coasting
The percent value is the average value of the three bars. The three bars and the mean value
begin at the value of 50%. A higher percent-
age indicates a more economical driving
style.
The ECO display does not indicate the actual fuel consumption. A fixed percentage count
in the ECO display does not indicate a fixed
consumption.
Apart from driving style, consumption is
dependent on many factors such as, e.g.:
R load
R tire pressure
R cold start
R choice of route
R electrical consumers switched on
These factors are not included in the ECO dis-
play.
The evaluation of your driving style is carried
out using the following three categories: R
Acceleration
Acceleration (evaluation of all accelera-
tion processes):
- The bar fills up: moderate acceleration,
especially at higher speeds
- The bar empties: sporty acceleration
R Constant
Constant (assessment of driving behavior
at all times)
- The bar fills up: constant speed and
avoidance of unnecessary acceleration
and deceleration
- The bar empties: fluctuations in speed
R Coasting Coasting (assessment of all deceleration
processes)
- The bar fills up: anticipatory driving,
keeping your distance and early release
of the accelerator. The vehicle can coast without use of the brakes.
- The bar empties: frequent braking
An economical driving style specially requires driving at moderate engine speeds.
To achieve a higher value in the categories
Acceleration Acceleration andConstant Constant:
R observe the gearshift recommendations.
R drive in drive program E.
On long journeys at a constant speed, e.g. on
the highway, only the bar for Constant
Constantwill
change.
The ECO display summarizes the driving char- acteristics from the start of the journey to its completion. For this reason, the bars change
dynamically at the beginning of the journey.
On longer journeys, there are fewer changes. For more dynamic changes, carry out a man- ual reset.
For further information on the ECO display,
see (Y page 204). Braking
Important safety notes G
WARNING
If you shift down on a slippery road surface in an attempt to increase the engine's braking Driving tips
165Driving and parking
Z
Page 169 of 362

Have the brake system checked immedi-
ately. This work should be carried out at a
qualified specialist workshop.
! A function or performance test should
only be carried out on a 2-axle dynamom-
eter. If you are planning to have the vehicle tested on such a dynamometer, contact an
authorized Mercedes-Benz Center to
obtain further information first. Otherwise,
you could damage the drive train or the
brake system.
! As the ESP ®
system operates automati-
cally, the engine and the ignition must be
switched off (the SmartKey must be in posi-
tion 0or 1in the ignition lock) if:
R the electric parking brake is tested on a
brake dynamometer (for a maximum of
ten second s)
R the vehicle is towed with the front axle
raised.
Braking triggered automatically by ESP ®
may seriously damage the brake system.
All checks and maintenance work on the
brake system must be carried out at a quali-
fied specialist workshop. Consult a qualified
specialist workshop to arrange this.
Have brake pads installed and brake fluid
replaced at a qualified specialist workshop.
If the brake system has only been subject to
moderate loads, you should test the function- ality of your brakes at regular intervals.
You can find a description of Brake Assist
(BAS) on (Y page 64).
Mercedes-Benz recommends that you only
have brake pads/linings installed on your
vehicle which have been approved for
Mercedes-Benz vehicles or which correspond to an equivalent quality standard. Brake
pads/linings which have not been approved
for Mercedes-Benz vehicles or which are not
of an equivalent quality could affect your vehi-
cle's operating safety.
Mercedes-Benz recommends that you only
use brake fluid that has been specially
approved for your vehicle by Mercedes-Benz, or which corresponds to an equivalent quality
standard. Brake fluid which has not been
approved for Mercedes-Benz vehicles or
which is not of an equivalent quality could
affect your vehicle's operating safety.
Checking brake lining thickness You can measure the break pad/lining thick-
ness using a test gage. Color-coding (green or
red) on the test gage allows you to determine whether the brake pad/lining thickness is still
sufficient. The test gage is in the vehicle docu-
ment wallet in the glove box. Front wheel Driving
tips
167Driving an d parking Z
Page 175 of 362
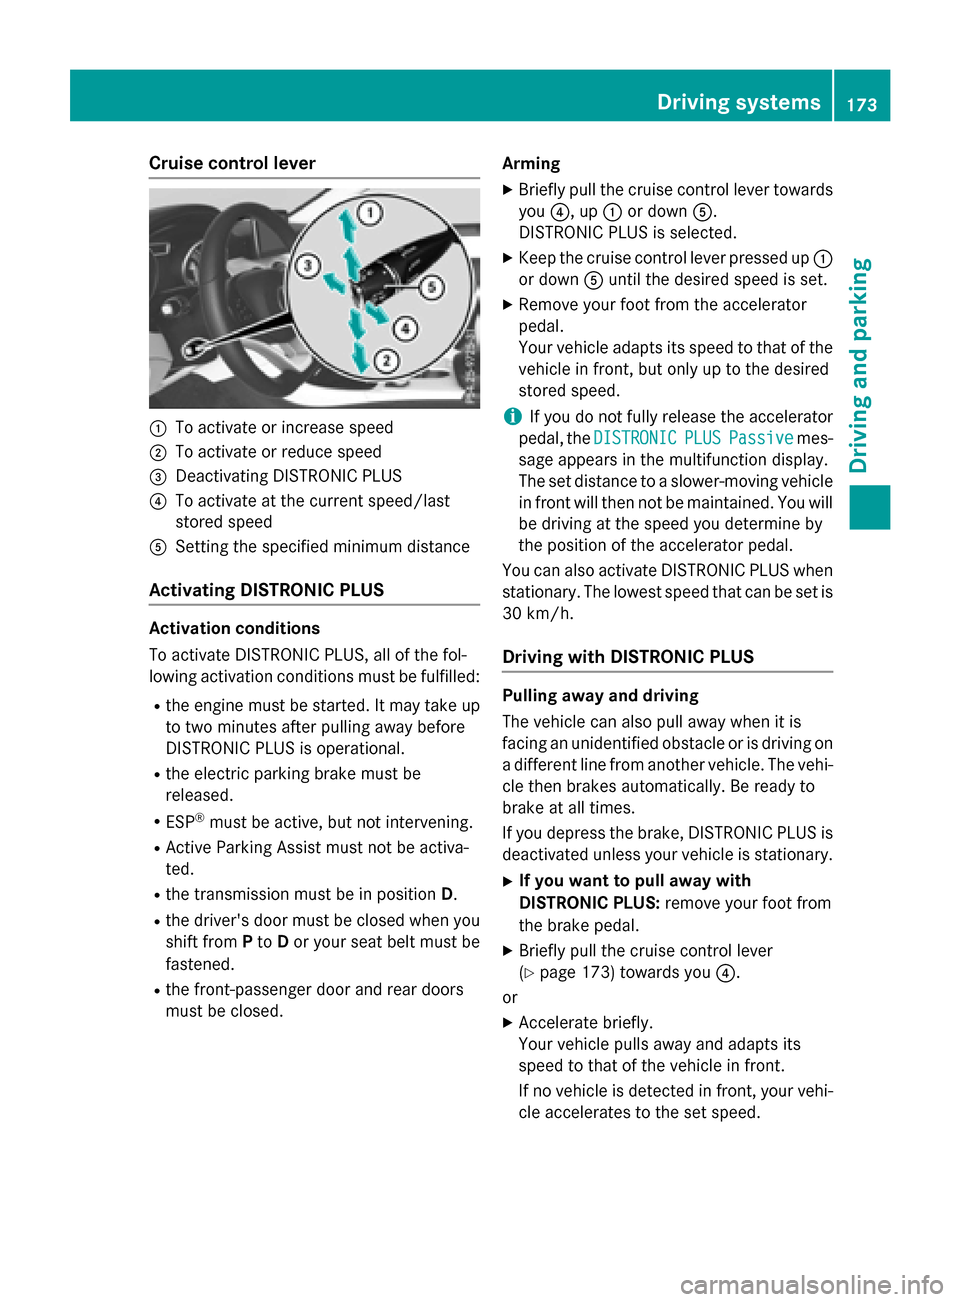
Cruise control lever
:
To activate or increase speed
; To activate or reduce speed
= Deactivating DISTRONIC PLUS
? To activate at the current speed/last
stored speed
A Setting the specified minimum distance
Activating DISTRONIC PLUS Activation conditions
To activate DISTRONIC PLUS, all of the fol-
lowing activation conditions must be fulfilled:
R the engine must be started. It may take up
to two minutes after pulling away before
DISTRONIC PLUS is operational.
R the electric parking brake must be
released.
R ESP ®
must be active, but not intervening.
R Active Parking Assist must not be activa-
ted.
R the transmission must be in position D.
R the driver's door must be closed when you
shift from Pto Dor your seat belt must be
fastened.
R the front-passenger door and rear doors
must be closed. Arming
X Briefly pull the cruise control lever towards
you ?, up :or down A.
DISTRONIC PLUS is selected.
X Keep the cruise control lever pressed up :
or down Auntil the desired speed is set.
X Remove your foot from the accelerator
pedal.
Your vehicle adapts its speed to that of the
vehicle in front, but only up to the desired
stored speed.
i If you do not fully release the accelerator
pedal, the DISTRONIC
DISTRONIC PLUS PLUSPassive
Passive mes-
sage appears in the multifunction display.
The set distance to a slower-moving vehicle in front will then not be maintained. You will
be driving at the speed you determine by
the position of the accelerator pedal.
You can also activate DISTRONIC PLUS when
stationary. The lowest speed that can be set is
30 km/h.
Driving with DISTRONIC PLUS Pulling away and driving
The vehicle can also pull away when it is
facing an unidentified obstacle or is driving on
a different line from another vehicle. The vehi- cle then brakes automatically. Be ready to
brake at all times.
If you depress the brake, DISTRONIC PLUS is
deactivated unless your vehicle is stationary.
X If you want to pull away with
DISTRONIC PLUS: remove your foot from
the brake pedal.
X Briefly pull the cruise control lever
(Y page 173) towards you ?.
or
X Accelerate briefly.
Your vehicle pulls away and adapts its
speed to that of the vehicle in front.
If no vehicle is detected in front, your vehi- cle accelerates to the set speed. Driving systems
173Driving and parking Z