2015 MERCEDES-BENZ B-CLASS SPORTS roof
[x] Cancel search: roofPage 49 of 346
However, it does not protect the chest or
arms.
In the event of a side impact, the window cur-
tain air bag is deployed on the side on which
the impact occurs.
If the system determines that they can offer
additional protection to that provided by the
seat belt, a window curtain air bag may be
deployed in other accident situations( Y page 52).
Occupant Classification System
(OCS)
Introduction
The Occupant Classification System (OCS)
categorizes the person in the front-passenger
seat. Depending on that result, the front-
passenger front air bag is either enabled or
deactivated.
The system does not deactivate: R the side impact air bag
R the window curtain air bag
R the Emergency Tensioning Devices
Prerequisites
To be classified correctly, the front passenger
must sit:
R with the seat belt fastened correctly
R in an almost upright position with their
back against the seat backrest
R with their feet resting on the floor, if possi-
ble
If the front passenger does not observe these
conditions, OCS may produce a false classi-
fication, e.g. because the front passenger:
R transfers their weight by supporting them-
selves on a vehicle armrest
R sits in such a way that their weight is raised
from the seat cushion
If it is absolutely necessary to install a child
restraint system on the front-passenger seat,
be sure to observe the correct positioning of the child restraint system. Never place
objects under or behind the child restraint
system, e.g. cushions. The entire base of the
child restraint system must always rest on the
seat cushion of the front-passenger seat. The
backrest of the forward-facing child restraint system must lie as flat as possible against the
backrest of the front-passenger seat.
The child restraint system must not touch the
roof or be subjected to a load by the head
restraint. Adjust the angle of the seat back-
rest and the head restraint position accord-
ingly.
Only then can OCS be guaranteed to function correctly. Always observe the child restraint
system manufacturer's installation instruc-tions.
Operation of Occupant Classification
System (OCS)
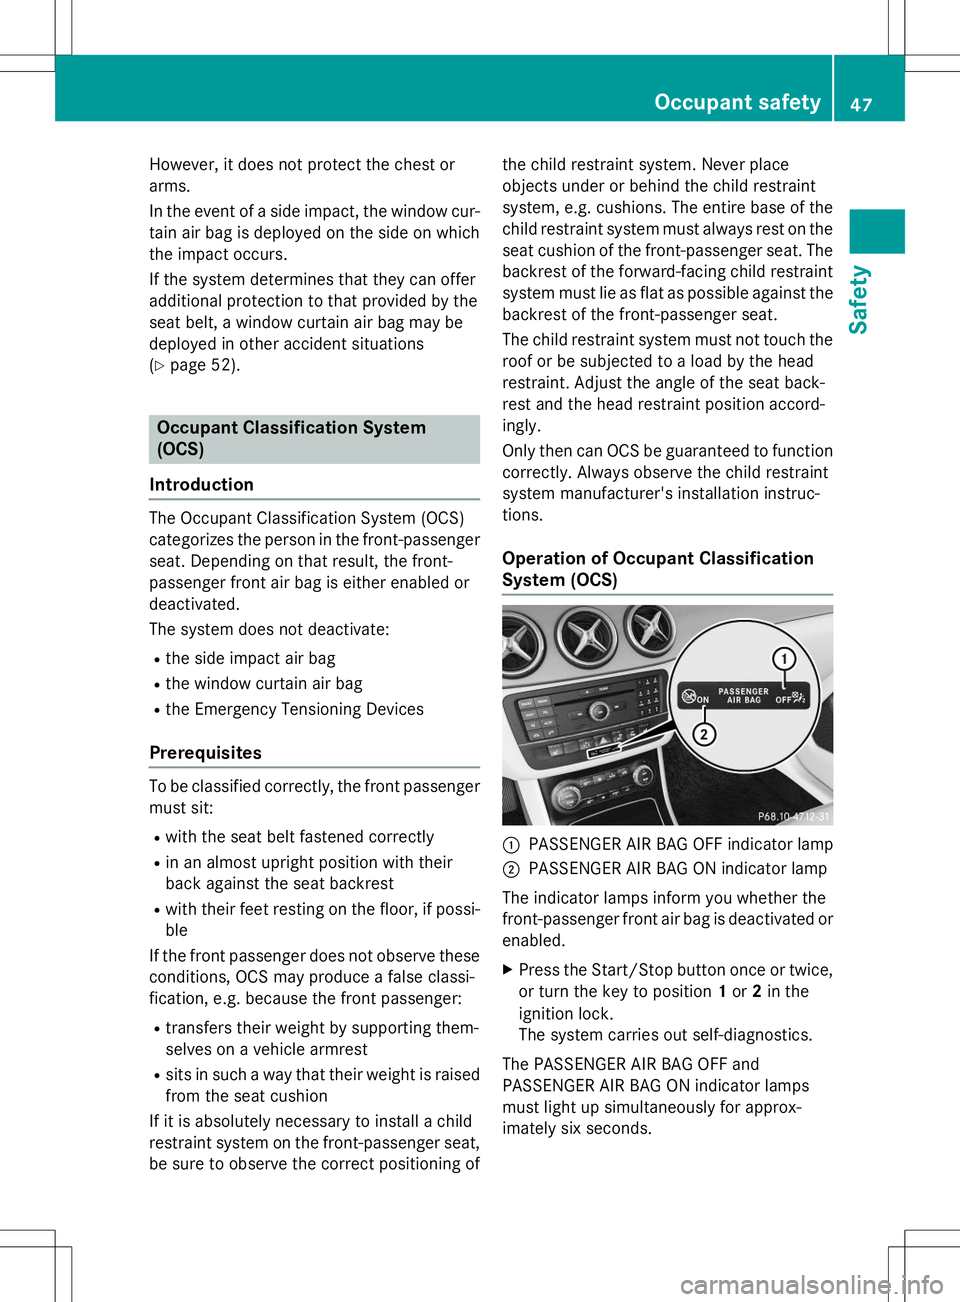
:PASSENGER AIR BAG OFF indicator lamp
;PASSENGER AIR BAG ON indicator lamp
The indicator lamps inform you whether the
front-passenger front air bag is deactivated or
enabled.
X Press the Start/Stop button once or twice,
or turn the key to position 1or 2in the
ignition lock.
The system carries out self-diagnostics.
The PASSENGER AIR BAG OFF and
PASSENGER AIR BAG ON indicator lamps
must light up simultaneously for approx-
imately six second s.
Occupant safety47
Safety
Z
Page 60 of 346
Make sure that:
R Top Tether hook Ais hooked into Top
Tether anchorage ?as shown.
R Top Tether belt Bis not twisted.
R Top Tether belt Bis routed between rear
seat backrest =and cargo compart-
ment cover ;if cargo compartment
cover ;is installed.
R Top Tether belt Bis routed between the
rear seat backrest =and the cargo net if
the cargo net is installed.
X Swing back rear seat backrest =until it
engages.
The red lock verification indicator is no lon- ger visible.
X Install the LATCH-type (ISOFIX) child
restraint system with Top Tether. Always
comply with the child restraint system
manufacturer's installation instructions
when doing so.
X Tension Top Tether belt B. Always comply
with the child restraint system manufactur- er's installation instructions when doing so.
X Move head restraint :back down again
slightly if necessary ( Ypage 95). Make
sure that you do not interfere with the cor-
rect routing of Top Tether belt B.
Child restraint system on the front-
passenger seat
General notes
Accident statistics show that children
secured in the rear seats are safer than chil-
dren secured in the front-passenger seat. For this reason, Mercedes-Benz strongly advises
that you install the child restraint system on a
rear seat.
If it is absolutely necessary to install a child
restraint system on the front-passenger seat,
be sure to observe the instructions and safety
notes on the "Occupant Classification System (OCS)" ( Ypage 47). You can thus avoid the risks that could arise
as a result of:
R an incorrectly categorized person in the
front-passenger seat
R the unintentional deactivation of the front-
passenger front air bag
R the unsuitable positioning of the child
restraint system, e.g. too close to the dash-
board
Rearward-facing child restraint system
If it is absolutely necessary to install a rear-
ward-facing child restraint system on the
front-passenger seat, always make sure that
the front-passenger front air bag is deactiva-
ted. Only if the PASSENGER AIR BAG OFF
indicator lamp is permanently lit ( Ypage 39)
is the front-passenger front air bag deactiva-ted.
Always observe the child restraint system
manufacturer's installation and operating
instructions.
Forward-facing child restraint system
If it is absolutely necessary to install a
forward-facing child restraint system on the
front-passenger seat, always move the front-
passenger seat as far back as possible. The
entire base of the child restraint system must
always rest on the seat cushion of the front-
passenger seat. The backrest of the child
restraint system must lie as flat as possible
against the backrest of the front-passenger
seat. The child restraint system must not
touch the roof or be subjected to a load by the
head restraint. Adjust the angle of the seat
backrest and the head restraint position
accordingly. Always make sure that the shoul- der belt strap is correctly routed from the
vehicle belt outlet to the shoulder belt guide
on the child restraint system. The shoulder
belt strap must be routed forwards and down-wards from the vehicle belt outlet. If neces-
sary, adjust the vehicle belt outlet and the
front-passenger seat accordingly.
58Children in the vehicle
Safety
Page 61 of 346
Always observe the child restraint system
manufacturer's installation and operating
instructions.
Child-proof locks
Important safety notes
GWARNING
If children are traveling in the vehicle, they
could: R open doors, thus endangering other people
or road users
R exit the vehicle and be caught by oncoming
traffic
R operate vehicle equipment and become
trapped
There is a risk of an accident and injury.
Always activate the child-proof locks and
override feature if children are traveling in the vehicle. When leaving the vehicle, always take
the key with you and lock the vehicle. Never
leave children unattended in the vehicle.
Override feature for: R the rear doors ( Ypage 59)
R the rear side windows ( Ypage 60)
GWARNING
If you leave children unsupervised in the vehi-
cle, they could set it in motion by, for example:
R release the parking brake.
R shift the automatic transmission out of the
parking position P.
R start the engine.
In addition, they may operate vehicle equip-
ment and become trapped. There is a risk of
an accident and injury.
When leaving the vehicle, always take the
SmartKey with you and lock the vehicle. Never
leave children unsupervised in the vehicle.
GWARNING
If persons, particularly children are subjected to prolonged exposure to extreme heat or
cold, there is a risk of injury, possibly even
fatal. Never leave children unattended in the
vehicle.
GWARNING
If the child restraint system is subjected to
direct sunlight, parts may get very hot. Chil-
dren may burn themselves on these parts,
particularly on the metal parts of the child
restraint system. There is a risk of injury.
If you leave the vehicle, taking the child with
you, always ensure that the child restraint
system is not exposed to direct sunlight. Pro-tect it with a blanket, for example. If the child
restraint system has been exposed to direct
sunlight, let it cool down before securing the
child in it. Never leave children unattended inthe vehicle.
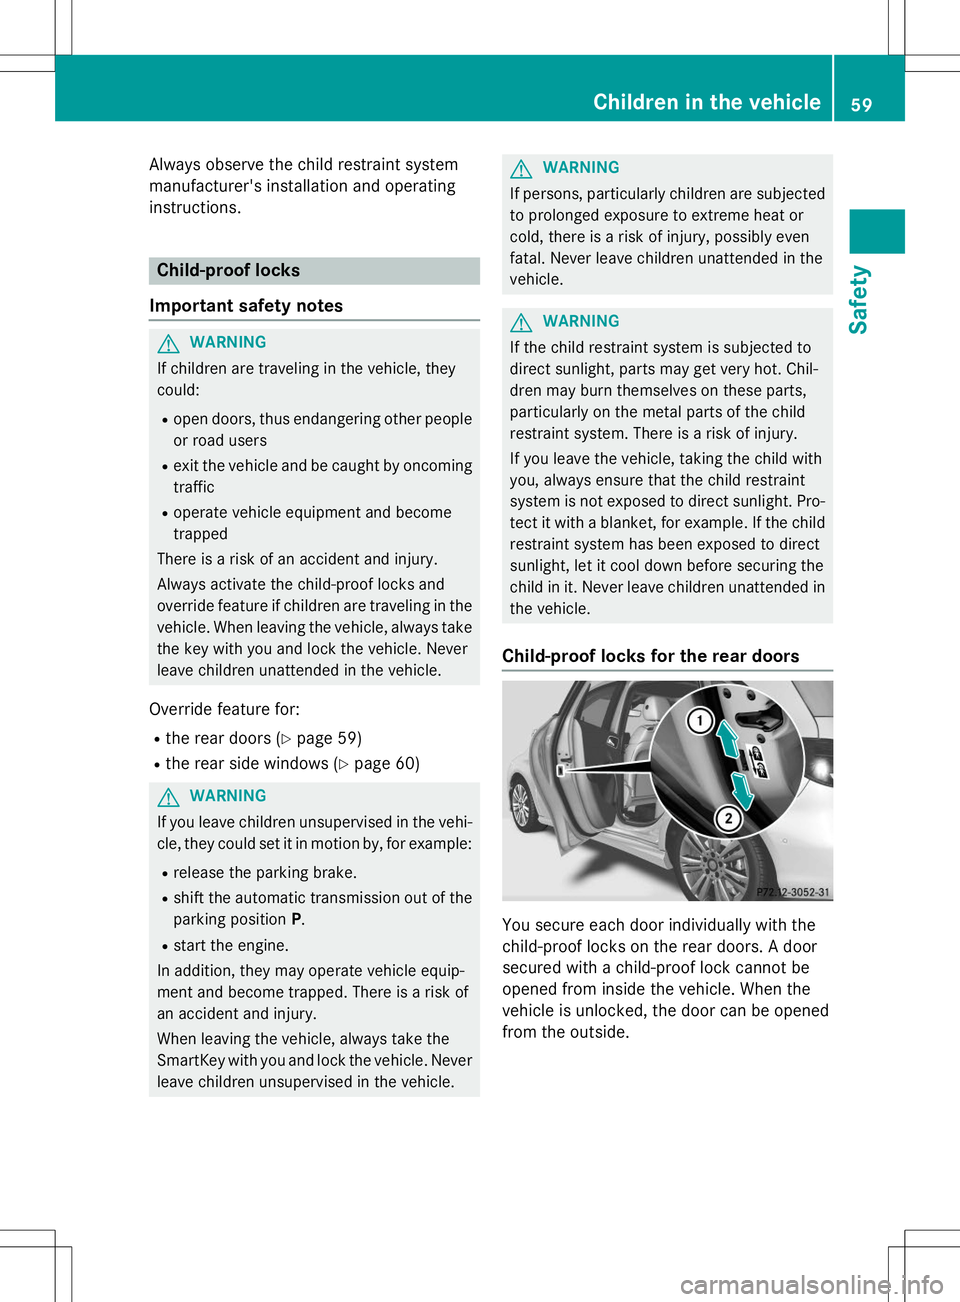
Child-proof locks for the rear doors
You secure each door individually with the
child-proof locks on the rear doors. A door
secured with a child-proof lock cannot be
opened from inside the vehicle. When the
vehicle is unlocked, the door can be opened
from the outside.
Children in the vehicle59
Safety
Z
Page 62 of 346
XTo activate: press the child-proof lock
lever up in the direction of arrow :.
X Make sure that the child-proof locks are
working properly.
X To deactivate: press the child-proof lock
lever down in the direction of arrow ;.
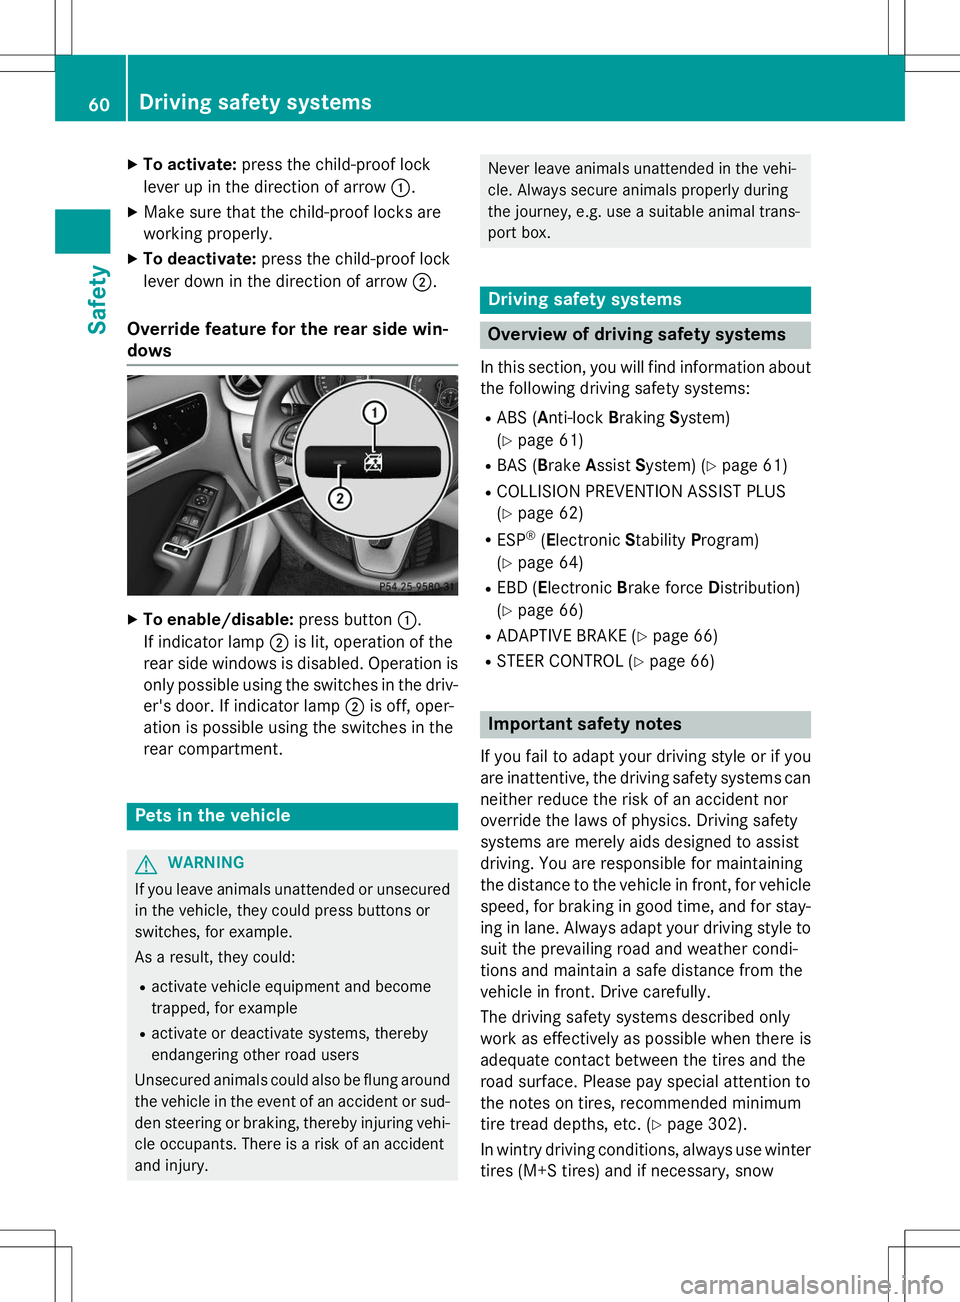
Override feature for the rear side win-
dows
X
To enable/disable: press button:.
If indicator lamp ;is lit, operation of the
rear side windows is disabled. Operation is only possible using the switches in the driv-
er's door. If indicator lamp ;is off, oper-
ation is possible using the switches in the
rear compartment.
Pets in the vehicle
GWARNING
If you leave animals unattended or unsecured in the vehicle, they could press buttons or
switches, for example.
As a result, they could: R activate vehicle equipment and become
trapped, for example
R activate or deactivate systems, thereby
endangering other road users
Unsecured animals could also be flung around
the vehicle in the event of an accident or sud- den steering or braking, thereby injuring vehi-
cle occupants. There is a risk of an accident
and injury.
Never leave animals unattended in the vehi-
cle. Always secure animals properly during
the journey, e.g. use a suitable animal trans-
port box.
Driving safety systems
Overview of driving safety systems
In this section, you will find information about the following driving safety systems:
R ABS ( Anti-lock Braking System)
( Y page 61)
R BAS ( Brake Assist System) ( Ypage 61)
R COLLISION PREVENTION ASSIST PLUS (Y page 62)
R ESP ®
(E lectronic Stability Program)
( Y page 64)
R EBD ( Electronic Brake force Distribution)
( Y page 66)
R ADAPTIVE BRAKE ( Ypage 66)
R STEER CONTROL ( Ypage 66)
Important safety notes
If you fail to adapt your driving style or if you
are inattentive, the driving safety systems can
neither reduce the risk of an accident nor
override the laws of physics. Driving safety
systems are merely aids designed to assist
driving. You are responsible for maintaining
the distance to the vehicle in front, for vehicle
speed, for braking in good time, and for stay- ing in lane. Always adapt your driving style to
suit the prevailing road and weather condi-
tions and maintain a safe distance from the
vehicle in front. Drive carefully.
The driving safety systems described only
work as effectively as possible when there is
adequate contact between the tires and the
road surface. Please pay special attention to
the notes on tires, recommended minimum
tire tread depths, etc. ( Ypage 302).
In wintry driving conditions, always use winter
tires (M+S tires) and if necessary, snow
60Driving safety systems
Safety
Page 71 of 346
Useful information..............................70
SmartKey ............................................. 70
Doors .................................................... 77
Cargo compartment ............................79
Side windows ...................................... 81
Panorama roof with power tilt/
sliding panel ........................................ 85
69
Opening and closing
Page 79 of 346
ProblemPossible causes/consequences andMSolutions
You have lost a Smart- Key.X
Have the SmartKey deactivated at a qualified specialist work- shop.
X Report the loss immediately to the vehicle insurers.
X If necessary, have the locks changed as well.
You have lost the
mechanical key.XReport the loss immediately to the vehicle insurers.
X If necessary, have the locks changed as well.
Doors
Important safety notes
GWARNING
If children are left unsupervised in the vehicle,
they could:
R open the doors, thus endangering other
people or road users.
R get out and disrupt traffic.
R operate the vehicle's equipment.
Additionally, children could set the vehicle in
motion if, for example, they:
R release the parking brake.
R shifting the automatic transmission out of
park position P
R Start the engine.
There is a risk of an accident and injury.
When leaving the vehicle, always take the
SmartKey with you and lock the vehicle. Never
leave children or animals unattended in the
vehicle. Always keep the SmartKey out of
reach of children.
You should preferably place luggage or loads in the cargo compartment. Observe the load-
ing guidelines ( Ypage 248).
Unlocking and opening doors from
the inside
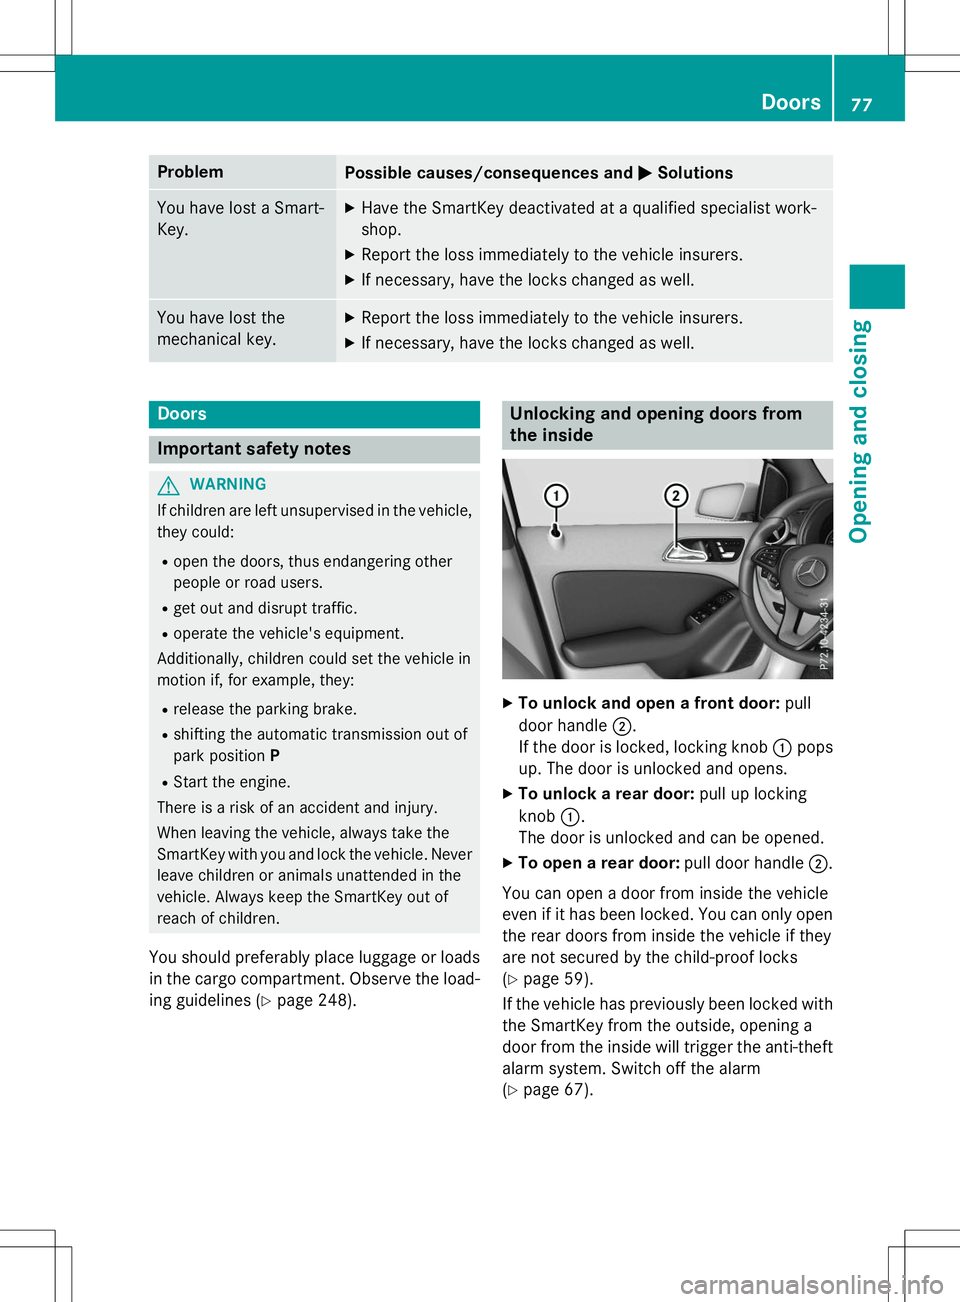
X
To unlock and open a front door: pull
door handle ;.
If the door is locked, locking knob :pops
up. The door is unlocked and opens.
X To unlock a rear door: pull up locking
knob :.
The door is unlocked and can be opened.
X To open a rear door: pull door handle;.
You can open a door from inside the vehicle
even if it has been locked. You can only open the rear doors from inside the vehicle if they
are not secured by the child-proof locks( Y page 59).
If the vehicle has previously been locked with
the SmartKey from the outside, opening a
door from the inside will trigger the anti-theft alarm system. Switch off the alarm( Y page 67).
Doors77
Opening and closing
Z
Page 80 of 346
Centrally locking and unlocking the
vehicle from the inside
You can centrally lock or unlock the vehicle
from the inside. This can be useful if you wish
to lock the vehicle before pulling away, for
example.
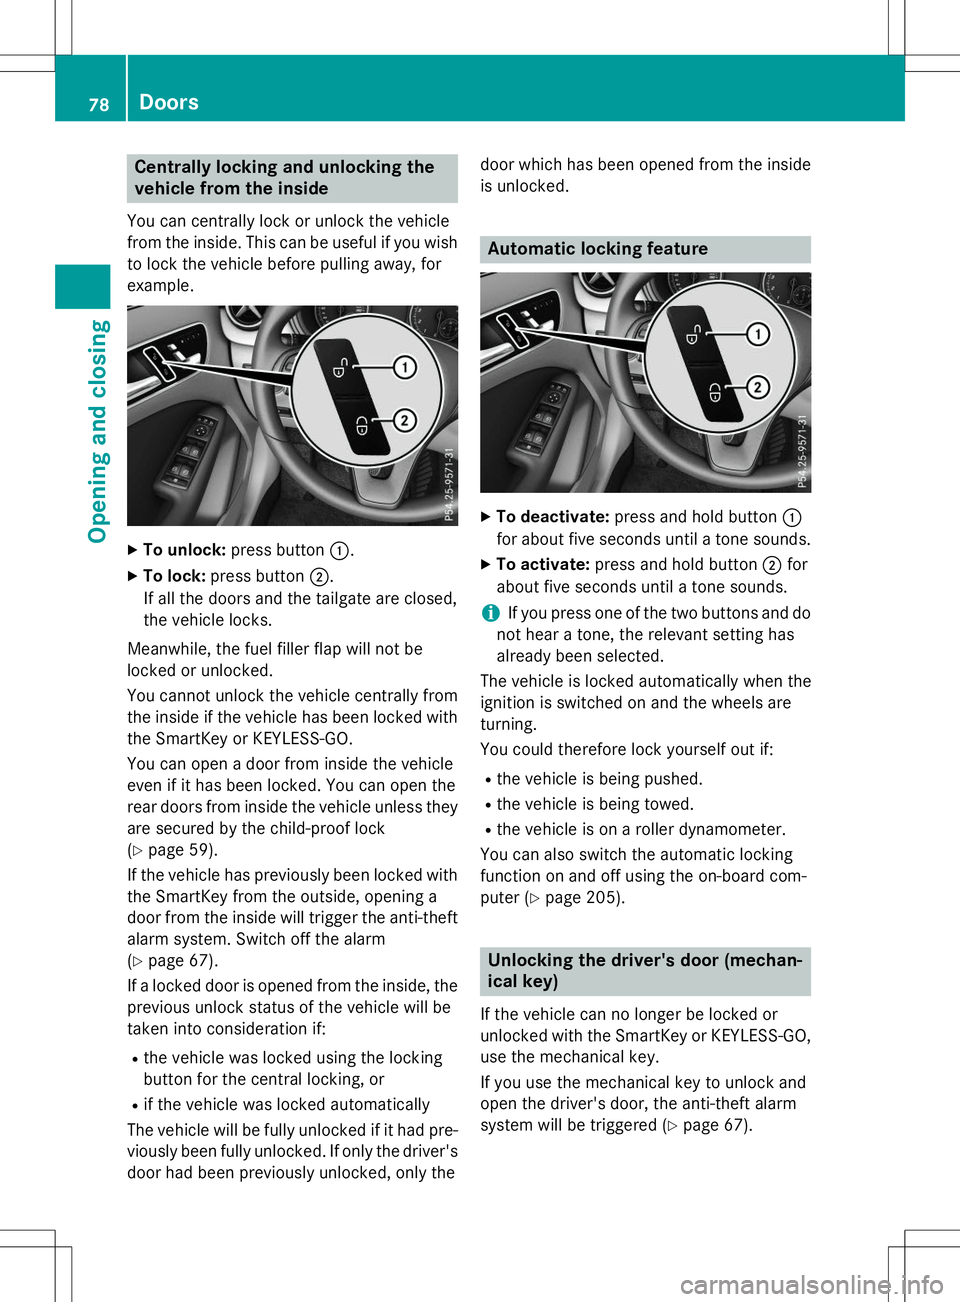
XTo unlock: press button :.
X To lock: press button ;.
If all the doors and the tailgate are closed,
the vehicle locks.
Meanwhile, the fuel filler flap will not be
locked or unlocked.
You cannot unlock the vehicle centrally from
the inside if the vehicle has been locked with the SmartKey or KEYLESS-GO.
You can open a door from inside the vehicle
even if it has been locked. You can open the
rear doors from inside the vehicle unless they
are secured by the child-proof lock( Y page 59).
If the vehicle has previously been locked with
the SmartKey from the outside, opening a
door from the inside will trigger the anti-theft alarm system. Switch off the alarm( Y page 67).
If a locked door is opened from the inside, the previous unlock status of the vehicle will be
taken into consideration if:
R the vehicle was locked using the locking
button for the central locking, or
R if the vehicle was locked automatically
The vehicle will be fully unlocked if it had pre- viously been fully unlocked. If only the driver's
door had been previously unlocked, only the door which has been opened from the inside
is unlocked.
Automatic locking feature
X
To deactivate: press and hold button :
for about five seconds until a tone sounds.
X To activate: press and hold button ;for
about five seconds until a tone sounds.
iIf you press one of the two buttons and do
not hear a tone, the relevant setting has
already been selected.
The vehicle is locked automatically when the
ignition is switched on and the wheels are
turning.
You could therefore lock yourself out if:
R the vehicle is being pushed.
R the vehicle is being towed.
R the vehicle is on a roller dynamometer.
You can also switch the automatic locking
function on and off using the on-board com-
puter ( Ypage 205).
Unlocking the driver's door (mechan-
ical key)
If the vehicle can no longer be locked or
unlocked with the SmartKey or KEYLESS-GO,
use the mechanical key.
If you use the mechanical key to unlock and
open the driver's door, the anti-theft alarm
system will be triggered ( Ypage 67).
78Doors
Opening and closing
Page 84 of 346
Opening and closing the side win- dows
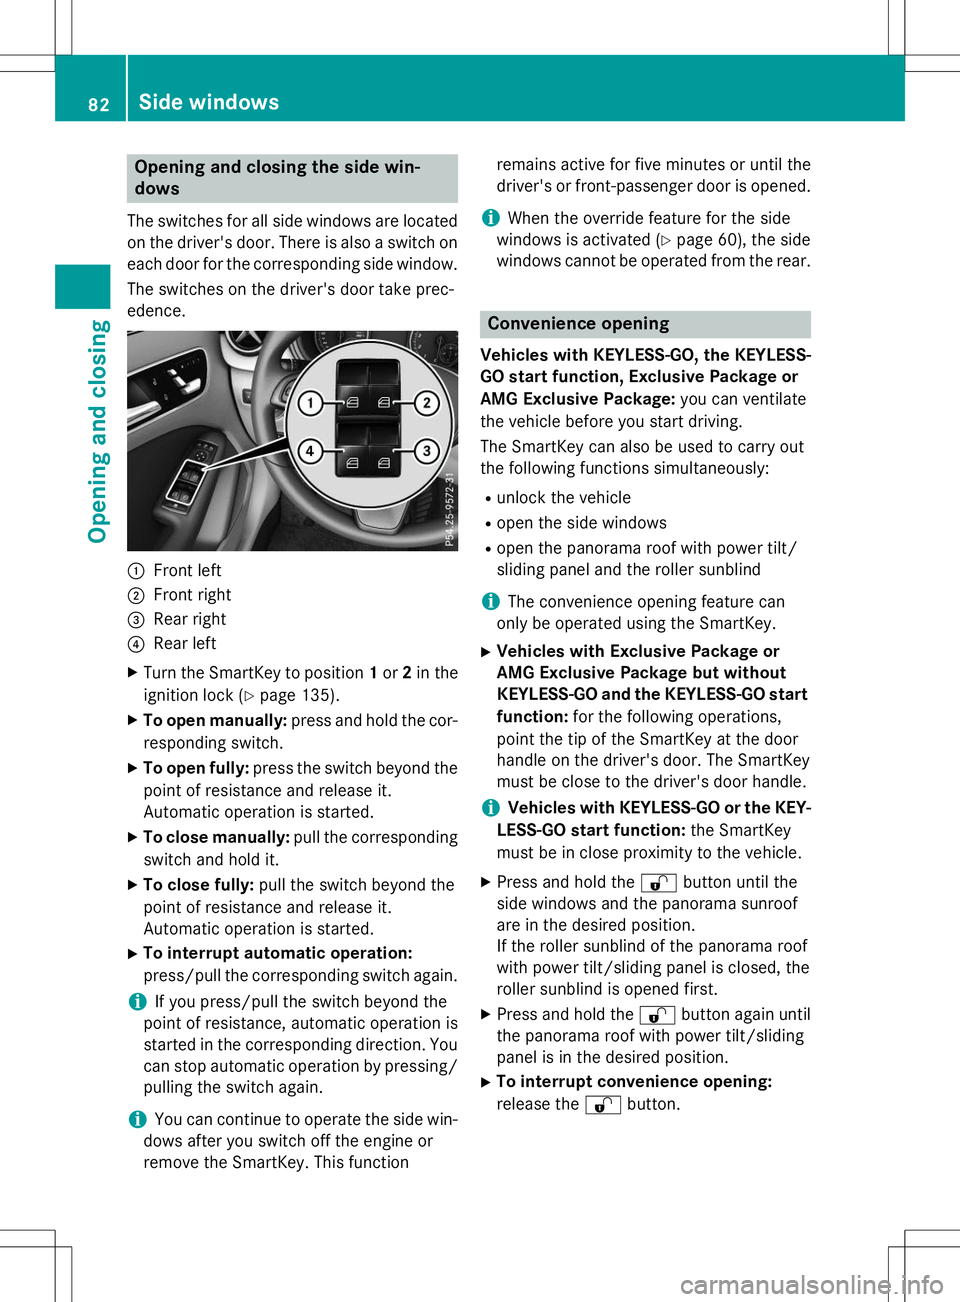
The switches for all side windows are located
on the driver's door. There is also a switch on
each door for the corresponding side window.
The switches on the driver's door take prec-edence.
:Front left
;Front right
=Rear right
?Rear left
X Turn the SmartKey to position 1or 2in the
ignition lock ( Ypage 135).
X To open manually: press and hold the cor-
responding switch.
X To open fully: press the switch beyond the
point of resistance and release it.
Automatic operation is started.
X To close manually: pull the corresponding
switch and hold it.
X To close fully: pull the switch beyond the
point of resistance and release it.
Automatic operation is started.
X To interrupt automatic operation:
press/pull the corresponding switch again.
iIf you press/pull the switch beyond the
point of resistance, automatic operation is
started in the corresponding direction. You
can stop automatic operation by pressing/ pulling the switch again.
iYou can continue to operate the side win-
dows after you switch off the engine or
remove the SmartKey. This function remains active for five minutes or until the
driver's or front-passenger door is opened.
iWhen the override feature for the side
windows is activated ( Ypage 60), the side
windows cannot be operated from the rear.
Convenience opening
Vehicles with KEYLESS-GO, the KEYLESS-
GO start function, Exclusive Package or
AMG Exclusive Package: you can ventilate
the vehicle before you start driving.
The SmartKey can also be used to carry out
the following functions simultaneously:
R unlock the vehicle
R open the side windows
R open the panorama roof with power tilt/
sliding panel and the roller sunblind
iThe convenience opening feature can
only be operated using the SmartKey.
X Vehicles with Exclusive Package or
AMG Exclusive Package but without
KEYLESS-GO and the KEYLESS-GO start
function: for the following operations,
point the tip of the SmartKey at the door
handle on the driver's door. The SmartKey
must be close to the driver's door handle.
iVehicles with KEYLESS-GO or the KEY-
LESS-GO start function: the SmartKey
must be in close proximity to the vehicle.
X Press and hold the %button until the
side windows and the panorama sunroof
are in the desired position.
If the roller sunblind of the panorama roof
with power tilt/sliding panel is closed, the
roller sunblind is opened first.
X Press and hold the %button again until
the panorama roof with power tilt/sliding
panel is in the desired position.
X To interrupt convenience opening:
release the %button.
82Side windows
Opening and closing