2015 MERCEDES-BENZ B-Class ELECTRIC wheel
[x] Cancel search: wheelPage 99 of 338
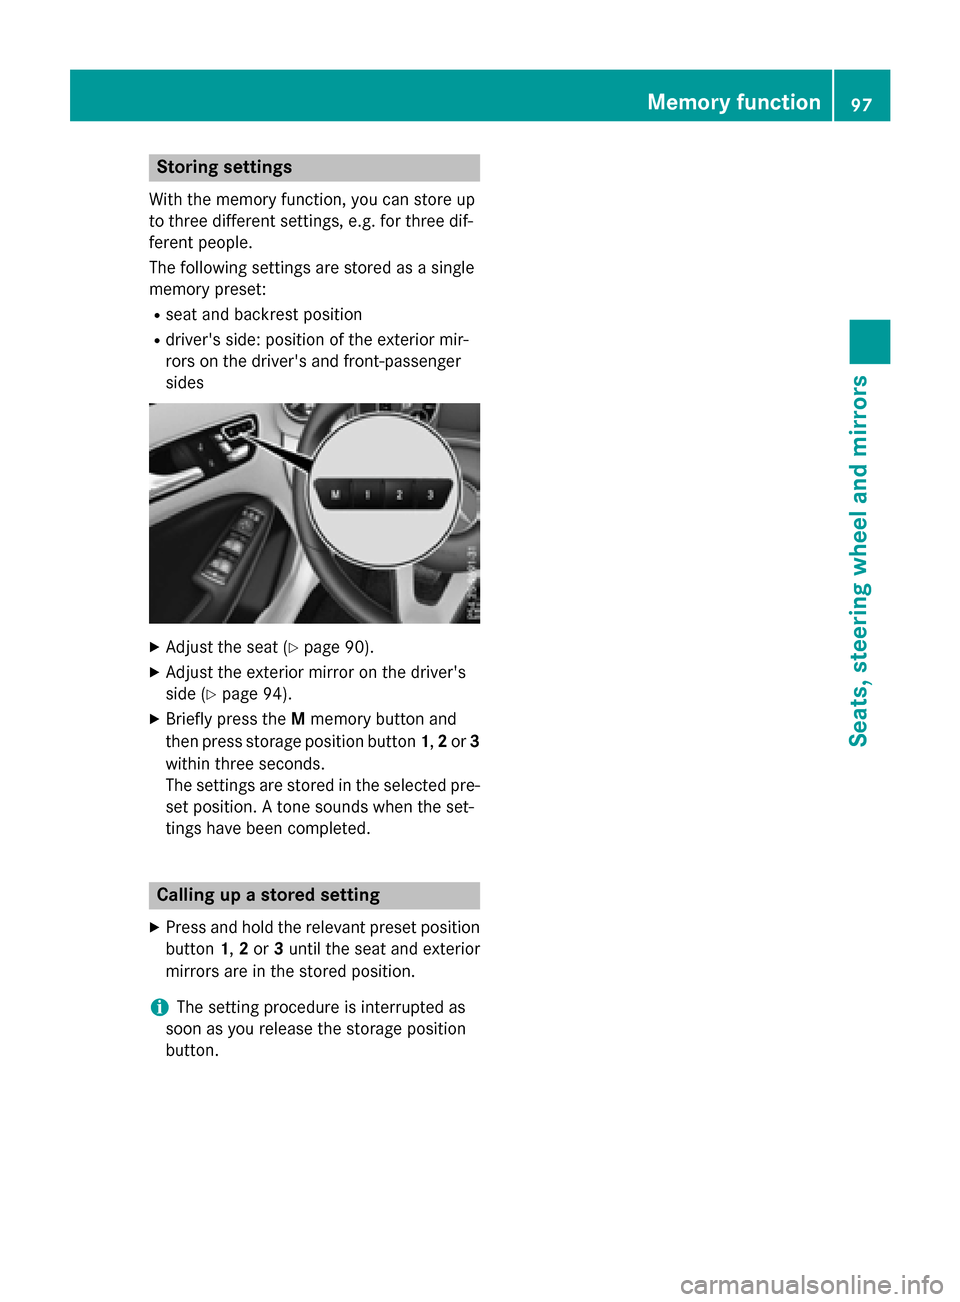
Storing settings
With the memory function, you can store up
to three different settings, e.g. for three dif-
ferent people.
The following settings are stored as a single
memory preset:
R seat and backrest position
R driver's side: position of the exterior mir-
rors on the driver's and front-passenger
sides X
Adjust the seat (Y page 90).
X Adjust the exterior mirror on the driver's
side (Y page 94).
X Briefly press the Mmemory button and
then press storage position button 1,2or 3
within three seconds.
The settings are stored in the selected pre- set position. A tone sounds when the set-
tings have been completed. Calling up a stored setting
X Press and hold the relevant preset position
button 1,2or 3until the seat and exterior
mirrors are in the stored position.
i The setting procedure is interrupted as
soon as you release the storage position
button. Memory function
97Seats, steering wheel and mirrors Z
Page 105 of 338
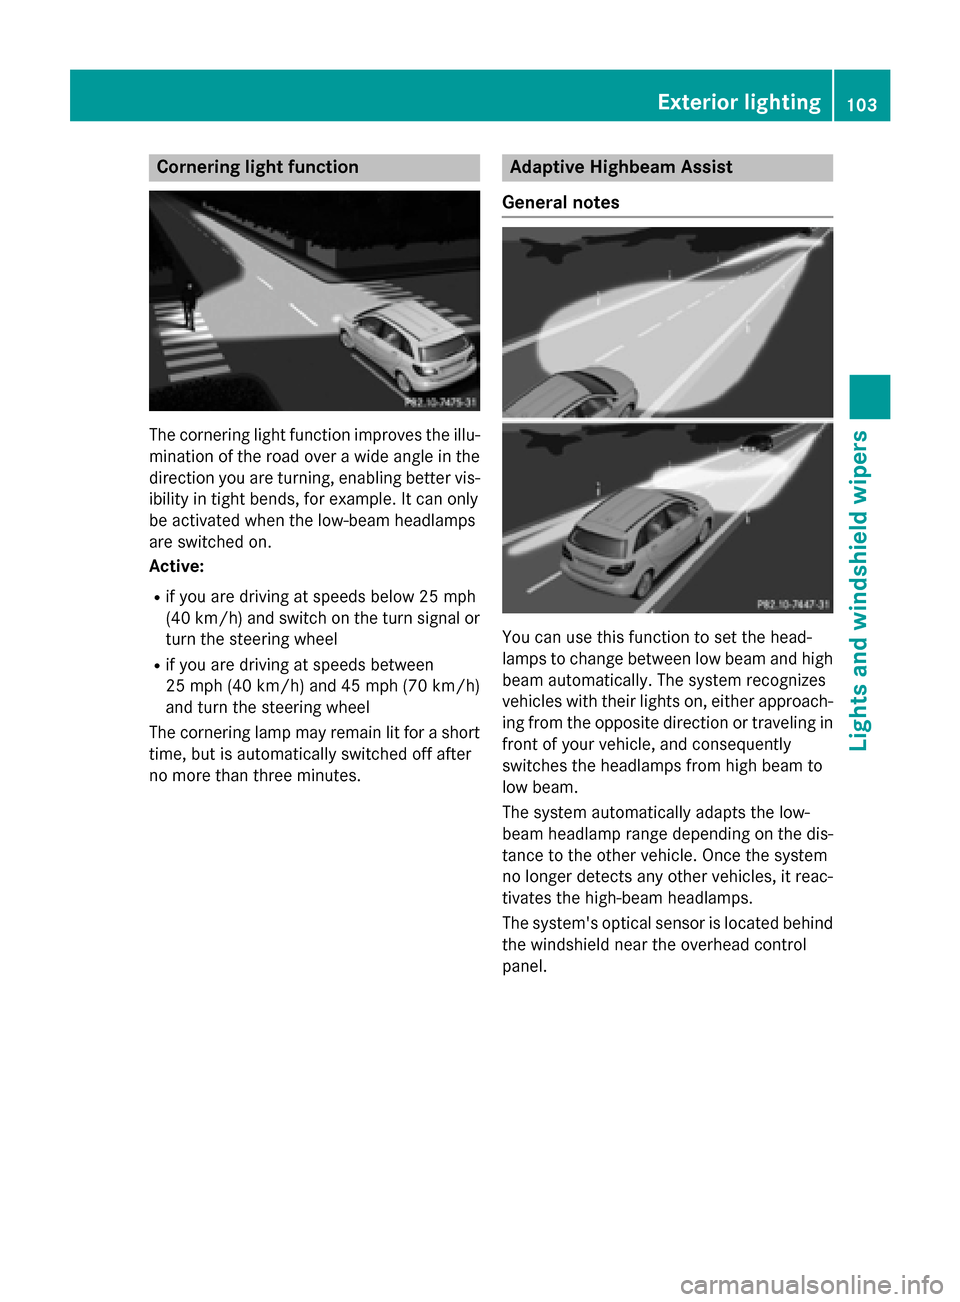
Cornering light function
The cornering light function improves the illu-
mination of the road over a wide angle in the direction you are turning, enabling better vis-
ibility in tight bends, for example. It can only
be activated when the low-beam headlamps
are switched on.
Active:
R if you are driving at speeds below 25 mph
(40 km/h) and switch on the turn signal or
turn the steering wheel
R if you are driving at speeds between
25 mph (40 km/ h)and 45 mph (70 km/h)
and turn the steering wheel
The cornering lamp may remain lit for a short
time, but is automatically switched off after
no more than three minutes. Adaptive Highbeam Assist
General notes You can use this function to set the head-
lamps to change between low beam and high beam automatically. The system recognizes
vehicles with their lights on, either approach-
ing from the opposite direction or traveling in front of your vehicle, and consequently
switches the headlamps from high beam to
low beam.
The system automatically adapts the low-
beam headlamp range depending on the dis-
tance to the other vehicle. Once the system
no longer detects any other vehicles, it reac-
tivates the high-beam headlamps.
The system's optical sensor is located behind
the windshield near the overhead control
panel. Exterior lighting
103Lights and windshield wipers Z
Page 109 of 338
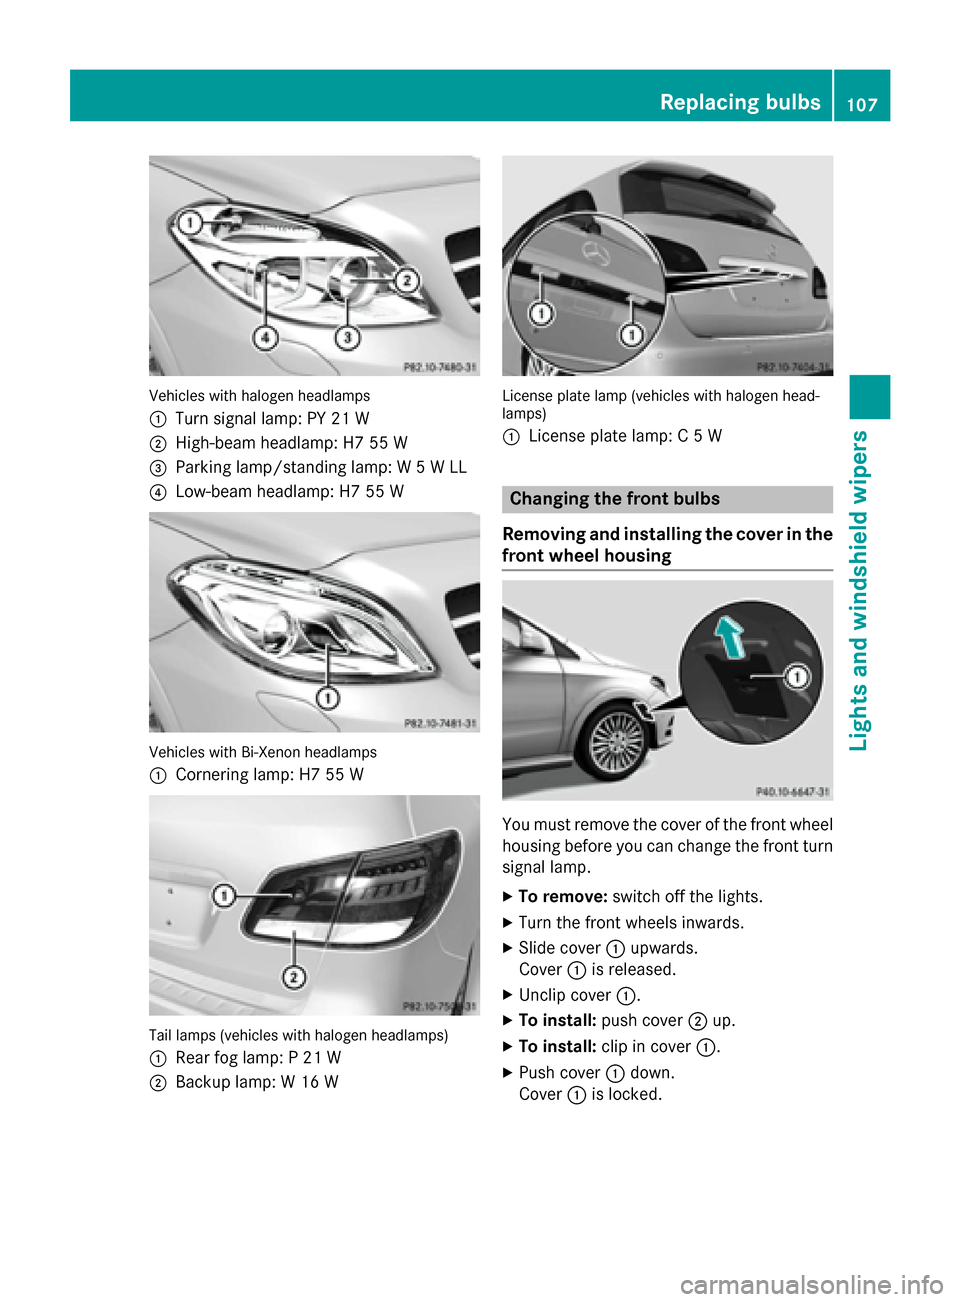
Vehicles with halogen headlamps
:
Turn signal lamp: PY 21 W
; High-beam headlamp: H7 55 W
= Parking lamp/standing lamp: W 5 W LL
? Low-beam headlamp: H7 55 W Vehicles with Bi-Xenon headlamps
:
Cornering lamp: H7 55 W Tail lamps (vehicles with halogen headlamps)
: Rear fog lamp: P 21 W
; Backup lamp: W 16 W License plate lamp (vehicles with halogen head-
lamps)
:
License plate lamp: C 5 W Changing the front bulbs
Removing and installing the cover in the
front wheel housing You must remove the cover of the front wheel
housing before you can change the front turn signal lamp.
X To remove: switch off the lights.
X Turn the front wheels inwards.
X Slide cover :upwards.
Cover :is released.
X Unclip cover :.
X To install: push cover ;up.
X To install: clip in cover :.
X Push cover :down.
Cover :is locked. Replacing bulbs
107Lights and windshield wipers Z
Page 110 of 338
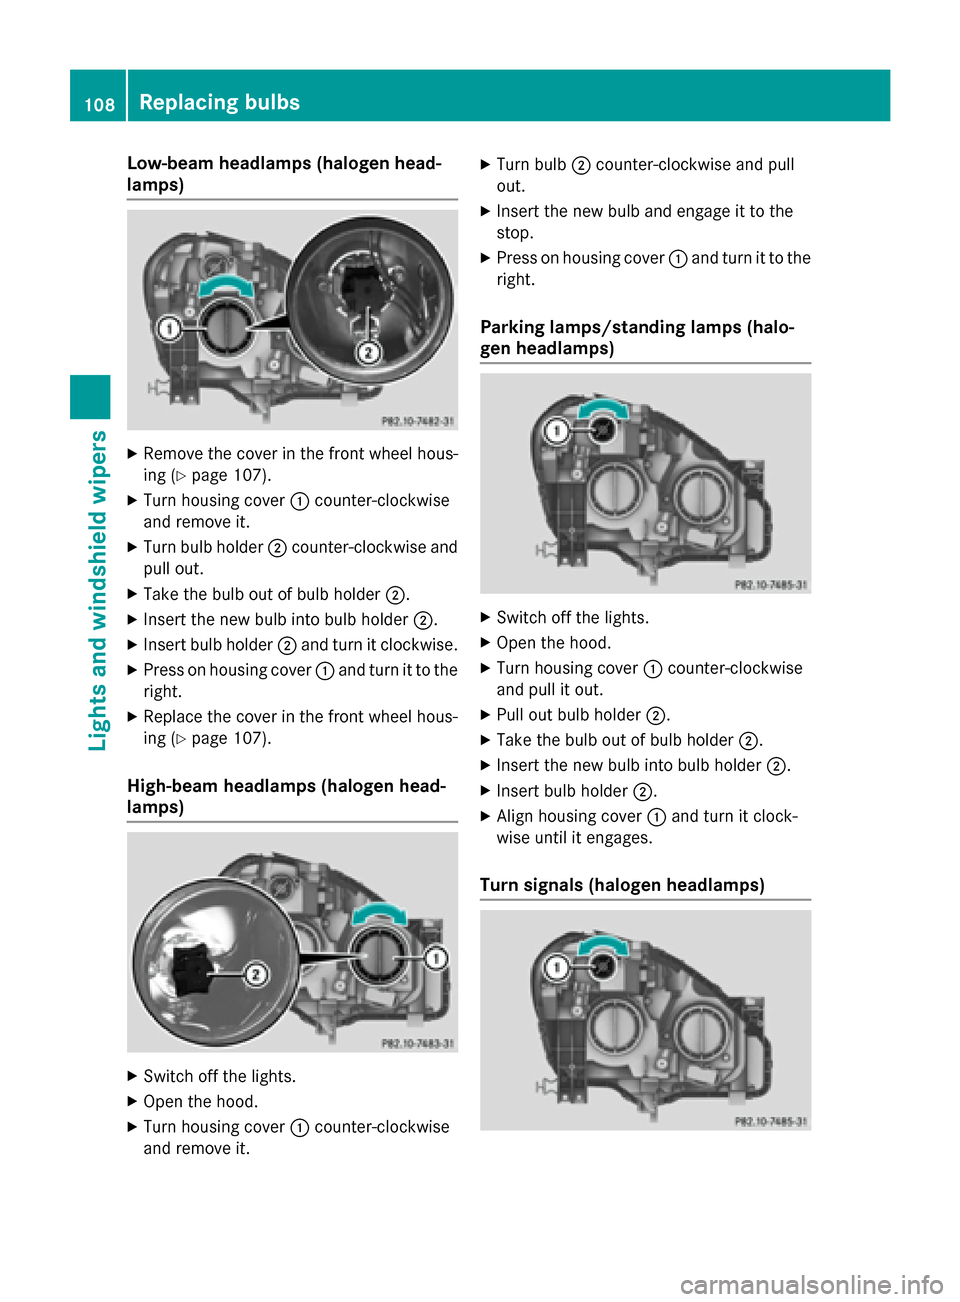
Low-beam headlamps (halogen head-
lamps) X
Remove the cover in the front wheel hous-
ing (Y page 107).
X Turn housing cover :counter-clockwise
and remove it.
X Turn bulb holder ;counter-clockwise and
pull out.
X Take the bulb out of bulb holder ;.
X Insert the new bulb into bulb holder ;.
X Insert bulb holder ;and turn it clockwise.
X Press on housing cover :and turn it to the
right.
X Replace the cover in the front wheel hous-
ing (Y page 107).
High-beam headlamps (halogen head-
lamps) X
Switch off the lights.
X Open the hood.
X Turn housing cover :counter-clockwise
and remove it. X
Turn bulb ;counter-clockwise and pull
out.
X Insert the new bulb and engage it to the
stop.
X Press on housing cover :and turn it to the
right.
Parking lamps/standing lamps (halo-
gen headlamps) X
Switch off the lights.
X Open the hood.
X Turn housing cover :counter-clockwise
and pull it out.
X Pull out bulb holder ;.
X Take the bulb out of bulb holder ;.
X Insert the new bulb into bulb holder ;.
X Insert bulb holder ;.
X Align housing cover :and turn it clock-
wise until it engages.
Turn signals (halogen headlamps) 108
Replacing bulbsLights and windshield wipers
Page 122 of 338
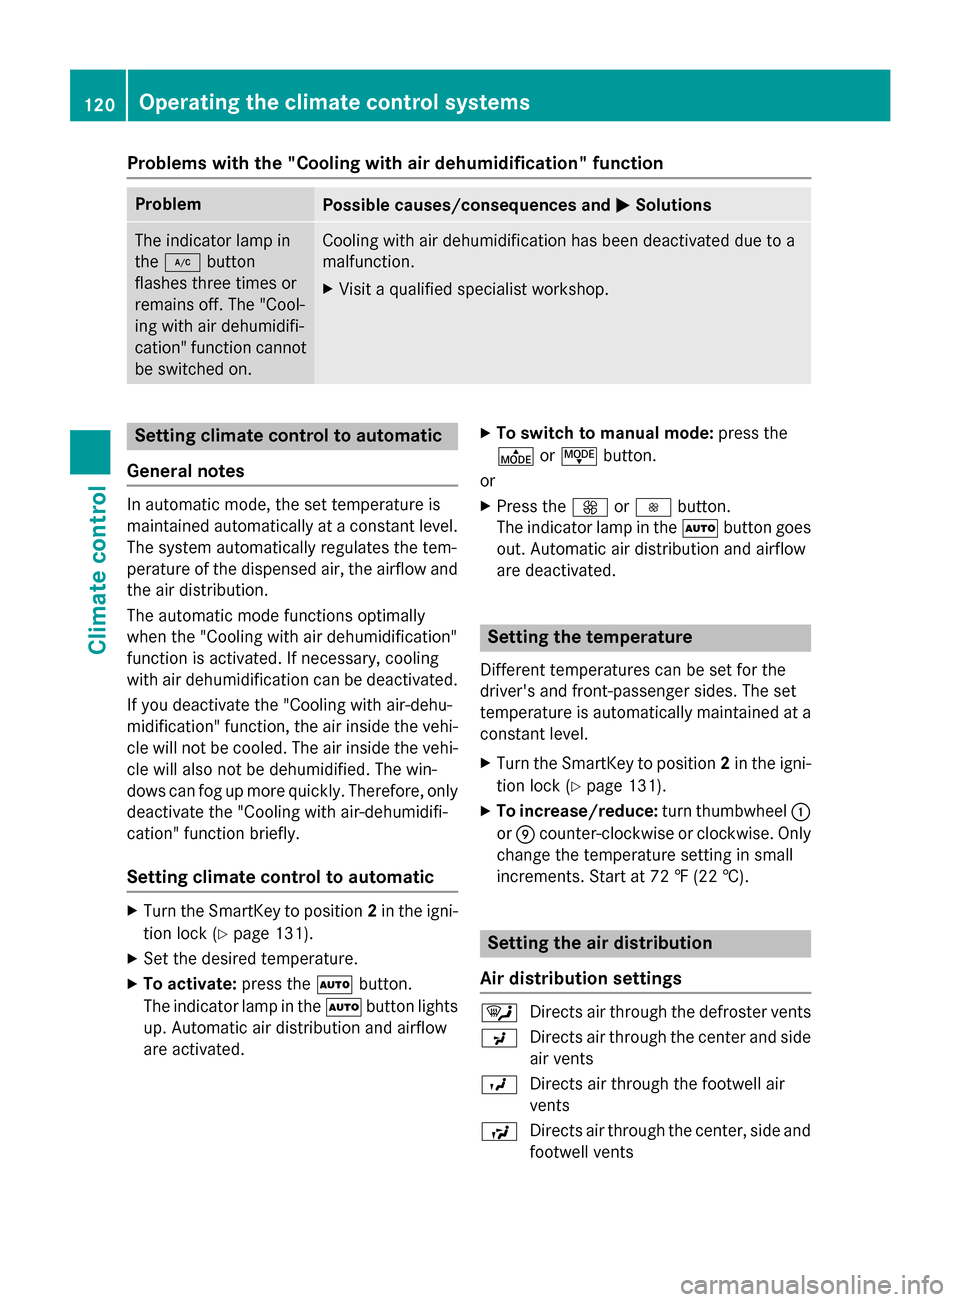
Problems with the "Cooling with air dehumidification" function
Problem
Possible causes/consequences and
M
MSolutions The indicator lamp in
the
¿ button
flashes three times or
remains off. The "Cool-
ing with air dehumidifi-
cation" function cannot
be switched on. Cooling with air dehumidification has been deactivated due to a
malfunction.
X Visit a qualified specialist workshop. Setting climate control to automatic
General notes In automatic mode, the set temperature is
maintained automatically at a constant level.
The system automatically regulates the tem-
perature of the dispensed air, the airflow and
the air distribution.
The automatic mode functions optimally
when the "Cooling with air dehumidification"
function is activated. If necessary, cooling
with air dehumidification can be deactivated.
If you deactivate the "Cooling with air-dehu-
midification" function, the air inside the vehi-
cle will not be cooled. The air inside the vehi- cle will also not be dehumidified. The win-
dows can fog up more quickly. Therefore, only deactivate the "Cooling with air-dehumidifi-
cation" function briefly.
Setting climate control to automatic X
Turn the SmartKey to position 2in the igni-
tion lock (Y page 131).
X Set the desired temperature.
X To activate: press theÃbutton.
The indicator lamp in the Ãbutton lights
up. Automatic air distribution and airflow
are activated. X
To switch to manual mode: press the
É orË button.
or X Press the KorI button.
The indicator lamp in the Ãbutton goes
out. Automatic air distribution and airflow
are deactivated. Setting the temperature
Different temperatures can be set for the
driver's and front-passenger sides. The set
temperature is automatically maintained at a
constant level.
X Turn the SmartKey to position 2in the igni-
tion lock (Y page 131).
X To increase/reduce: turn thumbwheel:
or E counter-clockwise or clockwise. Only
change the temperature setting in small
increments. Start at 72 ‡ (22 †). Setting the air distribution
Air distribution settings ¯
Directs air through the defroster vents
P Directs air through the center and side
air vents
O Directs air through the footwell air
vents
S Directs air through the center, side and
footwell vents 120
Operating the climate control systemsClimate control
Page 129 of 338
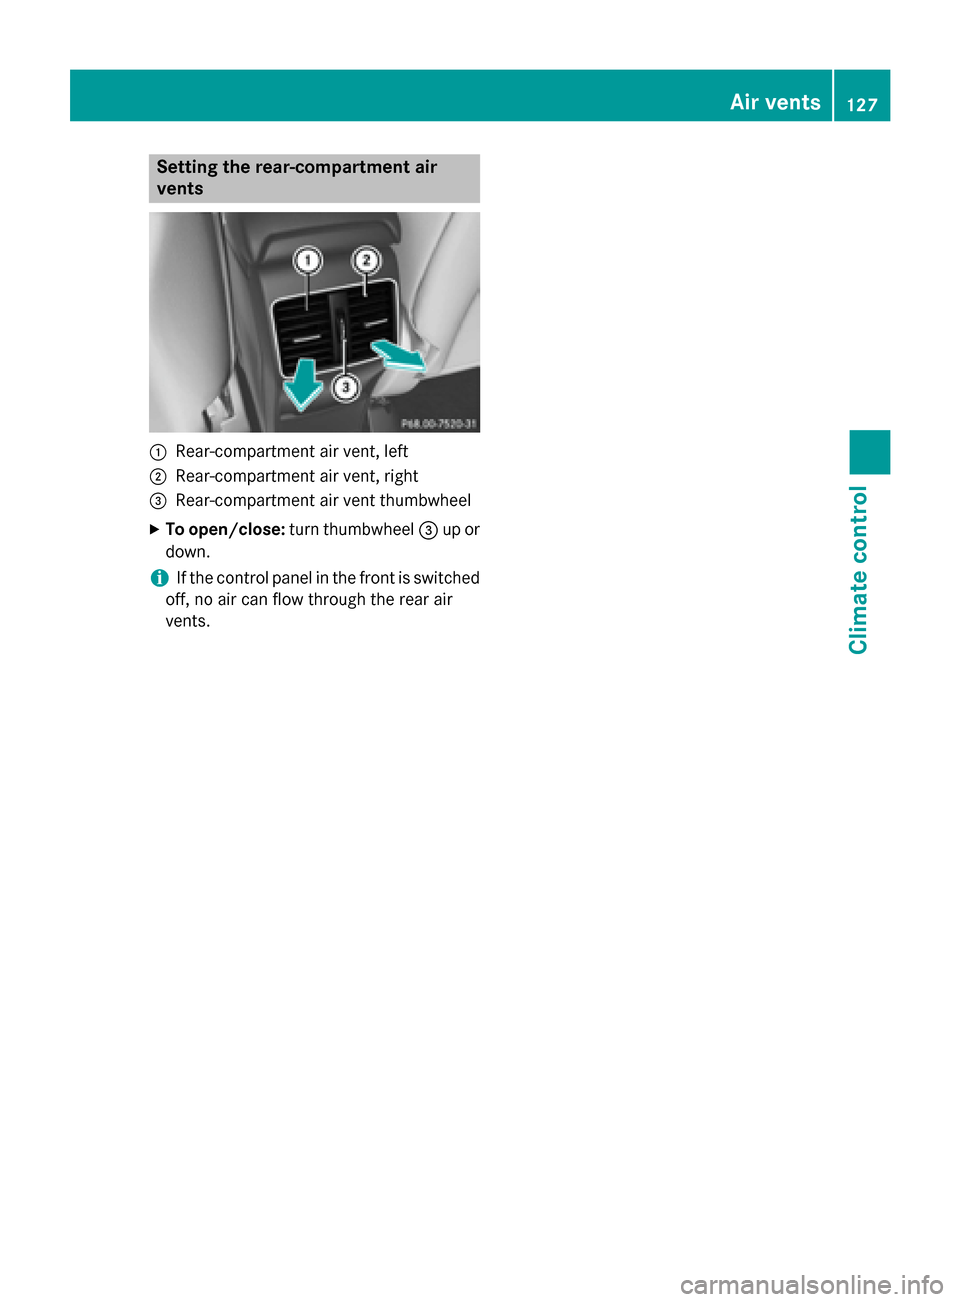
Setting the rear-compartment air
vents :
Rear-compartment air vent, left
; Rear-compartment air vent, right
= Rear-compartment air vent thumbwheel
X To open/close: turn thumbwheel =up or
down.
i If the control panel in the front is switched
off, no air can flow through the rear air
vents. Air vents
127Climate control Z
Page 139 of 338
A Neutral
No power is transmitted from the
drive system to the drive wheels.
Releasing the brakes will allow you
to move the vehicle freely.
If ESP ®
is faulty: only move the
DIRECT SELECT lever to Nif the
vehicle is in danger of skidding, e.g. on icy roads. 7 Drive
For driving forwards
Driving tips
Holding the vehicle stationary on uphill
gradients Do not hold the vehicle stationary on uphill
gradients by depressing the accelerator
pedal. Instead, only ever hold the vehicle sta-
tionary on uphill gradients by:
R depressing the brake pedal
R engaging the electric parking brake
Kickdown Use kickdown for maximum acceleration.
X Depress the accelerator pedal beyond the
pressure point.
The needle in the power display points to
the boost area (Y page 183).
X Ease off the accelerator pedal once the
desired speed is reached.
i Maximum acceleration is available for a
limited time.
Rocking the vehicle free Shifting the transmission repeatedly between
gears Dand Rmay help to free the vehicle if it
has become stuck in slush or snow. The vehi- cle's engine management system limits the
speed to a maximum of 5 mph (9 km/h) when shifting back and forth. To shift back and forth
between transmission positions Dand R, move the DIRECT SELECT lever up and down
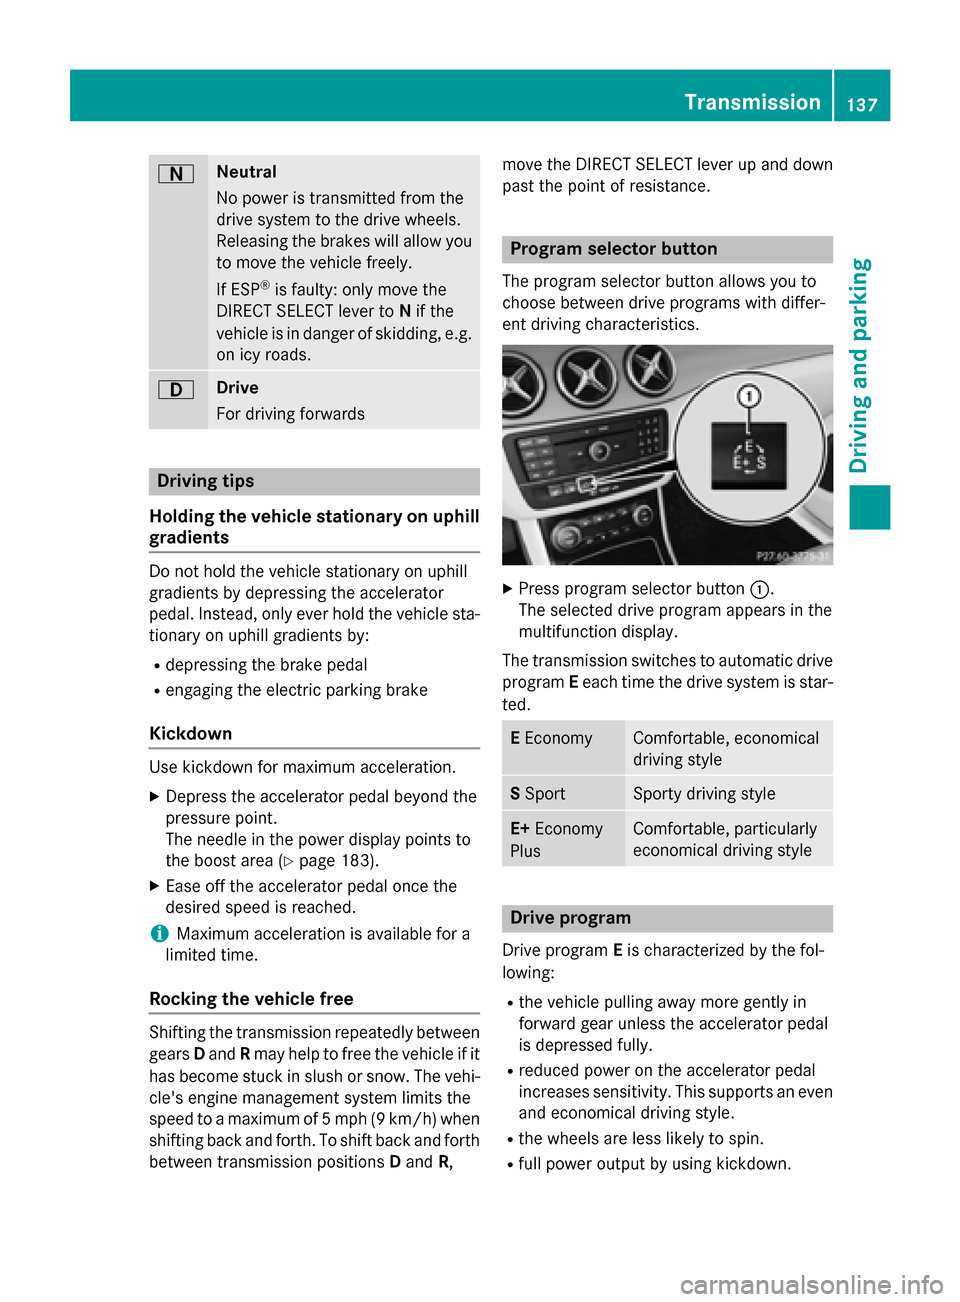
past the point of resistance. Program selector button
The program selector button allows you to
choose between drive programs with differ-
ent driving characteristics. X
Press program selector button :.
The selected drive program appears in the
multifunction display.
The transmission switches to automatic drive program Eeach time the drive system is star-
ted. E
Economy Comfortable, economical
driving style
S
Sport Sporty driving style
E+
Economy
Plus Comfortable, particularly
economical driving style
Drive program
Drive program Eis characterized by the fol-
lowing:
R the vehicle pulling away more gently in
forward gear unless the accelerator pedal
is depressed fully.
R reduced power on the accelerator pedal
increases sensitivity. This supports an even
and economical driving style.
R the wheels are less likely to spin.
R full power output by using kickdown. Transmission
137Driving and parking Z
Page 140 of 338
Drive program
Sis characterized by the fol-
lowing:
R the vehicle exhibits sporty driving charac-
teristics.
R the entire power output can be utilized by
depressing the accelerator pedal.
Drive program E+is characterized by the fol-
lowing:
R reduced torque and significantly reduced
power. This supports an especially efficient
and even driving style and results in a
reduction in speed to approximately
70 mph (110 km/h).
R the vehicle pulling away more gently in
forward gear unless the accelerator pedal
is depressed fully.
R the wheels are less likely to spin.
R particularly efficient overrun.
R full power output by using kickdown.
R the performance of air-conditioning system
and heating are reduced. Steering wheel paddle shifters
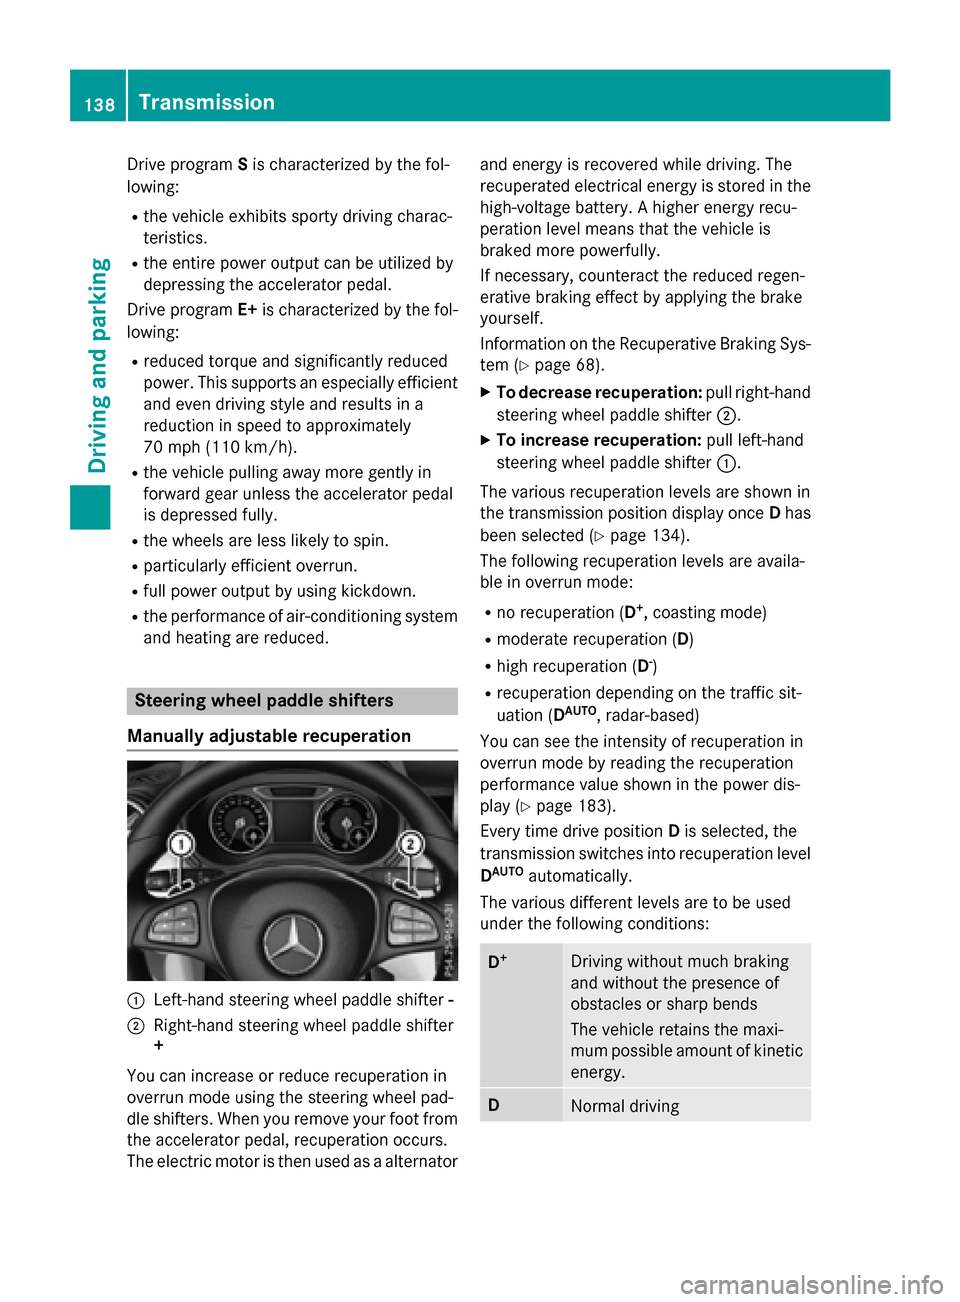
Manually adjustable recuperation :
Left-hand steering wheel paddle shifter -
; Right-hand steering wheel paddle shifter
+
You can increase or reduce recuperation in
overrun mode using the steering wheel pad-
dle shifters. When you remove your foot from
the accelerator pedal, recuperation occurs.
The electric motor is then used as a alternator and energy is recovered while driving. The
recuperated electrical energy is stored in the
high-voltage battery. A higher energy recu-
peration level means that the vehicle is
braked more powerfully.
If necessary, counteract the reduced regen-
erative braking effect by applying the brake
yourself.
Information on the Recuperative Braking Sys-
tem (Y page 68).
X To decrease recuperation: pull right-hand
steering wheel paddle shifter ;.
X To increase recuperation: pull left-hand
steering wheel paddle shifter :.
The various recuperation levels are shown in
the transmission position display once Dhas
been selected (Y page 134).
The following recuperation levels are availa-
ble in overrun mode:
R no recuperation (D +
, coasting mode)
R moderate recuperation (D)
R high recuperation (D -
)
R recuperation depending on the traffic sit-
uation (D AUTO
, radar-based)
You can see the intensity of recuperation in
overrun mode by reading the recuperation
performance value shown in the power dis-
play (Y page 183).
Every time drive position Dis selected, the
transmission switches into recuperation level
D AUTO
automatically.
The various different levels are to be used
under the following conditions: D
+ Driving without much braking
and without the presence of
obstacles or sharp bends
The vehicle retains the maxi-
mum possible amount of kinetic
energy. D
Normal driving138
TransmissionDriving an
d parking