2015 MERCEDES-BENZ B-Class ELECTRIC warning
[x] Cancel search: warningPage 309 of 338
Checking tire pressures manually
To determine and set the correct tire pres-
sure, proceed as follows:
X Remove the valve cap of the tire that is to
be checked.
X Press the tire pressure gauge securely onto
the valve.
X Read the tire pressure and compare it to
the recommended value on the Tire and
Loading Information placard or the tire
pressure table (Y page 303).
X If the tire pressure is too low, increase the
tire pressure to the recommended value.
X If the tire pressure is too high, release air.
To do so, press down the metal pin in the
valve, using the tip of a pen for example.
Then check the tire pressure again using
the tire pressure checker.
X Screw the valve cap onto the valve.
X Repeat these steps for the other tires. Tire pressure monitor
General notes If a tire pressure monitor is installed, the vehi-
cle's wheels have sensors that monitor the
tire pressures in all four tires. The tire pres-
sure monitor warns you if the pressure drops
in one or more of the tires. The tire pressure
monitor only functions if the corresponding
sensors are installed in all wheels.
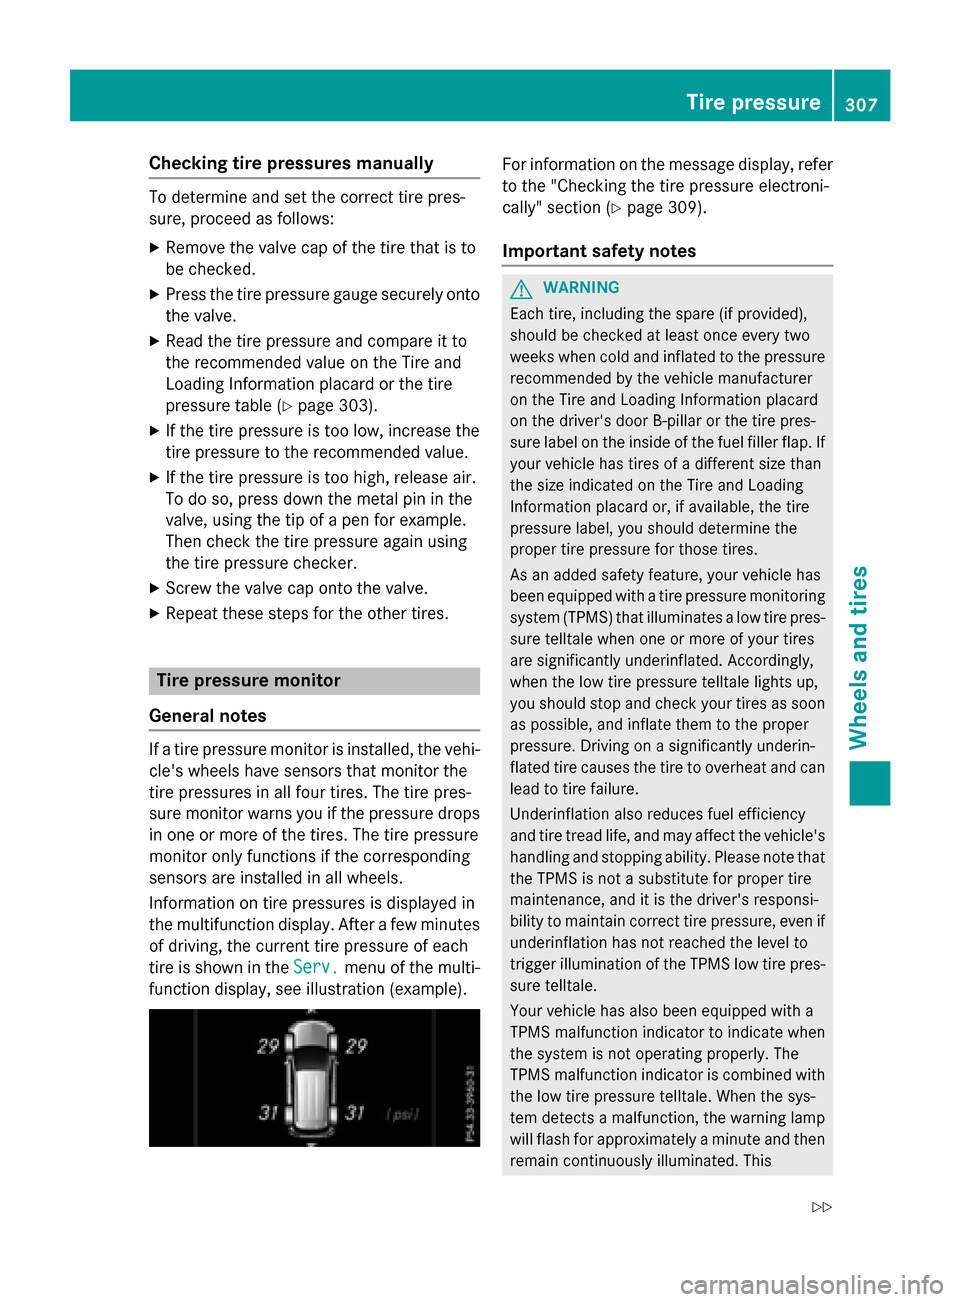
Information on tire pressures is displayed in
the multifunction display. After a few minutes of driving, the current tire pressure of each
tire is shown in the Serv. Serv.menu of the multi-
function display, see illustration (example). For information on the message display, refer
to the "Checking the tire pressure electroni-
cally" section (Y page 309).
Important safety notes G
WARNING
Each tire, including the spare (if provided),
should be checked at least once every two
weeks when cold and inflated to the pressure recommended by the vehicle manufacturer
on the Tire and Loading Information placard
on the driver's door B-pillar or the tire pres-
sure label on the inside of the fuel filler flap. If
your vehicle has tires of a different size than
the size indicated on the Tire and Loading
Information placard or, if available, the tire
pressure label, you should determine the
proper tire pressure for those tires.
As an added safety feature, your vehicle has
been equipped with a tire pressure monitoring system (TPMS) that illuminates a low tire pres-
sure telltale when one or more of your tires
are significantly underinflated. Accordingly,
when the low tire pressure telltale lights up,
you should stop and check your tires as soon
as possible, and inflate them to the proper
pressure. Driving on a significantly underin-
flated tire causes the tire to overheat and can
lead to tire failure.
Underinflation also reduces fuel efficiency
and tire tread life, and may affect the vehicle's handling and stopping ability. Please note that the TPMS is not a substitute for proper tire
maintenance, and it is the driver's responsi-
bility to maintain correct tire pressure, even if
underinflation has not reached the level to
trigger illumination of the TPMS low tire pres-
sure telltale.
Your vehicle has also been equipped with a
TPMS malfunction indicator to indicate when
the system is not operating properly. The
TPMS malfunction indicator is combined with
the low tire pressure telltale. When the sys-
tem detects a malfunction, the warning lamp
will flash for approximately a minute and then remain continuously illuminated. This Tire pressure
307Wheels and tires
Z
Page 310 of 338
sequence will be repeated every time the vehi-
cle is started as long as the malfunction
exists. When the malfunction indicator is illu-minated, the system may not be able to detect
or signal low tire pressure as intended.
TPMS malfunctions may occur for a variety of
reasons, including the installation of incom-
patible replacement or alternate tires or
wheels on the vehicle that prevent the TPMS
from functioning properly. Always check the
TPMS malfunction telltale after replacing one or more tires or wheels on your vehicle to
ensure that the replacement or alternate Tires and wheels allow the TPMS to continue to
function properly.
It is the driver's responsibility to set the tire
pressure to that recommended for cold tires
which is suitable for the operating situation
(Y page 303). Note that the correct tire pres-
sure for the current operating situation must
first be taught-in to the tire pressure monitor. If there is a substantial loss of pressure, the
warning threshold for the warning message is aligned to the reference values taught-in.
Restart the tire pressure monitor after adjust-
ing the pressure of the cold tires
(Y page 309). The current pressures are
saved as new reference values. As a result, a
warning message will appear if the tire pres-
sure drops significantly.
The tire pressure monitor does not warn you
of an incorrectly set tire pressure. Observe
the notes on the recommended tire pressure (Y page 303).
The tire pressure monitor is not able to warn
you of a sudden loss of pressure, e.g. if the
tire is penetrated by a foreign object. In the
event of a sudden loss of pressure, bring the
vehicle to a halt by braking carefully. Avoid
abrupt steering maneuvers. The tire pressure monitor has a yellow warn-
ing lamp in the instrument cluster for indicat-
ing a pressure loss or malfunction. Whether
the warning lamp flashes or lights up indi-
cates whether a tire pressure is too low or the tire pressure monitor is malfunctioning:
R if the warning lamp is lit continuously, the
tire pressure on one or more tires is signif-
icantly too low. The tire pressure monitor is
not malfunctioning.
R if the warning lamp flashes for around a
minute and then remains lit constantly, the
tire pressure monitor is malfunctioning.
In addition to the warning lamp, a message
appears in the multifunction display. Observe
the information on display messages
(Y page 221).
It may take up to ten minutes for a malfunc-
tion of the tire pressure monitor to be indica-
ted. A malfunction will be indicated by the tire
pressure warning lamp flashing for approx-
imately one minute and then remaining lit.
When the malfunction has been rectified, the
tire pressure warning lamp goes out after a
few minutes of driving.
The tire pressure values indicated by the on-
board computer may differ from those meas-
ured at a gas station with a pressure gauge.
The tire pressures shown by the on-board
computer refer to those measured at sea
level. At high altitudes, the tire pressure val-
ues indicated by a pressure gauge are higher
than those shown by the on-board computer. In this case, do not reduce the tire pressures.
The operation of the tire pressure monitor can be affected by interference from radio trans-
mitting equipment (e.g. radio headphones,
two-way radios) that may be being operated
in or near the vehicle. 308
Tire pressureWheels and tires
Page 311 of 338
Checking the tire pressure electroni-
cally
X
Make sure that the SmartKey is in position
2 in the ignition lock (Y page 131).
X Press =or; on the steering wheel
to select the Serv. Serv.menu.
X Press the 9or: button to select
Tire Pressure
Tire Pressure.
X Press the abutton.
The current tire pressure of each tire is
shown in the multifunction display.
If the vehicle was parked for longer than
20 minutes, the Tire pressure will be
Tire pressure will be
displayed after driving a few
displayed after driving a few
minutes minutes message is shown.
After a teach-in process, the tire pressure
monitor automatically detects new wheels or
new sensors. As long as a clear allocation of
the tire pressure value to the individual
wheels is not possible, the Tire Pressure
Tire Pressure
Monitor Active Monitor Active message is shown instead
of the tire pressure display. The tire pressures are already being monitored.
Tire pressure monitor warning mes-
sages If the tire pressure monitor detects a pressure
loss in one or more tires, a warning message
is shown in the multifunction display and the yellow tire pressure monitor warning lamp
comes on.
R If the Please Correct Tire Pressure
Please Correct Tire Pressure
message appears in the multifunction dis-
play, the tire pressure in at least one tire is
too low and must be corrected at the next
opportunity.
R If the Check Tire Pressure Check Tire Pressure message
appears in the multifunction display, the
tire pressure in one or more tires has drop-
ped significantly and the tires must be
checked.
R If the Tire Pressure Warning Tire Tire Pressure Warning Tire
Failure
Failure message appears in the multi-
function display, the tire pressure in one or more tires has dropped suddenly and the
tires must be checked.
Observe the instructions and safety notes in
the display messages in the "Tires" section
(Y page 221).
If the wheel positions on the vehicle are rota-
ted, the tire pressures may be displayed for
the wrong positions for a short time. This is
rectified after a few minutes of driving, and
the tire pressures are displayed for the cor-
rect positions.
Restarting the tire pressure monitor When you restart the tire pressure monitor, all
existing warning messages are deleted and
the warning lamps go out. The monitor uses
the currently set tire pressures as the refer-
ence values for monitoring. In most cases, the tire pressure monitor will automatically
detect the new reference values after you
have changed the tire pressure. However, you
can also define reference values manually as
described here. The tire pressure monitor
then monitors the new tire pressure values.
X Set the tire pressure to the value recom-
mended for the corresponding driving sit-
uation on the Tire and Loading Information
placard on the driver's side
B-pillar (Y page 303).
Additional tire pressure values for different operating conditions can also be found on
the tire pressure table on the inside of the
charge socket flap (Y page 148).
X Make sure that the tire pressure is correct
on all four wheels.
X Make sure that the SmartKey is in position
2 in the ignition lock (Y page 131).
X Press =or; on the steering wheel
to select the Serv.
Serv. menu.
X Press the 9or: button to select
Tire Pressure
Tire Pressure.
X Press the abutton.
The multifunction display shows the cur-
rent tire pressure for each tire or the Tire Tire Tire pressure
309Wheels and tires Z
Page 312 of 338
pressure will be displayed after
pressure will be displayed after
driving a few minutes
driving a few minutes message.
X Press the :button.
The multifunction display shows the Use
Use
current
current pressures
pressures as
asnew
new reference
reference
values
values message.
If you wish to confirm the restart:
X Press the abutton.
The Tire Press. Monitor Restarted
Tire Press. Monitor Restarted
message appears in the multifunction dis-
play.
After driving for a few minutes, the system checks whether the current tire pressures
are within the specified range. The new tire
pressures are then accepted as reference
values and monitored.
If you wish to cancel the restart:
X Press the %button.
The tire pressure values stored at the last
restart will continue to be monitored.
Radio type approval for the tire pres-
sure monitor Country Radio type approval number
USA FCC ID: MRXMW2433A
FCC ID: MRXGG4
FCC ID: MRXMC34MA4
Canada IC: 2546A-MW2433A
IC: 2546A-GG4
IC: 2546A-MC34MA4
Loading the vehicle
Instruction labels for tires and loads
G
WARNING
Overloaded tires can overheat, causing a
blowout. Overloaded tires can also impair the steering and driving characteristics and lead
to brake failure. There is a risk of accident.
Observe the load rating of the tires. The load
rating must be at least half of the GAWR of your vehicle. Never overload the tires by
exceeding the maximum load.
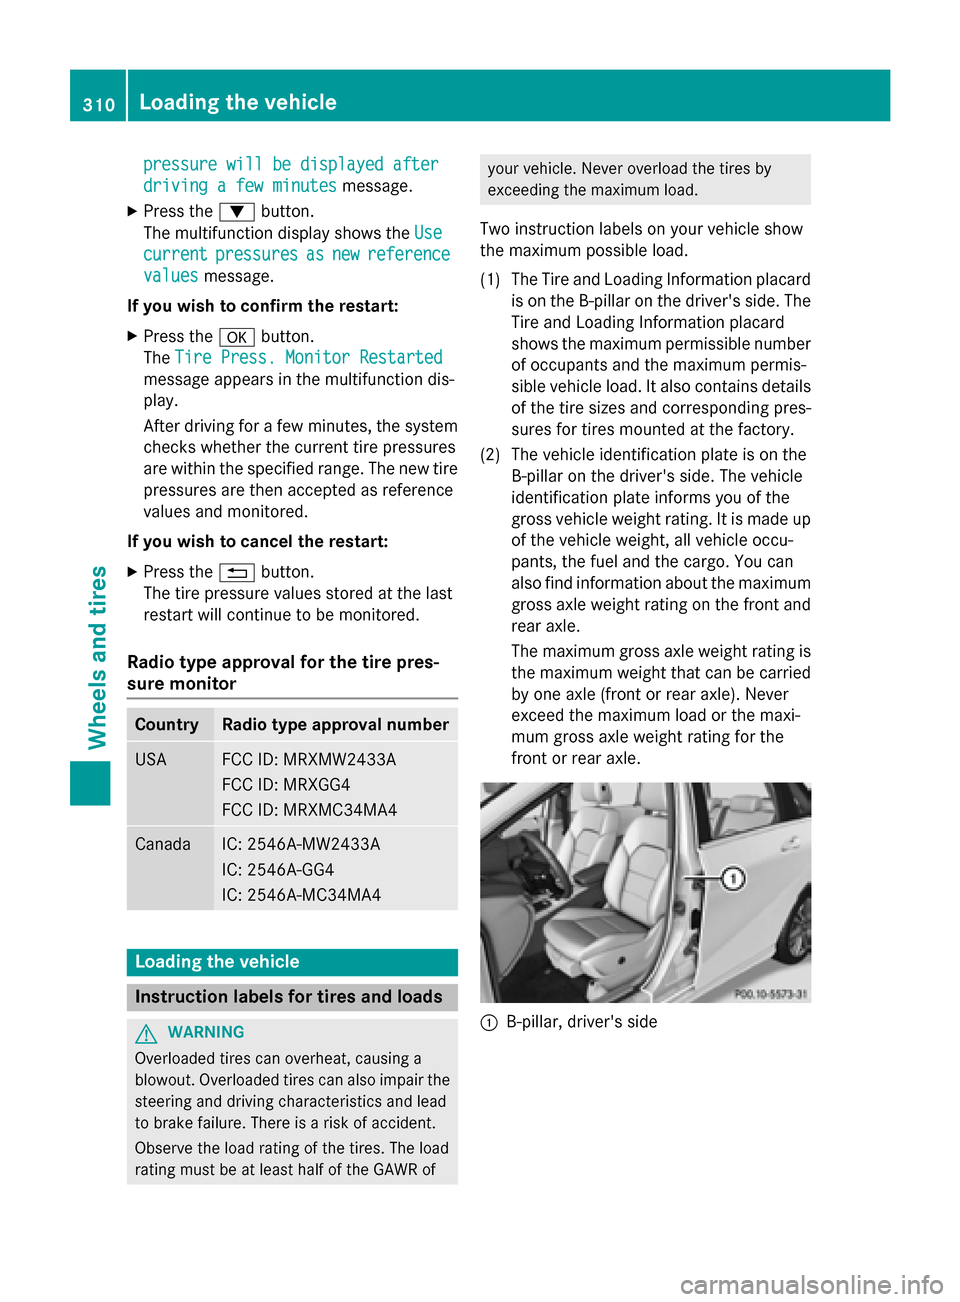
Two instruction labels on your vehicle show
the maximum possible load.
(1) The Tire and Loading Information placard is on the B-pillar on the driver's side. The
Tire and Loading Information placard
shows the maximum permissible number of occupants and the maximum permis-
sible vehicle load. It also contains details
of the tire sizes and corresponding pres-
sures for tires mounted at the factory.
(2) The vehicle identification plate is on the B-pillar on the driver's side. The vehicle
identification plate informs you of the
gross vehicle weight rating. It is made up
of the vehicle weight, all vehicle occu-
pants, the fuel and the cargo. You can
also find information about the maximum gross axle weight rating on the front and
rear axle.
The maximum gross axle weight rating is the maximum weight that can be carried
by one axle (front or rear axle). Never
exceed the maximum load or the maxi-
mum gross axle weight rating for the
front or rear axle. :
B-pillar, driver's side 310
Loading the vehicleWheels and tires
Page 316 of 338
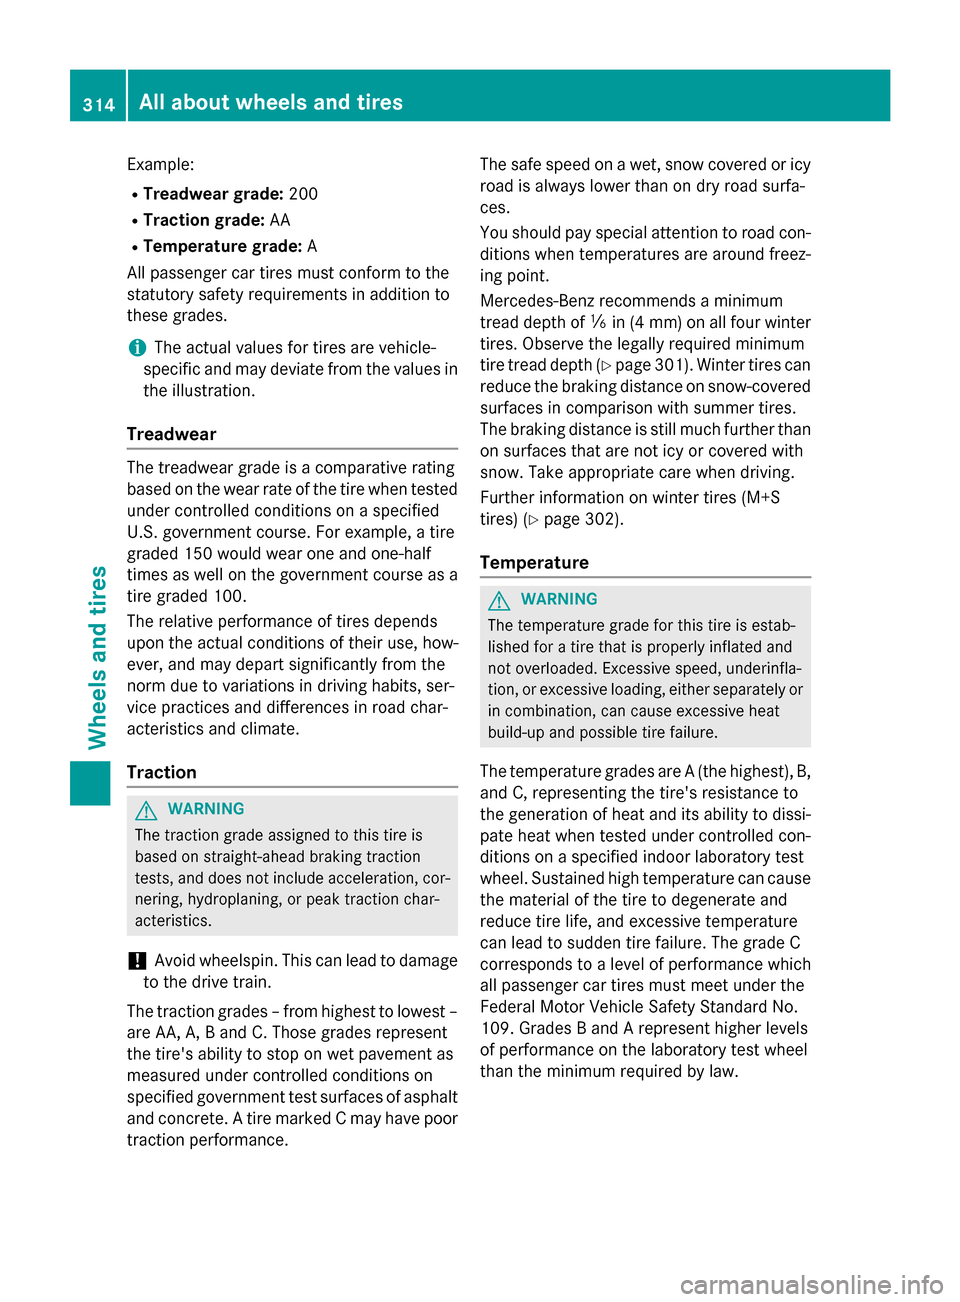
Example:
R Treadwear grade: 200
R Traction grade: AA
R Temperature grade: A
All passenger car tires must conform to the
statutory safety requirements in addition to
these grades.
i The actual values for tires are vehicle-
specific and may deviate from the values in
the illustration.
Treadwear The treadwear grade is a comparative rating
based on the wear rate of the tire when tested under controlled conditions on a specified
U.S. government course. For example, a tire
graded 150 would wear one and one-half
times as well on the government course as a
tire graded 100.
The relative performance of tires depends
upon the actual conditions of their use, how-
ever, and may depart significantly from the
norm due to variations in driving habits, ser-
vice practices and differences in road char-
acteristics and climate.
Traction G
WARNING
The traction grade assigned to this tire is
based on straight-ahead braking traction
tests, and does not include acceleration, cor- nering, hydroplaning, or peak traction char-
acteristics.
! Avoid wheelspin. This can lead to damage
to the drive train.
The traction grades – from highest to lowest –
are AA, A, B and C. Those grades represent
the tire's ability to stop on wet pavement as
measured under controlled conditions on
specified government test surfaces of asphalt
and concrete. A tire marked C may have poor
traction performance. The safe speed on a wet, snow covered or icy
road is always lower than on dry road surfa-
ces.
You should pay special attention to road con-
ditions when temperatures are around freez-
ing point.
Mercedes-Benz recommends a minimum
tread depth of ãin (4 mm) on all four winter
tires. Observe the legally required minimum
tire tread depth (Y page 301). Winter tires can
reduce the braking distance on snow-covered surfaces in comparison with summer tires.
The braking distance is still much further thanon surfaces that are not icy or covered with
snow. Take appropriate care when driving.
Further information on winter tires (M+S
tires) (Y page 302).
Temperature G
WARNING
The temperature grade for this tire is estab-
lished for a tire that is properly inflated and
not overloaded. Excessive speed, underinfla-
tion, or excessive loading, either separately or
in combination, can cause excessive heat
build-up and possible tire failure.
The temperature grades are A (the highest), B,
and C, representing the tire's resistance to
the generation of heat and its ability to dissi- pate heat when tested under controlled con-
ditions on a specified indoor laboratory test
wheel. Sustained high temperature can cause
the material of the tire to degenerate and
reduce tire life, and excessive temperature
can lead to sudden tire failure. The grade C
corresponds to a level of performance which
all passenger car tires must meet under the
Federal Motor Vehicle Safety Standard No.
109. Grades B and A represent higher levels
of performance on the laboratory test wheel
than the minimum required by law. 314
All about
wheels and tiresWheels and tires
Page 317 of 338
Tire labeling
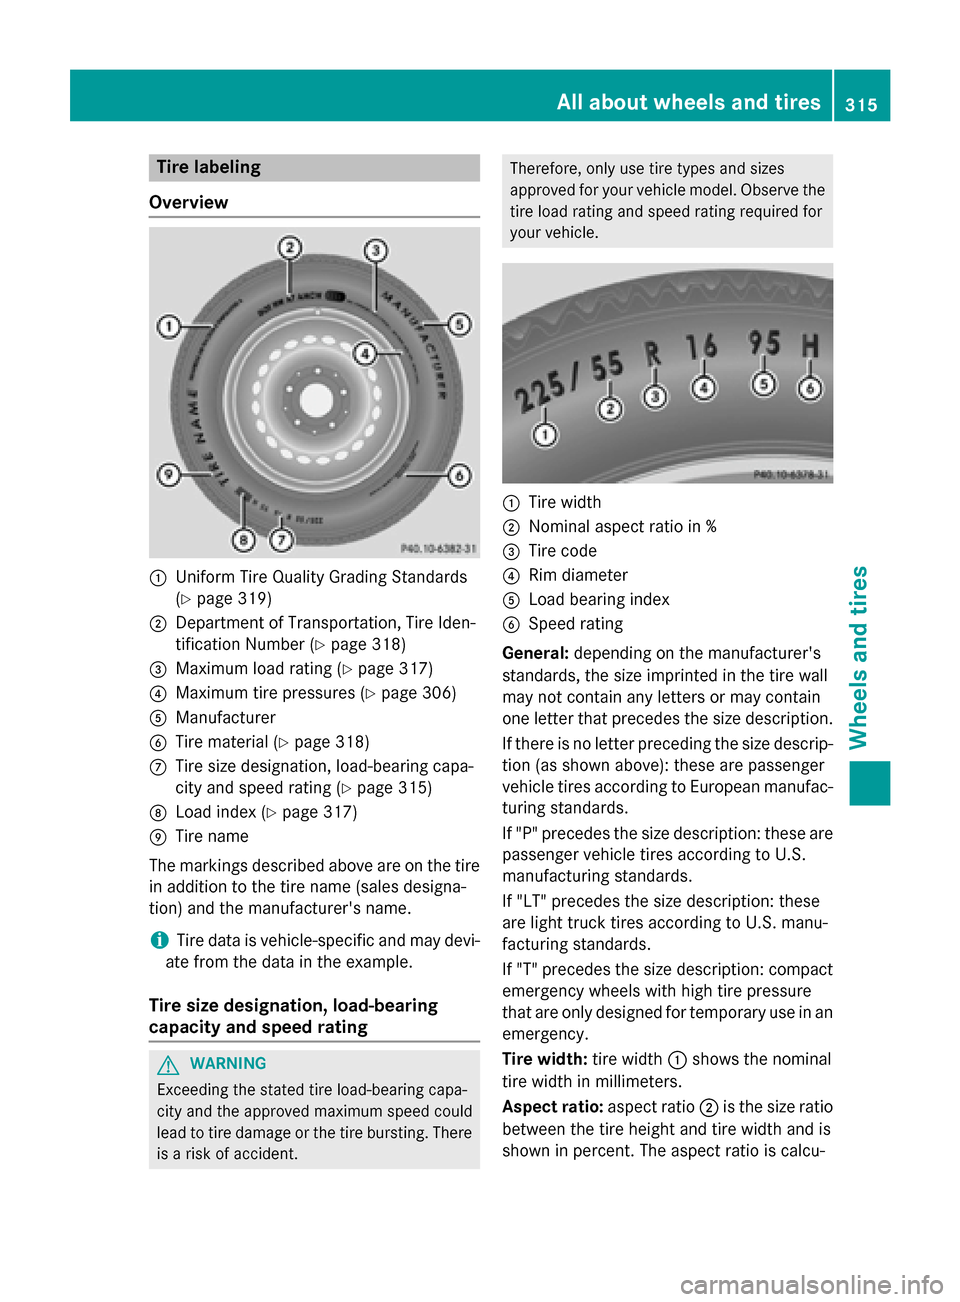
Overview :
Uniform Tire Quality Grading Standards
(Y page 319)
; Department of Transportation, Tire Iden-
tification Number (Y page 318)
= Maximum load rating (Y page 317)
? Maximum tire pressures (Y page 306)
A Manufacturer
B Tire material (Y page 318)
C Tire size designation, load-bearing capa-
city and speed rating (Y page 315)
D Load index (Y page 317)
E Tire name
The markings described above are on the tire in addition to the tire name (sales designa-
tion) and the manufacturer's name.
i Tire data is vehicle-specific and may devi-
ate from the data in the example.
Tire size designation, load-bearing
capacity and speed rating G
WARNING
Exceeding the stated tire load-bearing capa-
city and the approved maximum speed could
lead to tire damage or the tire bursting. There is a risk of accident. Therefore, only use tire types and sizes
approved for your vehicle model. Observe the
tire load rating and speed rating required for
your vehicle. :
Tire width
; Nominal aspect ratio in %
= Tire code
? Rim diameter
A Load bearing index
B Speed rating
General: depending on the manufacturer's
standards, the size imprinted in the tire wall
may not contain any letters or may contain
one letter that precedes the size description.
If there is no letter preceding the size descrip-
tion (as shown above): these are passenger
vehicle tires according to European manufac-
turing standards.
If "P" precedes the size description: these are
passenger vehicle tires according to U.S.
manufacturing standards.
If "LT" precedes the size description: these
are light truck tires according to U.S. manu-
facturing standards.
If "T" precedes the size description: compact emergency wheels with high tire pressure
that are only designed for temporary use in an
emergency.
Tire width: tire width:shows the nominal
tire width in millimeters.
Aspect ratio: aspect ratio;is the size ratio
between the tire height and tire width and is
shown in percent. The aspect ratio is calcu- All about
wheels and tires
315Wheels and tires Z
Page 323 of 338

Occupant distribution
The distribution of occupants in a vehicle at
their designated seating positions.
Total load limit
Nominal load and luggage load plus 68 kg
(150 lbs) multiplied by the number of seats in the vehicle. Changing a wheel
Flat tire
The "Breakdown assistance" section
(Y page 280) contains information and notes
on how to deal with a flat tire. Information on driving with MOExtended tires in the event of
a flat tire can be found under "MOExtended
tires (tires with run-flat characteristics"
(Y page 281). Rotating the wheels
G
WARNING
Interchanging the front and rear wheels may
severely impair the driving characteristics if
the wheels or tires have different dimensions. The wheel brakes or suspension components
may also be damaged. There is a risk of acci-
dent.
Rotate front and rear wheels only if the wheels and tires are of the same dimensions.
! On vehicles equipped with a tire pressure
monitor, electronic components are loca-
ted in the wheel.
Tire-mounting tools should not be used
near the valve. This could damage the elec- tronic components.
Only have tires changed at a qualified spe-cialist workshop.
Observe the instructions and safety notes in
the "Changing a wheel" section (Y page 321).
The wear patterns on the front and rear tires
differ, depending on the operating conditions. Rotate the wheels before a clear wear pattern has formed on the tires. Front tires typically
wear more on the shoulders and the rear tires
in the center.
If your vehicle's tire configuration allows, you can rotate the wheels according to the inter-
vals in the tire manufacturer's warranty book
in your vehicle documents. If no warranty
book is available, the tires should be rotated
every 3,000 to 6,000 miles (5,000 to
10,000 km), or earlier if tire wear requires.
Ensure the direction of rotation is maintained.
Clean the contact surfaces of the wheel and
the brake disc thoroughly every time a wheel
is rotated. Check the tire pressure and reac-
tivate the tire pressure monitor if necessary. Direction of rotation
Tires with a specified direction of rotation
have additional benefits, e.g. if there is a risk
of hydroplaning. These advantages can only
be gained if the tires are installed correspond- ing to the direction of rotation.
An arrow on the sidewall of the tire indicates
its correct direction of rotation. Storing wheels
Store wheels that are not being used in a cool, dry and preferably dark place. Protect the
tires against oil and grease. Mounting a wheel
Preparing the vehicle X
Stop the vehicle on solid, non-slippery and
level ground.
X Apply the electric parking brake manually.
X Bring the front wheels into the straight-
ahead position.
X Shift the transmission to position P.
X Switch off the engine.
X Vehicles without KEYLESS-GO: remove
the SmartKey from the ignition lock. Changing a wheel
321Wheels and tires Z
Page 324 of 338
X
Vehicles with KEYLESS-GO start-func-
tion or KEYLESS-GO: open the driver's
door.
The on-board electronics now have status
0. This is the same as the SmartKey having been removed.
X Vehicles with KEYLESS-GO start-func-
tion or KEYLESS-GO: remove the Start/
Stop button from the ignition lock
(Y page 131).
X If included in the vehicle equipment,
remove the tire-change tool kit from the
vehicle.
X Safeguard the vehicle against rolling away
(Y page 153).
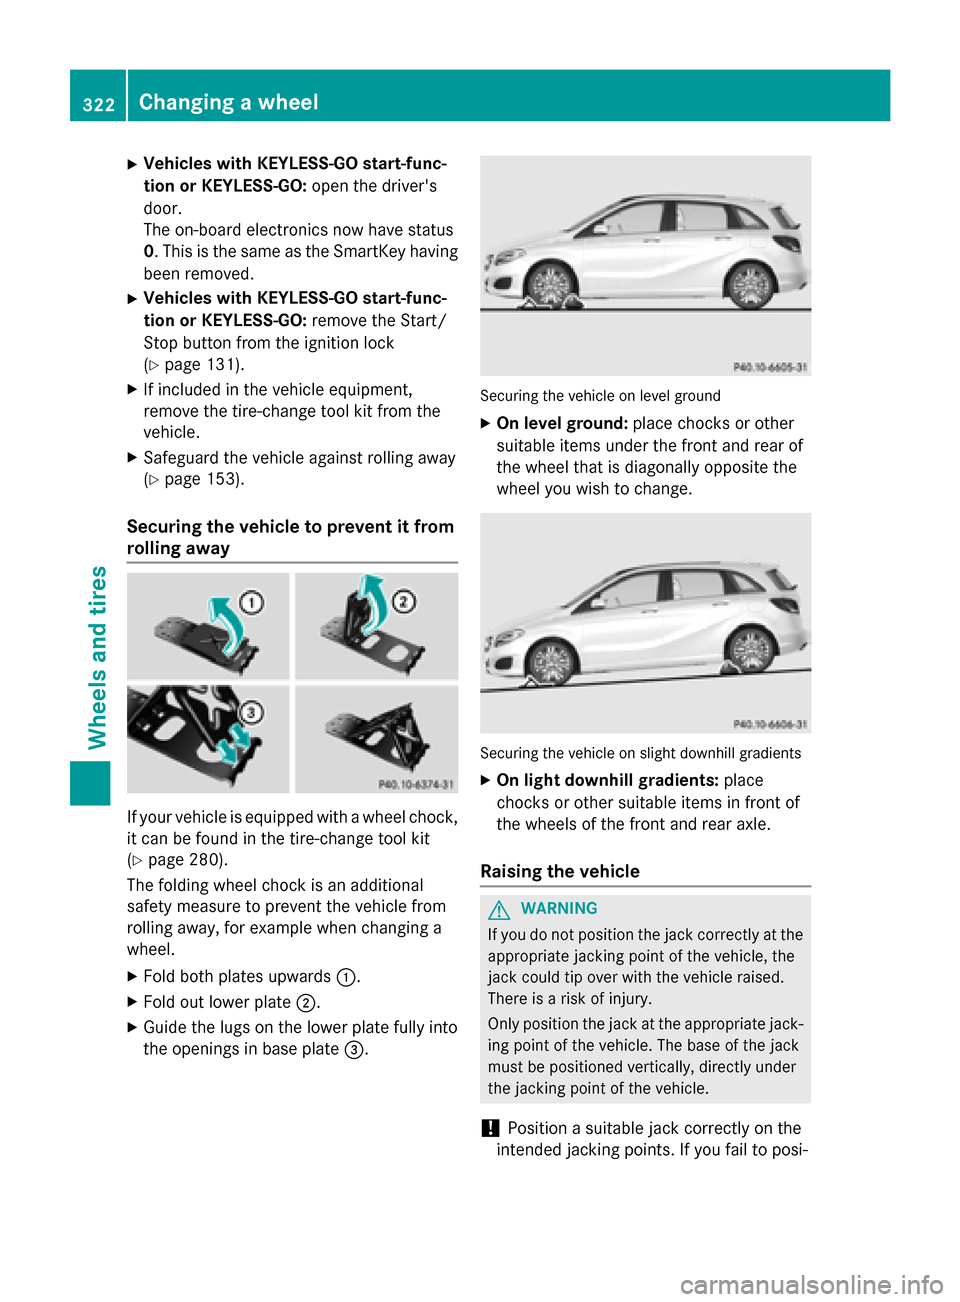
Securing the vehicle to prevent it from
rolling away If your vehicle is equipped with a wheel chock,
it can be found in the tire-change tool kit
(Y page 280).
The folding wheel chock is an additional
safety measure to prevent the vehicle from
rolling away, for example when changing a
wheel.
X Fold both plates upwards :.
X Fold out lower plate ;.
X Guide the lugs on the lower plate fully into
the openings in base plate =. Securing the vehicle on level ground
X On level ground: place chocks or other
suitable items under the front and rear of
the wheel that is diagonally opposite the
wheel you wish to change. Securing the vehicle on slight downhill gradients
X On light downhill gradients: place
chocks or other suitable items in front of
the wheels of the front and rear axle.
Raising the vehicle G
WARNING
If you do not position the jack correctly at the appropriate jacking point of the vehicle, the
jack could tip over with the vehicle raised.
There is a risk of injury.
Only position the jack at the appropriate jack-
ing point of the vehicle. The base of the jack
must be positioned vertically, directly under
the jacking point of the vehicle.
! Position a suitable jack correctly on the
intended jacking points. If you fail to posi- 322
Changing a wheelWheels and tires