2015 LINCOLN MKT engine
[x] Cancel search: enginePage 204 of 500

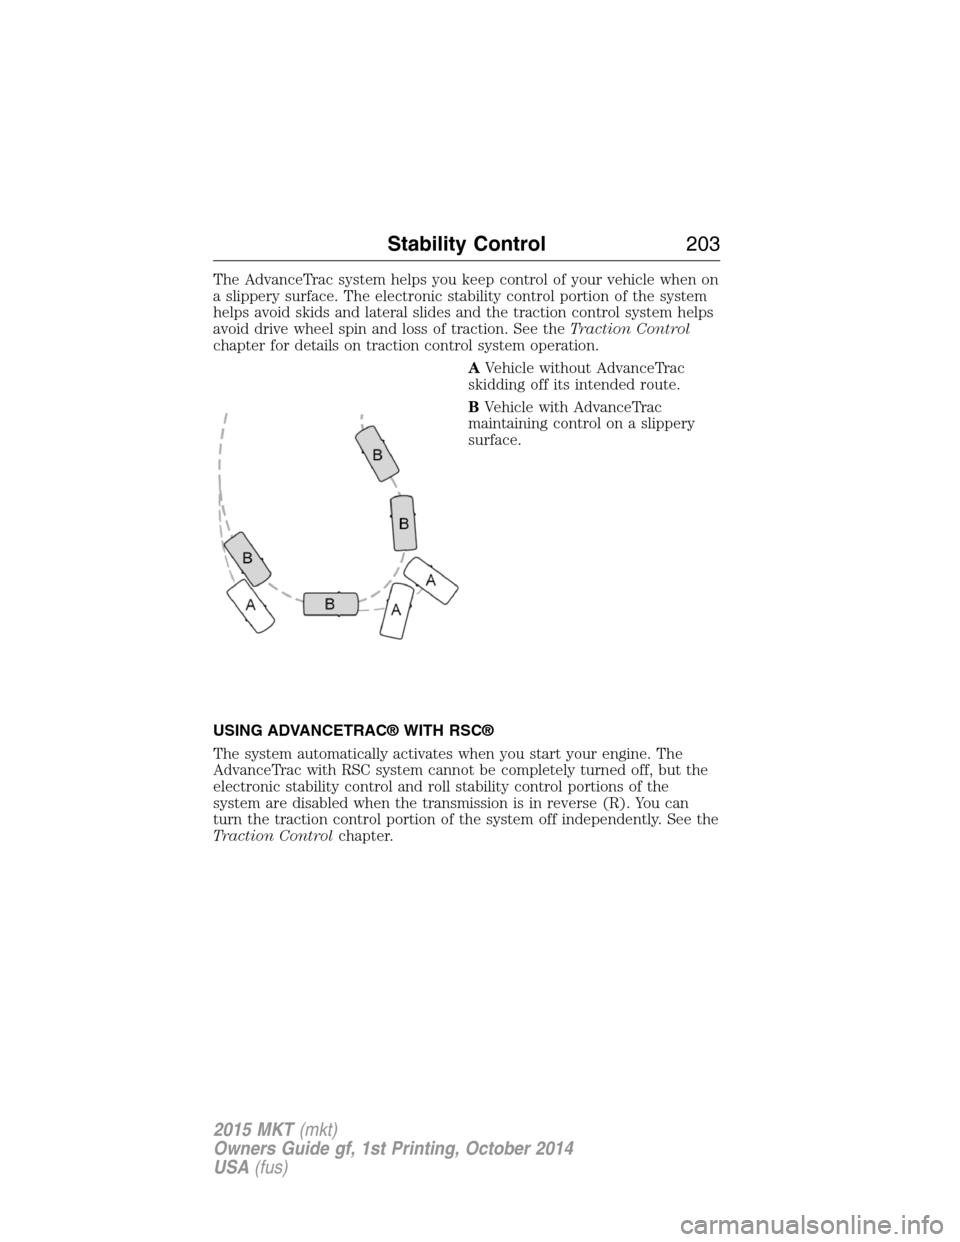
The AdvanceTrac system helps you keep control of your vehicle when on
a slippery surface. The electronic stability control portion of the system
helps avoid skids and lateral slides and the traction control system helps
avoid drive wheel spin and loss of traction. See theTraction Control
chapter for details on traction control system operation.
AVehicle without AdvanceTrac
skidding off its intended route.
BVehicle with AdvanceTrac
maintaining control on a slippery
surface.
USING ADVANCETRAC® WITH RSC®
The system automatically activates when you start your engine. The
AdvanceTrac with RSC system cannot be completely turned off, but the
electronic stability control and roll stability control portions of the
system are disabled when the transmission is in reverse (R). You can
turn the traction control portion of the system off independently. See the
Traction Controlchapter.
Stability Control203
2015 MKT(mkt)
Owners Guide gf, 1st Printing, October 2014
USA(fus)
Page 222 of 500

Resuming the Set Speed
Note:Resume should only be used if you are aware of the set speed and
intend to return to it.
Press and releaseRES. Your vehicle will return to the previously set
speed. The set speed will display continuously in the information display
while the system is active.
Low Speed Automatic Cancellation
The system is not functional at vehicle speeds below 16 mph (26 km/h).
An audible alarm sounds and the automatic braking released if your
vehicle drops below this speed.
Hilly Condition Usage
Note:An audible alarm sounds and the system shuts down if it is
applying brakes for an extended period of time. This allows the brakes to
cool down. The system will function normally again when the brakes
have cooled down.
You should select a lower gear position when the system is active in
situations such as prolonged downhill driving on steep grades, for
example driving in mountainous areas. Your vehicle needs additional
engine braking in these situations to reduce the load on the vehicle’s
regular brake system to prevent them from overheating.
Switching Off Adaptive Cruise Control
Note:The set speed memory will erase when you switch the system off.
Press and releaseOFFor turn off the ignition.
Cruise Control221
2015 MKT(mkt)
Owners Guide gf, 1st Printing, October 2014
USA(fus)
Page 225 of 500

Cause Action
Swirling water, or snow or ice on
the surface of the road may
interfere with the radar signals.Do not use system in these
conditions because it may not
detect any vehicle ahead.
You are in a desert or remote area
with no other vehicles and no
roadside objects.Wait a short time or switch to
normal cruise control.
Due to the nature of radar technology, it is possible to get a blockage
warning and not be blocked. This can happen, for example, when driving
in sparse rural or desert environments. A false blocked condition will
either self-clear or clear after a key cycle.
Switching to Normal Cruise Control
WARNING:Normal cruise control will not brake due to slower
vehicles. Always be aware of which mode is selected and apply
the brakes when necessary.
You can manually change from adaptive cruise control to normal cruise
control through the information display.
The cruise control indicator light will replace the adaptive
cruise control indicator light if normal cruise control is selected.
The gap setting will not be displayed, the system will not
automatically respond to lead vehicles and automatic braking will not be
activated. The system will default to adaptive cruise control when the
engine is started.
224Cruise Control
2015 MKT(mkt)
Owners Guide gf, 1st Printing, October 2014
USA(fus)
Page 233 of 500

Using the Systems
BLIS® turns on when the engine is started and the vehicle is driven
forward above 3 mph (5 km/h); it remains on while the transmission is in
D (Drive) or N (Neutral). If shifted out of D (Drive) or N (Neutral), the
system enters CTA mode. Once shifted back into D (Drive), BLIS® turns
back on when the vehicle is driven above 3 mph (5 km/h).
Note:BLIS® does not function in R (Reverse) or P (Park) or provide
any additional warning when a turn signal is on.
CTA detects approaching vehicles from up to 45 feet (14 meters) away
though coverage decreases when the sensors are blocked. Reversing
slowly helps increase the coverage area and effectiveness.
WARNING:To help avoid personal injury, NEVER use the CTA
system as a replacement for using the interior and exterior
mirrors and looking over your shoulder before backing out of a parking
space. CTA is not a replacement for careful driving.
In this first example, the left sensor is only partially obstructed; zone
coverage is nearly maximized.
232Driving Aids
2015 MKT(mkt)
Owners Guide gf, 1st Printing, October 2014
USA(fus)
Page 241 of 500

LINCOLN DRIVE CONTROL (IF EQUIPPED)
Lincoln Drive Control delivers the Lincoln driving experience through a
suite of sophisticated electronic vehicle systems. These systems
continuously monitor both your driving inputs and the road conditions to
optimize ride comfort, steering, handling, powertrain response and
sound. You can preset your preferences for these systems within the
information display. Lincoln Drive Control will respond to your
preferences based on what gear position you select. This provides a
single location to control multiple systems performance settings.
Lincoln Drive Control consists of the following systems:
•Continuously Controlled Damping (CCD) dynamically adjusts the
shock absorbers stiffness in real time to match the road surface and
driver inputs. Vehicle motion (roll, pitch, bounce), suspension
position, vehicle loading, vehicle speed, road conditions, and steering
are continuously monitored to adjust the suspension damping for
optimal vehicle control.
•Electronically Power-Assisted Steering (EPAS) adjusts steering effort
and feel based on vehicle speed and your inputs.
•Active Noise Control (ANC) utilizes vehicle electronics to enhance the
acoustic experience.
•Electronic Stability Control and Traction Control (ESC and TC)
maintain vehicle control in adverse conditions or high performance
driving.
•Electronic Throttle Control (ETC) which enhances the powertrain
response to your inputs.
These systems have a range of modes which you can choose from in
order to customize your ideal driving experience:
•Comfort – Provides a more relaxed driving experience, maximizing
comfort. Steering effort is decreased and suspension movement is
more fluid. Comfort mode is ideal when enhanced traveling comfort is
desired.
•Normal – Delivers a balanced combination of comfortable, controlled
ride and confident handling. This mode provides an engaging drive
experience and a direct connection to the road without sacrificing any
of the composure demanded from a luxury vehicle.
•Sport – Provides a sportier driving experience. Suspension stiffens,
with an emphasis on handling and control. The engine responds more
directly to your inputs and takes on a more powerful tone. Sport mode
is intended to be used during more spirited driving.
240Driving Aids
2015 MKT(mkt)
Owners Guide gf, 1st Printing, October 2014
USA(fus)
Page 242 of 500

Using Lincoln Drive Control
You can configure which of the Drive Control modes are active when the
vehicle is in D (Drive) or in S (Sport). The configuration is retained until
modified using the information display.
To change the vehicle’s Drive Control settings, access the main menu on
the information display:
1. Choose Settings.
2. Choose Driver Assist.
3. Choose Drive Control.
4. Select the shift position you would like to configure, either D or S.
5. Choose from Comfort, Normal, or Sport modes as your preferred
setting in D.
6. Choose from Normal or Sport modes as your preferred setting in S.
Note:Lincoln Drive Control has diagnostic checks that continuously
monitor the system to ensure proper operation. Certain types of system
errors will gray out the mode selections within the information display,
preventing you from changing states when the gear position is changed.
Other types of errors will produce a temporary message that states Drive
Control Malfunction. If either condition persists for multiple key cycles,
take your vehicle to an authorized dealer to have it checked.
STEERING
Electric Power Steering
WARNING:The electric power steering system has diagnostic
checks that continuously monitor the system to ensure proper
operation. When a system error is detected a steering message will
appear in the information display.
WARNING:The electric power steering system has diagnostic
checks that continuously monitor the system to ensure proper
operation of the electronic system. When an electronic error is
detected, a message will be displayed in the information display. If this
happens, stop the vehicle in a safe place, and turn off the engine. After
at least 10 seconds, reset the system by restarting the engine, and
watch the information display for a steering message. If a steering
message returns, or returns while driving, take the vehicle to your
dealer to have it checked.
Driving Aids241
2015 MKT(mkt)
Owners Guide gf, 1st Printing, October 2014
USA(fus)
Page 249 of 500

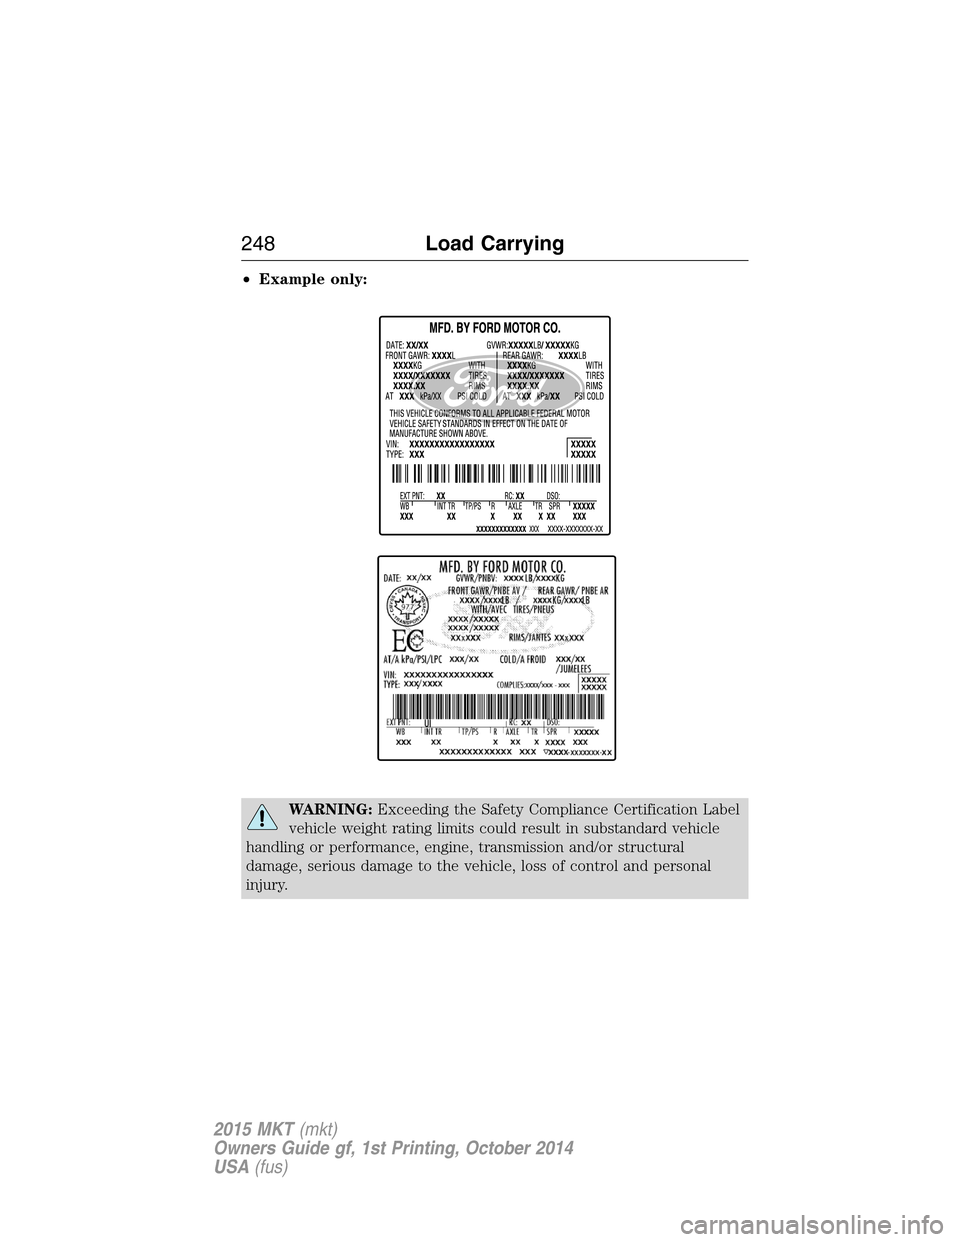
•Example only:
WARNING:Exceeding the Safety Compliance Certification Label
vehicle weight rating limits could result in substandard vehicle
handling or performance, engine, transmission and/or structural
damage, serious damage to the vehicle, loss of control and personal
injury.
248Load Carrying
2015 MKT(mkt)
Owners Guide gf, 1st Printing, October 2014
USA(fus)
Page 253 of 500

TOWING A TRAILER
WARNING:Do not exceed the GVWR or the GAWR specified on
the certification label.
WARNING:Towing trailers beyond the maximum recommended
gross trailer weight exceeds the limit of your vehicle and could
result in engine damage, transmission damage, structural damage, loss
of vehicle control, vehicle rollover and personal injury.
Note:For information on electrical items such as fuses or relays, see the
Fuseschapter.
The load capacity of your vehicle is designated by weight not volume.
You may not necessarily be able to use all available space when loading
your vehicle or trailer.
Towing a trailer places extra load on the engine, transmission, axle,
brakes, tires, and suspension. Inspect these components before, during
and after towing.
Load Placement
To help minimize how trailer movement affects your vehicle when
driving:
•Load the heaviest items closest to the trailer floor.
•Load the heaviest items centered between the left and right side
trailer tires.
•Load the heaviest items above the trailer axles or just slightly forward
toward the trailer tongue. Do not allow the final trailer tongue weight
to go above or below 10–15% of the loaded trailer weight.
•Select a tow bar with the correct rise or drop. When both the loaded
vehicle and trailer are connected, the trailer frame should be level, or
slightly angled down toward your vehicle, when viewed from the side.
When driving with a trailer or payload, a slight takeoff vibration or
shudder may be present due to the increased payload weight. You can
find more information about proper trailer loading and setting your
vehicle up for towing underLoad limitin theLoad Carryingchapter.
You can also find information in theRV and Trailer Towing Guide
available at your authorized dealer, or online at
http://www.fleet.ford.com/towing-guides.
252Towing
2015 MKT(mkt)
Owners Guide gf, 1st Printing, October 2014
USA(fus)