Page 414 of 499
619
What to do in an emergency
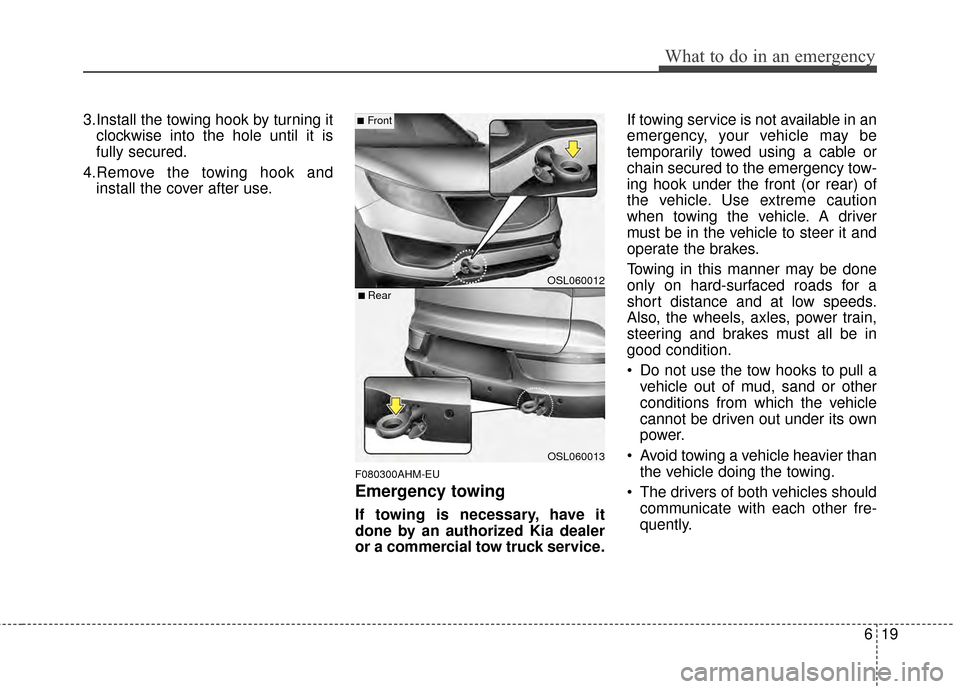
3.Install the towing hook by turning itclockwise into the hole until it is
fully secured.
4.Remove the towing hook and install the cover after use.
F080300AHM-EU
Emergency towing
If towing is necessary, have it
done by an authorized Kia dealer
or a commercial tow truck service. If towing service is not available in an
emergency, your vehicle may be
temporarily towed using a cable or
chain secured to the emergency tow-
ing hook under the front (or rear) of
the vehicle. Use extreme caution
when towing the vehicle. A driver
must be in the vehicle to steer it and
operate the brakes.
Towing in this manner may be done
only on hard-surfaced roads for a
short distance and at low speeds.
Also, the wheels, axles, power train,
steering and brakes must all be in
good condition.
Do not use the tow hooks to pull a
vehicle out of mud, sand or other
conditions from which the vehicle
cannot be driven out under its own
power.
Avoid towing a vehicle heavier than the vehicle doing the towing.
The drivers of both vehicles should communicate with each other fre-
quently.
OSL060012
OSL060013
■Front
■ Rear
Page 416 of 499
621
What to do in an emergency
F080301AAM-EU
Emergency towing precautions
Turn the ignition switch to ACC sothe steering wheel isn’t locked.
Place the transaxle shift lever in N (Neutral).
Release the parking bake.
Press the brake pedal with more force than usual since you will have
reduced brake performance.
More steering effort will be required because the power steer-
ing system will be disabled.
If you are driving down a long hill, the brakes may overheat and brake
performance will be reduced. Stop
often and let the brakes cool off.
If the car is being towed with all four wheels on the ground, it can
be towed only from the front. Be
sure that the transaxle is in neutral.
Be sure the steering is unlocked by
placing the ignition switch in the
ACC position. A driver must be in
the towed vehicle to operate the
steering and brakes.
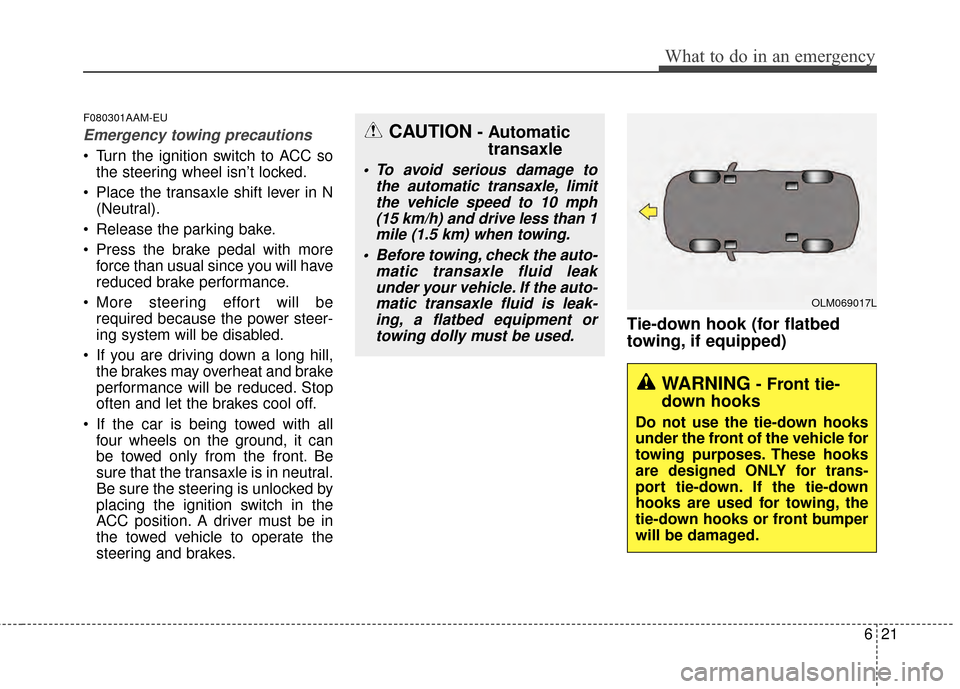
Tie-down hook (for flatbed
towing, if equipped)
WARNING- Front tie-
down hooks
Do not use the tie-down hooks
under the front of the vehicle for
towing purposes. These hooks
are designed ONLY for trans-
port tie-down. If the tie-down
hooks are used for towing, the
tie-down hooks or front bumper
will be damaged.
OLM069017L
CAUTION- Automatic transaxle
To avoid serious damage to
the automatic transaxle, limitthe vehicle speed to 10 mph(15 km/h) and drive less than 1mile (1.5 km) when towing.
Before towing, check the auto- matic transaxle fluid leakunder your vehicle. If the auto-matic transaxle fluid is leak-ing, a flatbed equipment ortowing dolly must be used.
Page 422 of 499
Maintenance
67
G030103AHM
At least monthly:
Check the coolant level in theengine coolant reservoir.
Check the operation of all exterior lights, including the stoplights, turn
signals and hazard warning flash-
ers.
Check the inflation pressures of all tires including the spare.
G030104AHM
At least twice a year
(i.e., every Spring and Fall):
Check the radiator, heater and air conditioning hoses for leaks or
damage.
Check the windshield washer spray and wiper operation. Clean
the wiper blades with clean cloth
dampened with washer fluid.
Check the headlight alignment.
Check the muffler, exhaust pipes, shields and clamps.
Check the lap/shoulder belts for wear and function.
Check for worn tires and loose wheel lug nuts.
G030105AHM-C1
At least once a year:
Clean the body and door drainholes.
Lubricate the door hinges and checks, and hood hinges.
Lubricate the door and hood locks and latches.
Lubricate the door rubber weather- strips.
Check the air conditioning system.
Check the power steering fluid level.
Inspect and lubricate the automat- ic transaxle linkage and controls.
Clean the battery and terminals.
Check the brake/clutch fluid level.
Page 426 of 499
Maintenance
10
7
Kilometers or time in months, whichever comes first
× 1,000 km 12 24 36 48 60 72 84 96 108 120 132 144 156 168 180 192
# Months 6 12 18 24 30 36 42 48 54 60 66 72 78 84 90 96
Front brake disc/pads, calipers I I I IIIII
Rear brake disc/pads I I I IIIII
Parking brake I I I I
Exhaust pipes, heat shield & mountings I I I IIIII
Front suspension ball jonts I I I IIIII
Steering gear box, linkage & boots/ IIIII IIIIIIII III
lower arm ball joint, upper arm ball joint
Drive shaft dust boots I I I IIIII
All latch, hinges and locks I I I IIIII
Battery condition I I I I I I IIIIIII III
MAINTENANCE
INTERVALS
MAINTENANCE
ITEM
NORMAL MAINTENANCE SCHEDULE (CONT.)
R : Replace or change I : Inspect and if necessary, adjust, correct, clean or replace.
Page 435 of 499
719
Maintenance
ENGINE COOLANT
G070000AHM
The high-pressure cooling system
has a reservoir filled with year round
antifreeze coolant. The reservoir is
filled at the factory.
Check the antifreeze protection and
coolant level at least once a year, at
the beginning of the winter season,
and before traveling to a colder cli-
mate.
G070100AHM
Checking the coolant level
Also, hot coolant or steam could cause
serious personal injury.
Turn the engine off and wait until it
cools down. Use extreme care when
removing the radiator cap. Wrap a
thick towel around it, and turn it coun-
terclockwise slowly to the first stop.
Step back while the pressure is
released from the cooling system.
When you are sure all the pressure
has been released, press down on the
cap, using a thick towel, and continue
turning counterclockwise to remove it.
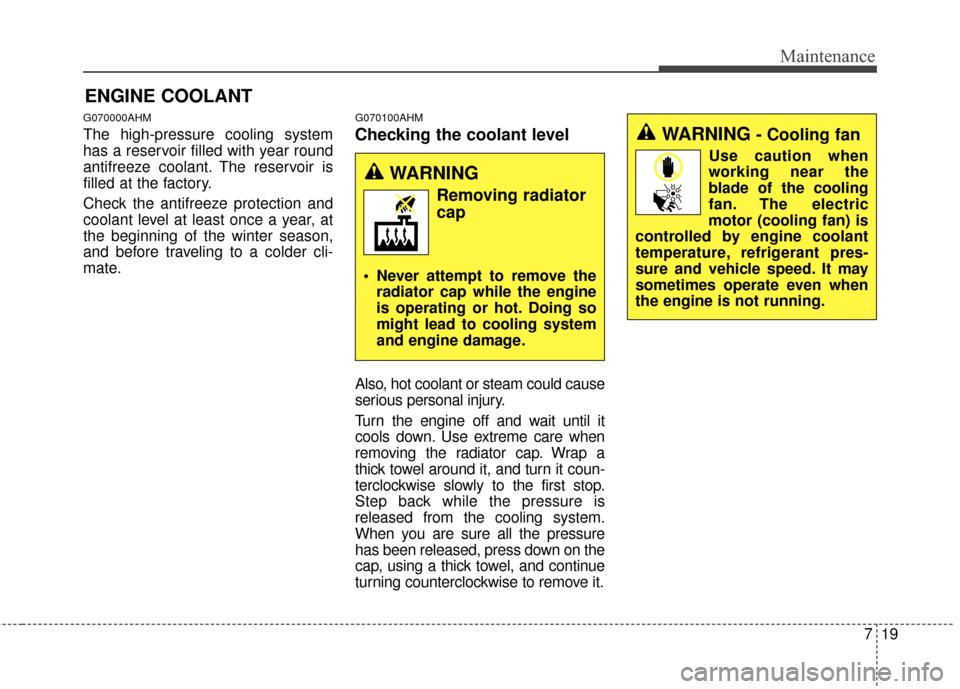
WARNING
Removing radiatorcap
Never attempt to remove the
radiator cap while the engine
is operating or hot. Doing so
might lead to cooling system
and engine damage.
WARNING- Cooling fan
Use caution when
working near the
blade of the cooling
fan. The electric
motor (cooling fan) is
controlled by engine coolant
temperature, refrigerant pres-
sure and vehicle speed. It may
sometimes operate even when
the engine is not running.
Page 443 of 499
727
Maintenance
Front windshield wiper blade
1.Raise the wiper arm and turn thewiper blade assembly to expose
the plastic locking clip. 2.Compress the clip and slide the
blade assembly downward. 3.Lift it off the arm.
4.Install the blade assembly in the
reverse order of removal.
1LDA50231JBA7037
CAUTION- Wiper arms
Do not allow the wiper arm tofall against the windshield,since it may chip or crack thewindshield.
1JBA7038
Page 447 of 499
731
Maintenance
G190300AAM
Reset items
Items should be reset after the bat-
tery has been discharged or the bat-
tery has been disconnected.
Auto up/down window (See section 4)
Sunroof (See section 4)
Trip computer (See section 4)
Climate control system (See section 4)
Clock (See section 4)
Audio (See section 4)
Page 452 of 499
Maintenance
36
7
G200600AHM-EU
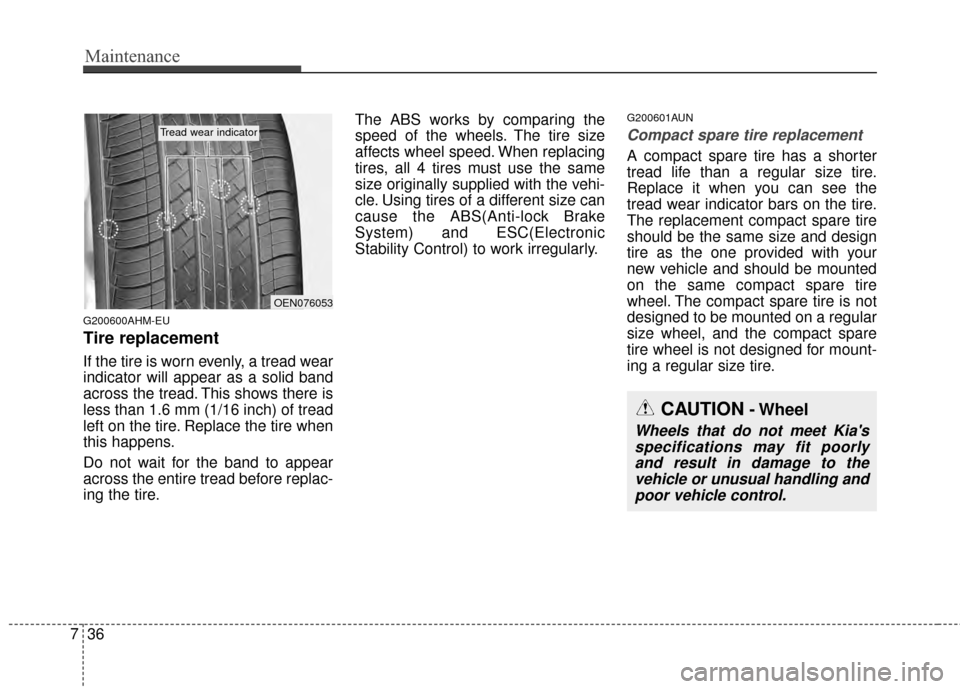
Tire replacement
If the tire is worn evenly, a tread wear
indicator will appear as a solid band
across the tread. This shows there is
less than 1.6 mm (1/16 inch) of tread
left on the tire. Replace the tire when
this happens.
Do not wait for the band to appear
across the entire tread before replac-
ing the tire. The ABS works by comparing the
speed of the wheels. The tire size
affects wheel speed. When replacing
tires, all 4 tires must use the same
size originally supplied with the vehi-
cle. Using tires of a different size can
cause the ABS(Anti-lock Brake
System) and ESC(Electronic
Stability Control) to work irregularly.
G200601AUN
Compact spare tire replacement
A compact spare tire has a shorter
tread life than a regular size tire.
Replace it when you can see the
tread wear indicator bars on the tire.
The replacement compact spare tire
should be the same size and design
tire as the one provided with your
new vehicle and should be mounted
on the same compact spare tire
wheel. The compact spare tire is not
designed to be mounted on a regular
size wheel, and the compact spare
tire wheel is not designed for mount-
ing a regular size tire.
OEN076053
Tread wear indicator
CAUTION- Wheel
Wheels that do not meet Kia's
specifications may fit poorlyand result in damage to thevehicle or unusual handling andpoor vehicle control.