Page 326 of 544
55
Driving your vehicle
WARNING- Check sur-roundings
Always check the surrounding
areas near your vehicle for peo-
ple, especially children, before
putting a vehicle into D (Drive)
or R (Reverse).
WARNING- Fire risk
When you intend to park or stop
the vehicle with the engine on,
be careful not to depress the
accelerator pedal for a long
period of time. It may overheat
the engine or exhaust system
and cause fire.WARNING- Loose objects
Securely store items in your
vehicle. When you make a sud-
den stop or turn the steering
wheel rapidly, loose objects
may drop on the floor and it
could interfere with the opera-
tion of the foot pedals, possibly
causing an accident.WARNING- Driving while intoxicated
Do not drive while intoxicated.
Drinking and driving is danger-
ous. Even a small amount of
alcohol will affect your reflexes,
perceptions and judgment.
Driving while under the influ-
ence of drugs is as dangerous
as or more dangerous than driv-
ing drunk.
Page 341 of 544
Driving your vehicle
20
5
In sports mode, moving the shift
lever backwards and forwards will
allow you to make gearshifts rapidly.
In contrast to a manual transaxle, the
sports mode allows gearshifts with
the accelerator pedal depressed.
Up (+) : Push the lever forward once
to shift up one gear.
Down (-) : Pull the lever backwards once to shift down one
gear. In sports mode, the driver must
execute upshifts in accordance
with road conditions, taking care to
keep the engine speed below the
red zone.
In sports mode, only the 6 forward gears can be selected. To reverse
or park the vehicle, move the shift
lever to the R (Reverse) or P (Park)
position as required.
In sports mode, downshifts are made automatically when the vehi-
cle slows down. When the vehicle
stops, 1st gear is automatically
selected.
In sports mode, when the engine rpm approaches the red zone shift
points are varied to upshift auto-
matically. To maintain the required levels of
vehicle performance and safety,
the system may not execute cer-
tain gearshifts when the shift lever
is operated.
When driving on a slippery road, push the shift lever forward into the
+(up) position. This causes the
transaxle to shift into the 2nd gear
which is better for smooth driving
on a slippery road. Push the shift
lever to the -(down) side to shift
back to the 1st gear.
Page 385 of 544
Driving your vehicle
64
5
✽
✽
NOTICE
Overloading your vehicle may cause
damage. Repairs would not be cov-
ered by your warranty. Do not over-
load your vehicle.
WARNING- Loose cargo
Do not travel with unsecured
blunt objects in the passenger
compartment of your vehicle
(e.g. suit cases or unsecured
child seats). These items may
strike occupant during a sud-
den stop or crash.WARNING- Over loading
Do not overload your vehicle.
Overloading your vehicle can
cause heat buildup in your vehi-
cle's tires and possible tire fail-
ure, increased stopping dis-
tances and poor vehicle han-
dling all of which may result in a
crash.
Page 390 of 544
What to do in an emergency
46
IF THE ENGINE WILL NOT START
If engine doesn't turn over or
turns over slowly
1.If your vehicle has an automatictransaxle, be sure the shift lever is
in N (Neutral) or P (Park) and the
emergency brake is set.
2.Check the battery connections to be sure they are clean and tight.
3.Turn on the interior light. If the light dims or goes out when you operate
the starter, the battery is dis-
charged.
4.Check the starter connections to be sure they are securely tight-
ened.
5.Do not push or pull the vehicle to start it. See instructions for "Jump
starting".
If engine turns over normally
but does not start
1.Check the fuel level.
2.With the ignition switch in theLOCK position, check all connec-
tors at the ignition coils and spark
plugs. Reconnect any that may be
disconnected or loose.
3.Check the fuel line in the engine compartment.
4.If the engine still does not start, call an authorized Kia dealer or seek
other qualified assistance.
WARNING- Push/pull
start
Do not push or pull the vehicle
to start it. Push or pull starting
may cause the catalytic con-
verter to overload and create a
fire hazard.
Page 400 of 544
What to do in an emergency
14
6
IF YOU HAVE A FLAT TIRE
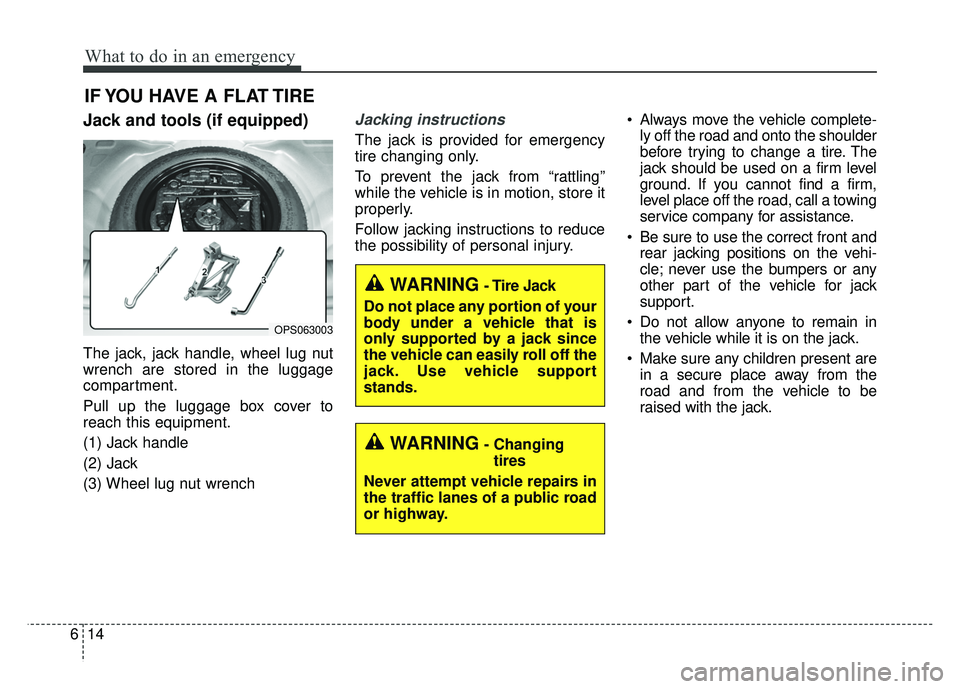
Jack and tools (if equipped)
The jack, jack handle, wheel lug nut
wrench are stored in the luggage
compartment.
Pull up the luggage box cover to
reach this equipment.
(1) Jack handle
(2) Jack
(3) Wheel lug nut wrench
Jacking instructions
The jack is provided for emergency
tire changing only.
To prevent the jack from “rattling”
while the vehicle is in motion, store it
properly.
Follow jacking instructions to reduce
the possibility of personal injury. Always move the vehicle complete-
ly off the road and onto the shoulder
before trying to change a tire. The
jack should be used on a firm level
ground. If you cannot find a firm,
level place off the road, call a towing
service company for assistance.
Be sure to use the correct front and rear jacking positions on the vehi-
cle; never use the bumpers or any
other part of the vehicle for jack
support.
Do not allow anyone to remain in the vehicle while it is on the jack.
Make sure any children present are in a secure place away from the
road and from the vehicle to be
raised with the jack.
OPS063003
WARNING- Changing
tires
Never attempt vehicle repairs in
the traffic lanes of a public road
or highway.
WARNING- Tire Jack
Do not place any portion of your
body under a vehicle that is
only supported by a jack since
the vehicle can easily roll off the
jack. Use vehicle support
stands.
Page 405 of 544
619
What to do in an emergency
If you have a tire gauge, remove the
valve cap and check the air pressure.
If the pressure is lower than recom-
mended, drive slowly to the nearest
service station and inflate to the cor-
rect pressure. If it is too high, adjust
it until it is correct. Always reinstall
the valve cap after checking or
adjusting the tire pressure. If the cap
is not replaced, dust and dirt may get
into the tire valve and air may leak
from the tire. If you lose a valve cap,
buy another and install it as soon as
possible.
After you have changed the wheels,
always secure the flat tire in its place
and return the jack and tools to their
proper storage locations.Note that most lug nuts do not have
metric threads. Be sure to use
extreme care in checking for thread
style before installing aftermarket lug
nuts or wheels. If in doubt, consult an
authorized Kia dealer.To prevent the jack, jack handle,
wheel lug nut wrench and spare tire
from rattling while the vehicle is in
motion, store them properly.
Check the inflation pressures as
soon as possible after installing the
spare tire. Adjust it to the specified
pressure, if necessary. Refer to
“Tires and wheels” in chapter 8.CAUTION- Reusing lug
nuts
Make certain during wheelremoval that the same nuts thatwere removed are reinstalled -or, if replaced, that nuts withmetric threads and the samechamfer configuration are used.Your vehicle has metric threadson the wheel studs and nuts.Installation of a non-metricthread nut on a metric stud willnot secure the wheel to the hubproperly and will damage thestud so that it must be replaced.
WARNING- Wheel studs
If the studs are damaged, they
may lose their ability to retain
the wheel. This could lead to the
loss of the wheel and a colli-
sion.
Page 418 of 544
What to do in an emergency
32
6
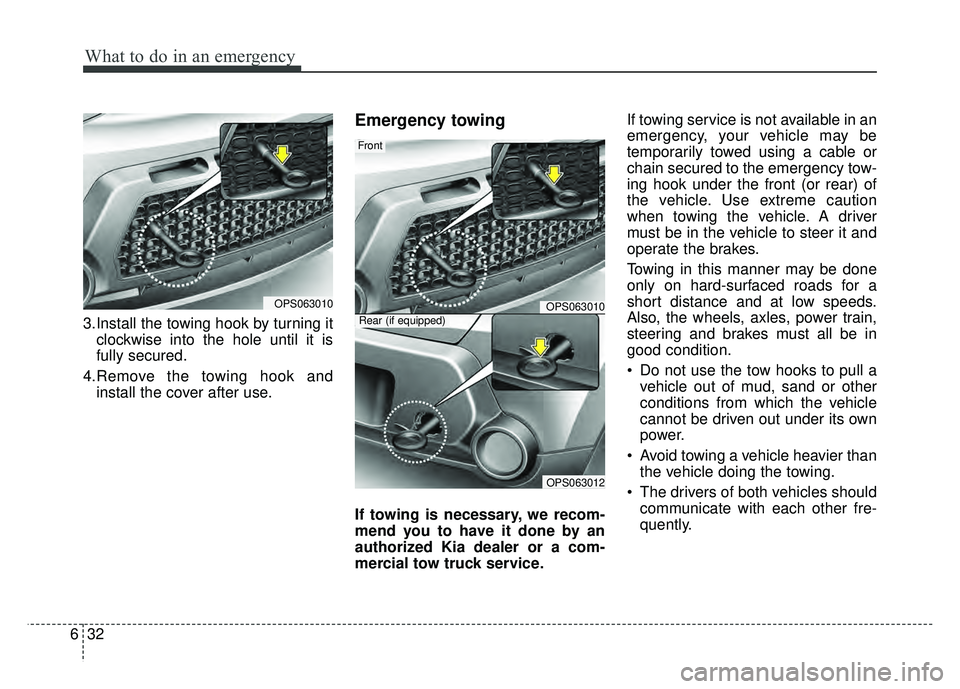
3.Install the towing hook by turning it
clockwise into the hole until it is
fully secured.
4.Remove the towing hook and install the cover after use.
Emergency towing
If towing is necessary, we recom-
mend you to have it done by an
authorized Kia dealer or a com-
mercial tow truck service. If towing service is not available in an
emergency, your vehicle may be
temporarily towed using a cable or
chain secured to the emergency tow-
ing hook under the front (or rear) of
the vehicle. Use extreme caution
when towing the vehicle. A driver
must be in the vehicle to steer it and
operate the brakes.
Towing in this manner may be done
only on hard-surfaced roads for a
short distance and at low speeds.
Also, the wheels, axles, power train,
steering and brakes must all be in
good condition.
Do not use the tow hooks to pull a
vehicle out of mud, sand or other
conditions from which the vehicle
cannot be driven out under its own
power.
Avoid towing a vehicle heavier than the vehicle doing the towing.
The drivers of both vehicles should communicate with each other fre-
quently.
OPS063010OPS063010
OPS063012
Front
Rear (if equipped)
Page 419 of 544
633
What to do in an emergency
Attach a towing strap to the towhook.
Using a portion of the vehicle other than the tow hooks for towing may
damage the body of your vehicle.
Only use a cable or chain specifi- cally intended for use in towing
vehicles. Securely fasten the cable
or chain to the towing hook provid-
ed.
Before emergency towing, check that the hook is not broken or dam-
aged.
Fasten the towing cable or chain securely to the hook.
Do not jerk the hook. Apply it steadily and with even force.
To avoid damaging the hook, do not pull from the side or at a verti-
cal angle. Always pull straight
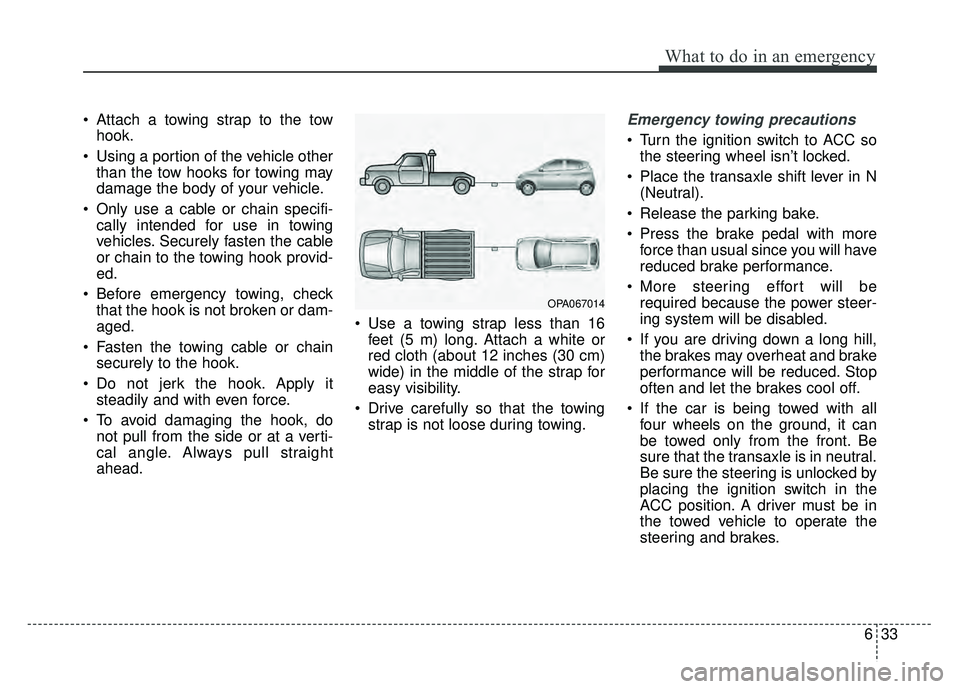
ahead. Use a towing strap less than 16
feet (5 m) long. Attach a white or
red cloth (about 12 inches (30 cm)
wide) in the middle of the strap for
easy visibility.
Drive carefully so that the towing strap is not loose during towing.Emergency towing precautions
Turn the ignition switch to ACC sothe steering wheel isn’t locked.
Place the transaxle shift lever in N (Neutral).
Release the parking bake.
Press the brake pedal with more force than usual since you will have
reduced brake performance.
More steering effort will be required because the power steer-
ing system will be disabled.
If you are driving down a long hill, the brakes may overheat and brake
performance will be reduced. Stop
often and let the brakes cool off.
If the car is being towed with all four wheels on the ground, it can
be towed only from the front. Be
sure that the transaxle is in neutral.
Be sure the steering is unlocked by
placing the ignition switch in the
ACC position. A driver must be in
the towed vehicle to operate the
steering and brakes.
OPA067014