Page 12 of 407

25
Your vehicle at a glance
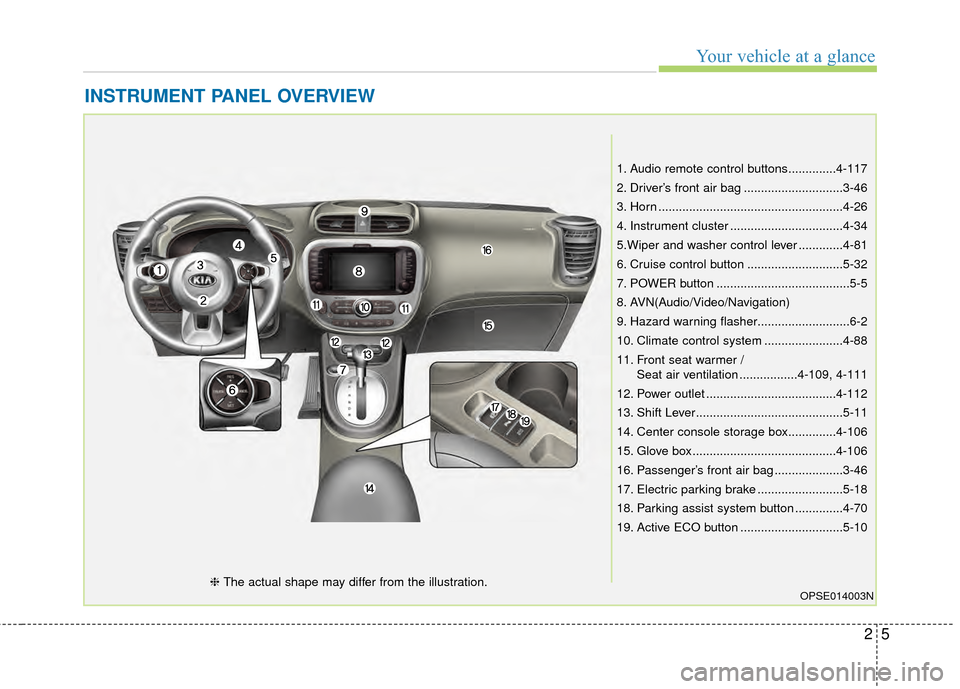
INSTRUMENT PANEL OVERVIEW
1. Audio remote control buttons..............4-117
2. Driver’s front air bag .............................3-46
3. Horn ......................................................4-26
4. Instrument cluster .................................4-34
5.Wiper and washer control lever .............4-81
6. Cruise control button ............................5-32
7. POWER button .......................................5-5
8. AVN(Audio/Video/Navigation)
9. Hazard warning flasher...........................6-2
10. Climate control system .......................4-88
11. Front seat warmer /Seat air ventilation .................4-109, 4-111
12. Power outlet ......................................4-112
13. Shift Lever...........................................5-11
14. Center console storage box..............4-106
15. Glove box ..........................................4-106
16. Passenger’s front air bag ....................3-46
17. Electric parking brake .........................5-18
18. Parking assist system button ..............4-70
19. Active ECO button ..............................5-10
OPSE014003N❈ The actual shape may differ from the illustration.
Page 105 of 407
435
Features of your vehicle
Instrument Cluster Control
Adjusting Instrument ClusterIllumination
The brightness of the instrument
panel illumination is changed by
pressing the illumination control but-
ton ("+" or "-") when the POWER but-
ton is ON, or the tail lights are turned
on. If you hold the illumination control
button ("+" or "-"), the brightness
will be changed continuously.
If the brightness reaches to the maximum or minimum level, an
alarm will sound.
LCD Display Control
The LCD display modes can be
changed by using the control buttons
on the steering wheel.
(1) : MODE button for changing modes or SELECT button
for setting the selected item
(2) : MOVE button for changing items or RESET button for
resetting the selected item
❈ For the LCD modes, refer to “LCD
Display” in this chapter.OPSE044039
OPSE044117L
OPS043040
Page 160 of 407

Features of your vehicle
90
4
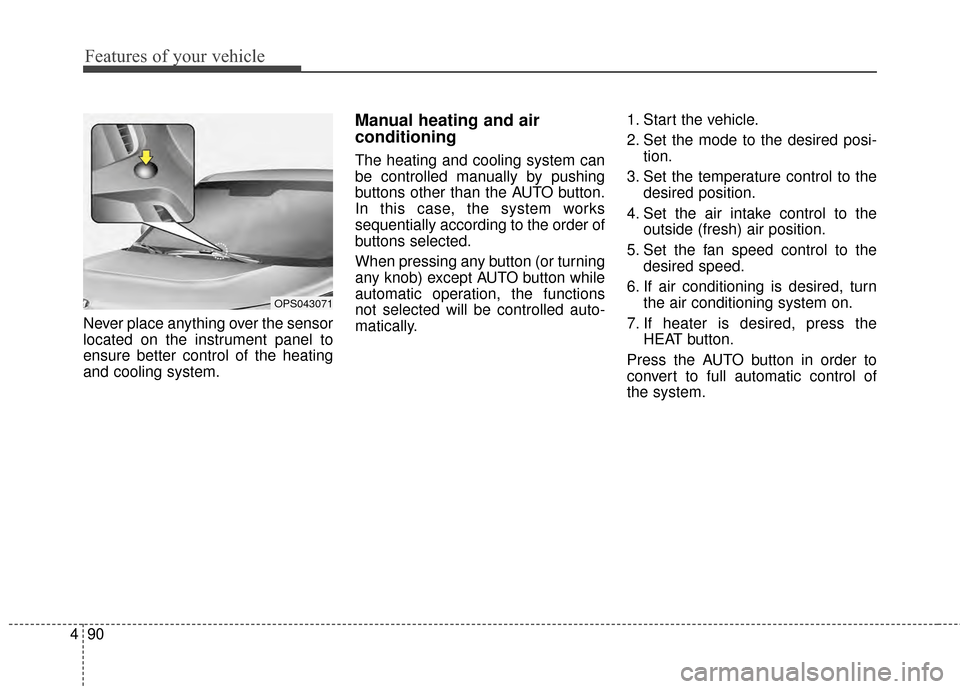
Never place anything over the sensor
located on the instrument panel to
ensure better control of the heating
and cooling system.
Manual heating and air
conditioning
The heating and cooling system can
be controlled manually by pushing
buttons other than the AUTO button.
In this case, the system works
sequentially according to the order of
buttons selected.
When pressing any button (or turning
any knob) except AUTO button while
automatic operation, the functions
not selected will be controlled auto-
matically. 1. Start the vehicle.
2. Set the mode to the desired posi-
tion.
3. Set the temperature control to the desired position.
4. Set the air intake control to the outside (fresh) air position.
5. Set the fan speed control to the desired speed.
6. If air conditioning is desired, turn the air conditioning system on.
7. If heater is desired, press the HEAT button.
Press the AUTO button in order to
convert to full automatic control of
the system.
OPS043071
Page 167 of 407

497
Features of your vehicle
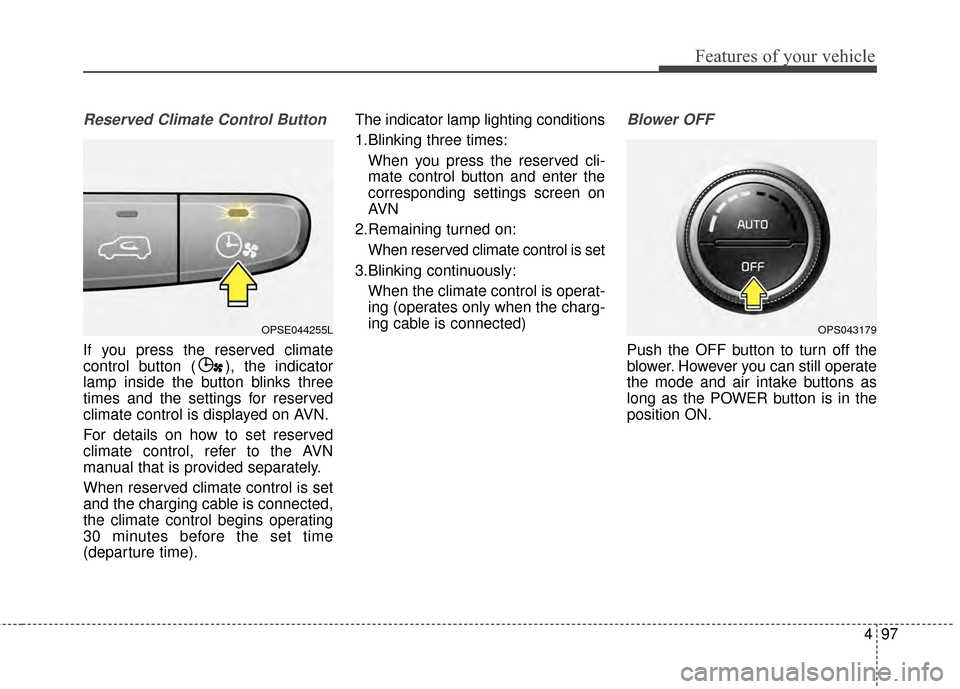
Reserved Climate Control Button
If you press the reserved climate
control button ( ), the indicator
lamp inside the button blinks three
times and the settings for reserved
climate control is displayed on AVN.
For details on how to set reserved
climate control, refer to the AVN
manual that is provided separately.
When reserved climate control is set
and the charging cable is connected,
the climate control begins operating
30 minutes before the set time
(departure time).The indicator lamp lighting conditions
1.Blinking three times:
When you press the reserved cli-
mate control button and enter the
corresponding settings screen on
AVN
2.Remaining turned on: When reserved climate control is set
3.Blinking continuously: When the climate control is operat-
ing (operates only when the charg-
ing cable is connected)
Blower OFF
Push the OFF button to turn off the
blower. However you can still operate
the mode and air intake buttons as
long as the POWER button is in the
position ON.
OPSE044255LOPS043179
Page 187 of 407
4117
Features of your vehicle
Audio remote control
(if equipped)
The steering wheel audio remote
control button may be installed.
Do not operate the audio remote
control buttons simultaneously.
VOLUME (VOL+/ VOL-) (1)
Push the VOL + to increase volume.
Push the VOL - to decrease volume.
SEEK/PRESET ( / ) (2)
If the SEEK/PRESET button is
pressed for 1 second or more, it will
work as follows in each mode.
RADIO mode
It will function as the AUTO SEEK
select button.
USB mode
It will function as the FF/REW button.
If the SEEK/PRESET button is
pressed for less than 1 second, it will
work as follows in each mode.
OPS043190
WARNING - Distracted
driving
Focus on the road while driving.
The driver's primary responsi-
bility is in the safe and legal
operation of the vehicle. Use of
any handled devices, other
equipment or vehicle systems
that distract the drive should
not be used during vehicle
operation.
Page 188 of 407
Features of your vehicle
118
4
RADIO mode
It will function as the PRESET STA-
TION select buttons.
USB mode
It will function as the FILE UP/DOWN
button.
MODE (3)
Press the button to select Radio,
USB or AUX.
Detailed information for audio control
buttons is described in the following
pages in this section.
Aux, USB and iPod®* port
If your vehicle has an aux and/or
USB(universal serial bus) port or
iPod
®port, you can use an aux port
to connect audio devices and an USB
port to plug in an USB and also an
iPod
®port to plug in an iPod®. When using a portable audio device
connected to the power outlet, noise
may occur during playback. If this
happens, use the power source of
the portable audio device.
*iPod®is a registered trademark of Apple Inc.
OPSE044194