Page 303 of 407
Maintenance
40
7
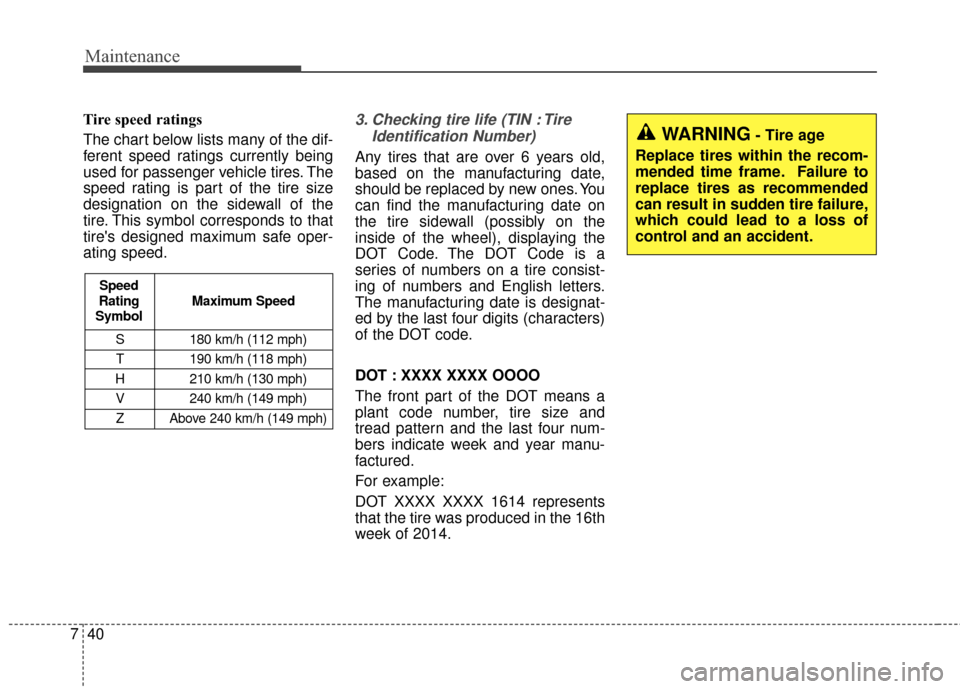
Tire speed ratings
The chart below lists many of the dif-
ferent speed ratings currently being
used for passenger vehicle tires. The
speed rating is part of the tire size
designation on the sidewall of the
tire. This symbol corresponds to that
tire's designed maximum safe oper-
ating speed.3. Checking tire life (TIN : Tire
Identification Number)
Any tires that are over 6 years old,
based on the manufacturing date,
should be replaced by new ones. You
can find the manufacturing date on
the tire sidewall (possibly on the
inside of the wheel), displaying the
DOT Code. The DOT Code is a
series of numbers on a tire consist-
ing of numbers and English letters.
The manufacturing date is designat-
ed by the last four digits (characters)
of the DOT code.
DOT : XXXX XXXX OOOO
The front part of the DOT means a
plant code number, tire size and
tread pattern and the last four num-
bers indicate week and year manu-
factured.
For example:
DOT XXXX XXXX 1614 represents
that the tire was produced in the 16th
week of 2014.
S 180 km/h (112 mph)
T 190 km/h (118 mph)
H 210 km/h (130 mph) V 240 km/h (149 mph)Z Above 240 km/h (149 mph)
Maximum Speed
Speed
Rating
Symbol
WARNING- Tire age
Replace tires within the recom-
mended time frame. Failure to
replace tires as recommended
can result in sudden tire failure,
which could lead to a loss of
control and an accident.
Page 304 of 407
741
Maintenance
4. Tire ply composition and mate-rial
The number of layers or plies of rub-
ber-coated fabric in the tire. Tire
manufacturers also must indicate the
materials in the tire, which include
steel, nylon, polyester, and others.
The letter "R" means radial ply con-
struction; the letter "D" means diago-
nal or bias ply construction; and the
letter "B" means belted-bias ply con-
struction.
5. Maximum permissible inflationpressure
This number is the greatest amount
of air pressure that should be put in
the tire. Do not exceed the maximum
permissible inflation pressure. Refer
to the Tire and Loading Information
label for recommended inflation
pressure.
6. Maximum load rating
This number indicates the maximum
load in kilograms and pounds that
can be carried by the tire. When
replacing the tires on the vehicle,
always use a tire that has the same
load rating as the factory installed
tire.
7. Uniform tire quality grading
Quality grades can be found where
applicable on the tire sidewall
between tread shoulder and maxi-
mum section width.
For example:
TREADWEAR 200
TRACTION AA
TEMPERATURE A
Tires degrade over time, even when
they are not being used. Regardless
of the remaining tread, we recom-
mend that tires be replaced after
approximately six (6) years of normal
service. Heat caused by hot climates
or frequent high loading conditions
can accelerate the aging process. Tread wear
The tread wear grade is a compara-
tive rating based on the wear rate of
the tire when tested under controlled
conditions on a specified govern-
ment test course. For example, a tire
graded 150 would wear one-and-a-
half times (1½) as well on the gov-
ernment course as a tire graded 100.
The relative performance of tires
depends upon the actual conditions
of their use, however, and may
depart significantly from the norm
due to variations in driving habits,
service practices and differences in
road characteristics and climate.
These grades are molded on the
side-walls of passenger vehicle tires.
The tires available as standard or
optional equipment on your vehicle
may vary with respect to grade.
Page 321 of 407
Maintenance
58
7
LIGHT BULBS
Use only the bulbs of the specified
wattage.
If you don’t have necessary tools, the correct bulbs and the expertise,
consult an authorized Kia dealer. In
many cases, it is difficult to replace
vehicle light bulbs because other
parts of the vehicle must be
removed before you can get to the
bulb. This is especially true if you
have to remove the headlight
assembly to get to the bulb(s).
Removing/installing the headlight
assembly can result in damage to
the vehicle.
Do not install additional bulb or LED. If you install that, the lamp
may not be operated properly and
fuse box or electric wiring system
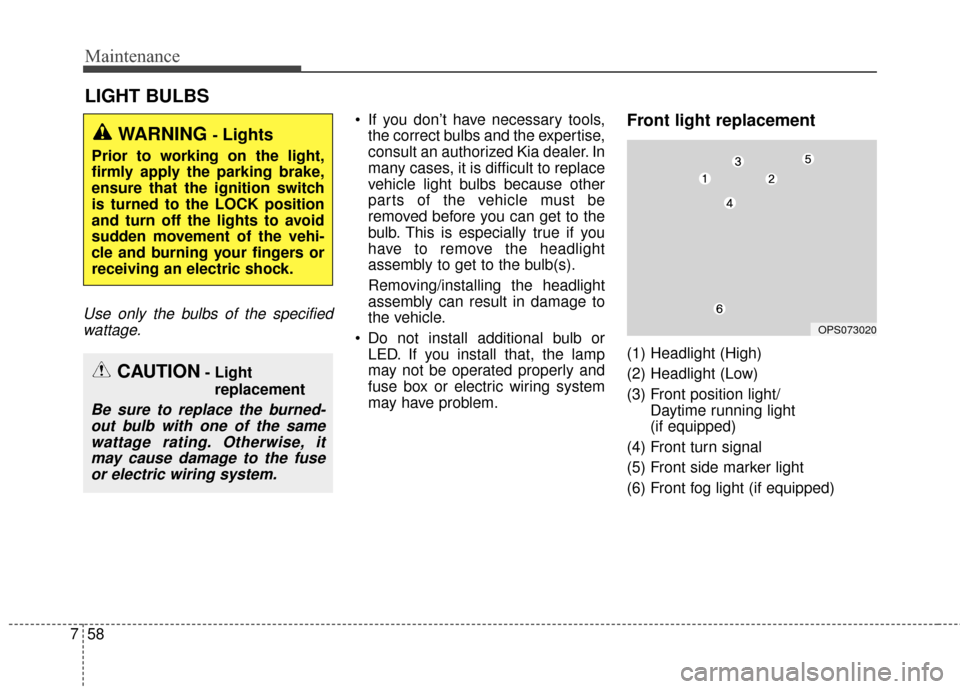
may have problem.Front light replacement
(1) Headlight (High)
(2) Headlight (Low)
(3) Front position light/ Daytime running light
(if equipped)
(4) Front turn signal
(5) Front side marker light
(6) Front fog light (if equipped)
WARNING - Lights
Prior to working on the light,
firmly apply the parking brake,
ensure that the ignition switch
is turned to the LOCK position
and turn off the lights to avoid
sudden movement of the vehi-
cle and burning your fingers or
receiving an electric shock.
CAUTION- Light replacement
Be sure to replace the burned-out bulb with one of the samewattage rating. Otherwise, itmay cause damage to the fuseor electric wiring system.
OPS073020
Page 353 of 407
8
■
■Near by stations
Stations around the current location
is searched. Depending on the sym-
bol color of the station, it is catego-
rized as Reachable area, Risky area
and Unreachable area.
■ ■Energy Information
You can check battery information
and power consumption.
� � Battery Information
You can check the available range,
battery charge amount that can be
used, and expected charging time
for each charge type.
� �Power Consumption
Power that is consumed by the
drive system, climate and electri-
cal components are displayed
respectively.
You can check how far the vehicle
can drive currently, and how much
more the vehicle can drive if the
climate is turned OFF.
EV MODE
Page 357 of 407
12
Normal Charge :We recommend using normal
charging for usual charging of the
vehicle.
(Refer to “Normal Charge.“ in this
chapter)
Quick Charge : You can charge at high speeds at
public charging stations. Refer to
the respective company's manual
that is provided for each quick
charger type.
Battery performance and durability
can deteriorate if the quick charger
is used constantly.
Use of quick charge should be
minimized in order to help prolong
high voltage battery life.
Trickle Charge : Trickle Charge can be used when
Normal Charge or Quick Charge
is not available by using house-
hold electricity. Normal Charge :
Takes about 4-5 hours at room tem-
perature (depending on charger ) for
a full charge (208V - 6.6kW: 4h
50min, 240V - 6.6kW: 4h 10min.)
(Can be charged to 100%.)
Quick Charge : Takes about 33 minutes at room
temperature. (50 kW charger)
(Can be charged to 83%.)
If you charge a second time after
the initial quick charge (up to
83%), it will charge up to 94%.
(Takes an additional 15 minutes at
room temperature.)
During cold weather, quick charg-
ing may not be available to prevent
battery degradation.
Trickle Charge : Takes up to 24 hours at room tem-
perature. (120V-12A : 24hours)
(Can be charged to 100%.) Depending on the condition and dura-
bility of the high voltage battery, charg-
er specifications, and ambient temper-
ature, the time required for charging
the high voltage battery may vary.
CHARGE TYPES FOR ELECTRIC
VEHICLE
Charging Information Charging Time Information
Page 371 of 407
26
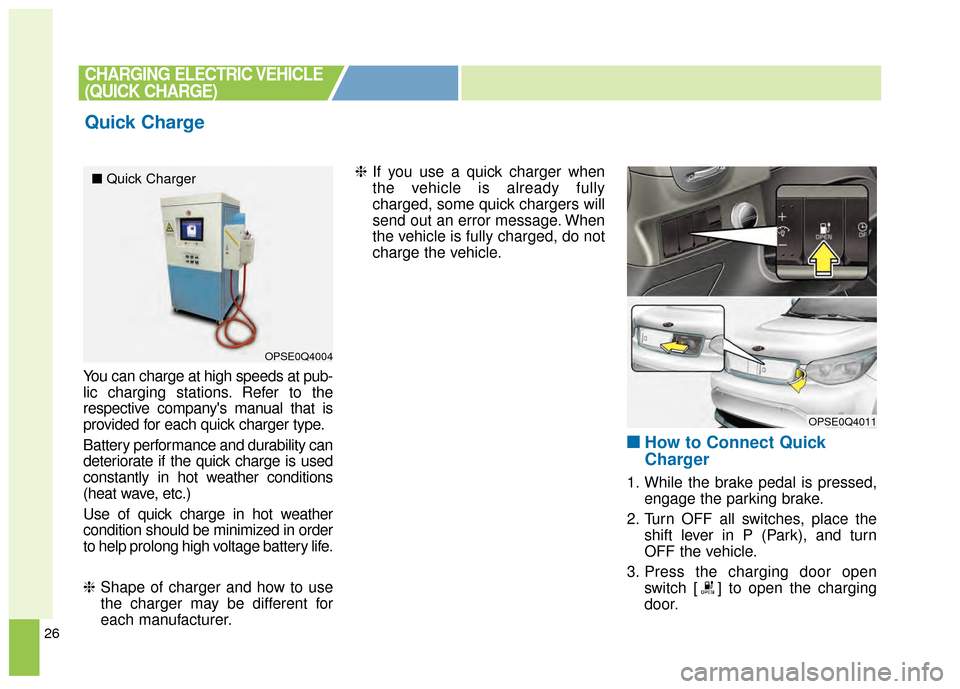
You can charge at high speeds at pub-
lic charging stations. Refer to the
respective company's manual that is
provided for each quick charger type.
Battery performance and durability can
deteriorate if the quick charge is used
constantly in hot weather conditions
(heat wave, etc.)
Use of quick charge in hot weather
condition should be minimized in order
to help prolong high voltage battery life.
❈Shape of charger and how to use
the charger may be different for
each manufacturer. ❈
If you use a quick charger when
the vehicle is already fully
charged, some quick chargers will
send out an error message. When
the vehicle is fully charged, do not
charge the vehicle.
■ ■
How to Connect Quick
Charger
1. While the brake pedal is pressed,
engage the parking brake.
2. Turn OFF all switches, place the shift lever in P (Park), and turn
OFF the vehicle.
3. Press the charging door open switch [ ] to open the charging
door.
Quick Charge
CHARGING ELECTRIC VEHICLE
(QUICK CHARGE)
OPSE0Q4004
OPSE0Q4011
■ Quick Charger
Page 375 of 407
30
■
■How to Disconnect Quick
Charger
1. Remove the charging connector
when quick charging is completed,
or after you stop charging using
the quick charger. Refer to each
respective quick charger manual
for details about how to discon-
nect the charging connector. 2. Make sure to completely close the
quick charging inlet cover.
3. Make sure to completely close the charging door.
CHARGING ELECTRIC VEHICLE
(QUICK CHARGE)
OPSE0Q4019
OPSE0Q4020
CAUTION- Disconnecting
charging plug
When disconnecting the charg-ing connector, do not try to dis-connect it by force while notpressing the release button.This may damage the chargingconnector and vehicle charginginlet.
Page 395 of 407
50
When a vehicle accident occurs,
move the vehicle to a safe place, turn
OFF the vehicle and remove the aux-
iliary battery (12 V) terminal to pre-
vent high voltage electricity from
flowing. Remove the auxiliary battery
(12 V) terminal and turn it OFF.When you suspect leakage of inflam-
mable gas and other harmful gases,
open the windows and evacuate to a
safe place. If any leaked fluid comes
in contact with your eyes or skin,
immediately clean the affected area
thoroughly with tap water or saline
solution and have doctors inspect it
as soon as possible.
SAFETY PRECAUTIONS FOR
ELECTRIC VEHICLE
Responding to Vehicle Accidents in your
Electric Vehicle
WARNING- Exposed
Wires & Electrical
Components
Do not touch electric wires that
may become exposed from
inside or outside the vehicle,
high voltage electric wires
(orange), connectors and all
electric components and
devices. Doing so may result in
electric shock and lead to
injuries.
WARNING- Damaged battery
Do not touch harmful gas and
electrolytes which may leak if
the high voltage battery is dam-
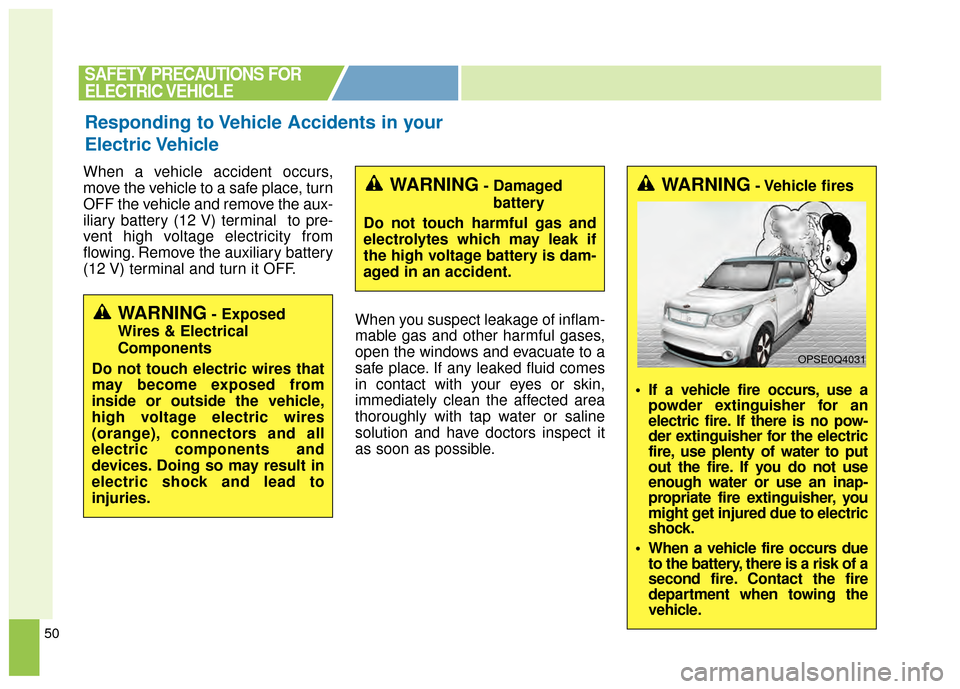
aged in an accident.WARNING- Vehicle fires
If a vehicle fire occurs, use a powder extinguisher for an
electric fire. If there is no pow-
der extinguisher for the electric
fire, use plenty of water to put
out the fire. If you do not use
enough water or use an inap-
propriate fire extinguisher, you
might get injured due to electric
shock.
When a vehicle fire occurs due to the battery, there is a risk of a
second fire. Contact the fire
department when towing the
vehicle.
OPSE0Q4031