2015 KIA PICANTO air con
[x] Cancel search: air conPage 794 of 846
741
Maintenance
Checking tyre inflation pressure
Check your tyres once a month or
more.
Also, check the tyre pressure of the
spare tyre.
How to check
Use a good quality gauge to check
tyre pressure. You can not tell if your
tyres are properly inflated simply by
looking at them. Radial tyres may
look properly inflated even when
they're underinflated.
Check the tyre's inflation pressure
when the tyres are cold. - "Cold"
means your vehicle has been sitting
for at least three hours or driven nomore than 1.6 km (1 mile).
WARNING - Tyre Inflation
Overinflation or underinflation
can reduce tyre life, adversely
affect vehicle handling, and
lead to sudden tyre failure. This
could result in loss of vehicle
control and potential injury.
CAUTION - Tyre pressure
Always observe the following:
Check tyre pressure when the tyres are cold. (After vehiclehas been parked for at leastthree hours or hasn't beendriven more than 1.6 km (one mile) since startup.)
Check the pressure of your spare tyre each time youcheck the pressure of othertyres.
Never overload your vehicle. Be careful not to overload avehicle luggage rack if yourvehicle is equipped with one.
Worn, old tyres can cause accidents. If your tread isbadly worn, or if your tyres have been damaged, replacethem.
CAUTION
Warm tyres normally exceed recommended cold tyre pres-sures by 28 to 41 kPa (4 to 6psi). Do not release air fromwarm tyres to adjust the pres- sure or the tyres will be under-inflated.
Be sure to reinstall the tyre inflation valve caps. Withoutthe valve cap, dirt or moisture could get into the valve coreand cause air leakage. If avalve cap is missing, install a new one as soon as possible.
Page 795 of 846
Maintenance
42
7
Remove the valve cap from the tyre
valve stem. Press the tyre gauge
firmly onto the valve to get a pres-
sure measurement. If the cold tyreinflation pressure matches the rec-ommended pressure on the tyre and
loading information label, no further
adjustment is necessary. If the pres-
sure is low, add air until you reachthe recommended amount.
If you overfill the tyre, release air by pushing on the metal stem in the
centre of the tyre valve. Recheck the
tyre pressure with the tyre gauge. Be
sure to put the valve caps back on
the valve stems. They help prevent
leaks by keeping out dirt and mois-
ture. Tyre rotation
To equalize tread wear, it is recom- mended that the tyres be rotated
every 12,000 km (7,500 miles) or
sooner if irregular wear develops.
During rotation, check the tyres for
correct balance.
When rotating tyres, check for
uneven wear and damage. Abnormal
wear is usually caused by incorrect
tyre pressure, improper wheel align-
ment, out-of-balance wheels, severe
braking or severe cornering. Look for
bumps or bulges in the tread or side
of tyre. Replace the tyre if you find
either of these conditions. Replace
the tyre if fabric or cord is visible.
After rotation, be sure to bring thefront and rear tyre pressures to spec-
ification and check lug nut tightness.
Refer to “Tyre and wheels” in section 8.
WARNING
Inspect your tyres frequently for proper inflation as well as
wear and damage. Always use
a tyre pressure gauge.
Tyres with too much or too lit- tle pressure wear unevenly
causing poor handling, loss of
vehicle control, and suddentyre failure leading to acci-
dents, injuries, and even death.The recommended cold tyre
pressure for your vehicle can
be found in this manual and onthe tyre label located on the
driver's side centre pillar.
Worn tyres can cause acci- dents. Replace tyres that are
worn, show uneven wear, or
are damaged.
Remember to check the pres- sure of your spare tyre. Kia
recommends that you check
the spare every time you
check the pressure of the
other tyres on your vehicle.
Page 800 of 846
747
Maintenance
3. Checking tyre life (TIN : TyreIdentification Number)
Any tyres that are over 6 years old,
based on the manufacturing date,(including the spare tyre) should be
replaced by new ones. You can find
the manufacturing date on the tyre
sidewall (possibly on the inside of the
wheel), displaying the DOT Code.
The DOT Code is a series of num-
bers on a tyre consisting of numbers
and English letters. The manufactur-
ing date is designated by the last four
digits (characters) of the DOT code. DOT : XXXX XXXX OOOO
The front part of the DOT means a
plant code number, tyre size and
tread pattern and the last four num-
bers indicate week and year manu-
factured.
For example:
DOT XXXX XXXX 1614 represents
that the tyre was produced in the
16th week of 2014.
4. Tyre ply composition and material
The number of layers or plies of rub-
ber-coated fabric in the tyre. Tyre
manufacturers also must indicate the
materials in the tyre, which include
steel, nylon, polyester, and others.
The letter "R" means radial ply con-
struction; the letter "D" means diago-
nal or bias ply construction; and theletter "B" means belted-bias ply con-
struction.
5. Maximum permissible inflation
pressure
This number is the greatest amount of air pressure that should be put in
the tyre. Do not exceed the maximum
permissible inflation pressure. Refer
to the Tyre and Loading Information
label for recommended inflation
pressure.
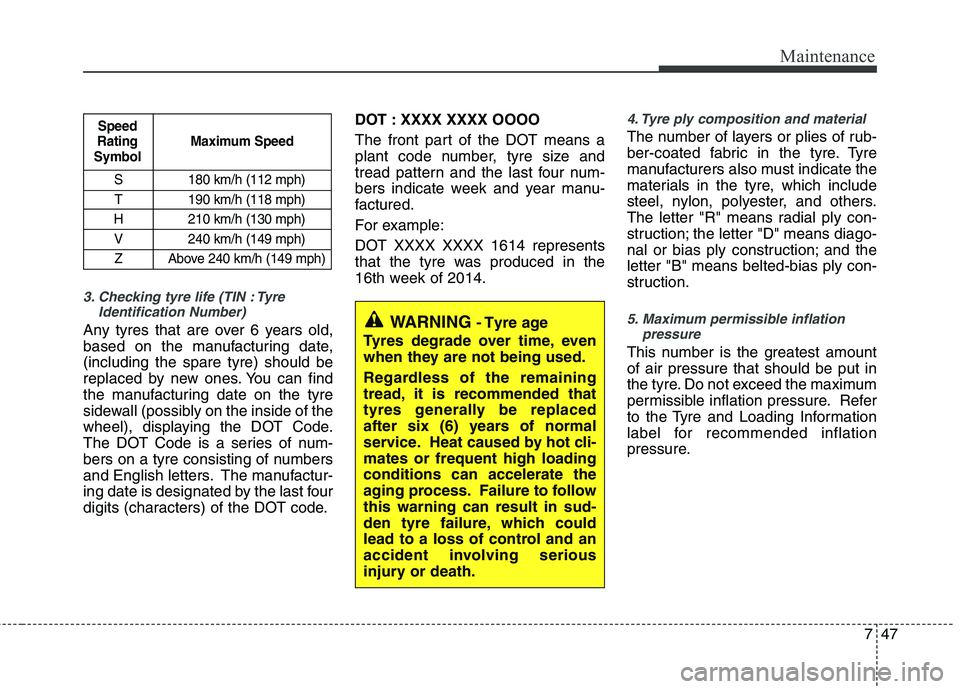
S 180 km/h (112 mph)
T 190 km/h (118 mph)
H 210 km/h (130 mph)
V 240 km/h (149 mph) Z Above 240 km/h (149 mph)
Maximum Speed
Speed
Rating
Symbol
WARNING - Tyre age
Tyres degrade over time, even
when they are not being used.
Regardless of the remaining
tread, it is recommended that
tyres generally be replaced
after six (6) years of normal
service. Heat caused by hot cli-mates or frequent high loadingconditions can accelerate the
aging process. Failure to followthis warning can result in sud-
den tyre failure, which could
lead to a loss of control and an
accident involving serious
injury or death.
Page 802 of 846
749
Maintenance
Temperature - A, B & C
The temperature grades are A (the
highest), B, and C, representing the
tyre’s resistance to the generation ofheat and its ability to dissipate heatwhen tested under controlled condi-
tions on a specified indoor laboratorytest wheel.
Sustained high temperature can
cause the material of the tyre to
degenerate and reduce tyre life, and
excessive temperature can lead to
sudden tyre failure. Grades B and A
represent higher levels of perform-
ance on the laboratory test wheel
than the minimum required by law.Low aspect ratio tyre (if equipped)
low aspect ratio tyres, whose aspect
ratio is lower than 50, are provided
for sporty looks.
Because the low aspect ratio tyres
are optimized for handling and brak-
ing, it may be more uncomfortable to
ride in and there is more noise com-
pare with normal tyres.
WARNING
- Tyre
temperature
The temperature grade for this
tyre is established for a tyre that
is properly inflated and not over-
loaded. Excessive speed, under-
inflation, or excessive loading,
either separately or in combina-
tion, can cause heat build-up and
possible sudden tyre failure. This
can cause loss of vehicle control
and serious injury or death.
CAUTION
Because the sidewall of the low aspect ratio tyre is shorter thanthe normal, the wheel and tyreof the low aspect ratio tyre iseasier to be damaged. So, followthe instructions below.
- When driving on a rough road or off road, drive cautiouslybecause tyres and wheels maybe damaged. And after driving,inspect tyres and wheels.
- When passing over a pothole, speed bump, manhole, or curbstone, drive slowly so that thetyres and wheels are not dam-aged.
(Continued)
CAUTION
It is not easy to recognize thetyre damage with your owneyes. But if there is the slight- est hint of tyre damage, eventhough you cannot see thetyre damage with your own eyes, have the tyre checked orreplaced because the tyredamage may cause air leakage from the tyre.
If the tyre is damaged by driv- ing on a rough road, off road,pothole, manhole, or curbstone, it will not be covered by the warranty.
You can find out the tyre infor- mation on the tyre sidewall.
(Continued)
- If the tyre is impacted, we rec- ommend that you inspect thetyre condition or contact anauthorised Kia dealer.
- To prevent damage to the tyre, inspect the tyre condition andpressure every 3,000km.
Page 803 of 846

Maintenance
50
7
FUSES
A vehicle’s electrical system is protected
from electrical overload damage by
fuses.
This vehicle has 2 fuse panels, one locat-
ed in the driver’s side panel bolster,
another is in the engine compartment.
If any of your vehicle’s lights, acces-
sories, or controls do not work, check the
appropriate circuit fuse. If a fuse has
blown, the element inside the fuse will bemelted.
If the electrical system does not work,
first check the driver’s side fuse panel.
Always replace a blown fuse with one of
the same rating.
Before replacing a blown fuse, discon-
nect the negative battery cable.
If the replacement fuse blows, this indi-
cates an electrical problem. Avoid using
the system involved and immediately
consult an authorised Kia dealer.
Four kinds of fuses are used: blade typefor lower amperage rating, cartridge type, and fusible link for higher amperage rat-ings.
✽✽ NOTICE
The actual fuse/relay panel label may
differ from equipped items
WARNING - Fuse replace-
ment
Never replace a fuse with any- thing but another fuse of the same rating.
A higher capacity fuse could cause damage and possibly a fire.
Never install a wire instead of the proper fuse - even as a temporary
repair. It may cause extensive
wiring damage and a possible fire.
Do not arbitrarily modify or add-on electric wiring of the vehicle.
CAUTION
Do not use a screwdriver or any
other metal object to remove fusesbecause it may cause a short circuitand damage the system.
OTA070039
Blade type
Cartridge type
Fusible link B
BBBlllloooowwwwnnnn
BBBBlllloooowwwwnnnn
BBBBlllloooowwwwnnnn
Page 823 of 846
Maintenance
70
7
Waxing
Wax the vehicle when water will no longer bead on the paint.
Always wash and dry the vehicle before
waxing. Use a good quality liquid or
paste wax, and follow the manufacturer’s
instructions. Wax all metal trim to protect
it and to maintain its luster.
Removing oil, tar, and similar materials
with a spot remover will usually strip the
wax from the finish. Be sure to re-wax
these areas even if the rest of the vehicle
does not yet need waxing.Finish damage repair
Deep scratches or stone chips in the
painted surface must be repaired
promptly. Exposed metal will quickly rust
and may develop into a major repair
expense.
✽✽
NOTICE
If your vehicle is damaged and requires
any metal repair or replacement, be sure
the body shop applies anti-corrosion
materials to the parts repaired or
replaced.
CAUTION
Wiping dust or dirt off the body with a dry cloth will scratch the
finish.
Do not use steel wool, abrasive cleaners, or strong detergentscontaining high alkaline or caus-tic agents on chrome-plated or
anodized aluminum parts. Thismay result in damage to the pro-tective coating and cause discol-oration or paint deterioration.
CAUTION
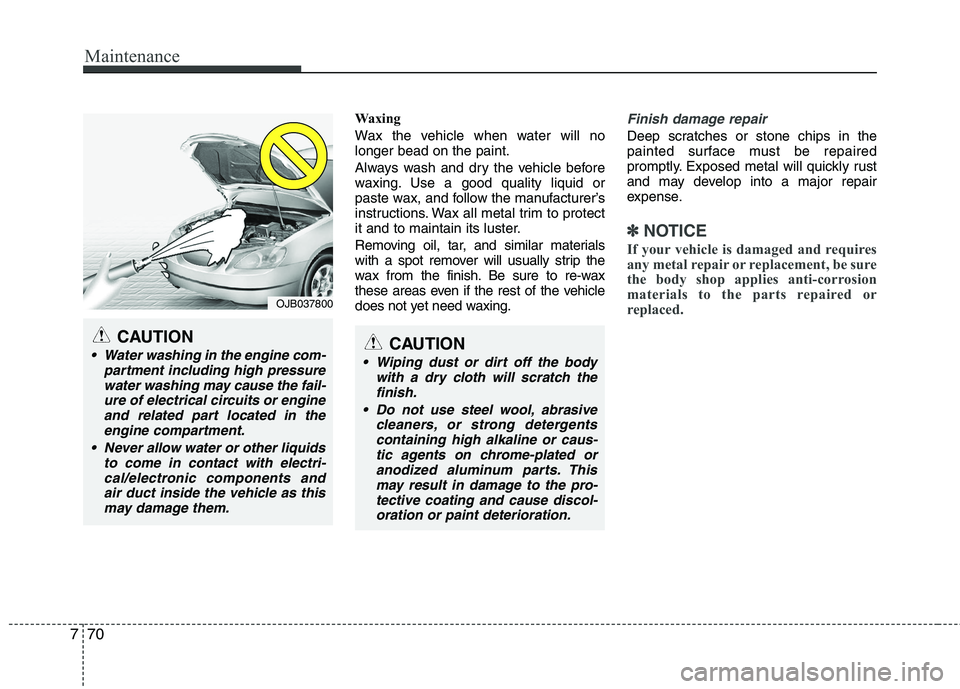
Water washing in the engine com-
partment including high pressurewater washing may cause the fail- ure of electrical circuits or engineand related part located in the
engine compartment.
Never allow water or other liquids to come in contact with electri-cal/electronic components and
air duct inside the vehicle as thismay damage them.
OJB037800
Page 824 of 846
771
Maintenance
Bright-metal maintenance
To remove road tar and insects, use atar remover, not a scraper or other
sharp object.
To protect the surfaces of bright-metal parts from corrosion, apply a coating of
wax or chrome preservative and rub to
a high luster.
During winter weather or in coastal areas, cover the bright metal parts with
a heavier coating of wax or preserva-
tive. If necessary, coat the parts with
non-corrosive petroleum jelly or other
protective compound.
Underbody maintenance
Corrosive materials used for ice and
snow removal and dust control may col-
lect on the underbody. If these materials
are not removed, accelerated rusting can
occur on underbody parts such as the
fuel lines, frame, floor pan and exhaust
system, even though they have been
treated with rust protection.
Thoroughly flush the vehicle underbody
and wheel openings with lukewarm or
cold water once a month, after off-road
driving and at the end of each winter. Payspecial attention to these areas because
it is difficult to see all the mud and dirt. It
will do more harm than good to wet down
the road grime without removing it. The
lower edges of doors, rocker panels, and
frame members have drain holes that
should not be allowed to clog with dirt;
trapped water in these areas can cause
rusting.WARNING
After washing the vehicle, test the
brakes whilst driving slowly to see
if they have been affected by water.
If braking performance is impaired,
dry the brakes by applying them
lightly whilst maintaining a slow
forward speed.
Page 825 of 846
Maintenance
72
7
Aluminum wheel maintenance
The aluminum wheels are coated with a
clear protective finish.
Do not use any abrasive cleaner, pol-
ishing compound, solvent, or wire
brushes on aluminum wheels. They
may scratch or damage the finish.
Clean the wheel when it has cooled.
Use only a mild soap or neutral deter- gent, and rinse thoroughly with water.
Also, be sure to clean the wheels after
driving on salted roads. This helps pre-
vent corrosion.
Avoid washing the wheels with high- speed car wash brushes.
Do not use any alkaline or acid deter- gent. It may damage and corrode the
aluminum wheels coated with a clear
protective finish.
Corrosion protection
Protecting your vehicle from corrosion
By using the most advanced design and
construction practices to combat corro-
sion, we produces cars of the highest
quality. However, this is only part of the
job. To achieve the long-term corrosion
resistance your vehicle can deliver, the
owner's cooperation and assistance isalso required.
Common causes of corrosion The most common causes of corrosion
on your car are:
allowed to accumulate underneath the
car.
Removal of paint or protective coatings by stones, gravel, abrasion or minor
scrapes and dents which leave unpro-
tected metal exposed to corrosion. High-corrosion areas
If you live in an area where your car is
regularly exposed to corrosive materials,
corrosion protection is particularly impor-
tant. Some of the common causes of
accelerated corrosion are road salts,
dust control chemicals, ocean air and
industrial pollution.
Moisture breeds corrosion Moisture creates the conditions in which
corrosion is most likely to occur. For
example, corrosion is accelerated by
high humidity, particularly when tempera-
tures are just above freezing. In such
conditions, the corrosive material is kept
in contact with the car surfaces by mois-
ture that is slow to evaporate.
Mud is particularly corrosive because it is
slow to dry and holds moisture in contact
with the vehicle. Although the mud
appears to be dry, it can still retain themoisture and promote corrosion.
High temperatures can also accelerate
corrosion of parts that are not properly
ventilated so the moisture can be dis-
persed. For all these reasons, it is partic-
ularly important to keep your car clean
and free of mud or accumulations of
other materials. This applies not only to
the visible surfaces but particularly to the
underside of the car.