2015 KIA PICANTO radio
[x] Cancel search: radioPage 325 of 846
What to do in an emergency
26
6
TPMS (Tire Pressure Monitoring System)malfunction indicator
The TPMS malfunction indicator will
illuminate after it blinks for approxi-
mately one minute when there is a
problem with the Tire Pressure
Monitoring System. If the system is
able to correctly detect an under infla-
tion warning at the same time as sys-
tem failure then it will illuminate the
TPMS malfunction indicator.
We recommend that the system be
checked by an authorized Kia dealer.
WARNING - Low pressure
damage
Significantly low tire pressure
makes the vehicle unstable and
can contribute to loss of vehicle
control and increased brakingdistances.
Continued driving on low pres- sure tires can cause the tires to
overheat and fail.CAUTION
The TPMS malfunction indica- tor may be illuminated if thevehicle is moving around elec- tric power supply cables orradios transmitter such as atpolice stations, government and public offices, broadcast-ing stations, military installa-tions, airports, or transmitting towers, etc. This can interferewith normal operation of theTire Pressure MonitoringSystem (TPMS).
The TPMS malfunction indica- tor may illuminate if snowchains or some separatelypurchased devices such asnotebook computers, mobile charger, remote starter, navi-gation etc. are used in thevehicle. This can interfere with normal operation of the TirePressure Monitoring System(TPMS).
Page 417 of 846
Specifications & Consumer information
8
8
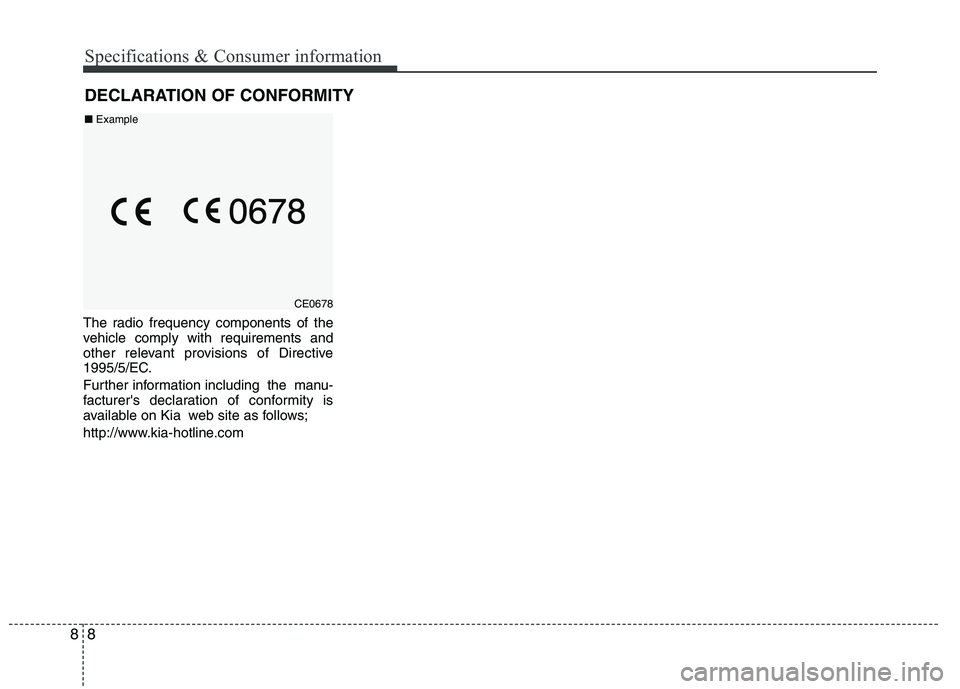
The radio frequency components of the
vehicle comply with requirements and
other relevant provisions of Directive
1995/5/EC.
Further information including the manu-
facturer's declaration of conformity is
available on Kia web site as follows;
http://www.kia-hotline.com
DECLARATION OF CONFORMITY
CE0678
■ Example
Page 506 of 846

47
Features of your vehicle
Transmitter precautions
✽✽NOTICE
The transmitter will not work if any of
following occur:
The ignition key is in ignition switch.
You exceed the operating distance limit (about 10 m [30 feet]).
The battery in the transmitter is weak.
Other vehicles or objects may be blocking the signal.
The weather is extremely cold.
The transmitter is close to a radio transmitter such as a radio station or
an airport which can interfere with
normal operation of the transmitter.
When the transmitter does not work
correctly, open and close the door with
the ignition key. If you have a problem
with the transmitter, contact an autho-
rised Kia dealer.
Battery replacement
CAUTION
Changes or modifications not expressly approved by the party
responsible for compliance couldvoid the user’s authority to operatethe equipment. If the keyless entry system is inoperative due to
changes or modifications notexpressly approved by the partyresponsible for compliance, it will
not be covered by your manufactur-er’s vehicle warranty.
OYDECO2006CN
■
Type A
■ Type B
OTA042256
■
Type C
CAUTION
Keep the transmitter away from
water or any liquid. If the keylessentry system is inoperative due to exposure to water or liquids, it will
not be covered by your manufactur-er vehicle warranty.
OYDDCO2005
Page 509 of 846

Features of your vehicle
10
4
Even though you press the outside door
handle buttons, the doors will not lock
and the chime will sound for 3 seconds if
any of following occur:
The smart key is in the vehicle.
The ENGINE START/STOP button is in
the ACC or ON position.
Any door except the tailgate is open.
Unlocking
Pressing the button of the front outside door handles with all doors (and tailgate)
closed and locked, unlocks all the doors
(and tailgate). The hazard warning lights
blink twice to indicate that all doors (and
tailgate) are unlocked.
The button will only operate when the
smart key is within 0.7~1 m (28~40 in.)
from the outside door handle.
When the smart key is recognized in the area of 0.7~1 m (28~40 in.) from the front
outside door handle, other people canalso open the door without possession of
the smart key.
After pressing the button, the doors will
lock automatically unless you open any
door within 30 seconds.
Tailgate unlocking
If you are within 0.7 m ~ 1 m (28 ~ 40 in.)
from the outside tailgate handle, with
your smart key in possession, the tail-
gate will unlock and open when you
press the tailgate handle switch.
The hazard warning lights will blink twice
to indicate that the tailgate is unlocked.
Also, once the tailgate is opened and
then closed, the tailgate will lock auto-
matically. ❈ The word “HOLD” is written on the but-
ton to inform you that you must press
and hold the button for 1 second.
Start-up
You can start the engine without inserting
the key. For detailed information refer to
“Starting the engine with a smart key” insection 5. Smart key precautions
✽✽
NOTICE
If, for some reason, you happen to lose your smart key, you will not be able to
start the engine. Tow the vehicle, if
necessary, and contact an authorised
Kia dealer.
A maximum of 2 smart keys can be
registered to a single vehicle. If you
lose a smart key, you should immedi-
ately take the vehicle and key to your
authorised Kia dealer to protect it
from potential theft.
The smart key will not work if any of
following occur:
- The smart key is close to a radiotransmitter such as a radio station or
an airport which can interfere with
normal operation of the smart key.
- You keep the smart key near a
mobile two-way radio system or a
mobile phone.
- Another vehicle’s smart key is being operated close to your vehicle.
When the smart key does not work
correctly, open and close the door with
the mechanical key. If you have a
problem with the smart key, contact
an authorised Kia dealer. (Continued)
Page 607 of 846
Features of your vehicle
108
4
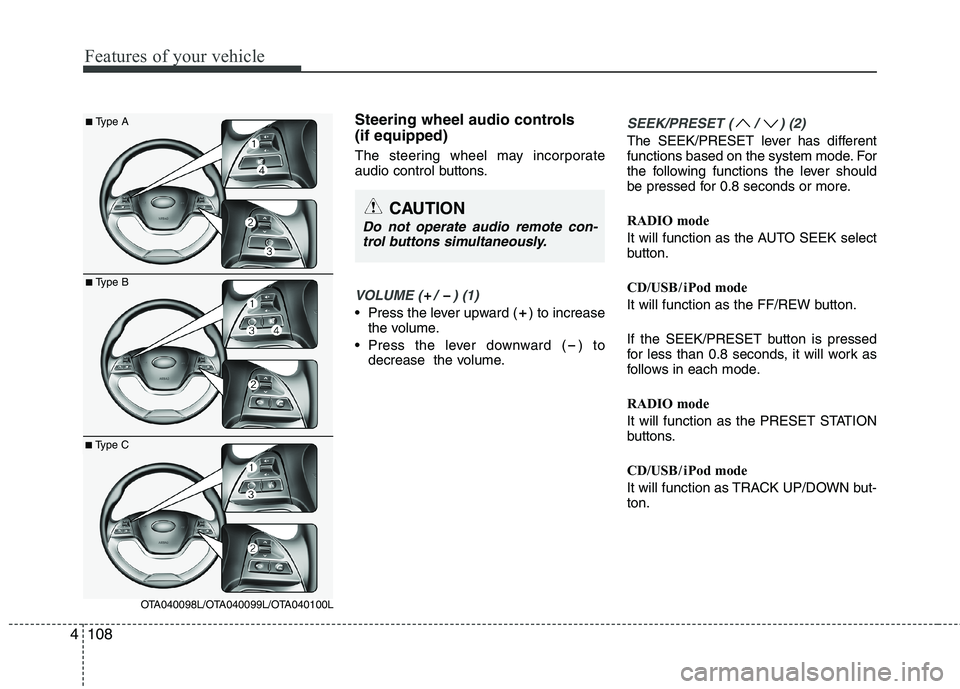
Steering wheel audio controls (if equipped)
The steering wheel may incorporate
audio control buttons.
VOLUME ( / ) (1)
• Press the lever upward ( ) to increase
the volume.
Press the lever downward ( ) to decrease the volume.
SEEK/PRESET ( / ) (2)
The SEEK/PRESET lever has different
functions based on the system mode. For
the following functions the lever should
be pressed for 0.8 seconds or more.
RADIO mode
It will function as the AUTO SEEK select
button.
CD/USB / i Pod mode
It will function as the FF/REW button.
If the SEEK/PRESET button is pressed
for less than 0.8 seconds, it will work as
follows in each mode.
RADIO mode
It will function as the PRESET STATION
buttons.
CD/USB / i Pod mode
It will function as TRACK UP/DOWN but- ton.
CAUTION
Do not operate audio remote con-
trol buttons simultaneously.
■ Type A
■Type B
■Type C
OTA040098L/OTA040099L/OTA040100L
Page 609 of 846
Features of your vehicle
110
4
How car audio works
AM (MW, LW) and FM radio signals are
broadcast from transmitter towers locat-
ed around your city. They are intercepted
by the radio antenna on your car. This
signal is then received by the radio and
sent to your car speakers.
When a strong radio signal has reached
your vehicle, the precise engineering of
your audio system ensures the best pos-
sible quality reproduction. However, in
some cases the signal coming to your
vehicle may not be strong and clear. This
can be due to factors such as the dis-
tance from the radio station, closeness of
other strong radio stations or the pres-
ence of buildings, bridges or other large
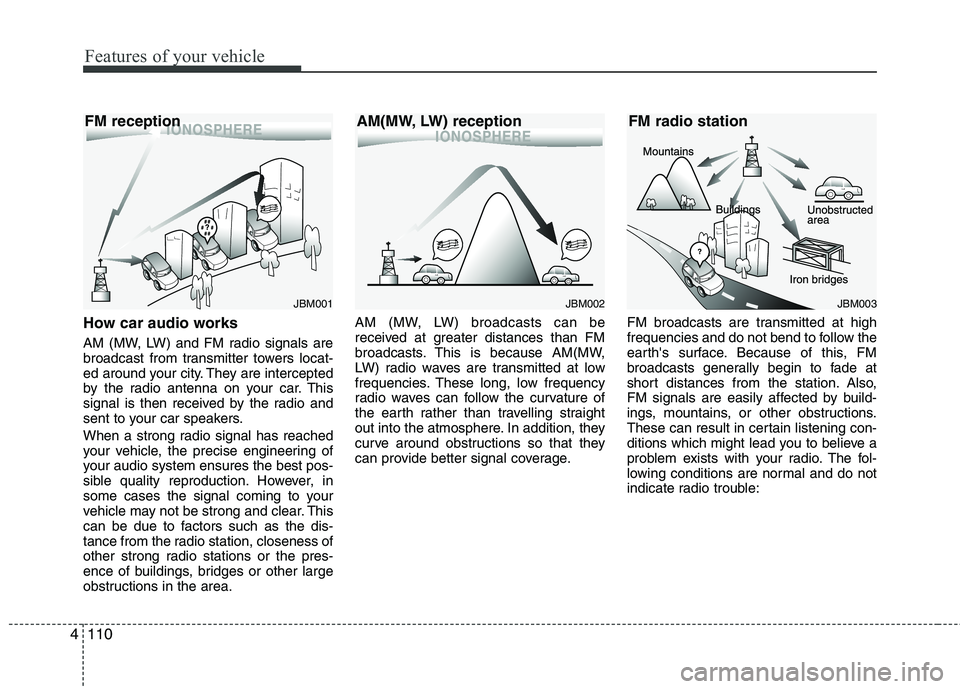
obstructions in the area. AM (MW, LW) broadcasts can be
received at greater distances than FM
broadcasts. This is because AM(MW,
LW) radio waves are transmitted at low
frequencies. These long, low frequency
radio waves can follow the curvature of
the earth rather than travelling straight
out into the atmosphere. In addition, they
curve around obstructions so that they
can provide better signal coverage.
FM broadcasts are transmitted at high
frequencies and do not bend to follow the
earth's surface. Because of this, FM
broadcasts generally begin to fade at
short distances from the station. Also,
FM signals are easily affected by build-
ings, mountains, or other obstructions.
These can result in certain listening con-
ditions which might lead you to believe a
problem exists with your radio. The fol-
lowing conditions are normal and do not
indicate radio trouble:
JBM001
FM receptionJBM002
AM(MW, LW) receptionJBM003
FM radio station
Page 610 of 846
4111
Features of your vehicle
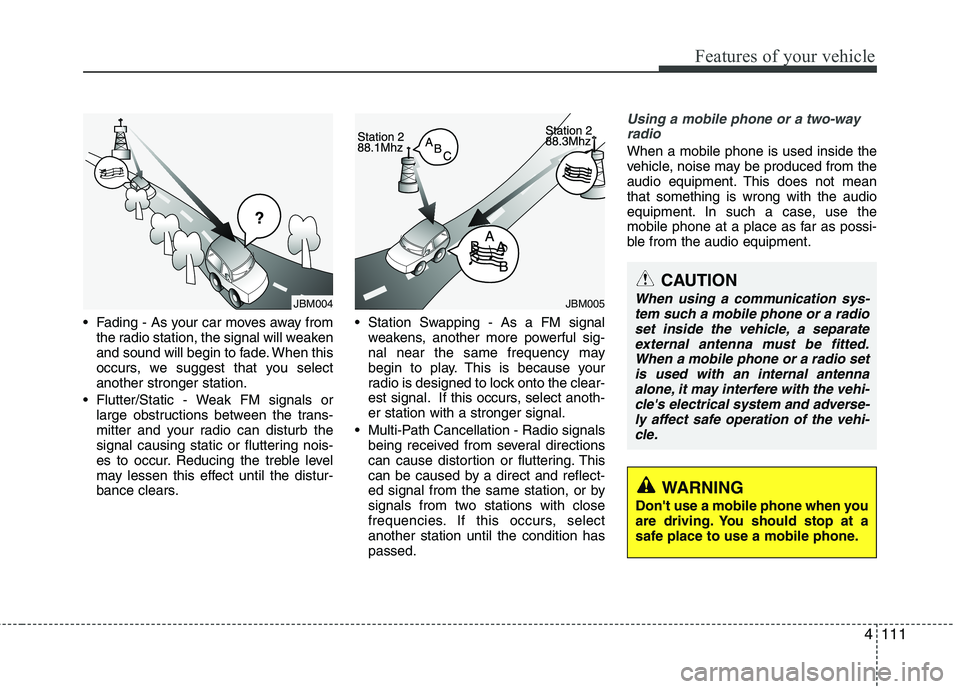
Fading - As your car moves away fromthe radio station, the signal will weaken
and sound will begin to fade. When this
occurs, we suggest that you selectanother stronger station.
Flutter/Static - Weak FM signals or large obstructions between the trans-
mitter and your radio can disturb the
signal causing static or fluttering nois-
es to occur. Reducing the treble level
may lessen this effect until the distur-
bance clears. Station Swapping - As a FM signal
weakens, another more powerful sig-
nal near the same frequency may
begin to play. This is because your
radio is designed to lock onto the clear-
est signal. If this occurs, select anoth-er station with a stronger signal.
Multi-Path Cancellation - Radio signals being received from several directions
can cause distortion or fluttering. This
can be caused by a direct and reflect-
ed signal from the same station, or by
signals from two stations with close
frequencies. If this occurs, selectanother station until the condition haspassed.
Using a mobile phone or a two-way
radio
When a mobile phone is used inside the
vehicle, noise may be produced from the
audio equipment. This does not meanthat something is wrong with the audio
equipment. In such a case, use the
mobile phone at a place as far as possi-
ble from the audio equipment.
JBM005JBM004
CAUTION
When using a communication sys-
tem such a mobile phone or a radio set inside the vehicle, a separateexternal antenna must be fitted. When a mobile phone or a radio set
is used with an internal antenna alone, it may interfere with the vehi-cle's electrical system and adverse- ly affect safe operation of the vehi-
cle.
WARNING
Don't use a mobile phone when you
are driving. You should stop at a
safe place to use a mobile phone.
Page 613 of 846
Features of your vehicle
114
4
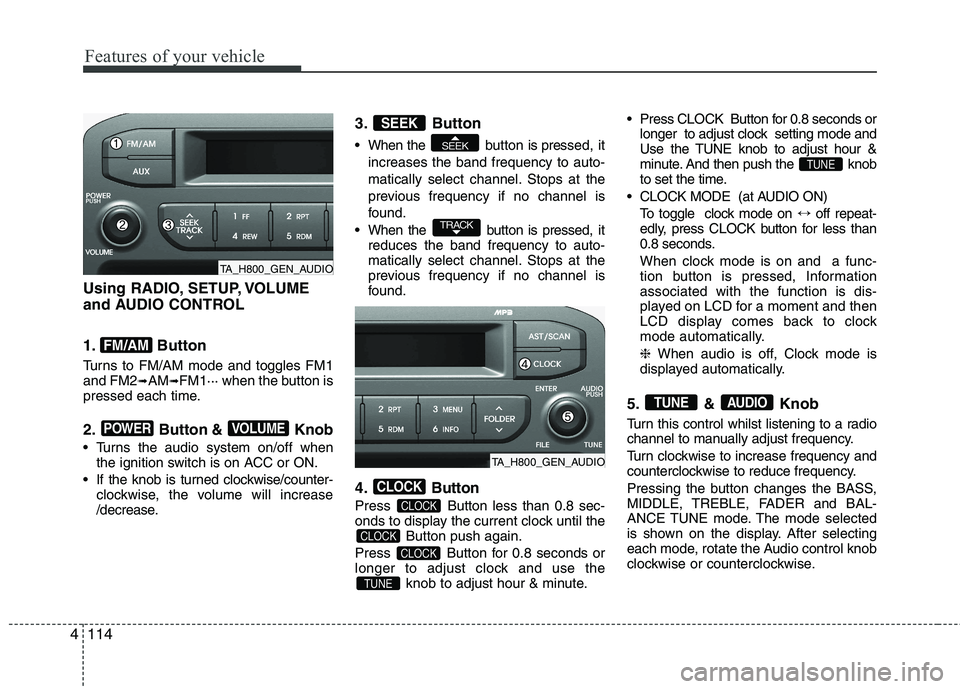
Using RADIO, SETUP, VOLUME
and AUDIO CONTROL
1. Button
Turns to FM/AM mode and toggles FM1 and FM2 ➟AM ➟FM1··· when the button is
pressed each time.
2. Button & Knob
Turns the audio system on/off when the ignition switch is on ACC or ON.
If the knob is turned clockwise/counter- clockwise, the volume will increase
/decrease. 3. Button
When the button is pre
ssed, it
increases the band frequency to auto-
matically select channel. Stops at the
previous frequency if no channel is
found.
When the button is pressed, it reduces the band frequency to auto-
matically select channel. Stops at the
previous frequency if no channel is
found.
4. Button
Press Button less than 0.8 sec-
onds to display the current clock until the Button push again.
Press Button for 0.8 seconds or
longer to adjust clock and use the knob to adjust hour & minute. Press CLOCK Button for 0.8 seconds or
longer to adjust clock setting mode and
Use the TUNE knob to adjust hour &
minute. And then push the knob
to set the time.
CLOCK MODE (at AUDIO ON) To toggle clock mode on ↔off repeat-
edly, press CLOCK button for less than
0.8 seconds.
When clock mode is on and a func-
tion button is pressed, Informationassociated with the function is dis-
played on LCD for a moment and then
LCD display comes back to clock
mode automatically. ❈ When audio is off, Clock mode is
displayed automatically.
5. & Knob
Turn this control whilst listening to a radio
channel to manually adjust frequency.
Turn clockwise to increase frequency and
counterclockwise to reduce frequency.
Pressing the button changes the BASS,
MIDDLE, TREBLE, FADER and BAL-
ANCE TUNE mode. The mode selected
is shown on the display. After selecting
each mode, rotate the Audio control knob
clockwise or counterclockwise.
AUDIOTUNE
TUNE
TUNE
CLOCK
CLOCK
CLOCK
CLOCK
TRACK
SEEK
SEEK
VOLUMEPOWER
FM/AM
TA_H800_GEN_AUDIO
TA_H800_GEN_AUDIO