2015 KIA PICANTO lock
[x] Cancel search: lockPage 808 of 846

755
Maintenance
Fuse NameSymbolFuse ratingProtected Component
ROOM110ALuggage Lamp, A/C Control Module, BCM/TACM, Auto Light & Photo Sensor, Cup Holder
ILL., Instrument Cluster, Ignition Key ILL. & Door Warning Switch, Driver Vanity Lamp,
Overhead Console Lamp (With Sunroof), Room Lamp(W/O Sunroof)
AUDIO20AAudio (W/O ISG), Low DC-DC Convertor (With ISG)
P WDW LH25ARear Power Window Switch LH, Power Window Main Switch, Passenger Safety Power
Window Module, Passenger Power Window Switch
P WDW RH25ARear Power Window Switch RH, Power Window Main Switch, Driver Power Window Switch
HTD MIRR10ADiver/Passenger Power Outside Mirror, ECM/PCM, A/C Control Module
A/CON10AA/C Control Module
BLOWER10AECM/PCM, Blower Switch, Blower Resistor
DOOR LOCK20ADoor Lock/Unlock Relay, Tailgate Unlock Relay
SAFETY P/WDW25ADriver Safety Power Window Module
S/HTD15ADriver/Passenger Seat Heater
TAIL LH10AInstrument Cluster, Rear Combination Lamp LH, License Lamp, Rear Bumper Lamp, Projection Lamp LH, Head Lamp LH
TAIL RH10ARear Combination Lamp LH, License Lamp, ILL.(+), Rear Bumper Lamp, Projection Lamp LH, Head Lamp LH
START10AIgnition Lock Switch, ECM/PCM, PCB fuse & Relay Box (Start Relay)
Instrument panel (Driver’s side fuse panel)
Page 814 of 846

761
Maintenance
LIGHT BULBS
Use only the bulbs of the specifiedwattage.
✽✽ NOTICE
After, driving in heavy rain or washing
the vehicle, headlight and taillight lenses
could appear frosty. This condition is
caused by the temperature difference
between the lamp inside and outside.
This is similar to the condensation on
your windows inside your vehicle during
the rain and doesn’t indicate a problem
with your vehicle. If the water leaks into
the lamp bulb circuitry, have the vehicle
checked by an authorised Kia dealer.
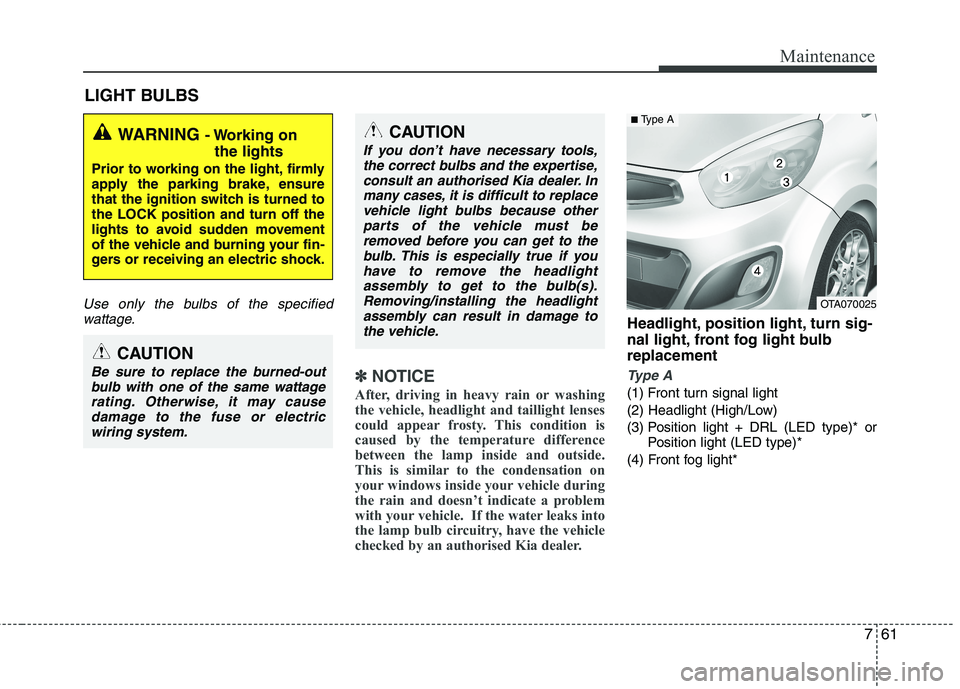
Headlight, position light, turn sig-
nal light, front fog light bulbreplacement
Type A
(1) Front turn signal light
(2) Headlight (High/Low)
(3) Position light + DRL (LED type)* or Position light (LED type)*
(4) Front fog light*
WARNING - Working on
the lights
Prior to working on the light, firmly
apply the parking brake, ensure
that the ignition switch is turned tothe LOCK position and turn off the
lights to avoid sudden movement
of the vehicle and burning your fin-
gers or receiving an electric shock.
CAUTION
Be sure to replace the burned-out bulb with one of the same wattagerating. Otherwise, it may causedamage to the fuse or electricwiring system.
CAUTION
If you don’t have necessary tools,the correct bulbs and the expertise,
consult an authorised Kia dealer. Inmany cases, it is difficult to replacevehicle light bulbs because other parts of the vehicle must be
removed before you can get to thebulb. This is especially true if youhave to remove the headlight
assembly to get to the bulb(s).Removing/installing the headlightassembly can result in damage tothe vehicle.
OTA070025
■ Type A
Page 816 of 846

763
Maintenance
Headlight/Position light (Bulb type)*
1. Open the bonnet.
2. Remove the headlight bulb cover byturning it counterclockwise.
3. Disconnect the headlight bulb socket- connector.
4. Remove the bulb from the headlight assembly.
5. Install a new headlight bulb.
6. Connect the headlight bulb socket- connector.
7. Install the headlight bulb cover by turn- ing it clockwise.
* : if equipped
✽✽ NOTICE
If the headlight aiming adjustment is nec-
essary after the headlight assembly is rein-
stalled, consult an authorised Kia dealer.
❋❋ Traffic Change (For Europe)
The low beam light distribution is asym-
metric.
If you go abroad to a country with oppo-
site traffic direction, this asymmetric part
will dazzle oncoming car driver. To pre-
vent dazzle, ECE regulation demand
several technical solutions (ex. automatic
change system, adhesive sheet, down
aiming). This headlamps are designed
not to dazzle opposite drivers. So, you
need not change your headlamps in a
country with opposite traffic direction.
Turn signal light
1. Remove the socket from the assembly by turning the socket counterclockwise
until the tabs on the socket align with
the slots on the assembly.
2. Remove the bulb from the socket by pressing it in and rotating it counter-
clockwise until the tabs on the bulb
align with the slots in the socket. Pull
the bulb out of the socket
3. Insert a new bulb by inserting it into the socket and rotating it until it locks
into place.
4. Install the socket in the assembly by aligning the tabs on the socket with the
slots in the assembly. Push the socket
into the assembly and turn the socket
clockwise.
OTA070026OTA070027
Page 817 of 846

Maintenance
64
7
Position light + DRL (LED type) or
Position light (LED type)(if equipped)
If the light bulb does not operate, have
the vehicle checked by an authorised Kia
dealer.
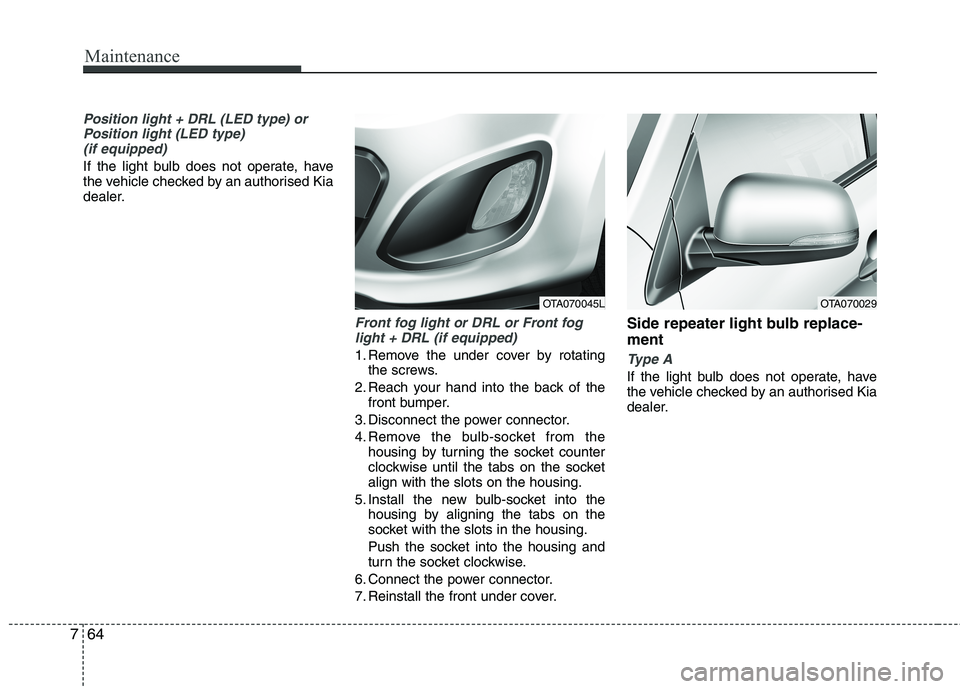
Front fog light or DRL or Front foglight + DRL (if equipped)
1. Remove the under cover by rotating the screws.
2. Reach your hand into the back of the front bumper.
3. Disconnect the power connector.
4. Remove the bulb-socket from the housing by turning the socket counter
clockwise until the tabs on the socketalign with the slots on the housing.
5. Install the new bulb-socket into the housing by aligning the tabs on the
socket with the slots in the housing.
Push the socket into the housing and
turn the socket clockwise.
6. Connect the power connector.
7. Reinstall the front under cover. Side repeater light bulb replace- ment Type A
If the light bulb does not operate, have
the vehicle checked by an authorised Kia
dealer.
OTA070045LOTA070029
Page 818 of 846

765
Maintenance
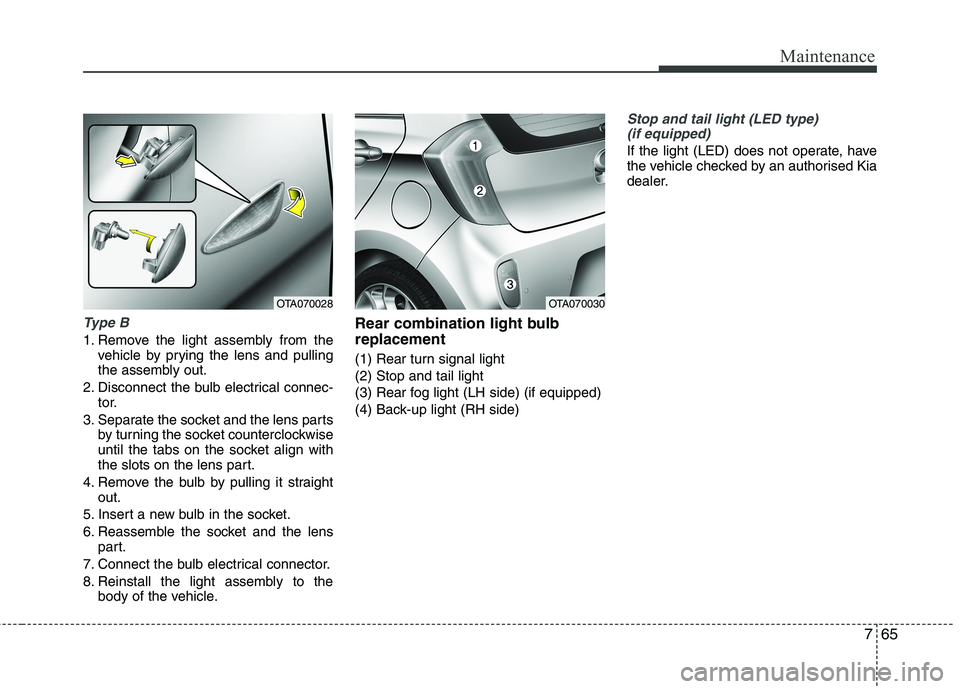
Type B
1. Remove the light assembly from thevehicle by prying the lens and pulling
the assembly out.
2. Disconnect the bulb electrical connec- tor.
3. Separate the socket and the lens parts by turning the socket counterclockwise
until the tabs on the socket align with
the slots on the lens part.
4. Remove the bulb by pulling it straight out.
5. Insert a new bulb in the socket.
6. Reassemble the socket and the lens part.
7. Connect the bulb electrical connector.
8. Reinstall the light assembly to the body of the vehicle. Rear combination light bulb replacement
(1) Rear turn signal light (2) Stop and tail light
(3) Rear fog light (LH side) (if equipped)
(4) Back-up light (RH side)
Stop and tail light (LED type)
(if equipped)
If the light (LED) does not operate, have
the vehicle checked by an authorised Kia
dealer.
OTA070028OTA070030
Page 819 of 846

Maintenance
66
7
Rear turn signal light/Stop and tail light
1. Open the tail gate.
2. Remove the rear combination light
assembly by turning the screw counter-
clockwise and removing the assembly. 3. Remove the socket from the assembly
by turning the socket counterclockwise
until the tabs on the socket align with
the slots on the assembly.
4. Remove the bulb from the socket by pressing it in and rotating it counter-
clockwise until the tabs on the bulb
align with the slots in the socket. Pull
the bulb out of the socket.
5. Insert a new bulb by inserting it into the socket and rotating it until it locks
into place.
6. Install the socket in the assembly by aligning the tabs on the socket with the
slots in the assembly. Push the socket
into the assembly and turn the socket
clockwise.
7. Reinstall the light assembly to the body of the vehicle.
Back-up light/Rear fog light
(if equipped)
1. Remove the under cover by rotating the screws.
2. Reach your hand into the back of the rear bumper.
3. Disconnect the power connector.
4. Remove the bulb-socket from the housing by turning the socket counter
clockwise until the tabs on the socketalign with the slots on the housing.
5. Install the new bulb-socket into the housing by aligning the tabs on the
socket with the slots in the housing.
Push the socket into the housing and
turn the socket clockwise.
6. Connect the power connector.
7. Reinstall the rear under cover.
OTA070031OTA070032OTA070046L
Page 837 of 846

87
Specifications & Consumer information
The tyres supplied on your new vehicle
are chosen to provide the best perform-
ance for normal driving.
The tyre label located on the driver's side
centre pillar gives the tyre pressures rec-
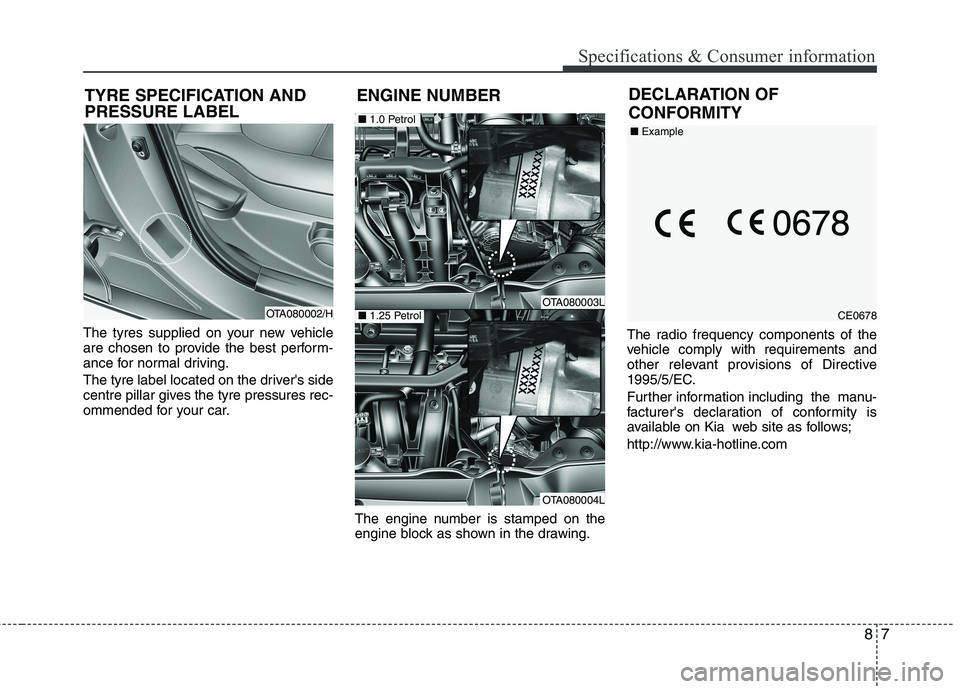
ommended for your car.The engine number is stamped on the
engine block as shown in the drawing.The radio frequency components of the
vehicle comply with requirements and
other relevant provisions of Directive
1995/5/EC.
Further information including the manu-
facturer's declaration of conformity is
available on Kia web site as follows;
http://www.kia-hotline.com
TYRE SPECIFICATION AND PRESSURE LABEL
OTA080002/H
ENGINE NUMBEROTA080003L
OTA080004L
■
1.25 Petrol
■1.0 Petrol
CE0678
DECLARATION OF CONFORMITY
■
Example
Page 839 of 846

Index
2
I
Air bags..........................................................................3-39
Air bag warning label ..............................................3-61
Air bag warning light ..............................................3-42
Curtain air bag..........................................................3-52
Driver's and passenger's front air bag ......................3-46
Side air bag ..............................................................3-51
Air cleaner ....................................................................7-30
Antenna ........................................................................4-107
Anti-lock brake system (ABS) ......................................5-28
Appearance care ............................................................7-69 Exterior care ............................................................7-69
Interior care ..............................................................7-74
Ashtray ........................................................................4-101
Audio system ..............................................................4-107 Antenna ..................................................................4-107
Aux, USB and iPod................................................4-109
Steering wheel audio control ................................4-108
Automatic climate control system ................................4-90 Air conditioning ......................................................4-96
Automatic heating and air conditioning ..................4-91
Manual heating and air conditioning ......................4-92
Automatic transaxle ......................................................5-19 Shift lock system ......................................................5-22 Base kerb weight ..........................................................5-55
Battery............................................................................7-36
Battery saver function ....................................................4-67
Before driving ..................................................................5-3
Bonnet ............................................................................4-25
Bottle holders, see cup holders ....................................4-102
Brake system..................................................................5-25
Anti-lock brake system (ABS) ................................5-28
Electronic stability control (ESC) ............................5-30
Hill-start assist control (HAC) ................................5-34
Emergency Stop Signal (ESS) ................................5-35
Parking brake ..........................................................5-26
Power brakes ............................................................5-25
Vehicle stability management (VSM) ......................5-34
Brake fluid ....................................................................7-26
Bulb replacement ..........................................................7-61
Bulb wattage ....................................................................8-2
Button start/stop, see engine start/stop button ................5-6
Capacities (Lubricants) ....................................................8-4 Care Exterior care ............................................................7-69
Interior care ..............................................................7-74
Tyre care ..................................................................7-40
AB
C