2015 KIA PICANTO fuel type
[x] Cancel search: fuel typePage 132 of 846

459
Features of your vehicle
Automatic transaxle shiftindicator (if equipped)
The indicator displays to show the auto-
matic transaxle shift lever selection.
Manual
transaxle shiftindicator
(if equipped)
This indicator informs you which gear is
desired while driving to save fuel.
For example
: Indicates that shifting up to the 3rdgear is desired (currently the shift
lever is in the 2nd gear).
: Indicates that shifting down to the 3rd gear is desired (currently the
shift lever is in the 4th gear).
Charging system warning
light
This warning light indicates a malfunction
of either the generator or electricalcharging system.
If the warning light comes on while the
vehicle is in motion:
1. Drive to the nearest safe location.
2. With the engine off, check the genera- tor drive belt for looseness or break-
age.
3. If the belt is adjusted properly, a prob- lem exists somewhere in the electrical
charging system. We recommend that
you have the vehicle inspected by an
authorized Kia dealer as soon as pos-
sible.
CAUTION
If the oil pressure warning light
stays on while the engine is run-
ning, serious engine damage mayresult. The oil pressure warninglight comes on whenever there is insufficient oil pressure. In normal
operation, it should come on whenthe ignition switch is turned on, thengo out when the engine is started. If
the oil pressure warning light stays on while the engine is running, thereis a serious malfunction.
If this happens, stop the car assoon as it is safe to do so, turn off
the engine and check the oil level. If the oil level is low, fill the engine oilto the proper level and start theengine again. If the light stays on
with the engine running, turn the engine off immediately. In this case,we recommend that you have thevehicle inspected by an authorized
Kia dealer.
■ Type A
■Type B
Page 255 of 846

Driving your vehicle
12
5
Your vehicle may be equipped with the ISG system, which reduces fuel con-
sumption by automatically shutting down
the engine, when the vehicle is at a
standstill. (For example : red light, stop
sign and traffic jam)
The engine starts automatically as soon
as the starting conditions are met.
The ISG system is ON whenever the
engine is running.
✽✽
NOTICE
When the engine automatically starts by
the ISG system, some warning lights
(ABS, ESC, ESC OFF, EPS or Parking
brake warning light) may turn on for a
few seconds.
This happens because of low battery
voltage. It does not mean the system has
malfunctioned.
Auto stop
To stop the engine in idle stop mode
1. Decrease the vehicle speed to less than 5 km/h (3 mph).
2. Shift into N (Neutral) position.
3. Release the clutch pedal.
The engine will stop and the green AUTO
STOP( ) indicator on the instrument
cluster will illuminate. Also, a message "Auto Stop" will appear
on the LCD display.
✽✽
NOTICE
You must reach a speed of at least 10
km/h (6 mph) since last idle stop.
ISG (IDLE STOP AND GO) SYSTEM (IF EQUIPPED)
OTA052017L
OTA052017L-1
■ Type A
■Type B
OTA052025L
Page 291 of 846

Driving your vehicle
48
5
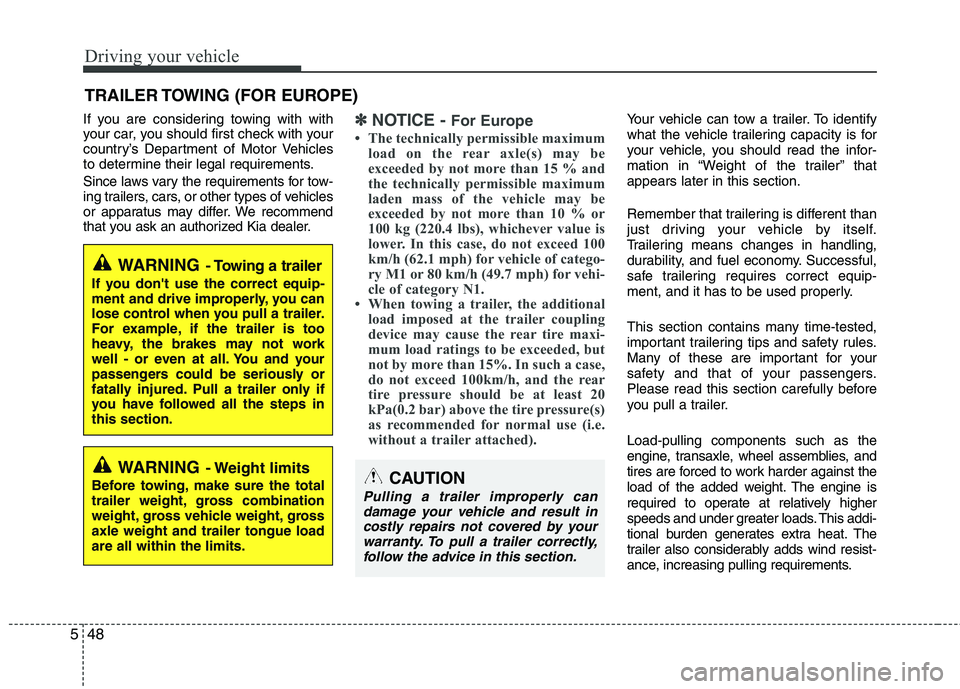
If you are considering towing with with
your car, you should first check with your
country’s Department of Motor Vehicles
to determine their legal requirements.
Since laws vary the requirements for tow-
ing trailers, cars, or other types of vehicles
or apparatus may differ. We recommend
that you ask an authorized Kia dealer.✽✽
NOTICE - For Europe
The technically permissible maximum load on the rear axle(s) may be
exceeded by not more than 15 % and
the technically permissible maximum
laden mass of the vehicle may be
exceeded by not more than 10 % or
100 kg (220.4 lbs), whichever value is
lower. In this case, do not exceed 100
km/h (62.1 mph) for vehicle of catego-
ry M1 or 80 km/h (49.7 mph) for vehi-
cle of category N1.
When towing a trailer, the additional load imposed at the trailer coupling
device may cause the rear tire maxi-
mum load ratings to be exceeded, but
not by more than 15%. In such a case,
do not exceed 100km/h, and the rear
tire pressure should be at least 20
kPa(0.2 bar) above the tire pressure(s)
as recommended for normal use (i.e.
without a trailer attached).Your vehicle can tow a trailer. To identify
what the vehicle trailering capacity is for
your vehicle, you should read the infor-
mation in “Weight of the trailer” thatappears later in this section.
Remember that trailering is different than
just driving your vehicle by itself.
Trailering means changes in handling,
durability, and fuel economy. Successful,
safe trailering requires correct equip-
ment, and it has to be used properly.
This section contains many time-tested,
important trailering tips and safety rules.
Many of these are important for your
safety and that of your passengers.
Please read this section carefully before
you pull a trailer. Load-pulling components such as the
engine, transaxle, wheel assemblies, and
tires are forced to work harder against the
load of the added weight. The engine is
required to operate at relatively higher
speeds and under greater loads. This addi-
tional burden generates extra heat. The
trailer also considerably adds wind resist-
ance, increasing pulling requirements.
TRAILER TOWING (FOR EUROPE)
WARNING
- Towing a trailer
If you don't use the correct equip-
ment and drive improperly, you can
lose control when you pull a trailer.
For example, if the trailer is too
heavy, the brakes may not work
well - or even at all. You and your
passengers could be seriously or
fatally injured. Pull a trailer only if
you have followed all the steps inthis section.
WARNING - Weight limits
Before towing, make sure the total
trailer weight, gross combination
weight, gross vehicle weight, grossaxle weight and trailer tongue loadare all within the limits.CAUTION
Pulling a trailer improperly can damage your vehicle and result incostly repairs not covered by yourwarranty. To pull a trailer correctly,follow the advice in this section.
Page 390 of 846

Maintenance
58
7
SymbolFuse ratingProtected Component
MULTI FUSE80AEPS Control Module
125AAlternator, PCB Fuse & Relay Box
FUSE
50AI/P Junction Box (Power Connector Fuse : F1 10A / F2 20A,
Fuse : F24 10A / F25 10A / F26 10A / F27 15A, Tail Lamp Relay)
40AProjection Type : E/R Sub Fuse Box (Fuse : F1 10A / F2 20A / F4 15A / F5 10A / F7 10A )
50AI/P Junction Box (Fuse : F8 20A / F9 25A / F10 15A / F16 15A / F17 25A / F18 15A / F19 10A
/ F35 10A, Power Window Relay)
40AE/R Junction Box (Fuse : F11 15A), Ignition Switch, PDM Relay Box (ESCL Relay)
40AABS Control Relay, ESC Control Relay
30AABS Control Relay, ESC Control Relay
40ARear Defogger Relay
10AInstrument Cluster, Head Lamp RH, PCB Fuse & Relay Box (Head Lamp (HI) Relay)
15APCB Fuse & Relay Box (Fuel Pump #2 Relay)
40APCB Fuse & Relay Box (Start Relay), Ignition Switch, PDM Relay Box (ESCL Relay)
30APCB Fuse & Relay Box (Engine Control Relay, Fuse : F23 10A)
40APCB Fuse & Relay Box (Blower Relay)
40APCB Fuse & Relay Box (Cooling Fan Relay)
Engine compartment main fuse panel
Page 391 of 846

759
Maintenance
SymbolFuse ratingProtected Component
FUSE
(General head lamp type)
15APCB Fuse & Relay Box (Fuel Pump #1 Relay)
20APCB Fuse & Relay Box (Head Lamp (HI) Relay)
20APCB Fuse & Relay Box (Head Lamp (LO) Relay)
10APCB Fuse & Relay Box (Horn Relay, Burglar Alarm Horn Relay)
10APCB Fuse & Relay Box (A/C Relay)
10APCM (B3LA)
10ATCM (F3LA/F4LA/F3LA), PCM (B3LA)
10ATransaxle Range Switch, TCM/PCM, ESC Control Module, Rear Bumper Lamp,
Instrument Cluster, BCM, Back-Up Lamp LH/RH, Back-Up Lamp Switch
10AECM/PCM, Front Wiper Motor, Multifunction Switch
15ATCM/PCM, Injector #1/#2/#3, Injector #4 (G4LA), Jumper Wire 1, Crash Pad Switch (B4LA),
Fuel Pump #2 Relay (B3LA)
10AHead Lamp LH
10A
G3LA/G4LA/F3LA : TCM/ECM, Camshaft Position Sensor #1/#2, Oxygen Sensor (UP)/(DOWN),
Canister Purge Solenoid Valve, Oil Control Valve #1/#2, PCB Fuse & Relay Box (A/C Relay,
Cooling Fan Relay, Start Relay), B3LA : PCM, Camshaft Position Sensor #1/#2,
PCB Fuse & Relay Box (A/C Relay, Cooling Fan Relay), Oxygen Sensor (UP)/(DOWN),
Canister Purge Solenoid Valve, Oil Control Valve #1/#2, Variable Intake Solenoid Valve
10AHead Lamp RH
20AIgnition coil, condensor
Page 392 of 846

Maintenance
60
7
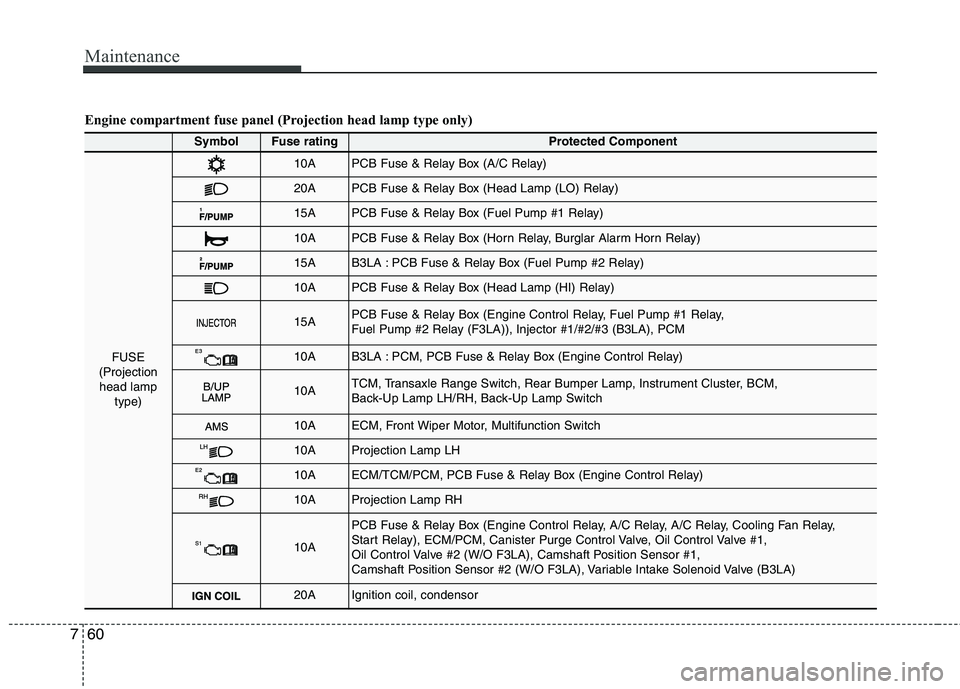
Engine compartment fuse panel (Projection head lamp type only)
SymbolFuse ratingProtected Component
FUSE
(Projection head lamp type)
10APCB Fuse & Relay Box (A/C Relay)
20APCB Fuse & Relay Box (Head Lamp (LO) Relay)
15APCB Fuse & Relay Box (Fuel Pump #1 Relay)
10APCB Fuse & Relay Box (Horn Relay, Burglar Alarm Horn Relay)
15AB3LA : PCB Fuse & Relay Box (Fuel Pump #2 Relay)
10APCB Fuse & Relay Box (Head Lamp (HI) Relay)
15APCB Fuse & Relay Box (Engine Control Relay, Fuel Pump #1 Relay,
Fuel Pump #2 Relay (F3LA)), Injector #1/#2/#3 (B3LA), PCM
10AB3LA : PCM, PCB Fuse & Relay Box (Engine Control Relay)
10ATCM, Transaxle Range Switch, Rear Bumper Lamp, Instrument Cluster, BCM,
Back-Up Lamp LH/RH, Back-Up Lamp Switch
10AECM, Front Wiper Motor, Multifunction Switch
10AProjection Lamp LH
10AECM/TCM/PCM, PCB Fuse & Relay Box (Engine Control Relay)
10AProjection Lamp RH
10A
PCB Fuse & Relay Box (Engine Control Relay, A/C Relay, A/C Relay, Cooling Fan Relay,
Start Relay), ECM/PCM, Canister Purge Control Valve, Oil Control Valve #1,
Oil Control Valve #2 (W/O F3LA), Camshaft Position Sensor #1,
Camshaft Position Sensor #2 (W/O F3LA), Variable Intake Solenoid Valve (B3LA)
20AIgnition coil, condensor
Page 433 of 846

Introduction
4
1
Use of MTBE
Kia recommends avoiding fuels contain-
ing MTBE (Methyl Tertiary Butyl Ether)
over 15.0% vol. (Oxygen Content 2.7%
weight) in your vehicle.
Fuel containing MTBE over 15.0% vol.
(Oxygen Content 2.7% weight) may
reduce vehicle performance and produce
vapour lock or hard starting.
Do not use methanol
Fuels containing methanol (wood alco-
hol) should not be used in your vehicle.
This type of fuel can reduce vehicle per-
formance and damage components ofthe fuel system, engine control systemand emission control system.
Fuel Additives
Kia recommends that you use unleaded
gasoline which has an octane rating of
RON (Research Octane Number) 95 /
AKI (Anti Knock Index) 91 or higher (for
Europe) or Octane Rating of RON(Reasearch Octane Number) 91 / AKI
(Anti-Knock Index)87 or higher (exceptEurope).
For customers who do not use good
quality petrols including fuel additives
regularly, and have problems starting or
the engine does not run smoothly, one
bottle of additives added to the fuel tank
at every 15,000km (For Europe and NewZealand)/ 5,000km (Except Europe and
New Zealand). Additives are available
from your authorised Kia dealer along
with information on how to use them. Do
not mix other additives.
Operation in foreign countries
If you are going to drive your vehicle in
another country, be sure to:
Observe all regulations regarding reg-
istration and insurance.
Determine that acceptable fuel is avail- able. No special break-in period is needed. By
following a few simple precautions for the
first 1,000 km (600 miles) you may add to
the performance, economy and life of
your vehicle.
Do not race the engine.
Whilst driving, keep your engine speed
(rpm, or revolutions per minute)
between 2,000 rpm and 4,000 rpm.
Do not maintain a single speed for long periods of time, either fast or slow.
Varying engine speed is needed to
properly break-in the engine.
Avoid hard stops, except in emergencies, to allow the brakes to seat properly.
Don't tow a trailer during the first 2,000 km (1,200 miles) of operation.
VEHICLE BREAK-IN PROCESS
CAUTION
Your New Vehicle Limited Warranty
may not cover damage to the fuelsystem and any performance prob-lems that are caused by the use offuels containing methanol or fuels
containing MTBE (Methyl TertiaryButyl Ether) over 15.0% vol. (Oxygen Content 2.7% weight.)
Page 528 of 846

429
Features of your vehicle
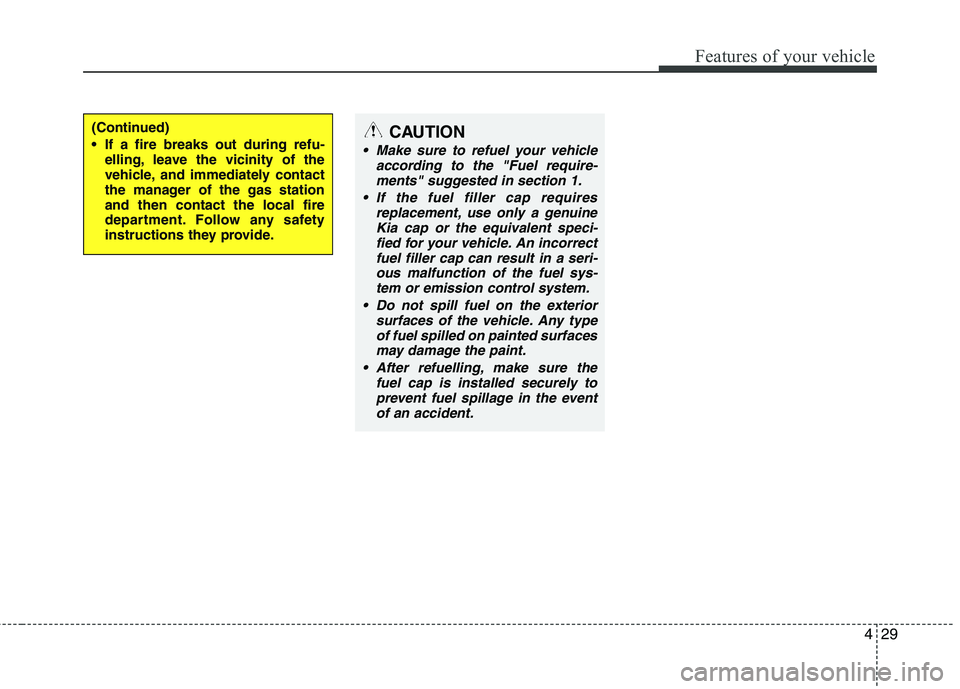
(Continued)
If a fire breaks out during refu-elling, leave the vicinity of the
vehicle, and immediately contact
the manager of the gas stationand then contact the local fire
department. Follow any safety
instructions they provide.CAUTION
Make sure to refuel your vehicle
according to the "Fuel require-
ments" suggested in section 1.
If the fuel filler cap requires replacement, use only a genuineKia cap or the equivalent speci-
fied for your vehicle. An incorrect fuel filler cap can result in a seri-ous malfunction of the fuel sys-tem or emission control system.
Do not spill fuel on the exterior surfaces of the vehicle. Any typeof fuel spilled on painted surfacesmay damage the paint.
After refuelling, make sure the fuel cap is installed securely to
prevent fuel spillage in the eventof an accident.