Page 361 of 846

729
Maintenance
WASHER FLUID
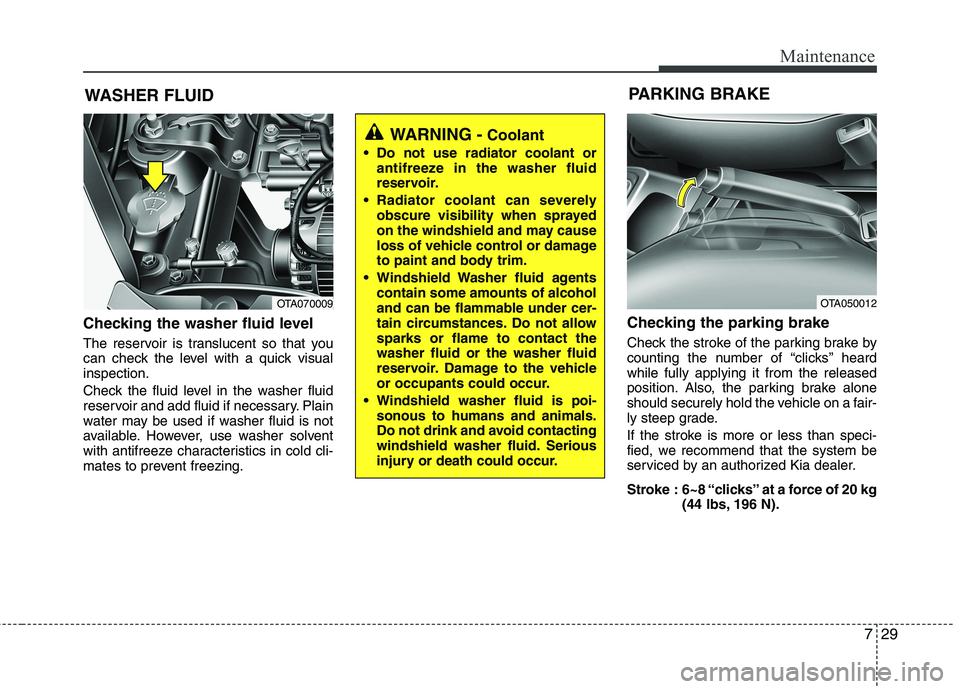
Checking the washer fluid level
The reservoir is translucent so that you
can check the level with a quick visualinspection.
Check the fluid level in the washer fluid
reservoir and add fluid if necessary. Plain
water may be used if washer fluid is not
available. However, use washer solvent
with antifreeze characteristics in cold cli-
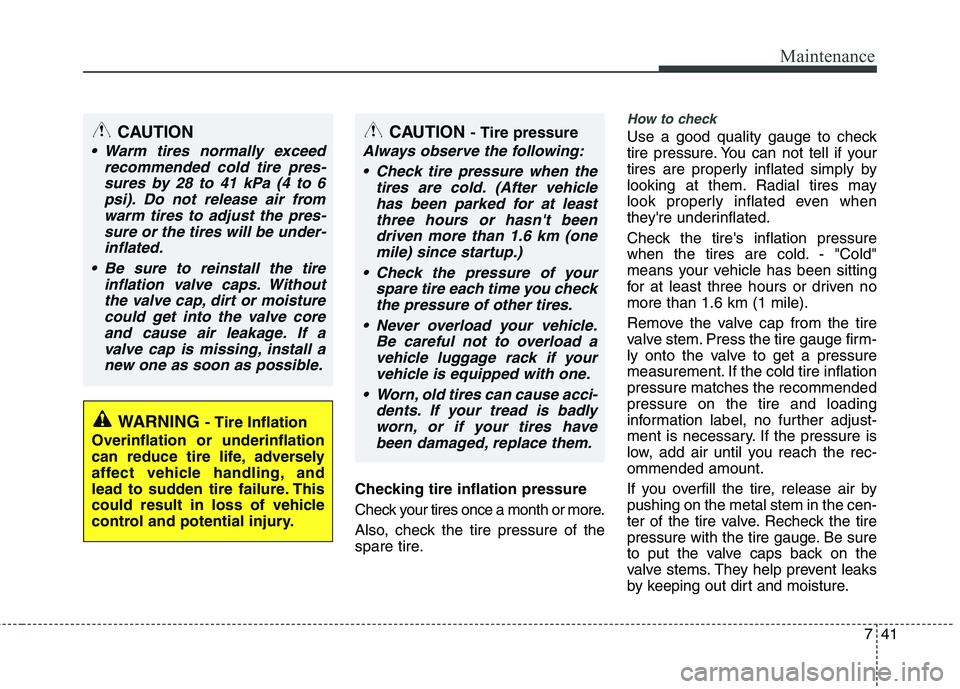
mates to prevent freezing. Checking the parking brake
Check the stroke of the parking brake by
counting the number of “clicks’’ heardwhile fully applying it from the released
position. Also, the parking brake alone
should securely hold the vehicle on a fair-
ly steep grade.
If the stroke is more or less than speci-
fied, we recommend that the system be
serviced by an authorized Kia dealer.
Stroke : 6~8 “clicks’’ at a force of 20 kg
(44 lbs, 196 N).
WARNING - Coolant
Do not use radiator coolant or antifreeze in the washer fluid
reservoir.
Radiator coolant can severely obscure visibility when sprayed
on the windshield and may cause
loss of vehicle control or damage
to paint and body trim.
Windshield Washer fluid agents contain some amounts of alcohol
and can be flammable under cer-
tain circumstances. Do not allowsparks or flame to contact thewasher fluid or the washer fluid
reservoir. Damage to the vehicle
or occupants could occur.
Windshield washer fluid is poi- sonous to humans and animals.
Do not drink and avoid contacting
windshield washer fluid. Serious
injury or death could occur.
OTA070009 PARKING BRAKE OTA050012
Page 363 of 846
731
Maintenance
Replace the filter according to the
Maintenance Schedule.
If the vehicle is operated in extremelydusty or sandy areas, replace the element more often than the usual
recommended intervals. (Refer to“Maintenance under severe usage condi-tions” in this section.)
CAUTION
Do not drive with the air cleaner removed; this will result in exces-
sive engine wear.
When removing the air cleaner fil- ter, be careful that dust or dirtdoes not enter the air intake, or
damage may result.
Use a Kia genuine part. Use of non-genuine parts could damagethe air flow sensor.
Page 364 of 846
Maintenance
32
7
CLIMATE CONTROL AIR FILTER
Filter inspection The climate control air filter should be replaced according to the maintenance
schedule. If the vehicle is operated in the
severely air-polluted cities or on dusty
rough roads for a long period, it shouldbe inspected more frequently and
replaced earlier. When you, the owner,
replace the climate control air filter,
replace it performing the following proce-
dure, and be careful to avoid damaging
other components. Replace the filter according to the main-
tenance Schedule. Filter replacement
1. With the glove box open, remove the
stoppers on both sides. 2. Remove the climate control air filter
cover while pressing the lock on the
both side of the cover.
OTA070015OTA070014
Page 365 of 846
733
Maintenance
3. Replace the climate control air filter.
4. Reassemble in the reverse order ofdisassembly.
✽✽ NOTICE
When replacing the climate control air
filter install it properly. Otherwise, the
system may produce noise and the effec-
tiveness of the filter may be reduced.
OTA070016
Page 373 of 846

741
Maintenance
Checking tire inflation pressure
Check your tires once a month or more.
Also, check the tire pressure of the
spare tire.
How to check
Use a good quality gauge to check
tire pressure. You can not tell if your
tires are properly inflated simply by
looking at them. Radial tires may
look properly inflated even when
they're underinflated.
Check the tire's inflation pressure
when the tires are cold. - "Cold"
means your vehicle has been sitting
for at least three hours or driven nomore than 1.6 km (1 mile).
Remove the valve cap from the tire
valve stem. Press the tire gauge firm-
ly onto the valve to get a pressure
measurement. If the cold tire inflationpressure matches the recommendedpressure on the tire and loading
information label, no further adjust-
ment is necessary. If the pressure is
low, add air until you reach the rec-ommended amount.
If you overfill the tire, release air by pushing on the metal stem in the cen-
ter of the tire valve. Recheck the tire
pressure with the tire gauge. Be sure
to put the valve caps back on the
valve stems. They help prevent leaks
by keeping out dirt and moisture.
WARNING - Tire Inflation
Overinflation or underinflation
can reduce tire life, adversely
affect vehicle handling, and
lead to sudden tire failure. This
could result in loss of vehicle
control and potential injury.
CAUTION - Tire pressure
Always observe the following:
Check tire pressure when the tires are cold. (After vehiclehas been parked for at leastthree hours or hasn't beendriven more than 1.6 km (one mile) since startup.)
Check the pressure of your spare tire each time you checkthe pressure of other tires.
Never overload your vehicle. Be careful not to overload avehicle luggage rack if your vehicle is equipped with one.
Worn, old tires can cause acci- dents. If your tread is badlyworn, or if your tires havebeen damaged, replace them.
CAUTION
Warm tires normally exceed recommended cold tire pres-sures by 28 to 41 kPa (4 to 6psi). Do not release air fromwarm tires to adjust the pres- sure or the tires will be under-inflated.
Be sure to reinstall the tire inflation valve caps. Withoutthe valve cap, dirt or moisture could get into the valve coreand cause air leakage. If avalve cap is missing, install anew one as soon as possible.
Page 379 of 846

747
Maintenance
3. Checking tire life (TIN : TireIdentification Number)
Any tires that are over 6 years old,
based on the manufacturing date,(including the spare tire) should be
replaced by new ones. You can find
the manufacturing date on the tire
sidewall (possibly on the inside of the
wheel), displaying the DOT Code.
The DOT Code is a series of num-
bers on a tire consisting of numbers
and English letters. The manufactur-
ing date is designated by the last four
digits (characters) of the DOT code. DOT : XXXX XXXX OOOO
The front part of the DOT means a
plant code number, tire size and
tread pattern and the last four num-
bers indicate week and year manu-
factured.
For example:
DOT XXXX XXXX 1614 represents
that the tire was produced in the 16th
week of 2014.
4. Tire ply composition and material
The number of layers or plies of rub-
ber-coated fabric in the tire. Tire
manufacturers also must indicate the
materials in the tire, which include
steel, nylon, polyester, and others.
The letter "R" means radial ply con-
struction; the letter "D" means diago-
nal or bias ply construction; and theletter "B" means belted-bias ply con-
struction.
5. Maximum permissible inflation
pressure
This number is the greatest amount of air pressure that should be put in the
tire. Do not exceed the maximum per-
missible inflation pressure. Refer to
the Tire and Loading Information label
for recommended inflation pressure.
6. Maximum load rating
This number indicates the maximum
load in kilograms and pounds that can
be carried by the tire. When replacing
the tires on the vehicle, always use a
tire that has the same load rating as
the factory installed tire.
S 180 km/h (112 mph)
T 190 km/h (118 mph)
H 210 km/h (130 mph)
V 240 km/h (149 mph) Z Above 240 km/h (149 mph)
Maximum Speed
Speed
Rating
Symbol
WARNING - Tire age
Tires degrade over time, even
when they are not being used.
Regardless of the remaining
tread, it is recommended that
tires generally be replaced after
six (6) years of normal service.
Heat caused by hot climates orfrequent high loading conditions
can accelerate the aging
process. Failure to follow this
warning can result in sudden tire
failure, which could lead to a
loss of control and an accident
involving serious injury or death.
Page 381 of 846

749
Maintenance
Low aspect ratio tire (if equipped)
Low aspect ratio tires, whose aspect
ratio is lower than 50, are provided
for sporty looks.
Because the low aspect ratio tires
are optimized for handling and brak-
ing, it may be more uncomfortable to
ride in and there is more noise com-
pare with normal tires.CAUTION
Because the sidewall of the lowaspect ratio tire is shorter thanthe normal, the wheel and tire of the low aspect ratio tire is easi-er to be damaged. So, follow theinstructions below.
- When driving on a rough road or off road, drive cautiouslybecause tires and wheels maybe damaged. And after driv- ing, inspect tires and wheels.
- When passing over a pothole, speed bump, manhole, or curbstone, drive slowly so that thetires and wheels are not dam- aged.
- If the tire is impacted, we rec- ommend that you inspect thetire condition or contact anauthorized Kia dealer.
- To prevent damage to the tire, inspect the tire condition andpressure every 3,000km.
CAUTION
It is not easy to recognize the tire damage with your owneyes. But if there is the slight-est hint of tire damage, eventhough you cannot see the tire damage with your own eyes,have the tire checked orreplaced because the tire damage may cause air leak-age from the tire.
If the tire is damaged by driv- ing on a rough road, off road,pothole, manhole, or curb stone, it will not be covered bythe warranty.
You can find out the tire infor- mation on the tire sidewall.
Page 382 of 846

Maintenance
50
7
FUSES
A vehicle’s electrical system is protected
from electrical overload damage by fuses.
This vehicle has 2 fuse panels, one locat-
ed in the driver’s side panel bolster, oth-
ers in the engine compartment near the
battery.
If any of your vehicle’s lights, acces-
sories, or controls do not work, check the
appropriate circuit fuse. If a fuse has
blown, the element inside the fuse will bemelted.
If the electrical system does not work,
first check the driver’s side fuse panel.
Always replace a blown fuse with one of
the same rating.
Before replacing a blown fuse, move to
safe place, turn off the engine and all
electric devices, and disconnect the neg-
ative battery cable.
If the replacement fuse blows, this indi-
cates an electrical problem. Avoid using
the system involved and we recommend
that you consult an authorized Kia dealer.
Four kinds of fuses are used: blade typefor lower amperage rating, cartridge type,battery fuse terminal and multi fuse typefor higher amperage ratings.
✽✽ NOTICE
The actual fuse/relay panel label may
differ from equipped items.
WARNING - Fuse replace-
ment
Never replace a fuse with any- thing but another fuse of the same rating.
A higher capacity fuse could cause damage and possibly a fire.
Never install a wire or aluminum foil instead of the proper fuse -
even as a temporary repair. It may
cause extensive wiring damage
and a possible fire.
CAUTION
Do not use a screwdriver or any
other metal object to remove fuses
because it may cause a short circuitand damage the system.
OTA070039
Blade type
Cartridge type
Fusible link
BBBBlllloooowwwwnnnn
BBBBlllloooowwwwnnnn
BBBBlllloooowwwwnnnn