2015 KIA MORNING oil type
[x] Cancel search: oil typePage 28 of 420
Safety features of your vehicle
16 3
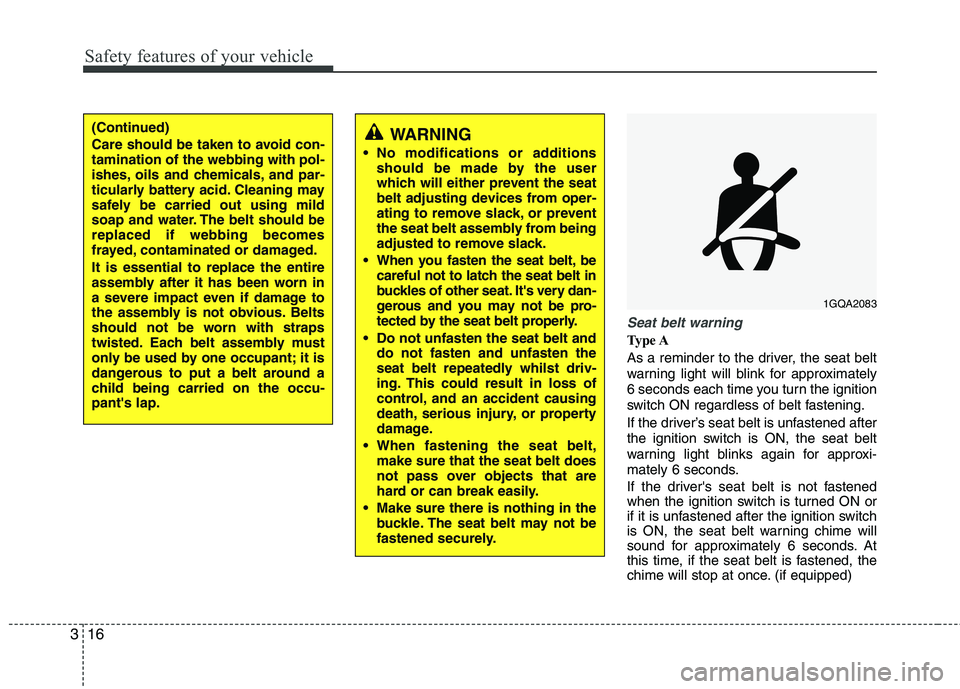
Seat belt warning
Type A
As a reminder to the driver, the seat belt
warning light will blink for approximately
6 seconds each time you turn the ignition
switch ON regardless of belt fastening.
If the driver’s seat belt is unfastened after
the ignition switch is ON, the seat belt
warning light blinks again for approxi-
mately 6 seconds.
If the driver's seat belt is not fastened
when the ignition switch is turned ON or
if it is unfastened after the ignition switch
is ON, the seat belt warning chime will
sound for approximately 6 seconds. At
this time, if the seat belt is fastened, the
chime will stop at once. (if equipped)
1GQA2083
WARNING
No modifications or additions
should be made by the user
which will either prevent the seat
belt adjusting devices from oper-
ating to remove slack, or prevent
the seat belt assembly from being
adjusted to remove slack.
When you fasten the seat belt, be
careful not to latch the seat belt in
buckles of other seat. It's very dan-
gerous and you may not be pro-
tected by the seat belt properly.
Do not unfasten the seat belt and
do not fasten and unfasten the
seat belt repeatedly whilst driv-
ing. This could result in loss of
control, and an accident causing
death, serious injury, or property
damage.
When fastening the seat belt,
make sure that the seat belt does
not pass over objects that are
hard or can break easily.
Make sure there is nothing in the
buckle. The seat belt may not be
fastened securely.
(Continued)
Care should be taken to avoid con-
tamination of the webbing with pol-
ishes, oils and chemicals, and par-
ticularly battery acid. Cleaning may
safely be carried out using mild
soap and water. The belt should be
replaced if webbing becomes
frayed, contaminated or damaged.
It is essential to replace the entire
assembly after it has been worn in
a severe impact even if damage to
the assembly is not obvious. Belts
should not be worn with straps
twisted. Each belt assembly must
only be used by one occupant; it is
dangerous to put a belt around a
child being carried on the occu-
pant's lap.
Page 162 of 420
489
Features of your vehicle
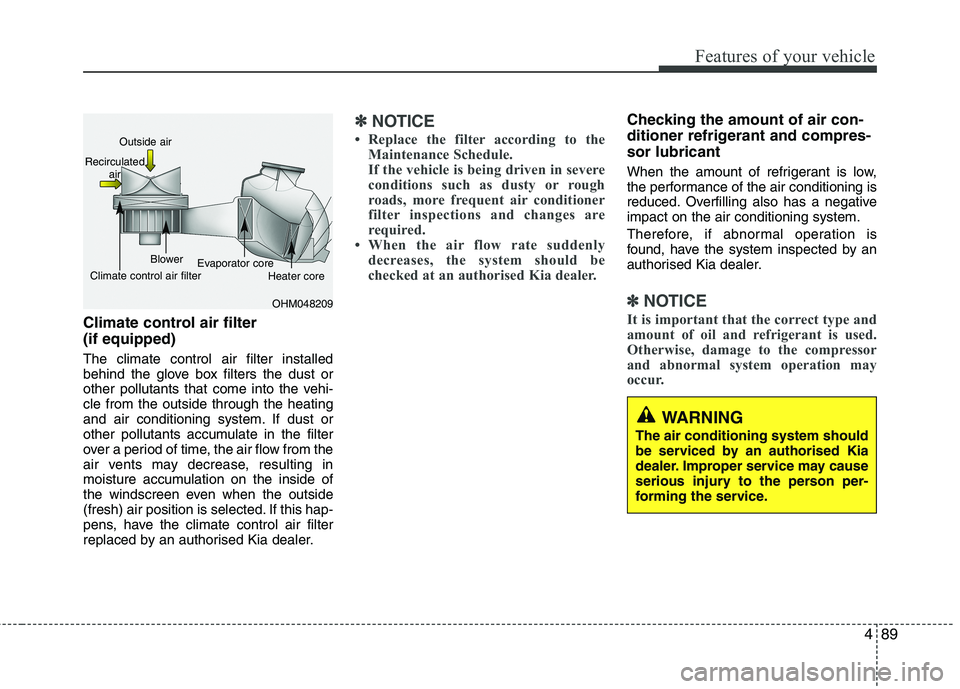
Climate control air filter
(if equipped)
The climate control air filter installed
behind the glove box filters the dust or
other pollutants that come into the vehi-
cle from the outside through the heating
and air conditioning system. If dust or
other pollutants accumulate in the filter
over a period of time, the air flow from the
air vents may decrease, resulting in
moisture accumulation on the inside of
the windscreen even when the outside
(fresh) air position is selected. If this hap-
pens, have the climate control air filter
replaced by an authorised Kia dealer.
✽ ✽
NOTICE
• Replace the filter according to the
Maintenance Schedule.
If the vehicle is being driven in severe
conditions such as dusty or rough
roads, more frequent air conditioner
filter inspections and changes are
required.
• When the air flow rate suddenly
decreases, the system should be
checked at an authorised Kia dealer.
Checking the amount of air con-
ditioner refrigerant and compres-
sor lubricant
When the amount of refrigerant is low,
the performance of the air conditioning is
reduced. Overfilling also has a negative
impact on the air conditioning system.
Therefore, if abnormal operation is
found, have the system inspected by an
authorised Kia dealer.
✽ ✽
NOTICE
It is important that the correct type and
amount of oil and refrigerant is used.
Otherwise, damage to the compressor
and abnormal system operation may
occur.
WARNING
The air conditioning system should
be serviced by an authorised Kia
dealer. Improper service may cause
serious injury to the person per-
forming the service.
OHM048209 Outside air
Recirculated
air
Climate control air filterBlower
Evaporator core
Heater core
Page 286 of 420
545
Driving your vehicle
Use high quality ethylene glycol
coolant
Your vehicle is delivered with high quality
ethylene glycol coolant in the cooling
system. It is the only type of coolant that
should be used because it helps prevent
corrosion in the cooling system, lubri-
cates the water pump and prevents
freezing. Be sure to replace or replenish
your coolant in accordance with the
maintenance schedule in section 7.
Before winter, have your coolant tested to
assure that its freezing point is sufficient
for the temperatures anticipated during
the winter.
Check battery and cables
Winter puts additional burdens on the
battery system. Visually inspect the bat-
tery and cables as described in section
7. The level of charge in your battery can
be checked by an authorised Kia dealer
or a service station.
Change to "winter weight" oil if
necessary
In some climates it is recommended that
a lower viscosity "winter weight" oil be
used during cold weather. See section 8
for recommendations. If you aren't sure
what weight oil you should use, consult
an authorised Kia dealer.
Check spark plugs and ignition
system
Inspect your spark plugs as described in
section 7 and replace them if necessary.
Also check all ignition wiring and compo-
nents to be sure they are not cracked,
worn or damaged in any way.
WARNING- tyre chains
The use of chains may adversely
affect vehicle handling.
Do not exceed 30 km/h (20 mph)
or the chain manufacturer’s rec-
ommended speed limit, whichev-
er is lower.
Drive carefully and avoid bumps,
holes, sharp turns, and other
road hazards, which may cause
the vehicle to bounce.
Avoid sharp turns or locked-
wheel braking.
CAUTION
Chains that are the wrong size or
improperly installed can damage
your vehicle's brake lines, sus-
pension, body and wheels.
Stop driving and retighten the
chains any time you hear them
hitting the vehicle.
Page 353 of 420
Maintenance
26 7
BRAKE FLUID
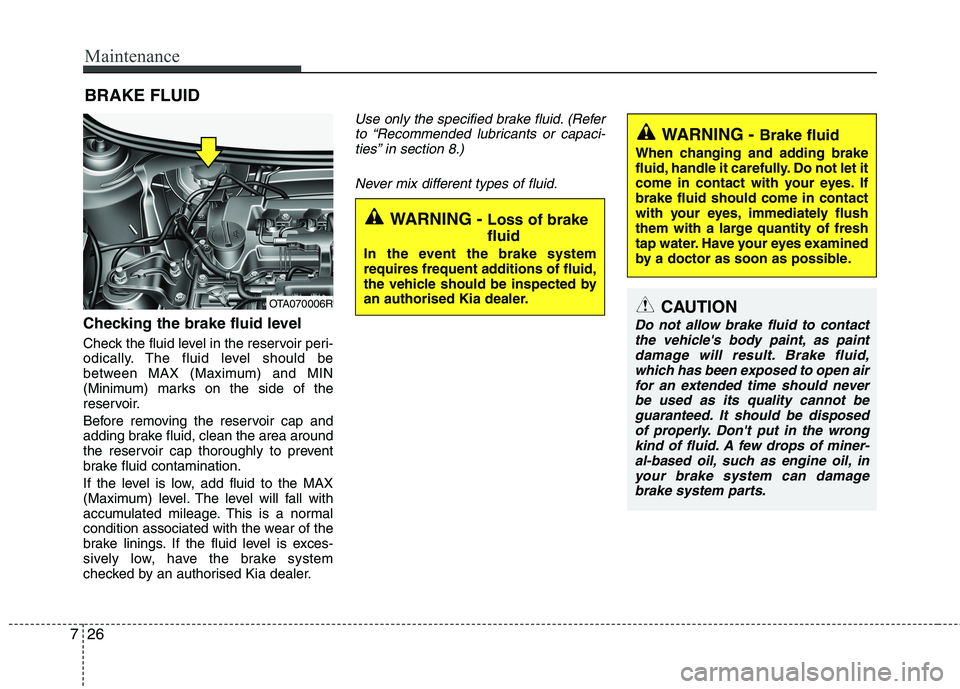
Checking the brake fluid level
Check the fluid level in the reservoir peri-
odically. The fluid level should be
between MAX (Maximum) and MIN
(Minimum) marks on the side of the
reservoir.
Before removing the reservoir cap and
adding brake fluid, clean the area around
the reservoir cap thoroughly to prevent
brake fluid contamination.
If the level is low, add fluid to the MAX
(Maximum) level. The level will fall with
accumulated mileage. This is a normal
condition associated with the wear of the
brake linings. If the fluid level is exces-
sively low, have the brake system
checked by an authorised Kia dealer.
Use only the specified brake fluid. (Refer
to “Recommended lubricants or capaci-
ties” in section 8.)
Never mix different types of fluid.
WARNING - Brake fluid
When changing and adding brake
fluid, handle it carefully. Do not let it
come in contact with your eyes. If
brake fluid should come in contact
with your eyes, immediately flush
them with a large quantity of fresh
tap water. Have your eyes examined
by a doctor as soon as possible.
WARNING - Loss of brake
fluid
In the event the brake system
requires frequent additions of fluid,
the vehicle should be inspected by
an authorised Kia dealer.
CAUTION
Do not allow brake fluid to contact
the vehicle's body paint, as paint
damage will result. Brake fluid,
which has been exposed to open air
for an extended time should never
be used as its quality cannot be
guaranteed. It should be disposed
of properly. Don't put in the wrong
kind of fluid. A few drops of miner-
al-based oil, such as engine oil, in
your brake system can damage
brake system parts.
OTA070006R
Page 386 of 420

759
Maintenance
SymbolFuse ratingProtected Component
FUSE
(General head
lamp type)
15APCB Fuse & Relay Box (Fuel Pump #1 Relay)
20APCB Fuse & Relay Box (Head Lamp (HI) Relay)
20APCB Fuse & Relay Box (Head Lamp (LO) Relay)
10APCB Fuse & Relay Box (Horn Relay, Burglar Alarm Horn Relay)
10APCB Fuse & Relay Box (A/C Relay)
10APCM (B3LA)
10ATCM (F3LA/F4LA/F3LA), PCM (B3LA)
10ATransaxle Range Switch, TCM/PCM, ESC Control Module, Rear Bumper Lamp,
Instrument Cluster, BCM, Back-Up Lamp LH/RH, Back-Up Lamp Switch
10AECM/PCM, Front Wiper Motor, Multifunction Switch
15ATCM/PCM, Injector #1/#2/#3, Injector #4 (G4LA), Jumper Wire 1, Crash Pad Switch (B4LA),
Fuel Pump #2 Relay (B3LA)
10AHead Lamp LH
10A
G3LA/G4LA/F3LA : TCM/ECM, Camshaft Position Sensor #1/#2, Oxygen Sensor
(UP)/(DOWN), Canister Purge Solenoid Valve, Oil Control Valve #1/#2, PCB Fuse & Relay Box
(A/C Relay, Cooling Fan Relay, Start Relay), B3LA : PCM, Camshaft Position Sensor #1/#2,
PCB Fuse & Relay Box (A/C Relay, Cooling Fan Relay), Oxygen Sensor (UP)/(DOWN),
Canister Purge Solenoid Valve, Oil Control Valve #1/#2, Variable Intake Solenoid Valve
10AHead Lamp RH
20AIGN COIL, Condensor
Page 387 of 420

Maintenance
60 7
Engine compartment fuse panel (Projection head lamp type only)
SymbolFuse ratingProtected Component
FUSE
(Projection
head lamp
type)
10APCB Fuse & Relay Box (A/C Relay)
20APCB Fuse & Relay Box (Head Lamp (LO) Relay)
15APCB Fuse & Relay Box (Fuel Pump #1 Relay)
10APCB Fuse & Relay Box (Horn Relay, Burglar Alarm Horn Relay)
15AB3LA : PCB Fuse & Relay Box (Fuel Pump #2 Relay)
10APCB Fuse & Relay Box (Head Lamp (HI) Relay)
15APCB Fuse & Relay Box (Engine Control Relay, Fuel Pump #1 Relay,
Fuel Pump #2 Relay (F3LA)), Injector #1/#2/#3 (B3LA), PCM
10AB3LA : PCM, PCB Fuse & Relay Box (Engine Control Relay)
10ATCM, Transaxle Range Switch, Rear Bumper Lamp, Instrument Cluster, BCM,
Back-Up Lamp LH/RH, Back-Up Lamp Switch
10AECM, Front Wiper Motor, Multifunction Switch
10AProjection Lamp LH
10AECM/TCM/PCM, PCB Fuse & Relay Box (Engine Control Relay)
10AProjection Lamp RH
10A
PCB Fuse & Relay Box (Engine Control Relay, A/C Relay, A/C Relay, Cooling Fan Relay, Start
Relay), ECM/PCM, Canister Purge Control Valve, Oil Control Valve #1, Oil Control Valve #2
(W/O F3LA), Camshaft Position Sensor #1, Camshaft Position Sensor #2 (W/O F3LA),
Variable Intake Solenoid Valve (B3LA)
20AIGN COIL, Condensor
Page 389 of 420
Maintenance
62 7
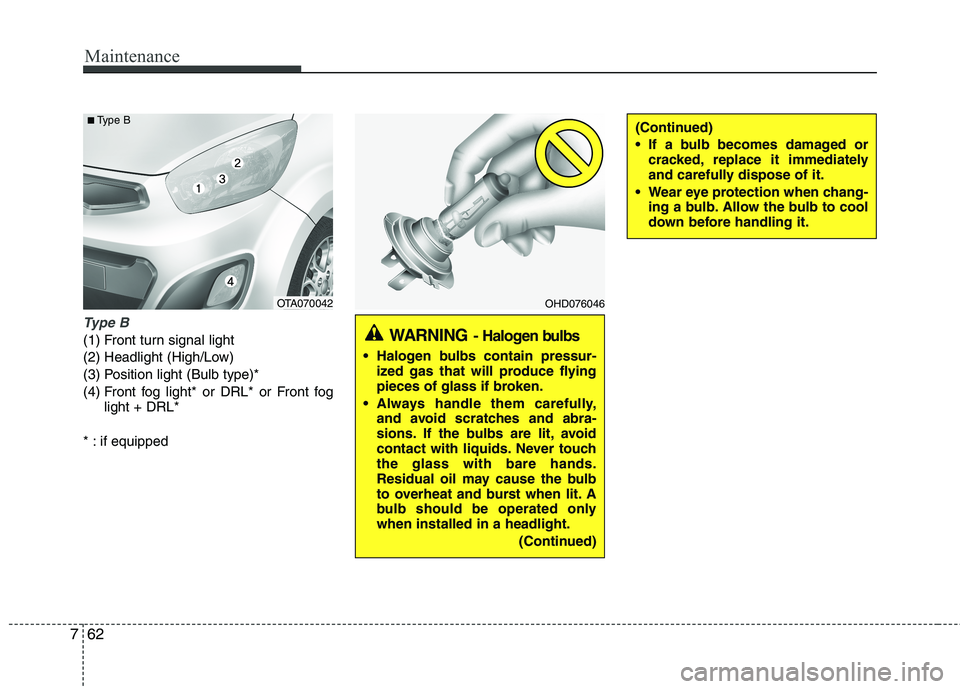
Type B
(1) Front turn signal light
(2) Headlight (High/Low)
(3) Position light (Bulb type)*
(4) Front fog light* or DRL* or Front fog
light + DRL*
* : if equipped
OHD076046
WARNING- Halogen bulbs
Halogen bulbs contain pressur-
ized gas that will produce flying
pieces of glass if broken.
Always handle them carefully,
and avoid scratches and abra-
sions. If the bulbs are lit, avoid
contact with liquids. Never touch
the glass with bare hands.
Residual oil may cause the bulb
to overheat and burst when lit. A
bulb should be operated only
when installed in a headlight.
(Continued)
(Continued)
If a bulb becomes damaged or
cracked, replace it immediately
and carefully dispose of it.
Wear eye protection when chang-
ing a bulb. Allow the bulb to cool
down before handling it.
OTA070042
■Type B