2015 KIA MORNING steering
[x] Cancel search: steeringPage 280 of 420
539
Driving your vehicle
Hazardous driving conditions
When hazardous driving conditions are
encountered such as water, snow, ice,
mud, sand, or similar hazards, follow
these suggestions:
Drive cautiously and allow extra dis-
tance for braking.
Avoid sudden movements in braking or
steering.
When braking with non-ABS brakes
pump the brake pedal with a light up-
and-down motion until the vehicle is
stopped. If stalled in snow, mud, or sand, use
second gear. Accelerate slowly to
avoid spinning the drive wheels.
Use sand, rock salt, tyre chains, or
other non-slip material under the drive
wheels to provide traction when stalled
in ice, snow, or mud.
Rocking the vehicle
If it is necessary to rock the vehicle to
free it from snow, sand, or mud, first turn
the steering wheel right and left to clear
the area around your front wheels. Then,
shift back and forth between R (Reverse)
and any forward gear in vehicles
equipped with an automatic transaxle.
Do not race the engine, and spin the
wheels as little as possible. If you are still
stuck after a few tries, have the vehicle
pulled out by a tow vehicle to avoid
engine overheating and possible dam-
age to the transaxle.
SPECIAL DRIVING CONDITIONS
WARNING - ABS
Do not pump the brake pedal on a
vehicle equipped with ABS.
WARNING - Downshifting
Downshifting with an automatic
transaxle, whilst driving on slippery
surfaces can cause an accident.
The sudden change in tyre speed
could cause the tyres to skid. Be
careful when downshifting on slip-
pery surfaces.CAUTION
Prolonged rocking may cause
engine over-heating, transaxle dam-
age or failure, and tyre damage.
OSA057013
Page 287 of 420
Driving your vehicle
46 5
To keep locks from freezing
To keep the locks from freezing, squirt an
approved de-icer fluid or glycerine into
the key opening. If a lock is covered with
ice, squirt it with an approved de-icing
fluid to remove the ice. If the lock is
frozen internally, you may be able to thaw
it out by using a heated key. Handle the
heated key with care to avoid injury.
Use approved window washer
anti-freeze in system
To keep the water in the window washer
system from freezing, add an approved
window washer anti-freeze solution in
accordance with instructions on the con-
tainer. Window washer anti-freeze is
available from an authorised Kia dealer
and most auto parts outlets. Do not use
engine coolant or other types of anti-
freeze as these may damage the paint
finish.
Don't let your parking brake
freeze
Under some conditions your parking
brake can freeze in the engaged position.
This is most likely to happen when there
is an accumulation of snow or ice around
or near the rear brakes or if the brakes
are wet. If there is a risk the parking
brake may freeze, apply it only temporar-
ily whilst you put the shift lever in P (Park)
and block the rear wheels so the vehicle
cannot roll. Then release the parking
brake.
Don't let ice and snow accumu-
late underneath
Under some conditions, snow and ice
can build up under the fenders and inter-
fere with the steering. When driving in
severe winter conditions where this may
happen, you should periodically check
underneath the car to be sure the move-
ment of the front wheels and the steering
components is not obstructed.
Carry emergency equipment
Depending on the severity of the weath-
er where you drive your car, you should
carry appropriate emergency equipment.
Some of the items you may want to carry
include tyre chains, tow straps or chains,
flashlight, emergency flares, sand, a
shovel, jumper cables, a window scraper,
gloves, ground cloth, coveralls, a blanket,
etc.
Page 291 of 420
Driving your vehicle
50 5
Following distance
Stay at least twice as far behind the vehi-
cle ahead as you would when driving
your vehicle without a trailer. This can
help you avoid situations that require
heavy braking and sudden turns.
Passing
You’ll need more passing distance up
ahead when you’re towing a trailer. And,
because of the increased vehicle length,
you’ll need to go much farther beyond the
passed vehicle before you can return to
your lane.
Backing up
Hold the bottom of the steering wheel
with one hand. Then, to move the trailer
to the left, just move your hand to the left.
To move the trailer to the right, move your
hand to the right. Always back up slowly
and, if possible, have someone guide
you.
Making turns
When you’re turning with a trailer, make
wider turns than normal. Do this so your
trailer won’t strike soft shoulders, kerbs,
road signs, trees, or other objects. Avoid
jerky or sudden manoeuvres. Signal well
in advance.
Turn signals when towing a trailer
When you tow a trailer, your vehicle has
to have a different turn signal flasher and
extra wiring. The green arrows on your
instrument panel will flash whenever you
signal a turn or lane change. Properly
connected, the trailer lights will also flash
to alert other drivers you’re about to turn,
change lanes, or stop.
When towing a trailer, the green arrows
on your instrument panel will flash for
turns even if the bulbs on the trailer are
burned out. Thus, you may think drivers
behind you are seeing your signals
when, in fact, they are not. It’s important
to check occasionally to be sure the trail-
er bulbs are still working. You must also
check the lights every time you discon-
nect and then reconnect the wires.
Do not connect a trailer lighting system
directly to your vehicle’s lighting system.
Use only an approved trailer wiring har-
ness.
An authorised Kia dealer can assist you
in installing the wiring harness.
Driving on grades
Reduce the speed and shift to a lower
gear before you start down a long or
steep downgrade. If you don’t shift down,
you might have to use your brakes so
much that they would get hot and no
longer operate efficiently.
On a long uphill grade, shift down and
reduce your speed to around 45 mph (70
km/h) to reduce the possibility of engine
and transaxle overheating.
If your trailer weighs more than the max-
imum trailer weight without trailer brakes
and you have an automatic transaxle,
you should drive in D (Drive) when tow-
ing a trailer.
Operating your vehicle in D (Drive) when
towing a trailer will minimise heat build up
and extend the life of your transaxle.
WARNING
Failure to use an approved trailer
wiring harness could result in dam-
age to the vehicle electrical system
and/or personal injury.
Page 292 of 420
551
Driving your vehicle
Parking on hills
Generally, if you have a trailer attached to
your vehicle, you should not park your
vehicle on a hill. People can be seriously
or fatally injured, and both your vehicle
and the trailer can be damaged if unex-
pectedly roll down hill.
However, if you ever have to park your
trailer on a hill, here's how to do it:
1. Pull the vehicle into the parking space.
Turn the steering wheel in the direction
of the kerb (left if headed down hill,
right if headed up hill).
2. If the vehicle has a manual transaxle,
place the car in neutral. If the vehicle
has an automatic transaxle, place the
car in P (Park).
3. Set the parking brake and shut off the
vehicle.
4. Place chocks under the trailer wheels
on the down hill side of the wheels.5. Start the vehicle, hold the brakes, shift
to neutral, release the parking brake
and slowly release the brakes until the
trailer chocks absorb the load.
6. Reapply the brakes, reapply the park-
ing brake and shift the vehicle to R
(Reverse) for manual transaxle or P
(Park) for automatic transaxle.
7. Shut off the vehicle and release the
vehicle brakes but leave the parking
brake set.
WARNING- Parking brake
It can be dangerous to get out of
your vehicle if the parking brake is
not firmly set.
If you have left the engine running,
the vehicle can move suddenly. You
or others could be seriously or
fatally injured.
CAUTION
When towing a trailer on steep
grades (in excess of 6%) pay
close attention to the engine
coolant temperature gauge to
ensure the engine does not over-
heat. If the needle of the coolant
temperature gauge moves across
the dial towards “H (or 130°C /
260°F)” (HOT), pull over and stop
as soon as it is safe to do so, and
allow the engine to idle until it
cools down. You may proceed
once the engine has cooled suffi-
ciently.
You must decide the driving
speed depending on trailer
weight and uphill grade to reduce
the possibility of engine and
transaxle overheating.
WARNING- Parking on a
hill
Parking your vehicle on a hill with a
trailer attached could cause seri-
ous injury or death, should the trail-
er break loose.
Page 313 of 420
617
What to do in an emergency
IF YOU HAVE A FLAT TYRE (WITH TYREMOBILITYKIT, IF EQUIPPED)
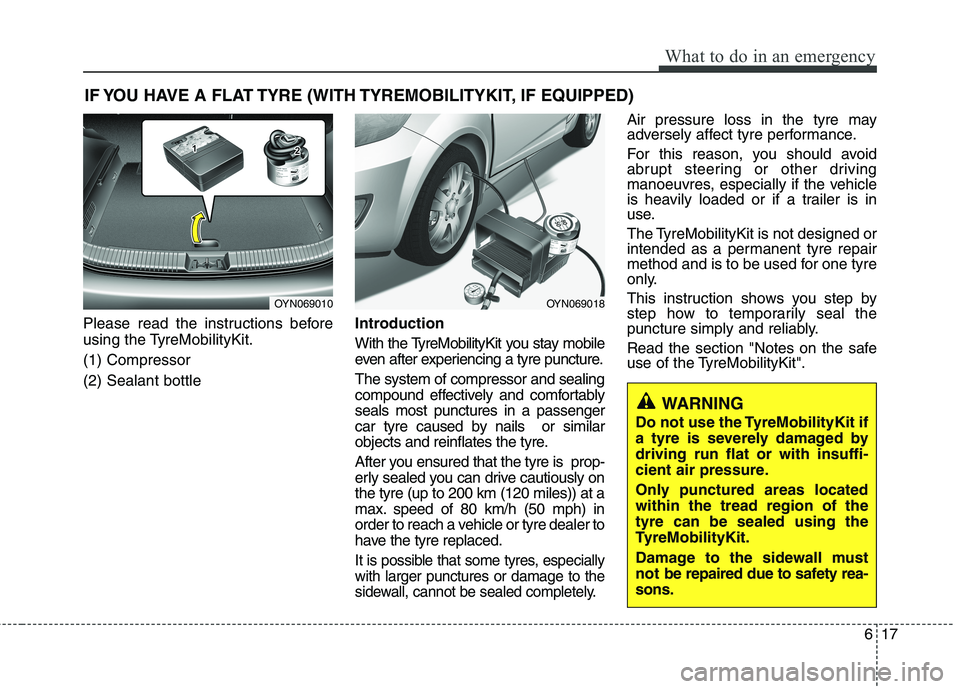
Please read the instructions before
using the TyreMobilityKit.
(1) Compressor
(2) Sealant bottleIntroduction
With the TyreMobilityKit you stay mobile
even after experiencing a tyre puncture.
The system of compressor and sealing
compound effectively and comfortably
seals most punctures in a passenger
car tyre caused by nails or similar
objects and reinflates the tyre.
After you ensured that the tyre is prop-
erly sealed you can drive cautiously on
the tyre (up to 200 km (120 miles)) at a
max. speed of 80 km/h (50 mph) in
order to reach a vehicle or tyre dealer to
have the tyre replaced.
It is possible that some tyres, especially
with larger punctures or damage to the
sidewall, cannot be sealed completely.
Air pressure loss in the tyre may
adversely affect tyre performance.
For this reason, you should avoid
abrupt steering or other driving
manoeuvres, especially if the vehicle
is heavily loaded or if a trailer is in
use.
The TyreMobilityKit is not designed or
intended as a permanent tyre repair
method and is to be used for one tyre
only.
This instruction shows you step by
step how to temporarily seal the
puncture simply and reliably.
Read the section "Notes on the safe
use of the TyreMobilityKit".
OYN069010OYN069018
WARNING
Do not use the TyreMobilityKit if
a tyre is severely damaged by
driving run flat or with insuffi-
cient air pressure.
Only punctured areas located
within the tread region of the
tyre can be sealed using the
TyreMobilityKit.
Damage to the sidewall must
not be repaired due to safety rea-
sons.
Page 314 of 420
What to do in an emergency
18 6
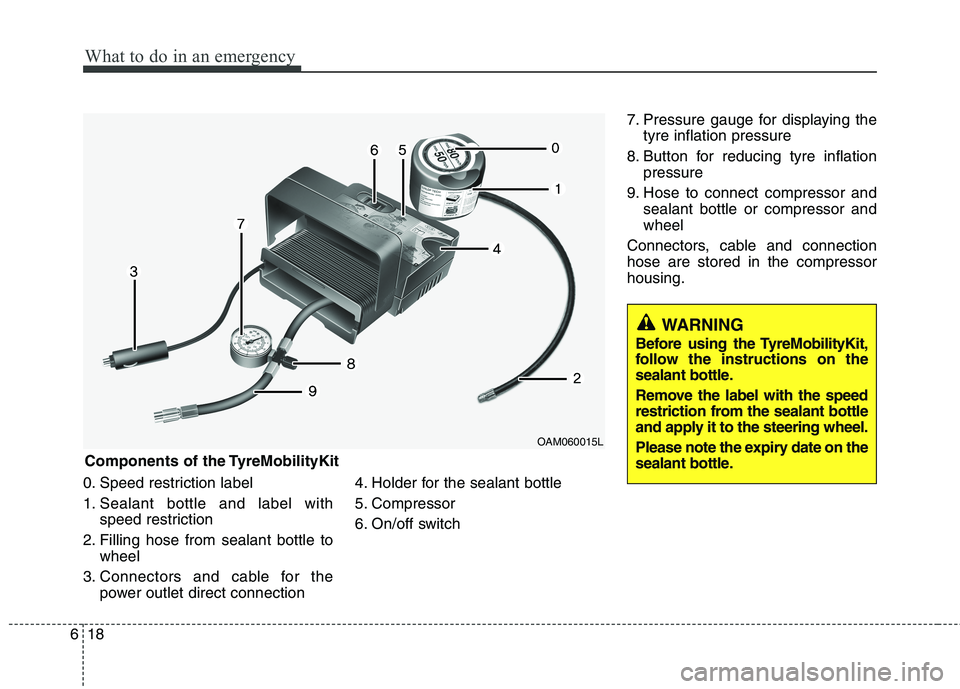
0. Speed restriction label
1. Sealant bottle and label with
speed restriction
2. Filling hose from sealant bottle to
wheel
3. Connectors and cable for the
power outlet direct connection4. Holder for the sealant bottle
5. Compressor
6. On/off switch7. Pressure gauge for displaying the
tyre inflation pressure
8. Button for reducing tyre inflation
pressure
9. Hose to connect compressor and
sealant bottle or compressor and
wheel
Connectors, cable and connection
hose are stored in the compressor
housing.
WARNING
Before using the TyreMobilityKit,
follow the instructions on the
sealant bottle.
Remove the label with the speed
restriction from the sealant bottle
and apply it to the steering wheel.
Please note the expiry date on the
sealant bottle.
Components of the TyreMobilityKit
OAM060015L
Page 325 of 420
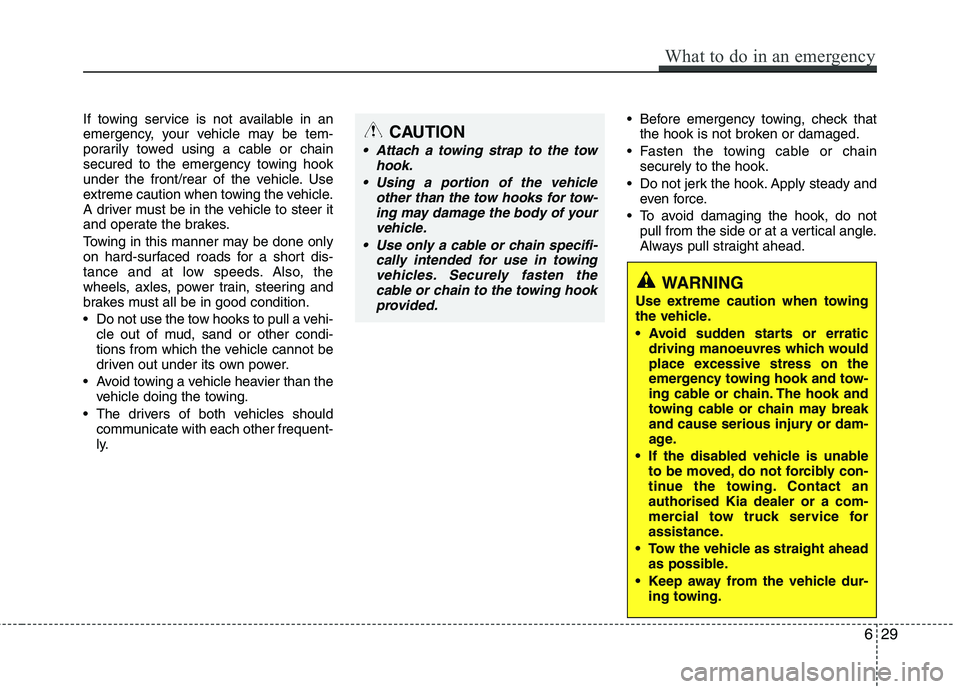
If towing service is not available in an
emergency, your vehicle may be tem-
porarily towed using a cable or chain
secured to the emergency towing hook
under the front/rear of the vehicle. Use
extreme caution when towing the vehicle.
A driver must be in the vehicle to steer it
and operate the brakes.
Towing in this manner may be done only
on hard-surfaced roads for a short dis-
tance and at low speeds. Also, the
wheels, axles, power train, steering and
brakes must all be in good condition.
Do not use the tow hooks to pull a vehi-
cle out of mud, sand or other condi-
tions from which the vehicle cannot be
driven out under its own power.
Avoid towing a vehicle heavier than the
vehicle doing the towing.
The drivers of both vehicles should
communicate with each other frequent-
ly. Before emergency towing, check that
the hook is not broken or damaged.
Fasten the towing cable or chain
securely to the hook.
Do not jerk the hook. Apply steady and
even force.
To avoid damaging the hook, do not
pull from the side or at a vertical angle.
Always pull straight ahead.CAUTION
Attach a towing strap to the tow
hook.
Using a portion of the vehicle
other than the tow hooks for tow-
ing may damage the body of your
vehicle.
Use only a cable or chain specifi-
cally intended for use in towing
vehicles. Securely fasten the
cable or chain to the towing hook
provided.
WARNING
Use extreme caution when towing
the vehicle.
driving manoeuvres which would
place excessive stress on the
emergency towing hook and tow-
ing cable or chain. The hook and
towing cable or chain may break
and cause serious injury or dam-
age.
If the disabled vehicle is unable
to be moved, do not forcibly con-
tinue the towing. Contact an
authorised Kia dealer or a com-
mercial tow truck service for
assistance.
Tow the vehicle as straight ahead
as possible.
Keep away from the vehicle dur-
ing towing.
What to do in an emergency
29 6
Page 326 of 420
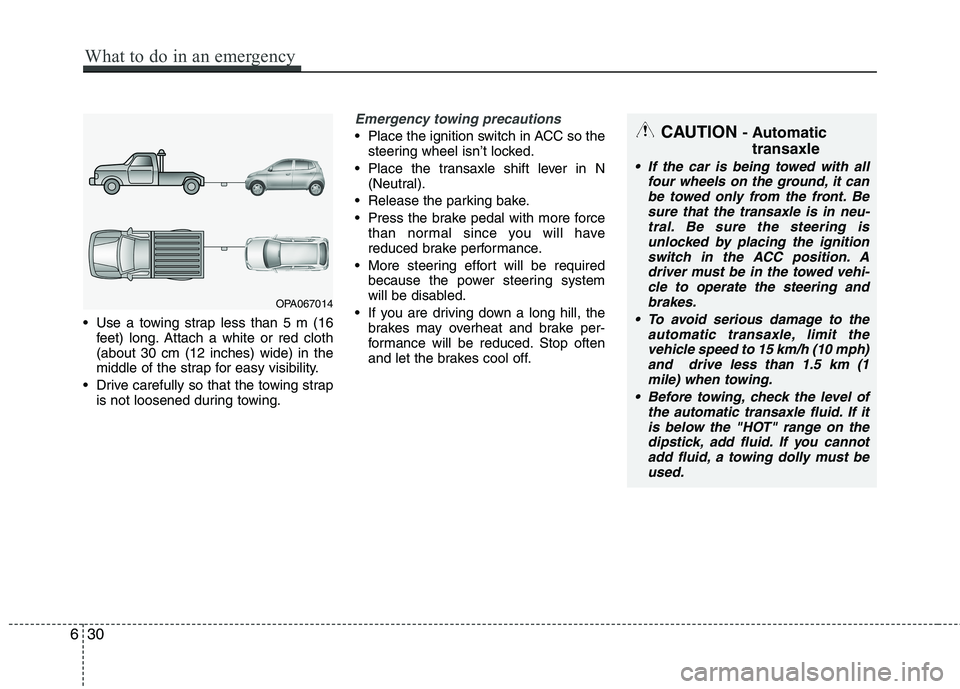
Use a towing strap less than 5 m (16
feet) long. Attach a white or red cloth
(about 30 cm (12 inches) wide) in the
middle of the strap for easy visibility.
Drive carefully so that the towing strap
is not loosened during towing.
Emergency towing precautions
Place the ignition switch in ACC so the
steering wheel isn’t locked.
Place the transaxle shift lever in N
(Neutral).
Release the parking bake.
Press the brake pedal with more force
than normal since you will have
reduced brake performance.
More steering effort will be required
because the power steering system
will be disabled.
If you are driving down a long hill, the
brakes may overheat and brake per-
formance will be reduced. Stop often
and let the brakes cool off.CAUTION - Automatic
transaxle
If the car is being towed with all
four wheels on the ground, it can
be towed only from the front. Be
sure that the transaxle is in neu-
tral. Be sure the steering is
unlocked by placing the ignition
switch in the ACC position. A
driver must be in the towed vehi-
cle to operate the steering and
brakes.
To avoid serious damage to the
automatic transaxle, limit the
vehicle speed to 15 km/h (10 mph)
and drive less than 1.5 km (1
mile) when towing.
Before towing, check the level of
the automatic transaxle fluid. If it
is below the "HOT" range on the
dipstick, add fluid. If you cannot
add fluid, a towing dolly must be
used.
OPA067014
630
What to do in an emergency