Page 141 of 420
Features of your vehicle
68 4
Lighting control
The light switch has a Headlight and a
Parking light position.
To operate the lights, turn the knob at the
end of the control lever to one of the fol-
lowing positions:
(1) OFF position
(2) Parking light position
(3) Headlight position
(4) Auto light position (if equipped)
Parking light position ( )
When the light switch is in the parking
light position, the tail, license and instru-
ment panel lights will turn ON.
✽ ✽
NOTICE
The ignition switch must be in the ON
position to turn on the instrument panel
lights.
Headlight position ( )
When the light switch is in the headlight
position, the head, tail, license and
instrument panel lights will turn ON.
✽ ✽
NOTICE
The ignition switch must be in the ON
position to turn on the headlights.
OTA040050E ■Type A
OTA040050L ■Type B
OTA040050R ■Type C
ORBC040047 ■Type A
ORB040047E ■Type B
OTA040211R ■Type C
ORBC040048 ■Type A
ORB040048E ■Type B
OTA040212R ■Type C
Page 142 of 420
469
Features of your vehicle
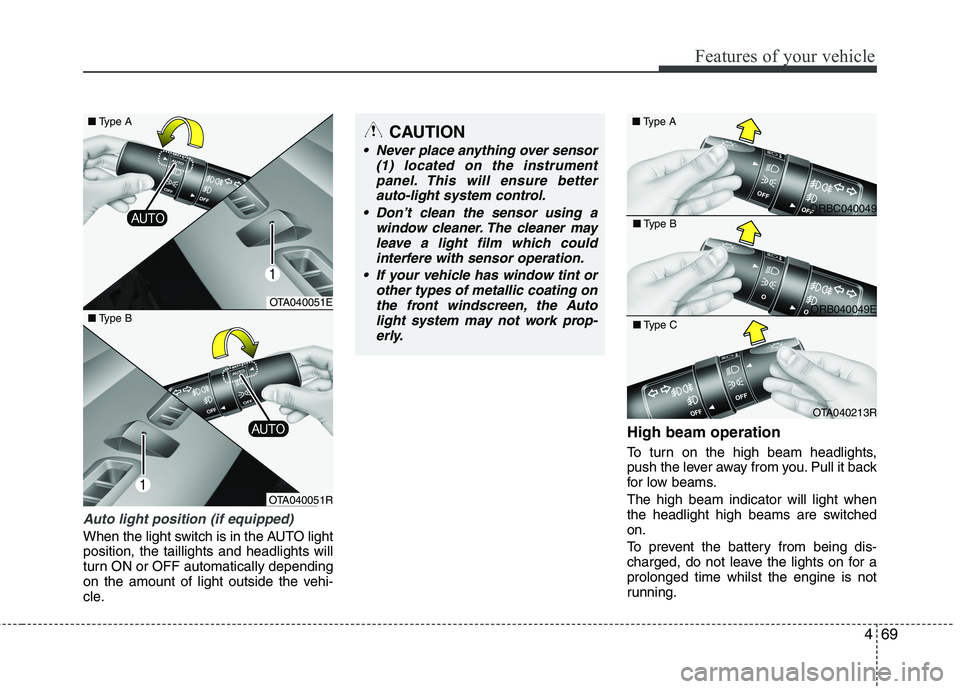
Auto light position (if equipped)
When the light switch is in the AUTO light
position, the taillights and headlights will
turn ON or OFF automatically depending
on the amount of light outside the vehi-
cle.
High beam operation
To turn on the high beam headlights,
push the lever away from you. Pull it back
for low beams.
The high beam indicator will light when
the headlight high beams are switched
on.
To prevent the battery from being dis-
charged, do not leave the lights on for a
prolonged time whilst the engine is not
running.
CAUTION
Never place anything over sensor
(1) located on the instrument
panel. This will ensure better
auto-light system control.
Don’t clean the sensor using a
window cleaner. The cleaner may
leave a light film which could
interfere with sensor operation.
If your vehicle has window tint or
other types of metallic coating on
the front windscreen, the Auto
light system may not work prop-
erly.
OTA040051E
OTA040051R ■Type B
ORBC040049 ■Type A
ORB040049E ■Type B
OTA040213R ■Type C
■Type A
Page 143 of 420
Features of your vehicle
70 4
Flashing headlights
To flash the headlights, pull the lever
towards you. It will return to the normal
(low beam) position when released. The
headlight switch does not need to be on
to use this flashing feature.
Turn signals and lane change
signals
■Type B
OTA040210R ORB040051E ORBC040051
■Type C
■Type A
ORBC040050 ■Type A
ORB040050E ■Type B
OTA040214R ■Type C
WARNING
Do not use high beam when there
are other vehicles. Using high beam
could obstruct the other driver's
vision.
Page 145 of 420
Features of your vehicle
72 4
Fog lights are used to provide improved
visibility and avoid accidents when visibil-
ity is poor due to fog, rain or snow etc.
The fog lights will turn on when fog light
switch (1) is turned to ON after the park-
ing light is turned on.
To turn off the fog lights, turn the switch
to OFF.
✽ ✽
NOTICE
The ignition switch must be in the ON
position to turn on the front fog light.
Rear fog light (if equipped)
■Type B
■Type A
■Type E
■Type C■Type F
■Type D
CAUTION
When in operation, the fog lights
consume large amounts of vehicle
electrical power. Only use the fog
lights when visibility is poor or
unnecessary battery and generator
drain could occur.
ORBC040053/ORBC040052E/ORB040053E/ORB040053L/OTA040217R/OTA040218R
Page 146 of 420
473
Features of your vehicle
To turn the rear fog lights on, turn the
headlight switch to the headlight on posi-
tion and turn the rear fog light switch (1)
to the on position.
The rear fog lights turn on when the rear
fog light switch is turned on after the
headlight switch is in the parklight posi-
tion or highlight position.
To turn the rear fog lights off, turn the rear
fog light switch to the on position again or
turn the headlight switch off. (with Auto
light)
To turn off the rear fog lights, turn the
switch to OFF (without Auto light)
✽ ✽
NOTICE
To turn on the rear fog light switch, the
ignition switch must be in the ON position.
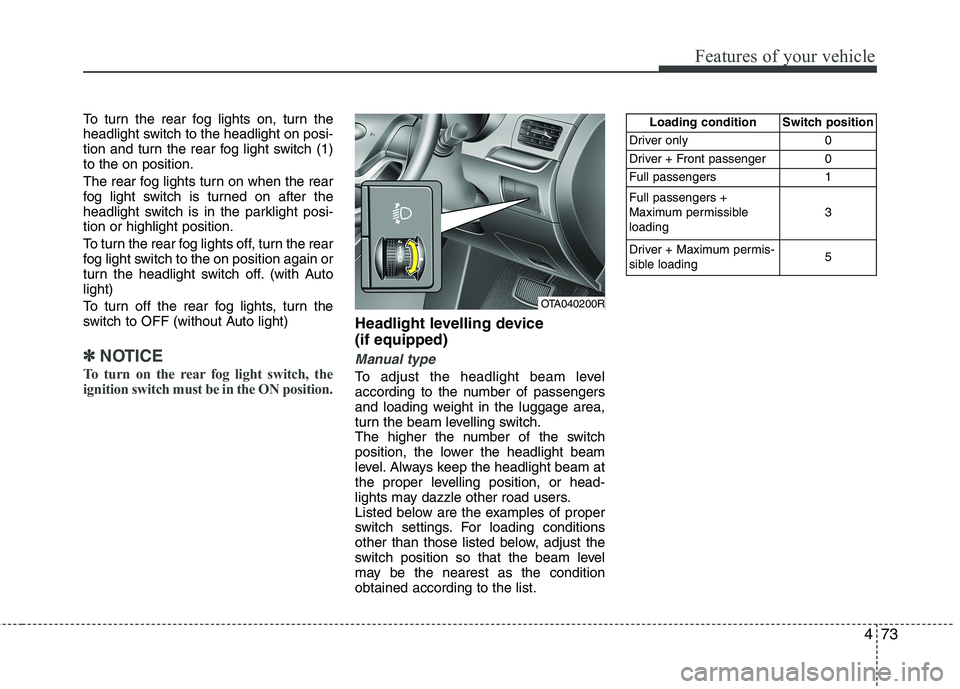
Headlight levelling device
(if equipped)
Manual type
To adjust the headlight beam level
according to the number of passengers
and loading weight in the luggage area,
turn the beam levelling switch.
The higher the number of the switch
position, the lower the headlight beam
level. Always keep the headlight beam at
the proper levelling position, or head-
lights may dazzle other road users.
Listed below are the examples of proper
switch settings. For loading conditions
other than those listed below, adjust the
switch position so that the beam level
may be the nearest as the condition
obtained according to the list.
OTA040200R
Loading condition Switch position
Driver only 0
Driver + Front passenger 0
Full passengers 1
Full passengers +
Maximum permissible
loading3
Driver + Maximum permis-
sible loading 5
Page 151 of 420
Features of your vehicle
78 4
INTERIOR LIGHT
Automatic turn off function
(if equipped)
The interior lights automatically turn off
approximately 20 minutes after the igni-
tion switch is turned off.
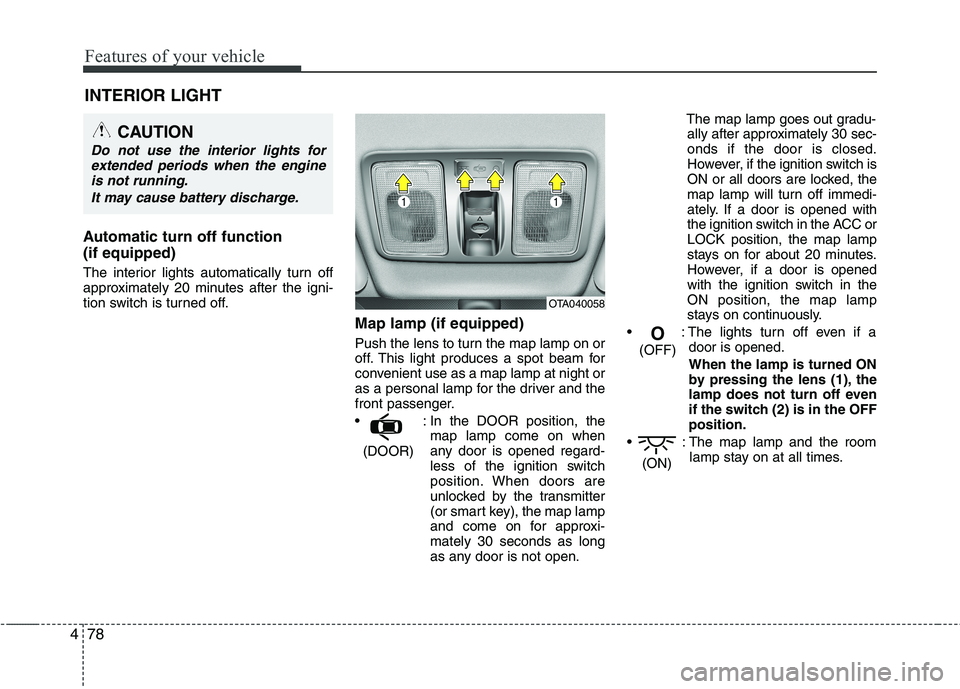
Map lamp (if equipped)
Push the lens to turn the map lamp on or
off. This light produces a spot beam for
convenient use as a map lamp at night or
as a personal lamp for the driver and the
front passenger.
: In the DOOR position, the
map lamp come on when
any door is opened regard-
less of the ignition switch
position. When doors are
unlocked by the transmitter
(or smart key), the map lamp
and come on for approxi-
mately 30 seconds as long
as any door is not open.The map lamp goes out gradu-
ally after approximately 30 sec-
onds if the door is closed.
However, if the ignition switch is
ON or all doors are locked, the
map lamp will turn off immedi-
ately. If a door is opened with
the ignition switch in the ACC or
LOCK position, the map lamp
stays on for about 20 minutes.
However, if a door is opened
with the ignition switch in the
ON position, the map lamp
stays on continuously.
: The lights turn off even if a
door is opened.
When the lamp is turned ON
by pressing the lens (1), the
lamp does not turn off even
if the switch (2) is in the OFF
position.
: The map lamp and the room
lamp stay on at all times.
(ON) O(OFF)
(DOOR)
CAUTION
Do not use the interior lights for
extended periods when the engine
is not running.
It may cause battery discharge.
OTA040058
Page 152 of 420
479
Features of your vehicle
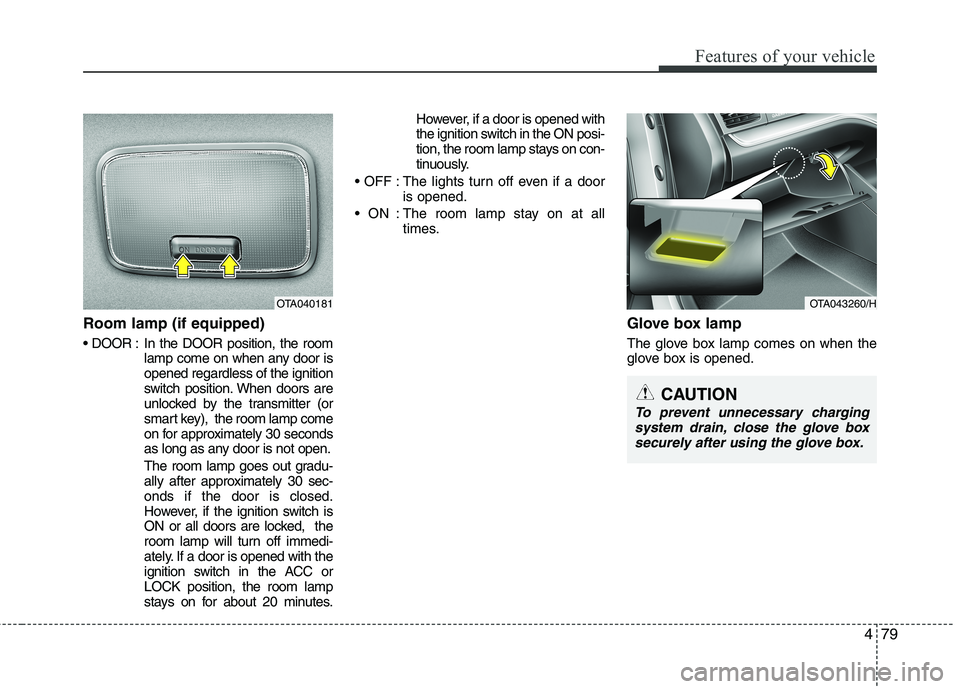
Room lamp (if equipped)
In the DOOR position, the room
lamp come on when any door is
opened regardless of the ignition
switch position. When doors are
unlocked by the transmitter (or
smart key), the room lamp come
on for approximately 30 seconds
as long as any door is not open.
The room lamp goes out gradu-
ally after approximately 30 sec-
onds if the door is closed.
However, if the ignition switch is
ON or all doors are locked, the
room lamp will turn off immedi-
ately. If a door is opened with the
ignition switch in the ACC or
LOCK position, the room lamp
stays on for about 20 minutes.However, if a door is opened with
the ignition switch in the ON posi-
tion, the room lamp stays on con-
tinuously.
: The lights turn off even if a door
is opened.
: The room lamp stay on at all
times.
Glove box lamp
The glove box lamp comes on when the
glove box is opened.
OTA040181OTA043260/H
CAUTION
To prevent unnecessary charging
system drain, close the glove box
securely after using the glove box.
Page 244 of 420
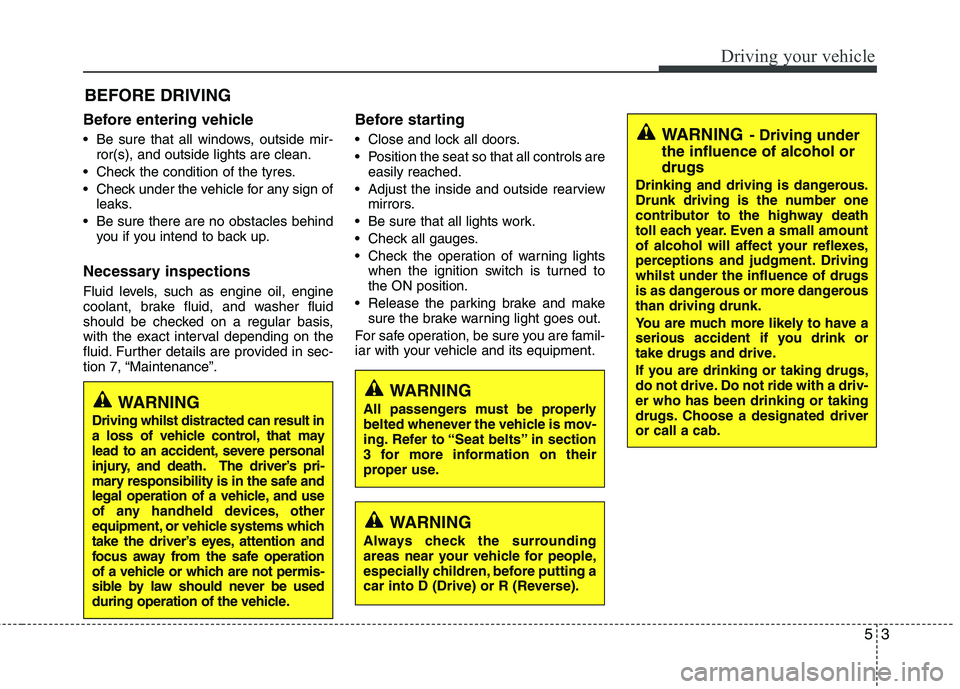
53
Driving your vehicle
Before entering vehicle
• Be sure that all windows, outside mir-
ror(s), and outside lights are clean.
Check the condition of the tyres.
Check under the vehicle for any sign of
leaks.
Be sure there are no obstacles behind
you if you intend to back up.
Necessary inspections
Fluid levels, such as engine oil, engine
coolant, brake fluid, and washer fluid
should be checked on a regular basis,
with the exact interval depending on the
fluid. Further details are provided in sec-
tion 7, “Maintenance”.
Before starting
Close and lock all doors.
Position the seat so that all controls are
easily reached.
Adjust the inside and outside rearview
mirrors.
Be sure that all lights work.
Check all gauges.
Check the operation of warning lights
when the ignition switch is turned to
the ON position.
Release the parking brake and make
sure the brake warning light goes out.
For safe operation, be sure you are famil-
iar with your vehicle and its equipment.
BEFORE DRIVING
WARNING
All passengers must be properly
belted whenever the vehicle is mov-
ing. Refer to “Seat belts” in section
3 for more information on their
proper use.
WARNING
Always check the surrounding
areas near your vehicle for people,
especially children, before putting a
car into D (Drive) or R (Reverse).
WARNING- Driving under
the influence of alcohol or
drugs
Drinking and driving is dangerous.
Drunk driving is the number one
contributor to the highway death
toll each year. Even a small amount
of alcohol will affect your reflexes,
perceptions and judgment. Driving
whilst under the influence of drugs
is as dangerous or more dangerous
than driving drunk.
You are much more likely to have a
serious accident if you drink or
take drugs and drive.
If you are drinking or taking drugs,
do not drive. Do not ride with a driv-
er who has been drinking or taking
drugs. Choose a designated driver
or call a cab.
WARNING
Driving whilst distracted can result in
a loss of vehicle control, that may
lead to an accident, severe personal
injury, and death. The driver’s pri-
mary responsibility is in the safe and
legal operation of a vehicle, and use
of any handheld devices, other
equipment, or vehicle systems which
take the driver’s eyes, attention and
focus away from the safe operation
of a vehicle or which are not permis-
sible by law should never be used
during operation of the vehicle.