Page 324 of 420
When towing your vehicle in an emer-
gency without wheel dollies :
1. Set the ignition switch in the ACC posi-
tion.
2. Place the shift lever in N (Neutral).
3. Release the parking brake.
Removable towing hook
(front, if equipped)
1. Open the trunk, and remove the tow-
ing hook from the tool case.
2. Remove the hole cover pressing the
lower part of the cover on the front
bumper.
3. Install the towing hook by turning it
clockwise into the hole until it is fully
secured.
4. Remove the towing hook and install
the cover after use.
Emergency towing
If towing is necessary, we recommend
you to have it done by an authorised
Kia dealer or a commercial tow truck
service.
628
What to do in an emergency
CAUTION
Failure to place the shift lever in N
(Neutral) may cause internal dam-
age to the transaxle.
OTA060010
OTA060012
Front
RearOTA060011
Page 326 of 420

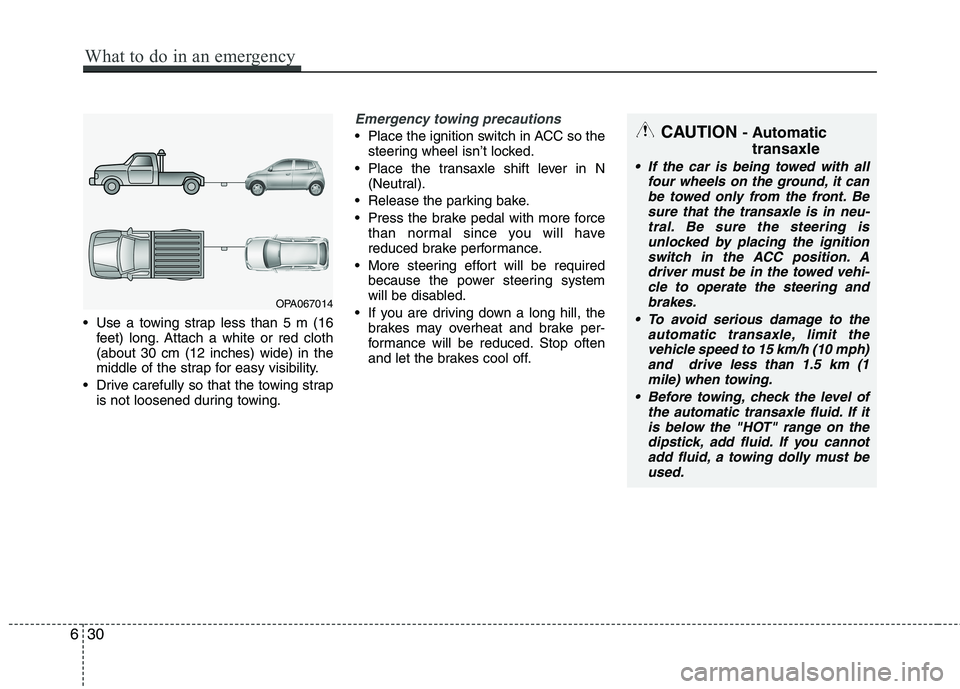
Use a towing strap less than 5 m (16
feet) long. Attach a white or red cloth
(about 30 cm (12 inches) wide) in the
middle of the strap for easy visibility.
Drive carefully so that the towing strap
is not loosened during towing.
Emergency towing precautions
Place the ignition switch in ACC so the
steering wheel isn’t locked.
Place the transaxle shift lever in N
(Neutral).
Release the parking bake.
Press the brake pedal with more force
than normal since you will have
reduced brake performance.
More steering effort will be required
because the power steering system
will be disabled.
If you are driving down a long hill, the
brakes may overheat and brake per-
formance will be reduced. Stop often
and let the brakes cool off.CAUTION - Automatic
transaxle
If the car is being towed with all
four wheels on the ground, it can
be towed only from the front. Be
sure that the transaxle is in neu-
tral. Be sure the steering is
unlocked by placing the ignition
switch in the ACC position. A
driver must be in the towed vehi-
cle to operate the steering and
brakes.
To avoid serious damage to the
automatic transaxle, limit the
vehicle speed to 15 km/h (10 mph)
and drive less than 1.5 km (1
mile) when towing.
Before towing, check the level of
the automatic transaxle fluid. If it
is below the "HOT" range on the
dipstick, add fluid. If you cannot
add fluid, a towing dolly must be
used.
OPA067014
630
What to do in an emergency
Page 364 of 420

737
Maintenance
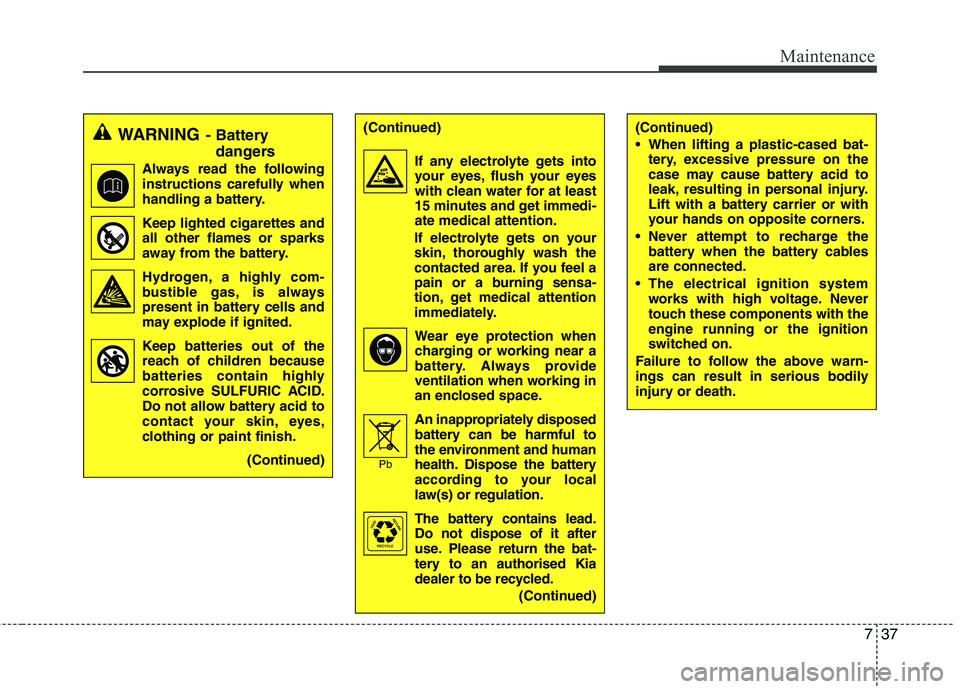
WARNING- Battery
dangers
Always read the following
instructions carefully when
handling a battery.
Keep lighted cigarettes and
all other flames or sparks
away from the battery.
Hydrogen, a highly com-
bustible gas, is always
present in battery cells and
may explode if ignited.
Keep batteries out of the
reach of children because
batteries contain highly
corrosive SULFURIC ACID.
Do not allow battery acid to
contact your skin, eyes,
clothing or paint finish.
(Continued)
(Continued)
If any electrolyte gets into
your eyes, flush your eyes
with clean water for at least
15 minutes and get immedi-
ate medical attention.
If electrolyte gets on your
skin, thoroughly wash the
contacted area. If you feel a
pain or a burning sensa-
tion, get medical attention
immediately.
Wear eye protection when
charging or working near a
battery. Always provide
ventilation when working in
an enclosed space.
An inappropriately disposed
battery can be harmful to
the environment and human
health. Dispose the battery
according to your local
law(s) or regulation.
The battery contains lead.
Do not dispose of it after
use. Please return the bat-
tery to an authorised Kia
dealer to be recycled.
(Continued)
Pb
(Continued)
When lifting a plastic-cased bat-
tery, excessive pressure on the
case may cause battery acid to
leak, resulting in personal injury.
Lift with a battery carrier or with
your hands on opposite corners.
Never attempt to recharge the
battery when the battery cables
are connected.
The electrical ignition system
works with high voltage. Never
touch these components with the
engine running or the ignition
switched on.
Failure to follow the above warn-
ings can result in serious bodily
injury or death.
Page 378 of 420

751
Maintenance
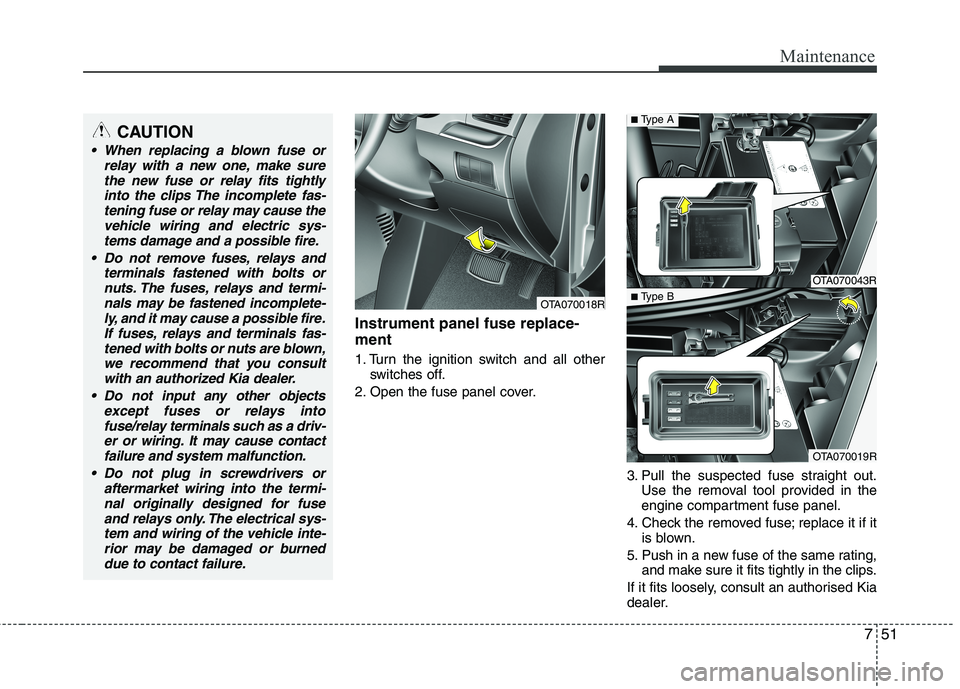
Instrument panel fuse replace-
ment
1. Turn the ignition switch and all other
switches off.
2. Open the fuse panel cover.
3. Pull the suspected fuse straight out.
Use the removal tool provided in the
engine compartment fuse panel.
4. Check the removed fuse; replace it if it
is blown.
5. Push in a new fuse of the same rating,
and make sure it fits tightly in the clips.
If it fits loosely, consult an authorised Kia
dealer.
OTA070018R
OTA070043R
OTA070019R
■Type A
■Type B
CAUTION
When replacing a blown fuse or
relay with a new one, make sure
the new fuse or relay fits tightly
into the clips The incomplete fas-
tening fuse or relay may cause the
vehicle wiring and electric sys-
tems damage and a possible fire.
Do not remove fuses, relays and
terminals fastened with bolts or
nuts. The fuses, relays and termi-
nals may be fastened incomplete-
ly, and it may cause a possible fire.
If fuses, relays and terminals fas-
tened with bolts or nuts are blown,
we recommend that you consult
with an authorized Kia dealer.
Do not input any other objects
except fuses or relays into
fuse/relay terminals such as a driv-
er or wiring. It may cause contact
failure and system malfunction.
Do not plug in screwdrivers or
aftermarket wiring into the termi-
nal originally designed for fuse
and relays only. The electrical sys-
tem and wiring of the vehicle inte-
rior may be damaged or burned
due to contact failure.
Page 380 of 420
753
Maintenance
Engine compartment fuse
replacement
1. Turn the ignition switch and all other
switches off.2. Remove the fuse panel cover by
pressing the tab and pulling the cover
up. When the blade type fuse is dis-
connected, remove it by using the clip
designed for changing fuses located in
the engine room fuse box. Upon
removal, securely insert reserve fuse
of equal quantity.
3. Check the removed fuse; replace it if it
is blown. To remove or insert the fuse,
use the fuse puller in the engine com-
partment fuse panel.
4. Push in a new fuse of the same rating,
and make sure it fits tightly in the clips.
If it fits loosely, consult an authorised
Kia dealer.
Multi fuse
If the multi fuse is blown, consult an
authorised Kia dealer.
OTA070022R
CAUTION
After checking the fuse panel in the
engine compartment, securely
install the fuse panel cover. If not,
electrical failures may occur from
water contact.
OTA070021R
OTA070040R
■Type A
■Type B
Page 382 of 420

755
Maintenance
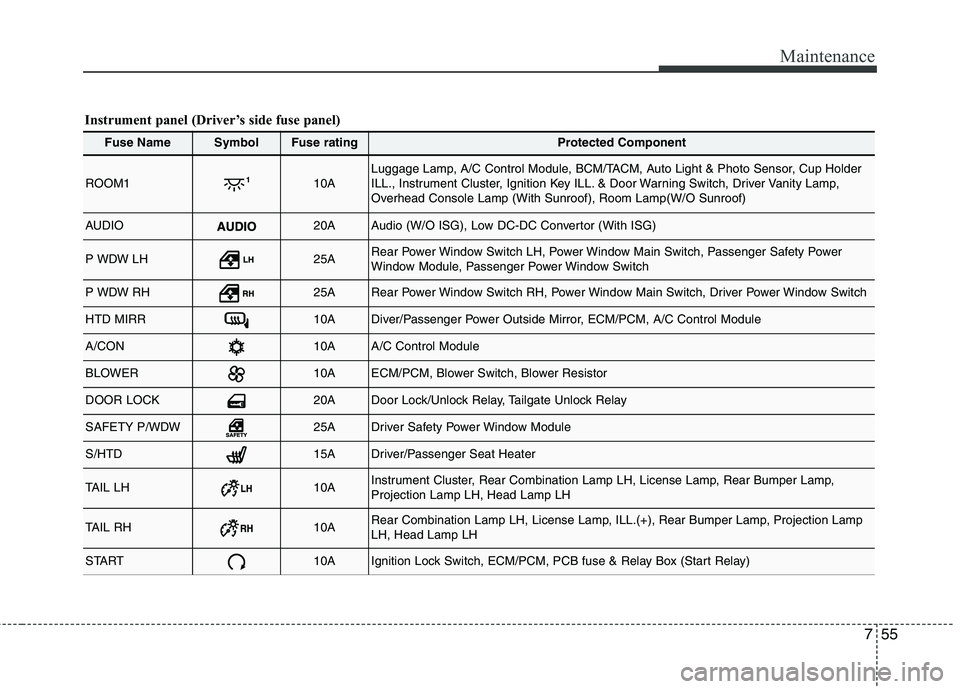
Fuse NameSymbolFuse ratingProtected Component
ROOM110ALuggage Lamp, A/C Control Module, BCM/TACM, Auto Light & Photo Sensor, Cup Holder
ILL., Instrument Cluster, Ignition Key ILL. & Door Warning Switch, Driver Vanity Lamp,
Overhead Console Lamp (With Sunroof), Room Lamp(W/O Sunroof)
AUDIO20AAudio (W/O ISG), Low DC-DC Convertor (With ISG)
P WDW LH25ARear Power Window Switch LH, Power Window Main Switch, Passenger Safety Power
Window Module, Passenger Power Window Switch
P WDW RH25ARear Power Window Switch RH, Power Window Main Switch, Driver Power Window Switch
HTD MIRR10ADiver/Passenger Power Outside Mirror, ECM/PCM, A/C Control Module
A/CON10AA/C Control Module
BLOWER10AECM/PCM, Blower Switch, Blower Resistor
DOOR LOCK20ADoor Lock/Unlock Relay, Tailgate Unlock Relay
SAFETY P/WDW25ADriver Safety Power Window Module
S/HTD15ADriver/Passenger Seat Heater
TAIL LH10AInstrument Cluster, Rear Combination Lamp LH, License Lamp, Rear Bumper Lamp,
Projection Lamp LH, Head Lamp LH
TAIL RH10ARear Combination Lamp LH, License Lamp, ILL.(+), Rear Bumper Lamp, Projection Lamp
LH, Head Lamp LH
START10AIgnition Lock Switch, ECM/PCM, PCB fuse & Relay Box (Start Relay)
Instrument panel (Driver’s side fuse panel)
Page 383 of 420
Maintenance
56 7
Fuse NameSymbolFuse ratingProtected Component
H/LP RH10AInstrument Cluster, Head Lamp RH
HAZARD15AHazard Relay, Flasher Unit, Hazard Switch
PDM125ASmart Key Control Module
S/ROOF15ASunroof Motor
PDM310ASmart Key Control Module, Immobiliser Module, Start/Stop Button Switch
TCU15APulse Generator 'A'/'B', Vehicle Speed Sensor, Transaxle Range Switch
IGN COIL15AIgnition Coil, Condenser
IGN210ABCM/TACM, A/C Control Module, Sunroof Motor, Rear Defogger Timer, Dual Pressure Switch,
Head Lamp Levelling Device Actuator LH/RH, I/P Junction Box (Power Window Relay)
F/WPR25AFront Wiper Motor, Multifunction Switch
R/FOG10ARear Fog Lamp Relay
F/FOG10AFront Fog Lamp Relay
DRL10ABCM/TACM
STOP LAMP15AStop Lamp Relay, PCB Fuse & Relay Box (HAC Relay), Stop Lamp Switch, Data Link
Connector, Smart Key Control Module, Power Window Relay
CLUSTER10ABCM, TACM, Seat Belt Timer, A/C Control Module, Instrument Cluster
Page 385 of 420

Maintenance
58 7
SymbolFuse ratingProtected Component
MULTI FUSE80AEPS Control Module
125AAlternator, PCB Fuse & Relay Box
FUSE
50AI/P Junction Box (Power Connector Fuse : F1 10A / F2 20A, Fuse : F24 10A / F25 10A / F26
10A / F27 15A, Tail Lamp Relay)
40AProjection Type : E/R Sub Fuse Box (Fuse : F1 10A / F2 20A / F4 15A / F5 10A / F7 10A )
50AI/P Junction Box (Fuse : F8 20A / F9 25A / F10 15A / F16 15A / F17 25A / F18 15A / F19 10A
/ F35 10A, Power Window Relay)
40AE/R Junction Box (Fuse : F11 15A), Ignition Switch, PDM Relay Box (ESCL Relay)
40AABS Control Relay, ESC Control Relay
30AABS Control Relay, ESC Control Relay
40ARear Defogger Relay
10AInstrument Cluster, Head Lamp RH, PCB Fuse & Relay Box (Head Lamp (HI) Relay)
15APCB Fuse & Relay Box (Fuel Pump #2 Relay)
40APCB Fuse & Relay Box (Start Relay), Ignition Switch, PDM Relay Box (ESCL Relay)
30APCB Fuse & Relay Box (Engine Control Relay, Fuse : F23 10A)
40APCB Fuse & Relay Box (Blower Relay)
40APCB Fuse & Relay Box (Cooling Fan Relay)
Engine compartment main fuse panel