2015 JEEP RENEGADE clock
[x] Cancel search: clockPage 148 of 220

PROGRAMMABLE FEATURES
Uconnect® Customer Programmable Features
The Uconnect®system allows you to access Customer Programmable feature
settings such as Display, Units, Voice, Clock, Safety & Driving Assistance, Lights,
Doors & Locks, Engine Off Options, Audio, Phone/Bluetooth®, SiriusXM Setup,
System Information, Restore Default Settings, Clear Personal Data, and Compass
(Uconnect®5.0) through buttons on the touchscreen.
• For the Uconnect 5.0 system, push the Morebutton on the faceplate, then
press the “Settings”button on the touchscreen. For the Uconnect 6.5 system,
push the Settingsbutton located on the right side of the display. When making
a selection, scroll up or down until the preferred setting is highlighted, then press
and release the preferred setting until the selection is highlighted showing that
setting has been selected. Depending on the vehicles options, the following
feature settings are available:
• Display• Audio
• Units• Phone/Bluetooth®
• Voice• SiriusXM Setup
• Clock• System Information
• Safety & Driving Assistance• Restore Default Settings
• Lights• Clear Personal Data
• Doors & Locks• Compass (Uconnect®5.0)
• Engine Off Options
POWER INVERTER — IF EQUIPPED
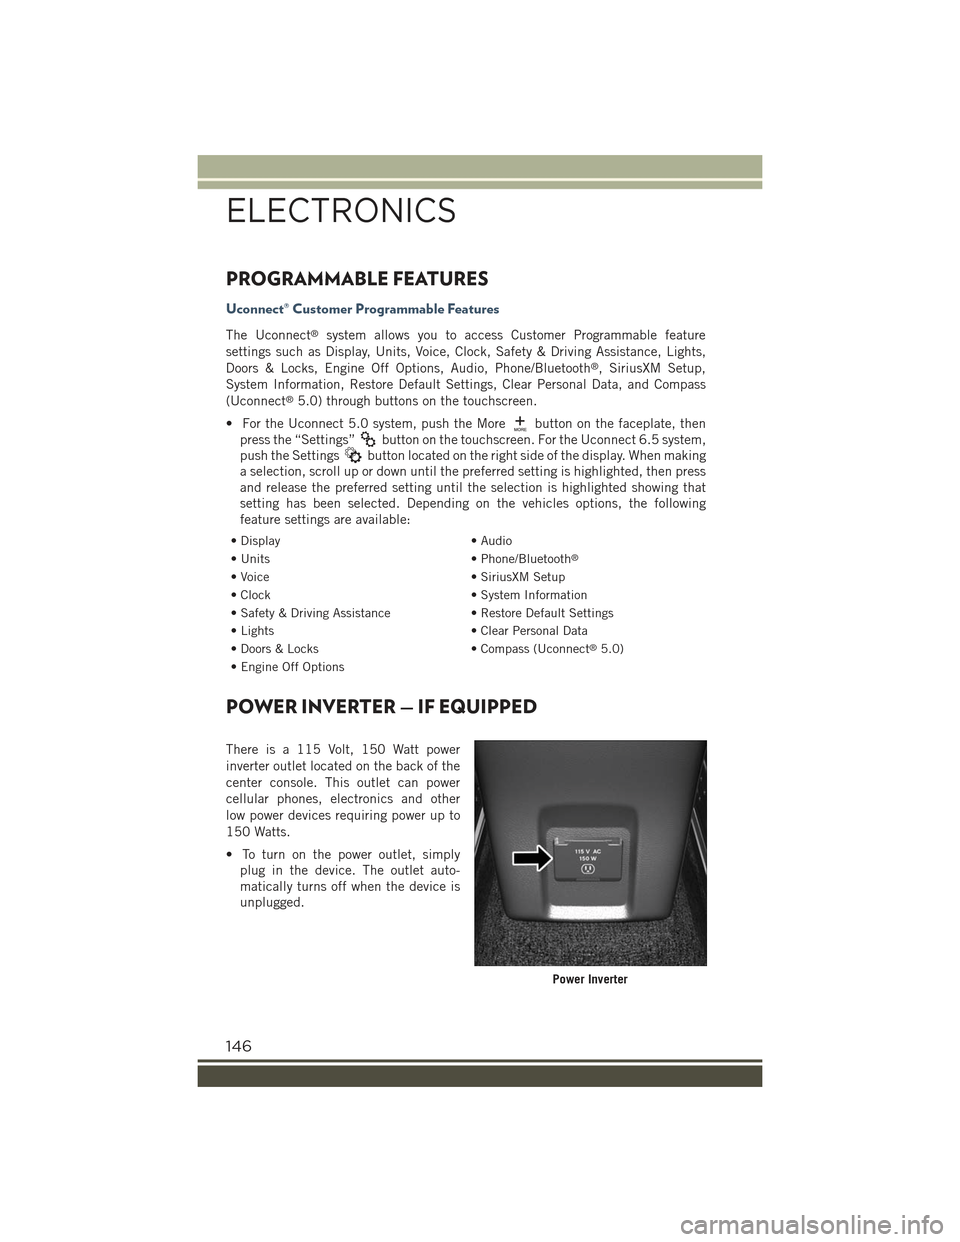
There is a 115 Volt, 150 Watt power
inverter outlet located on the back of the
center console. This outlet can power
cellular phones, electronics and other
low power devices requiring power up to
150 Watts.
• To turn on the power outlet, simply
plug in the device. The outlet auto-
matically turns off when the device is
unplugged.
Power Inverter
ELECTRONICS
146
Page 172 of 220

Jacking Instructions
WARNING!
Carefully follow these tire changing warnings to help prevent personal injury or
damage to your vehicle:
• Always park on a firm, level surface as far from the edge of the roadway as
possible before raising the vehicle.
• Turn on the Hazard Warning flasher.
• Chock the wheel diagonally opposite the wheel to be raised.
• Apply the parking brake and place an automatic transmission in PARK.
• Never start or run the engine with the vehicle on a jack.
• Do not let anyone sit in the vehicle when it is on a jack.
• Do not get under the vehicle when it is on a jack. If you need to get under a
raised vehicle, take it to a service center where it can be raised on a lift.
• Only use the jack in the positions indicated and for lifting this vehicle during
a tire change.
• If working on or near a roadway, be extremely careful of motor traffic.
• To assure that spare tires, flat or inflated, are securely stowed, spares must be
stowed with the valve stem facing the ground.
CAUTION!
Do not attempt to raise the vehicle by jacking on locations other than those
indicated in the Jacking Instructions for this vehicle.
1. Remove the spare tire, jack, and wheel bolt wrench.
2. If equipped with wheels where the center cap covers the wheel bolts, use the
wheel bolt wrench to pry the center cap off carefully before raising the vehicle.
3. Before raising the vehicle, use the wheel bolt wrench to loosen, but not remove,
the wheel bolts on the wheel with the flat tire. Turn the wheel bolts counterclock-
wise one turn while the wheel is still on the ground.
4. Place the jack underneath the lift area that is closest to the flat tire. Turn the jack
screw clockwise to firmly engage the jack saddle with the lift area of the sill
flange, centering the jack saddle inside the cutout in the sill cladding.
Jack Warning Label
WHAT TO DO IN EMERGENCIES
170
Page 175 of 220

9. Lower the vehicle to the ground by turning the jack handle counterclockwise.
10. Finish tightening the wheel bolts. Push down on the wrench while at the end of
the handle for increased leverage. Tighten the wheel bolts in a star pattern until
each wheel bolt has been tightened twice. The correct torque specification for
the wheel bolts is 63 Ft-Lbs (86 Nm) for steel wheels and 89 Ft-Lbs (120 Nm)
for aluminum wheels. If in doubt about the correct tightness, have them
checked with a torque wrench by your authorized dealer or at a service station.
11. Securely stow the jack, tools, chocks and flat tire.
WARNING!
A loose tire or jack thrown forward in a collision or hard stop could endanger the
occupants of the vehicle. Always stow the jack parts and the spare tire in the
places provided. Have the deflated (flat) tire repaired or replaced immediately.
Road Tire Installation
1. Mount the road tire on the axle.
2. Install the remaining wheel bolts with the threaded end of the wheel bolt toward
the wheel. Lightly tighten the wheel bolts.
WARNING!
To avoid the risk of forcing the vehicle off the jack, do not tighten the lug nuts fully
until the vehicle has been lowered. Failure to follow this warning may result in
serious injury.
3. Lower the vehicle to the ground by turning the jack handle counterclockwise.
4. Finish tightening the wheel bolts. Push down on the wrench while at the end ofthe handle for increased leverage. Tighten the wheel bolts in a star pattern untileach wheel bolt has been tightened twice. The correct torque specification for thewheel bolts is 63 Ft-Lbs (86 Nm) for steel wheels and 89 Ft-Lbs (120 Nm) foraluminum wheels. If in doubt about the correct tightness, have them checkedwith a torque wrench by your authorized dealer or at a service station.
5. Lower the jack until it is free. Remove the wheel chocks. Stow the jack and tools
back in the proper storage location. Release the Electric Park Brake before driving
the vehicle.
6. After 25 miles (40 km) check the wheel bolt torque with a torque wrench to
ensure that all wheel bolts are properly seated against the wheel.
WHAT TO DO IN EMERGENCIES
173
Page 209 of 220

FREQUENTLY ASKED QUESTIONS
GETTING STARTED
How do I install my LATCH Equipped Child Seat? pg. 23
ELECTRONICS
Which radio is in my vehicle?
• Uconnect®3.0 pg. 91
• Uconnect®5.0 pg. 94
• Uconnect®6.5AN pg. 106
How do I activate the Audio Jack?
• Uconnect®3.0 pg. 93
• Uconnect®5.0 pg. 97
• Uconnect®6.5AN pg. 111
How do I set the clock on my radio?
• Uconnect®3.0 pg. 92
• Uconnect®5.0 pg. 94
• Uconnect®6.5AN pg. 106
How do I use the Navigation feature?
• Uconnect®6.5AN pg. 114
How do I pair my cell phone via Bluetooth®with the Uconnect®Hands-Free Voice
Activation System? pg. 130
How do I improve the Bluetooth®performance of my Uconnect®System? pg. 137
OFF-ROAD CAPABILITIES
How do I shift into different four-wheel drive selections? pg. 150
UTILITY
How do I know how much I can tow with my Jeep Renegade? pg. 153
WHAT TO DO IN EMERGENCIES
What do I do if my TPMS warning light is blinking? pg. 157
How do I change a flat tire? pg. 168
How do I Jump-Start my vehicle? pg. 174
MAINTAINING YOUR VEHICLE
Where is my Fuse Block located? pg. 194
What type of oil do I use? pg. 186
How often should I change my engine’s oil? pg. 187
What should my tire pressure be set at? pg. 200
FAQ’s
207
Page 210 of 220

Access
Uconnect®.............75
Access, Uconnect®...........75
Adding Engine Coolant (Antifreeze)..187
Adding Fuel..............199
Adding Washer Fluid.........187
Air Bag
Advanced Front Air Bag . . . . . .19
Advance Front Air Bag . . . . . .18
Air Bags . . . . . . . . . . . . . . .18Air Bag Warning Light . . . .18, 157Driver Knee Air Bag........20Front Air Bag . . . . . . . . . . . .18Passenger Knee Air Bag......20Rollover...............18Side Air Bags . . . . . . . . . . . .20Side Impact Curtains.......20Side Impacts . . . . . . . . . . . .18Air Cleaner, Engine (Engine Air CleanerFilter)................187Air Conditioner Maintenance....187Air Conditioning Refrigerant.....187Air Conditioning System.......187AlarmArm The System..........13Disarm The System........13Vehicle Security Alarm......13Alarm, Panic..............11Alarm (Security Alarm).....13,162Antifreeze (Engine Coolant) . .186, 187Disposal . . . . . . . . . . . . . .187Anti-Lock Brake System (ABS) . . .156APPUconnect®Access . . . . . . . . .77Appearance Care...........187Assistance Towing..........156Audio Systems (Radio)......72,96Automatic Headlights.........35Automatic TransmissionAdding Fluid...........187Fluid Type . . . . . . . . . . . .187Axle Fluid . . . . . . . . . . . . . . .187Axle Lubrication............187
Battery.................187Charging System Light.....156Blind Spot Monitoring.........47Body Mechanism Lubrication....187
Brake Fluid . . . . . . . . . . . . . .187
Brakes . . . . . . . . . . . . . . . . .187
Brake System.............187
Fluid Check . . . . . . . . . . . .187
Master Cylinder.........187
Warning Light..........160
Break-In Recommendations, New
Vehicle................34
Camera, Rear..............62Capacities, Fluid...........186Caps, FillerOil (Engine)............187Car Washes . . . . . . . . . . . . . .187Change Oil Indicator.........163Changing A Flat Tire . . . . . . . . .168Charging System Light........156Check Engine Light (Malfunction Indi-cator Light).............161Child Restraint...........21,22Child RestraintsCenter Seat LATCH . . . . . . . . .23Lower Anchors And Tethers For Chil-dren . . . . . . . . . . . . . .22, 23
Using The Top Tether Anchorage..23CleaningWheels..............187Windshield Wiper Blades....187Climate ControlAutomatic..............44Manual . . . . . . . . . . . . . . .43Clock...................94Clock Setting..............94Cluster Warning/Indicator LightsAir Bag Warning Light . . . . . .157Brake Warning Light.......160Electronic Speed Control ONIndicator..............162Electronic Speed Control SET Indi-cator................162Front Fog Light Indicator....162High Beam Indicator......162Park/Headlight ON Indicator . .162Seat Belt Reminder Light . . . .159Turn Signal Indicator......161Vehicle Security Light......162Clutch . . . . . . . . . . . . . . . . .187Clutch Fluid . . . . . . . . . . . . . .187
INDEX
208