2015 JEEP PATRIOT ECO mode
[x] Cancel search: ECO modePage 53 of 132
Push the MEDIA button on the faceplate to display the media source tabs at the top
of the screen. Select the source by pressing the “HDD,” “DISC,” or “AUX” media
source button on the touchscreen tab.
NOTE:
Your Touchscreen Radio will automatically switch to the appropriate mode when
something is first connected or inserted into the system.
Insert a CD/DVD Disc
• To insert a disc, push the LOAD button on the faceplate.
• With the printed side upwards, insert the disc into the disc slot of the radio. The
radio pulls the disc in automatically and closes the flip screen. The radio selects
the appropriate mode after the disc is recognized, and starts playing the first track.
The display shows “Reading...” during this process.
Seek Up/Seek Down
• Push the “Seek Up” or “Seek Down” buttons on the touchscreen to seek through
tracks in Disc Mode. Hold either Seek button to bypass tracks without stopping.
Audio Jack Operation
The AUX/Audio Jack provides a means to connect a portable audio device, such as an
MP3 player or an iPod®, to the vehicle’s sound system. This requires the use of a
3.5 mm stereo audio patch cable.
•Push the MEDIA button on the faceplate then the “AUX” button on the touchscreen
to change the mode to auxiliary device if the Audio Jack is connected, allowing the
music from your portable device to play through the vehicle's speakers.
NOTE:
The functions of the portable device are controlled using the device itself, not the
buttons on the radio. However, the volume may be controlled using the radio or
portable device.
Hard Disk Drive (HDD) Operation
• The Hard Disk Drive (HDD) mode gives you access to the audio files on the internal
hard disk drive. It functions similar to a CD player, with the exception that the
internal HDD can hold more tracks.
• It is also possible to import display pictures to the internal hard disk drive. The
pictures can be displayed on the right half of the radio screen.
• Before using the HDD mode, you will need to copy songs and pictures to the
internal hard drive. Songs and pictures can be added to the hard drive by using a
CD or USB device (e.g. thumb drive or memory stick).
NOTE:
• HDD supports only .jpg/JPEG formats for photos.
• WMA/MP3 Files and Selective Songs from a CD can also be added to the HDD. See
the Uconnect®430/430N User's Manual for more information.
ELECTRONICS
51
Page 62 of 132
Replay
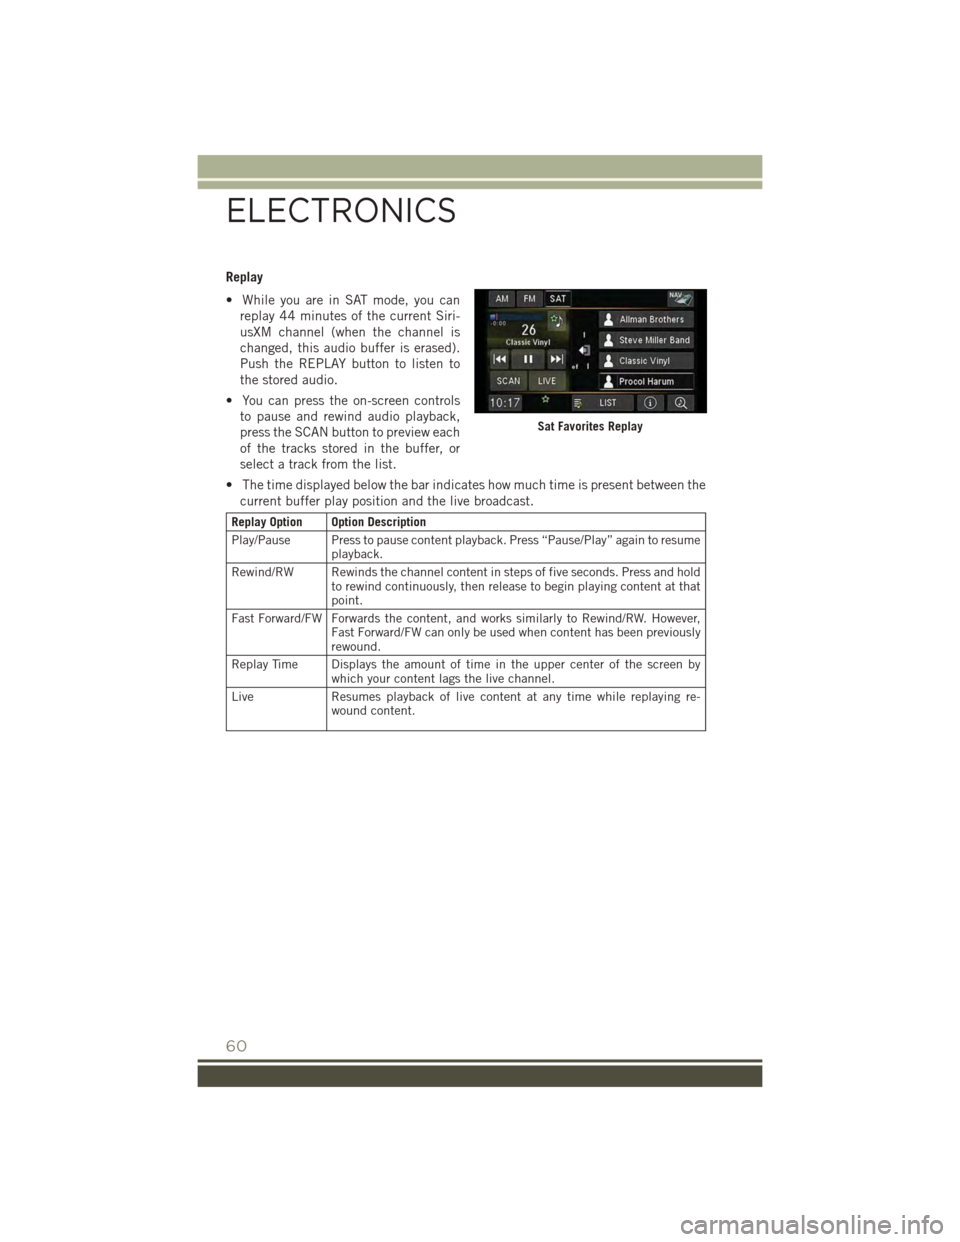
• While you are in SAT mode, you can
replay 44 minutes of the current Siri-
usXM channel (when the channel is
changed, this audio buffer is erased).
Push the REPLAY button to listen to
the stored audio.
• You can press the on-screen controls
to pause and rewind audio playback,
press the SCAN button to preview each
of the tracks stored in the buffer, or
select a track from the list.
• The time displayed below the bar indicates how much time is present between the
current buffer play position and the live broadcast.
Replay Option Option Description
Play/Pause Press to pause content playback. Press “Pause/Play” again to resumeplayback.
Rewind/RW Rewinds the channel content in steps of five seconds. Press and holdto rewind continuously, then release to begin playing content at thatpoint.
Fast Forward/FW Forwards the content, and works similarly to Rewind/RW. However,Fast Forward/FW can only be used when content has been previouslyrewound.
Replay Time Displays the amount of time in the upper center of the screen bywhich your content lags the live channel.
Live Resumes playback of live content at any time while replaying re-wound content.
Sat Favorites Replay
ELECTRONICS
60
Page 68 of 132
Uconnect® VOICE COMMAND
Voice Command Operation
The Uconnect®Voice Command system allows you to control your AM, FM radio,
satellite radio, disc player, HDD, Uconnect®Phone, a memo recorder, and supported
portable media devices.
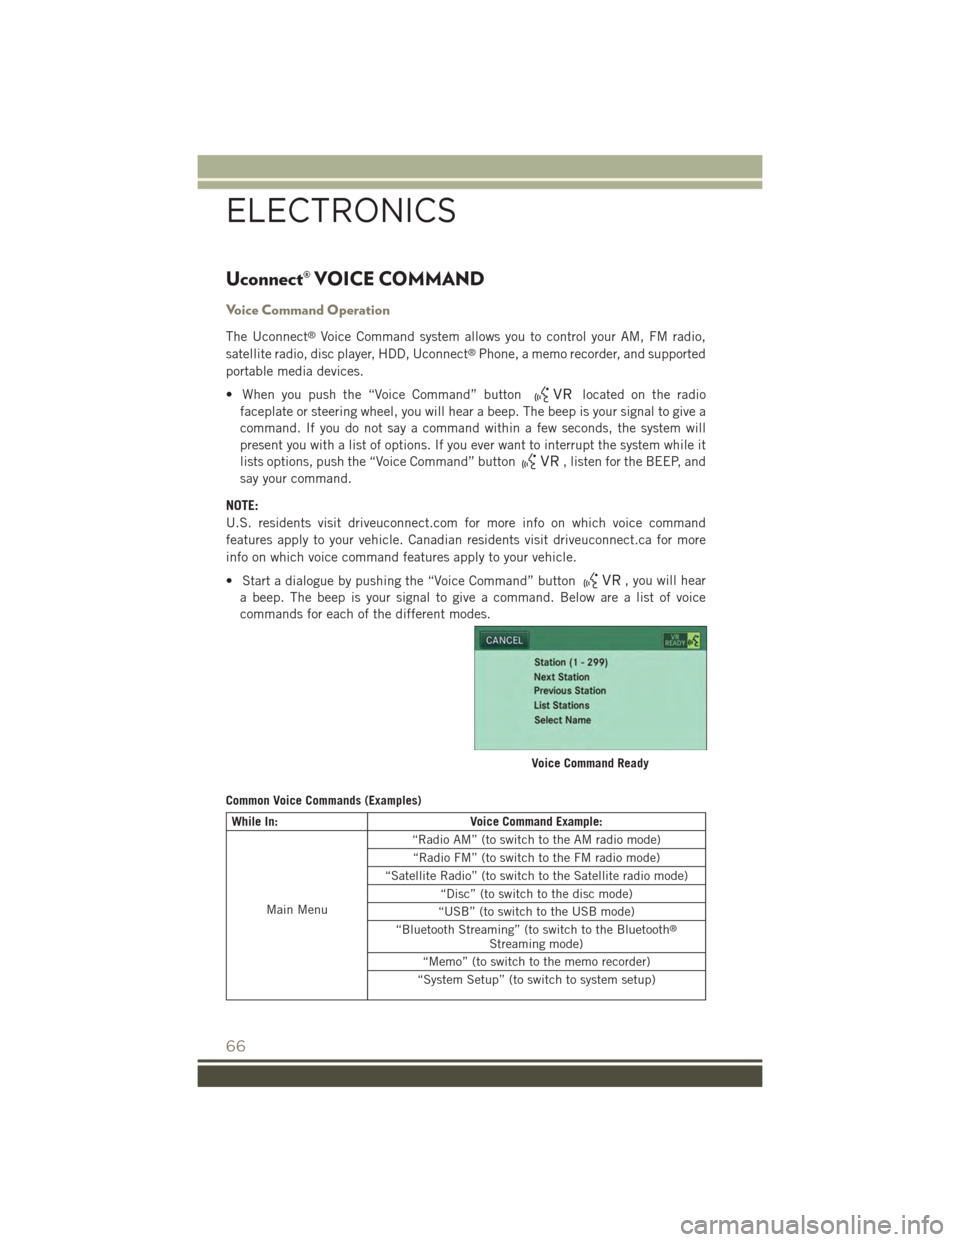
• When you push the “Voice Command” buttonlocated on the radio
faceplate or steering wheel, you will hear a beep. The beep is your signal to give a
command. If you do not say a command within a few seconds, the system will
present you with a list of options. If you ever want to interrupt the system while it
lists options, push the “Voice Command” button, listen for the BEEP, and
say your command.
NOTE:
U.S. residents visit driveuconnect.com for more info on which voice command
features apply to your vehicle. Canadian residents visit driveuconnect.ca for more
info on which voice command features apply to your vehicle.
• Start a dialogue by pushing the “Voice Command” button, you will hear
a beep. The beep is your signal to give a command. Below are a list of voice
commands for each of the different modes.
Common Voice Commands (Examples)
While In:Voice Command Example:
Main Menu
“Radio AM” (to switch to the AM radio mode)
“Radio FM” (to switch to the FM radio mode)
“Satellite Radio” (to switch to the Satellite radio mode)
“Disc” (to switch to the disc mode)
“USB” (to switch to the USB mode)
“Bluetooth Streaming” (to switch to the Bluetooth®
Streaming mode)
“Memo” (to switch to the memo recorder)
“System Setup” (to switch to system setup)
Voice Command Ready
ELECTRONICS
66
Page 69 of 132
While In:Voice Command Example:
Radio Mode
“Frequency” (to change the frequency)
“Next Station” (to select the next station)
“Previous Station” (to select the previous station)
“Radio Menu” (to switch to the radio menu)
“Main Menu” (to switch to the main menu)
SiriusXM SatelliteRadio Mode
“Channel Number” (to change the channel by its spokennumber)
“Next Channel” (to select the next channel)
“Previous Channel” (to select the previous channel)
“List Channel” (to hear a list of available channels)
"Channel Name" (to change the channel by its spokenname)
“Select Name” (to say the name of a channel)
“Radio Menu” (to switch to the radio menu)
“Main Menu” (to switch to the main menu)
Disc Mode
“Track” (#) (to change the track)
“Next Track” (to play the next track)
“Previous Track” (to play the previous track)
“Main Menu” (to switch to the main menu)
Memo Mode
To switch to the voice recorder mode, say “Memo.” The fol-lowing are common voice commands for this mode: “NewMemo” (to record a new memo) — During the recording,you may push the Voice Command buttonto stoprecording. You proceed by saying one of the following com-mands:
— “Save” (to save the memo)
— “Continue” (to continue recording)
— “Delete” (to delete the recording)
— “Play Memos” (to play previously recorded memos) —During the playback you may push the Voice Command but-tonto stop playing memos. You proceed by sayingone of the following commands:
— “Repeat” (to repeat a memo)
— “Next” (to play the next memo)
— “Previous” (to play the previous memo)
— “Delete” (to delete a memo)
— “Delete All” (to delete all memos)
ELECTRONICS
67
Page 87 of 132

CAUTION!
Continuous driving with the Transmission Temperature Warning Light illuminated
will eventually cause severe transmission damage or transmission failure.
WARNING!
If you continue operating the vehicle when the Transmission Temperature Warning
Light is illuminated you could cause the fluid to boil over, come in contact with hot
engine or exhaust components and cause a fire.
- Seat Belt Reminder Light
When the ignition switch is first turned to the ON/RUN position, this light will turn on
for four to eight seconds as a bulb check. During the bulb check, if the driver's seat
belt is unbuckled, a chime will sound. After the bulb check or when driving, if the
driver or front passenger seat belt remains unbuckled, the Seat Belt Indicator Light
will flash or remain on continuously. Refer to “Seat Belt Systems” in “Things To
Know Before Starting” in your Owner’s Manual on the DVD for further information.
- Malfunction Indicator Light (MIL)
Certain conditions, such as a loose or missing gas cap, poor fuel quality, etc., may
illuminate the MIL after engine start. The vehicle should be serviced if the light stays
on through several typical driving cycles. In most situations, the vehicle will drive
normally and not require towing.
If the MIL flashes when the engine is running, serious conditions may exist that could
lead to immediate loss of power or severe catalytic converter damage. We recommend
you do not operate the vehicle. Have the vehicle serviced immediately.
-ElectronicStabilityControl(ESC)Activation/MalfunctionIndicatorLight
If the “ESC Activation/Malfunction Indicator Light” comes on continuously with the
engine running, a malfunction has been detected in the ESC system. If this light
remains on after several ignition cycles, and the vehicle has been driven several miles
(kilometers) at speeds greater than 30 mph (48 km/h), we recommend you do not
operate the vehicle. Have the vehicle serviced immediately.
The “ESC Activation/Malfunction Indicator Light” starts to flash as soon as the tires
lose traction and the ESC system becomes active. If the light begins to flash during
acceleration, ease up on the accelerator and apply as little throttle as possible. Be
sure to adapt your speed and driving to the prevailing road conditions. The light also
flashes when Traction Control System (TCS) is active. To improve the vehicle's
traction when starting off in deep snow, sand or gravel, it may be desirable to switch
the ESC system to Partial Off mode by momentarily pressing the ESC Offswitch.
WHAT TO DO IN EMERGENCIES
85
Page 88 of 132

INSTRUMENT CLUSTER INDICATOR LIGHTS
- Turn Signal Indicator
The arrows will flash with the exterior turn signals when the turn signal lever is
operated. A tone will chime, and a EVIC message will appear if either turn signal is
left on for more than 1 mile (1.6 km).
NOTE:
If either indicator flashes at a rapid rate, check for a defective outside light bulb.
- High Beam Indicator
Indicates that headlights are on high beam.
- Front Fog Light Indicator
This indicator will illuminate when the front fog lights are on.
- Vehicle Security Light
This light will flash rapidly for approximately 15 seconds when the vehicle security
alarm is arming. The light will flash at a slower speed continuously after the alarm is
set. The security light will also come on for about three seconds when the ignition is
first turned on.
– 4WD Indicator
This light indicates the vehicle is in 4-wheel drive (4WD) mode.
- Electronic Stability Control (ESC) OFF Indicator Light
This light indicates the Electronic Stability Control (ESC) is off.
— Cruise Indicator
This indicator shows that the Electronic Speed Control System is ON.
- Hill Descent Control Indicator — If Equipped
This indicator will illuminate when Hill Descent Control (HDC) has been selected
using the Hill Descent Control Switch.
Oil Change Indicator
Message
If an “oil change” message (shown as CHANgE OIL) appears and a single chime
sounds, it is time for your next required oil change.
WHAT TO DO IN EMERGENCIES
86
Page 89 of 132
Resetting The Light After Servicing
1. Turn the ignition switch to the ON/RUN position (do not start engine).
2. Fully depress the accelerator pedal three times within 10 seconds.
3. Turn the ignition switch to the OFF/LOCK position.
IF YOUR ENGINE OVERHEATS
In any of the following situations, you can reduce the potential for overheating by
taking the appropriate action:
• On the highways — slow down.
• In city traffic — while stopped, shift the transmission to NEUTRAL, but do not
increase engine idle speed.
NOTE:
There are steps that you can take to slow down an impending overheat condition:
• If your air conditioner (A/C) is on, turn it off. The A/C system adds heat to the
engine cooling system and turning the A/C off can help remove this heat.
• You can also turn the temperature control to maximum heat, the mode control to
floor and the blower control to high. This allows the heater core to act as a
supplement to the radiator and aids in removing heat from the engine cooling
system.
CAUTION!
Driving with a hot cooling system could damage your vehicle. If the temperature
gauge reads HOT (H), pull over and stop the vehicle. Idle the vehicle with the air
conditioner turned off until the pointer drops back into the normal range. If the
pointer remains on HOT (H), and you hear continuous chimes, turn the engine off
immediately, and call for service.
WARNING!
You or others can be badly burned by hot engine coolant (antifreeze) or steam from
your radiator. If you see or hear steam coming from under the hood, do not open
the hood until the radiator has had time to cool. Never try to open a cooling system
pressure cap when the radiator or coolant bottle is hot.
WHAT TO DO IN EMERGENCIES
87
Page 101 of 132

TOWING A DISABLED VEHICLE
To w i n gConditionWheels OFFthe GroundManualTransmission
6-SpeedAutomatic(FWD Only)
6-SpeedAutomatic4WD
CVTAutomaticTransmission
Flat Tow NONE
• Transmis-sion in
NEUTRAL• Key inACC orON/RUNposition
If transmis-sion is oper-able:• Transmis-sion in
NEUTRAL•25mph(40 km/h)
maxspeed• 15 miles(24 km)maxdis-
tance
If transmis-sion is oper-able:• Transmis-sion in
NEUTRAL•25mph(40 km/h)
maxspeed• 15 miles(24 km)maxdis-
tance
NOTALLOWED
Wheel Liftor DollyTow
RearNOT ALLOWEDNOT ALLOWEDNOTALLOWED
FrontFWD ModelsONLYOK NOT ALLOWEDFWD ModelsONLY
FlatbedALL BEST METHOD BEST METHOD BEST METHODBESTMETHOD
FREEING A STUCK VEHICLE
If your vehicle becomes stuck in mud, sand or snow, it can often be moved by a
rocking motion. Turn your steering wheel right and left to clear the area around the
front wheels. Then move the shift lever back and forth between REVERSE and
DRIVE. Using minimal accelerator pedal pressure to maintain the rocking motion,
without spinning the wheels, is most effective.
NOTE:
To improve the vehicle's traction when starting off in deep snow, sand or gravel, it
may be desirable to switch the Electronic Stability Control (ESC) to “Partial Off”
mode by momentarily pressing the ESC Offswitch. For further information on
ESC, refer to the Owner's Manual on the DVD.
WHAT TO DO IN EMERGENCIES
99