Page 170 of 572
Headlights And Parking Lights
Turn the end of the multifunction lever to the first detent
to turn on the parking lights. Turn the end of the lever to
the second detent to turn on the headlights.
Daytime Running Lights — If Equipped
The high beam lights will come on as Daytime Running
Lights (lower intensity), whenever the ignition is ON, the
engine is running, the headlight switch is off, the parking
brake is off, the turn signal is off, and the shift lever is in
any position except PARK.
Lights-On Reminder
If the headlights or parking lights are left on after the
ignition is turned OFF, a chime will sound to alert the
driver when the driver’s door is opened.
Fog Lights — If Equipped
The front fog light switch is on the multifunc-
tion lever. To activate the front fog lights, turn
on the parking lights or the low beam head-
lights and pull out the end of the multifunction lever.
Headlight Control
168 UNDERSTANDING THE FEATURES OF YOUR VEHICLE
Page 171 of 572
NOTE:The fog lights will only operate with the head-
lights on low beam. Selecting high beam headlights will
turn off the fog lights.
Turn Signals
Move the multifunction lever up or down and the arrows
on each side of the instrument cluster flash to show
proper operation of the front and rear turn signal lights.
Front Fog Light Operation
Turn Signal Operation
3
UNDERSTANDING THE FEATURES OF YOUR VEHICLE 169
Page 172 of 572

NOTE:If either light remains on and does not flash, or
there is a very fast flash rate, check for a defective outside
light bulb. If an indicator fails to light when the lever is
moved, it would suggest that the indicator bulb is
defective.
Lane Change Assist
Tap the lever up or down once, without moving beyond
the detent, and the turn signal (right or left) will flash
three times then automatically turn off.
High/Low Beam Switch
Push the multifunction lever away from you to switch
the headlights to high beam. Pull the multifunction lever
toward you to switch the headlights back to low beam.
Flash-To-Pass
You can signal another vehicle with your headlights by
lightly pulling the multifunction lever toward you. This
will turn on the high beam headlights until the lever is
released.
NOTE:If the multifunction lever is held in the flash-to-
pass position for more than 20 seconds, the high beams
will shut off. If this occurs, wait 30 seconds for the next
flash-to-pass operation.
Instrument Panel Dimming
Rotate the center portion of the lever to the extreme
bottom position to fully dim the instrument panel lights
and prevent the interior lights from illuminating when a
door is opened.
170 UNDERSTANDING THE FEATURES OF YOUR VEHICLE
Page 173 of 572
Rotate the center portion of the lever up to increase the
brightness of the instrument panel lights when the park-
ing lights or headlights are on.
Rotate the center portion of the lever upward to the next
detent position to brighten the odometer and radio when
the parking lights or headlights are on.
Rotate the center portion of the lever upward to the last
detent to turn on the interior lighting.
Map/Reading Lights
These lights are mounted between the sun visors above
the rear view mirror. Each light is turned on by pushing
the button. Push the button a second time to turn the
Dimmer Control
3
UNDERSTANDING THE FEATURES OF YOUR VEHICLE 171
Page 174 of 572
light off. The lights also come on when a door is opened
or the dimmer control is turned fully upward, past the
second detent.
NOTE:The lights will remain on until the switch is
pushed a second time, so be sure they have been turned
off before leaving the vehicle. They will not turn off
automatically.
WINDSHIELD WIPERS AND WASHERS
The windshield wiper/washer control lever is
located on the right side of the steering column.
The front wipers are operated by rotating a
switch, located on the end of the lever. For information
on the rear wiper/washer, refer to “Rear Window Fea-
tures” in “Understanding The Features Of Your Vehicle”.
Map/Reading Lights
172 UNDERSTANDING THE FEATURES OF YOUR VEHICLE
Page 199 of 572

CAUTION!(Continued)
•Accessories that draw higher power (i.e., coolers,
vacuum cleaners, lights, etc.) will degrade the bat-
tery even more quickly. Only use these intermit-
tently and with great caution.
•After the use of high power draw accessories, or
long periods of the vehicle not being started (with
accessories still plugged in), the vehicle must be
driven a sufficient length of time to allow the
generator to recharge the vehicle’s battery.
POWER INVERTER — IF EQUIPPED
A 115 Volt (150 Watt) AC power inverter is located on the
front of the center console for added convenience. This
outlet can power mobile phones, electronics and other
low power devices requiring power up to 150 Watts.
Certain high-end video games, such as Playstation®3
and XBox360 will exceed this power limit, as will most
power tools.
The power inverter is designed with built-in overload
protection. If the power rating of 150 Watts is exceeded,
the power inverter will automatically shut down. Once
the electrical device has been removed from the outlet the
inverter should automatically reset. If the power rating
exceeds approximately 170 Watts, the power inverter
may have to be reset manually. To reset the inverter
manually, unplug the device and plug it in again. To
avoid overloading the circuit, check the power ratings on
electrical devices prior to using the inverter.
3
UNDERSTANDING THE FEATURES OF YOUR VEHICLE 197
Page 201 of 572
CAUTION!(Continued)
•Accessories that draw higher power (i.e., coolers,
vacuum cleaners, lights, etc.) will degrade the bat-
tery even more quickly. Only use these intermit-
tently and with great caution.
•After the use of high power draw accessories, or
long periods of the vehicle not being started (with
accessories still plugged in), the vehicle must be
driven a sufficient length of time to allow the
generator to recharge the vehicle’s battery.
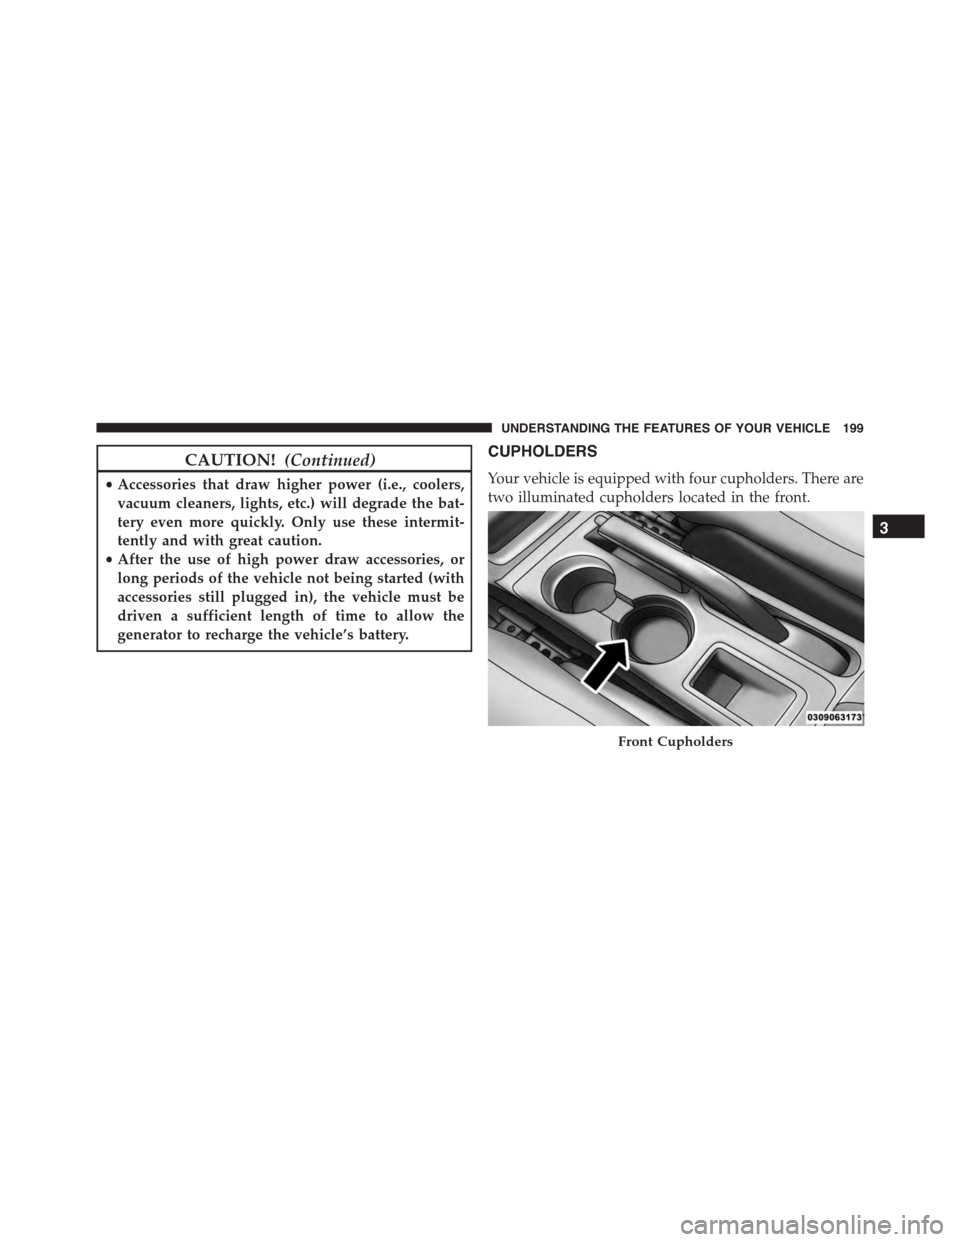
CUPHOLDERS
Your vehicle is equipped with four cupholders. There are
two illuminated cupholders located in the front.
Front Cupholders
3
UNDERSTANDING THE FEATURES OF YOUR VEHICLE 199
Page 222 of 572

NOTE:If either indicator flashes at a rapid rate, check
for a defective outside light bulb.
9. High Beam Indicator
This indicator shows that the high beam head-
lights are on. Push the multifunction lever for-
ward to switch the headlights to high beam and pull
toward yourself (normal position) to return to low beam.
10. Anti-Lock Brake (ABS) Light — If Equipped
This light monitors the Anti-Lock Brake System
(ABS). The light will turn on when the ignition
switch is turned to the ON/RUN position and
may stay on for as long as four seconds.
If the ABS light remains on or turns on while driving, it
indicates that the Anti-Lock portion of the brake system
is not functioning and that service is required. However,
the conventional brake system will continue to operate
normally if the BRAKE warning light is not on.
If the ABS light is on, the brake system should be serviced
as soon as possible to restore the benefits of Anti-Lock
brakes. If the ABS light does not turn on when the
ignition switch is turned to the ON/RUN position, have
the light inspected by an authorized dealer.
11. Seat Belt Reminder Light
When the ignition switch is first turned to ON/
RUN, this light will turn on for four to eight
seconds as a bulb check. During the bulb check, if
the driver’s seat belt is unbuckled, a chime will sound.
After the bulb check or when driving, if the driver or
front passenger’s seat belt remains unbuckled, the Seat
Belt Reminder Light will illuminate, and the chime will
sound. Refer to “Occupant Restraints” in “Things To
Know Before Starting Your Vehicle” for further
information.
220 UNDERSTANDING YOUR INSTRUMENT PANEL