Page 183 of 636
To tilt the steering column, move the lever up or down as
desired. To lengthen or shorten the steering column, pull
the lever toward you or push the lever away from you as
desired.NOTE:For vehicles equipped with Driver Memory Seat,
you can use your Remote Keyless Entry (RKE) transmit-
ter or the memory switch on the driver’s door trim panel
to return the tilt/telescopic steering column to pre-
programmed positions. Refer to “Driver Memory Seat”
in this section for further information.
WARNING!
Do not adjust the steering column while driving.
Adjusting the steering column while driving or driv-
ing with the steering column unlocked, could cause
the driver to lose control of the vehicle. Failure to
follow this warning may result in serious injury or
death.
Power Tilt/Telescoping Steering Column
3
UNDERSTANDING THE FEATURES OF YOUR VEHICLE 181
Page 253 of 636
POWER SUNROOF — IF EQUIPPED
The power sunroof switch is located between the sun
visors on the overhead console.
WARNING!
•Never leave children unattended in a vehicle, or
with access to an unlocked vehicle. Never leave the
Key Fob in or near the vehicle, or in a location
accessible to children. Do not leave the ignition of
a vehicle equipped with Keyless Enter-N-Go™ in
the ACC or ON/RUN mode. Occupants, particu-
larly unattended children, can become entrapped
by the power sunroof while operating the power
sunroof switch. Such entrapment may result in
serious injury or death.
•In a collision, there is a greater risk of being thrown
from a vehicle with an open sunroof. You could
also be seriously injured or killed. Always fasten
your seat belt properly and make sure all passen-
gers are also properly secured.
(Continued)
Power Sunroof Switch
3
UNDERSTANDING THE FEATURES OF YOUR VEHICLE 251
Page 257 of 636

WARNING!
•Never leave children unattended in a vehicle, or
with access to an unlocked vehicle. Never leave the
Key Fob in or near the vehicle, or in a location
(Continued)
WARNING!(Continued)
accessible to children. Do not leave the ignition of
a vehicle equipped with Keyless Enter-N-Go™ in
the ACC or ON/RUN mode. Occupants, particu-
larly unattended children, can become entrapped
by the power sunroof while operating the power
sunroof switch. Such entrapment may result in
serious injury or death.
•In a collision, there is a greater risk of being thrown
from a vehicle with an open sunroof. You could
also be seriously injured or killed. Always fasten
your seat belt properly and make sure all passen-
gers are also properly secured.
•Do not allow small children to operate the sunroof.
Never allow your fingers, other body parts, or any
object, to project through the sunroof opening.
Injury may result.
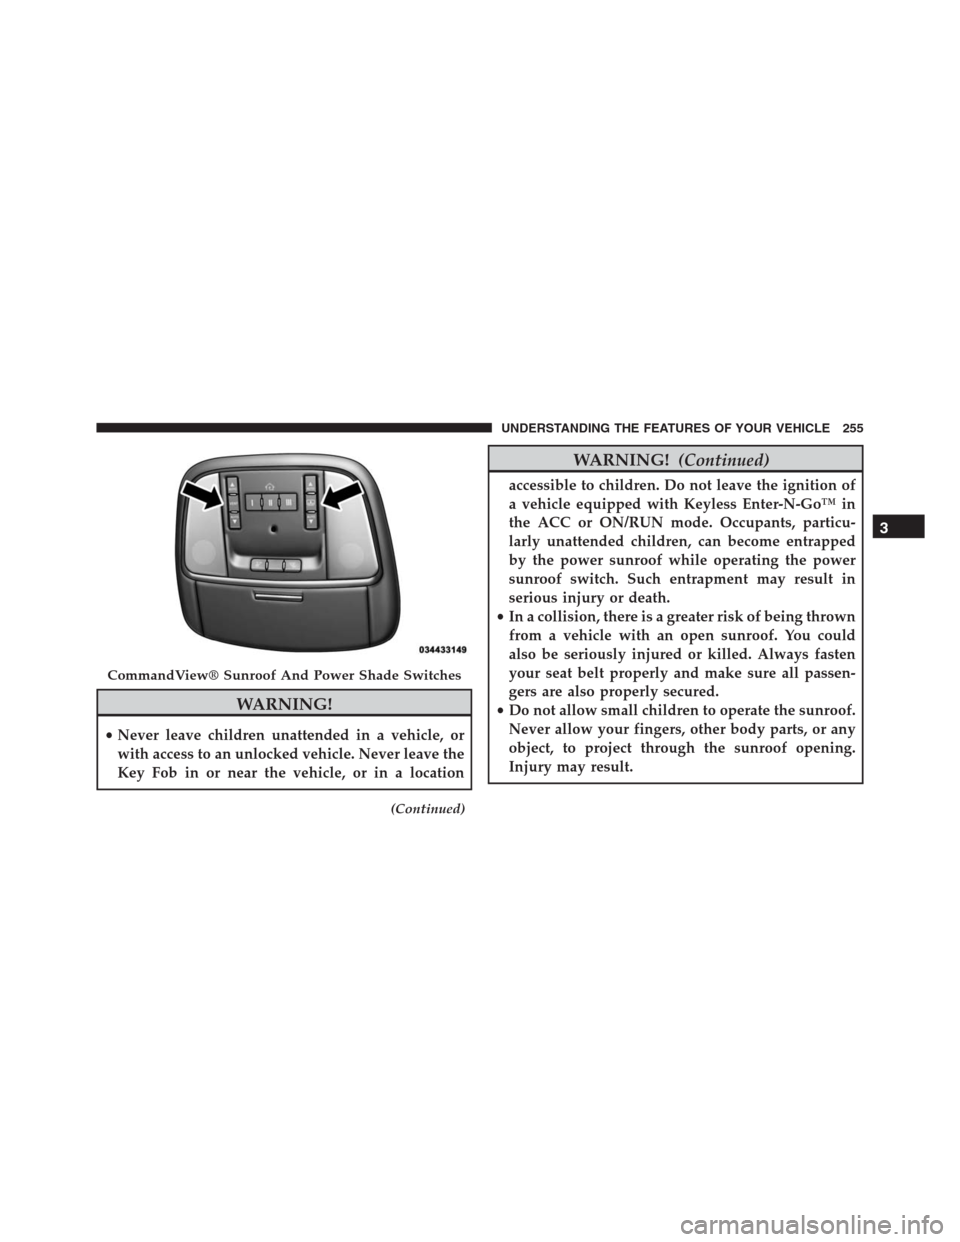
CommandView® Sunroof And Power Shade Switches
3
UNDERSTANDING THE FEATURES OF YOUR VEHICLE 255
Page 261 of 636

Ignition Off Operation
NOTE:
•The power sunroof switch can remain active for up to
approximately ten minutes after the vehicles ignition is
placed to the Off position. Opening either front door
will cancel this feature.
•This feature is programmable using the Uconnect®
System. Refer to “Uconnect® Settings” in “Under-
standing Your Instrument Panel” for further informa-
tion.
ELECTRICAL POWER OUTLETS
Your vehicle is equipped with 12 Volt (13 Amp) power
outlets that can be used to power cellular phones, small
electronics and other low powered electrical accessories.
The power outlets are labeled with either a “key” or a
“battery” symbol to indicate how the outlet is powered.
Power outlets labeled with a “key” are powered whenthe ignition is in the ON or ACC position, while the
outlets labeled with a “battery” are connected directly to
the battery and powered at all times.
NOTE:
•All accessories connected to the “battery” powered
outlets should be removed or turned off when the
vehicle is not in use to protect the battery against
discharge.
•To ensure proper cigar lighter operation, a MOPAR®
knob and element must be used.
CAUTION!
Power outlets are designed for accessory plugs only.
Do not insert any other object in the power outlets as
this will damage the outlet and blow the fuse.
Improper use of the power outlet can cause damage
not covered by your New Vehicle Limited Warranty.
3
UNDERSTANDING THE FEATURES OF YOUR VEHICLE 259
Page 289 of 636

5. Front Fog Light Indicator — If Equipped
This indicator will illuminate when the front fog
lights are on.
6. Upper Left Selectable DID
This area of the cluster will display selectable informa-
tion such as compass, outside temperature, etc. For
further information, refer to “Driver Information Display
(DID)” in this section.
7. Turn Signal Indicator
The arrows will flash with the exterior turn
signals when the turn signal lever is operated.
A tone will chime, and a DID message will
appear if either turn signal is left on for more
than 1 mile (1.6 km).
NOTE:If either indicator flashes at a rapid rate, check
for a defective outside light bulb.8. Speedometer
Indicates vehicle speed.
9. Upper Right Selectable DID
This area of the cluster will display selectable informa-
tion such as compass, outside temperature, etc. For
further information, refer to “Driver Information Display
(DID)” in this section.
10. Malfunction Indicator Light (MIL)
The Malfunction Indicator Light (MIL) is part of
an onboard diagnostic system called OBD II that
monitors engine and automatic transmission con-
trol systems. The light will illuminate when the key is in
the ON/RUN position before engine start. If the bulb
does not come on when turning the key from OFF to
ON/RUN, have the condition checked promptly.
Certain conditions, poor fuel quality, etc., may illuminate
the light after engine start. The vehicle should be serviced
4
UNDERSTANDING YOUR INSTRUMENT PANEL 287
Page 303 of 636
•Battery Voltage Low
•Service Electronic Throttle Control
•Lights On
•Right Turn Signal Light Out
•Left Turn Signal Light Out
•IGN OR ACC
•Vehicle Not In Park
•IGN OR ACC KEYLESS GO
•Key in Ignition Lights On
•Remote Start Active Key to Run
•Remote Start Active Push Start Button
•Remote Start Aborted Fuel Low
•Remote Start Aborted Too Cold•Remote Start Aborted Door Open
•Remote Start Aborted Hood Open
•Remote Start Aborted Tailgate Open
•Remote Start Aborted Time Expired
•Remote Start Disabled Start To Reset
•Service Airbag System
•Service Airbag Warning Light
•Door Open
•Doors Open
•Liftgate Open
•Gear Not Available
•Shift Not Allowed
•Vehicle Speed To High To Shift
4
UNDERSTANDING YOUR INSTRUMENT PANEL 301
Page 307 of 636

•Oil Pressure Warning Light
This telltale indicates low engine oil pressure. If
the light turns on while driving, stop the vehicle and shut
off the engine as soon as possible. A chime will sound
when this light turns on.
Do not operate the vehicle until the cause is corrected.
This light does not show how much oil is in the engine.
The engine oil level must be checked under the hood.
•Oil Temperature Warning Light
This telltale indicates engine oil temperature is
high. If the light turns on while driving, stop
the vehicle and shut off the engine as soon as
possible.
•Charging System Light
This light shows the status of the electrical charg-
ing system. If the light stays on or comes on while
driving, turn off some of the vehicle’s non-essentialelectrical devices or increase engine speed (if at idle). If
the charging system light remains on, it means that the
vehicle is experiencing a problem with the charging
system. Obtain SERVICE IMMEDIATELY. See an autho-
rized dealer.
If jump starting is required, refer to “Jump Starting
Procedures” in “What To Do In Emergencies.”
•Electronic Throttle Control (ETC) Light
This light informs you of a problem with the
Electronic Throttle Control (ETC) system. The
light will come on when the ignition is first
turned ON and remain on briefly as a bulb
check. If the light does not come on during starting, have
the system checked by an authorized dealer.
If a problem is detected, the light will come on while the
engine is running. Cycle the ignition key when the
4
UNDERSTANDING YOUR INSTRUMENT PANEL 305
Page 329 of 636

are unlocked with the Remote Keyless Entry (RKE)
transmitter. To change the Illuminated Approach status,
press the “+” or “–” button on the touchscreen to select
your desired time interval. Press the back arrow button
on the touchscreen to return to the previous menu, or
push the back button on the faceplate.
•Headlights With Wipers — If Equipped
When this feature is selected, and the headlight switch is
in the AUTO position, the headlights will turn on ap-
proximately 10 seconds after the wipers are turned on.
The headlights will also turn off when the wipers are
turned off if they were turned on by this feature. To make
your selection, press the Headlights With Wipers button
on the touchscreen, until a check-mark appears next to
setting, showing that setting has been selected. Press the
back arrow button on the touchscreen to return to the
previous menu, or push the back button on the faceplate.•Auto Dim High Beams — If Equipped
When this feature is selected, the high beam headlights
will activate/deactivate automatically under certain con-
ditions. To make your selection, press the “Auto High
Beams” button on the touchscreen, until a check-mark
appears next to setting, showing that setting has been
selected. Press the back arrow button on the touchscreen
to return to the previous menu, or push the back button
on the faceplate. Refer to “Automatic High Beam Head-
lamp Control — If Equipped” in “Understanding The
Features Of Your Vehicle” for further information.
•Daytime Running Lights — If Equipped
When this feature is selected, the headlights will turn on
whenever the vehicle is set in motion. To make your
selection, press the “Daytime Running Lights” button on
the touchscreen, until a check-mark appears next to
setting, showing that setting has been selected. Press the
4
UNDERSTANDING YOUR INSTRUMENT PANEL 327