Page 255 of 636

Pinch Protect Feature
This feature will detect an obstruction in the opening of
the sunroof during Express Close operation. If an ob-
struction in the path of the sunroof is detected, the
sunroof will automatically retract. Remove the obstruc-
tion if this occurs. Next, push the switch forward and
release to Express Close.
NOTE:If three consecutive sunroof close attempts result
in Pinch Protect reversals, the fourth close attempt will be
a Manual Close movement with Pinch Protect disabled.
Venting Sunroof — Express
Push and release the Vent button within one half second
and the sunroof will open to the vent position. This is
called “Express Vent” and it will occur regardless of
sunroof position. During Express Vent operation, any
movement of the switch will stop the sunroof.
Sunshade Operation
The sunshade can be opened manually. However, the
sunshade will open automatically as the sunroof opens.
NOTE:The sunshade cannot be closed if the sunroof is
open.
Wind Buffeting
Wind buffeting can be described as the perception of
pressure on the ears or a helicopter-type sound in the
ears. Your vehicle may exhibit wind buffeting with the
windows down, or the sunroof (if equipped) in certain
open or partially open positions. This is a normal occur-
rence and can be minimized. If the buffeting occurs with
the rear windows open, open the front and rear windows
together to minimize the buffeting. If the buffeting occurs
with the sunroof open, adjust the sunroof opening to
minimize the buffeting or open any window.
3
UNDERSTANDING THE FEATURES OF YOUR VEHICLE 253
Page 257 of 636

WARNING!
•Never leave children unattended in a vehicle, or
with access to an unlocked vehicle. Never leave the
Key Fob in or near the vehicle, or in a location
(Continued)
WARNING!(Continued)
accessible to children. Do not leave the ignition of
a vehicle equipped with Keyless Enter-N-Go™ in
the ACC or ON/RUN mode. Occupants, particu-
larly unattended children, can become entrapped
by the power sunroof while operating the power
sunroof switch. Such entrapment may result in
serious injury or death.
•In a collision, there is a greater risk of being thrown
from a vehicle with an open sunroof. You could
also be seriously injured or killed. Always fasten
your seat belt properly and make sure all passen-
gers are also properly secured.
•Do not allow small children to operate the sunroof.
Never allow your fingers, other body parts, or any
object, to project through the sunroof opening.
Injury may result.
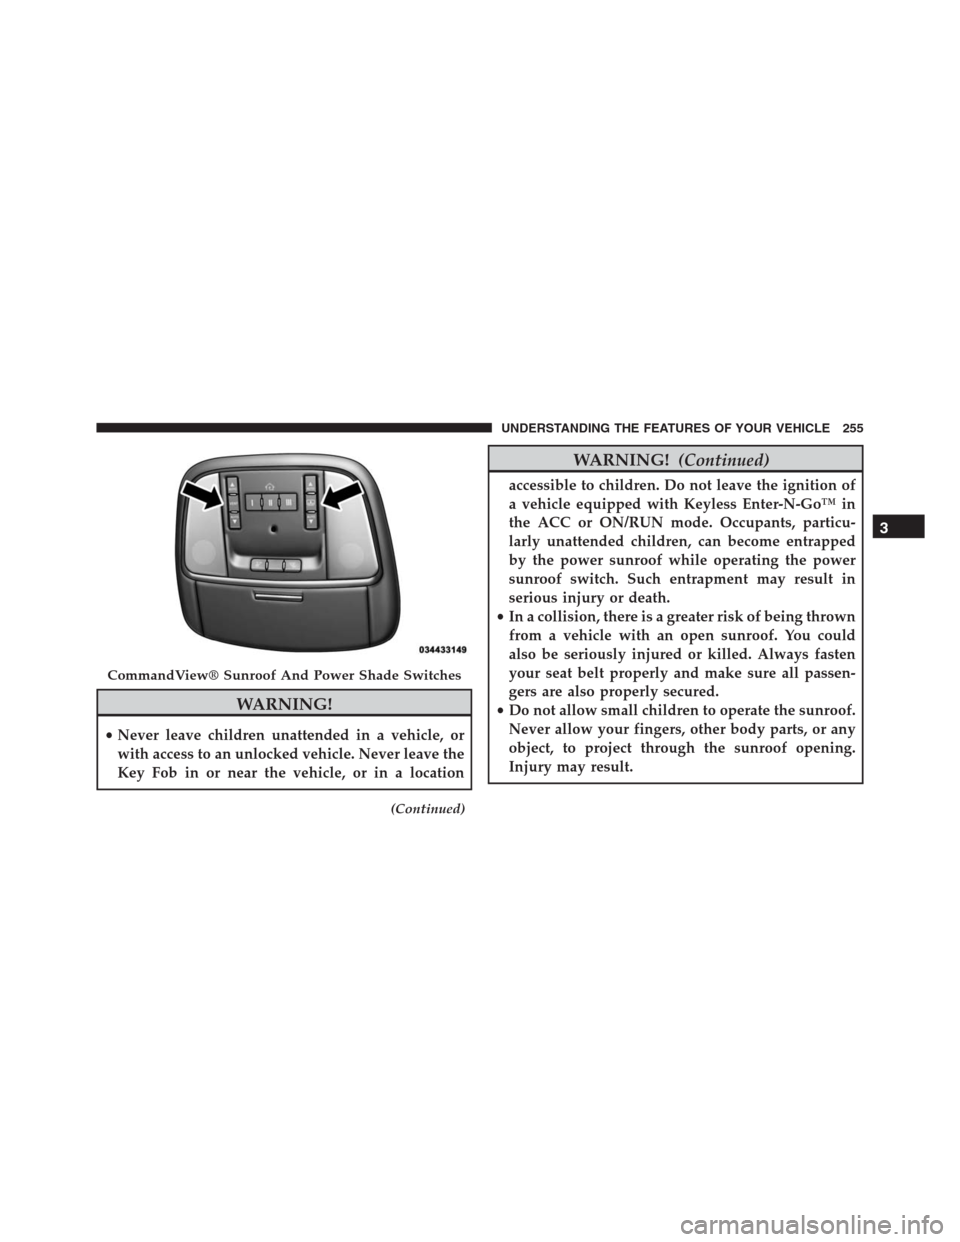
CommandView® Sunroof And Power Shade Switches
3
UNDERSTANDING THE FEATURES OF YOUR VEHICLE 255
Page 260 of 636

sunroof position. During Express Vent operation, any
movement of the switch will stop the sunroof.
NOTE:If the sunshade is in the closed position when the
vent switch is pushed, the sunshade will automatically
cycle to the halfway open position prior to the sunroof
opening to the Vent position.
Pinch Protect Feature
This feature will detect an obstruction in the opening of
the sunroof during Express Close operation. If an ob-
struction in the path of the sunroof is detected, the
sunroof will automatically retract. Remove the obstruc-
tion if this occurs. Next, push the switch forward and
release to Express Close.
NOTE:If three consecutive sunroof close attempts result
in Pinch Protect reversals, the fourth close attempt will be
a Manual Close movement with Pinch Protect disabled.
Wind Buffeting
Wind buffeting can be described as the perception of
pressure on the ears or a helicopter-type sound in the
ears. Your vehicle may exhibit wind buffeting with the
windows down, or the sunroof (if equipped) in certain
open or partially open positions. This is a normal occur-
rence and can be minimized. If the buffeting occurs with
the rear windows open, open the front and rear windows
together to minimize the buffeting. If the buffeting occurs
with the sunroof open, adjust the sunroof opening to
minimize the buffeting or open any window.
Sunroof Maintenance
Use only a non-abrasive cleaner and a soft cloth to clean
the glass panel.
258 UNDERSTANDING THE FEATURES OF YOUR VEHICLE
Page 274 of 636
Two additional storage bins are located under the load
floor. To access the lower storage bins, raise the load floor
and attach the tether hook (attached to the bottom of the
load floor) to the liftgate opening.
Retractable Cargo Area Cover — If Equipped
NOTE:The purpose of this cover is for privacy, not to
secure loads. It will not prevent cargo from shifting or
protect passengers from loose cargo.
Tether Strap
Lower Storage Bins
272 UNDERSTANDING THE FEATURES OF YOUR VEHICLE
Page 276 of 636
WARNING!(Continued)
cover on the cargo floor or in the passenger compart-
ment. Remove the cover from the vehicle when taken
from its mounting. Do not store it in the vehicle.
Rear Cargo Tie-Downs
The rear cargo tie-downs, located on the cargo area floor,
should be used to safely secure loads when the vehicle is
moving.
WARNING!
•To help protect against personal injury, passengers
should not be seated in the rear cargo area. The rear
cargo space is intended for load carrying purposes
(Continued)
Rear Cargo Tie-Downs
274 UNDERSTANDING THE FEATURES OF YOUR VEHICLE
Page 281 of 636

•If (or any metallic object) is placed over the satellite
radio antenna (if equipped), you may experience in-
terruption of satellite radio reception. For improved
satellite radio reception, avoid placing the rear cross-
bar over the satellite radio antenna.
CAUTION!
•To prevent damage to the roof of your vehicle, do
not carry any loads on the roof rack without the
crossbars installed. The load should be secured and
placed on top of the crossbars, not directly on the
roof. If it is necessary to place the load on the roof,
place a blanket or some other protection between
the load and the roof surface.
•To avoid damage to the roof rack and vehicle, do
not exceed the maximum roof rack load capacity of
150 lb (68 kg). Always distribute heavy loads as
(Continued)
CAUTION!(Continued)
evenly as possible and secure the load appropri-
ately.
•Long loads which extend over the windshield, such
as wood panels or surfboards, or loads with large
frontal area should be secured to both the front and
rear of the vehicle.
•Travel at reduced speeds and turn corners carefully
when carrying large or heavy loads on the roof
rack. Wind forces, due to natural causes or nearby
truck traffic, can add sudden upward lift to a load.
This is especially true on large flat loads and may
result in damage to the cargo or your vehicle.
3
UNDERSTANDING THE FEATURES OF YOUR VEHICLE 279
Page 282 of 636
WARNING!
Cargo must be securely tied before driving your
vehicle. Improperly secured loads can fly off the
vehicle, particularly at high speeds, resulting in per-
sonal injury or property damage. Follow the roof rack
cautions when carrying cargo on your roof rack.
280 UNDERSTANDING THE FEATURES OF YOUR VEHICLE
Page 295 of 636

U.S. Federal regulations require that upon transfer of
vehicle ownership, the seller certify to the purchaser the
correct mileage that the vehicle has been driven. If your
odometer needs to be repaired or serviced, the repair
technician should leave the odometer reading the same
as it was before the repair or service. If she/he cannot do
so, then the odometer must be set at zero, and a sticker
must be placed in the door jamb stating what the mileage
was before the repair or service. It is a good idea for you
to make a record of the odometer reading before the
repair/service, so that you can be sure that it is properly
reset, or that the door jamb sticker is accurate if the
odometer must be reset at zero.
When the appropriate conditions exist, this Driver Infor-
mation Display (DID) messages. Refer to “Driver Infor-
mation Display” in this section.16. Selectable DID Menu
This area of the cluster will display the DID selectable
menu. For further information, refer to “Driver Informa-
tion Display (DID)” in this section.
17. Air Bag Warning Light
This light will turn on for four to eight seconds
as a bulb check when the ignition switch is first
turned to the ON/RUN position. If the light is
either not on during starting, stays on, or turns
on while driving, have the system inspected at an autho-
rized dealer as soon as possible. Refer to “Occupant
Restraints” in “Things To Know Before Starting Your
Vehicle” for further information.
18. Vehicle Security Light
This light will flash rapidly for approximately
15 seconds when the vehicle security alarm is
arming. The light will flash at a slower speed
4
UNDERSTANDING YOUR INSTRUMENT PANEL 293