Page 528 of 717

However, the system still needs to be serviced as long as
the#SERVICE TPM SYSTEM#message exists.
NOTE:There is no tire pressure monitoring sensor in the
spare tire. The TPMS will not be able to monitor the tire
pressure. If you install the spare tire in place of a road tire
that has a pressure below the low-pressure warning limit,
upon the next ignition switch cycle, the Tire Pressure
Monitoring Telltale Light will remain ON, a chime will
sound, and the DID will still display a pressure value in the
different color graphic display and an#Inflate to XXX kPa#
message will be displayed. After driving the vehicle for up
to 20 minutes above 15 mph (24 km/h), the Tire Pressure
Monitoring Telltale Light will flash on and off for 75
seconds and then remain on solid. In addition, the DID will
display a “SERVICE TPM SYSTEM#message for five
seconds and then display dashes (- -) in place of the
pressure value. For each subsequent ignition switch cycle,
a chime will sound, the Tire Pressure Monitoring Telltale
Light will flash on and off for 75 seconds and then remain
on solid, and the DID will display a#SERVICE TPM
SYSTEM#message for five seconds and then display
dashes (- -) in place of the pressure value. Once you repair
or replace the original road tire, and reinstall it on the
vehicle in place of the spare tire, the TPMS will update
automatically.
In addition, the Tire Pressure Monitoring Telltale Light
will turn OFF and the graphic in the DID will display a
new pressure value instead of dashes (- -), as long as no
tire pressure is below the low-pressure warning limit in
any of the four active road tires. The vehicle may need to
be driven for up to 20 minutes above 15 mph (24 km/h)
in order for the TPMS to receive this information.
General Information
This device complies with Part 15 of the FCC rules and
RSS 210 of Industry Canada. Operation is subject to the
following conditions:
•This device may not cause harmful interference.
526 STARTING AND OPERATING
Page 540 of 717
WARNING!
•Never have any smoking materials lit in or near the
vehicle when the fuel door is open or the tank is
being filled.
•Never add fuel when the engine is running. This is
in violation of most state and federal fire regula-
tions and may cause the “Malfunction Indicator
Light” to turn on.
•A fire may result if fuel is pumped into a portable
container that is inside of a vehicle. You could be
burned. Always place fuel containers on the
ground while filling.
Emergency Fuel Filler Door Release
If you are unable to open the fuel filler door, use the fuel
filler door emergency release.
1. Open the liftgate.
2. Push the inboard edge of the left storage bin to the
center, this will pop up the outboard edge.
3. Grab popped up outboard edge with other hand to
disengage snaps.
4. Remove the storage bin.
5. Pull the release cable to open the fuel door, push the
release cable back to the home position to re-seat the
fuel door latch to the closed position.
538 STARTING AND OPERATING
Page 547 of 717
WARNING!
•An improperly adjusted Weight Distributing Hitch
system may reduce handling, stability, braking
performance, and could result in a collision.
•Weight Distributing Systems may not be compatible
with Surge Brake Couplers. Consult with your hitch
and trailer manufacturer or a reputable Recreational
Vehicle dealer for additional information.
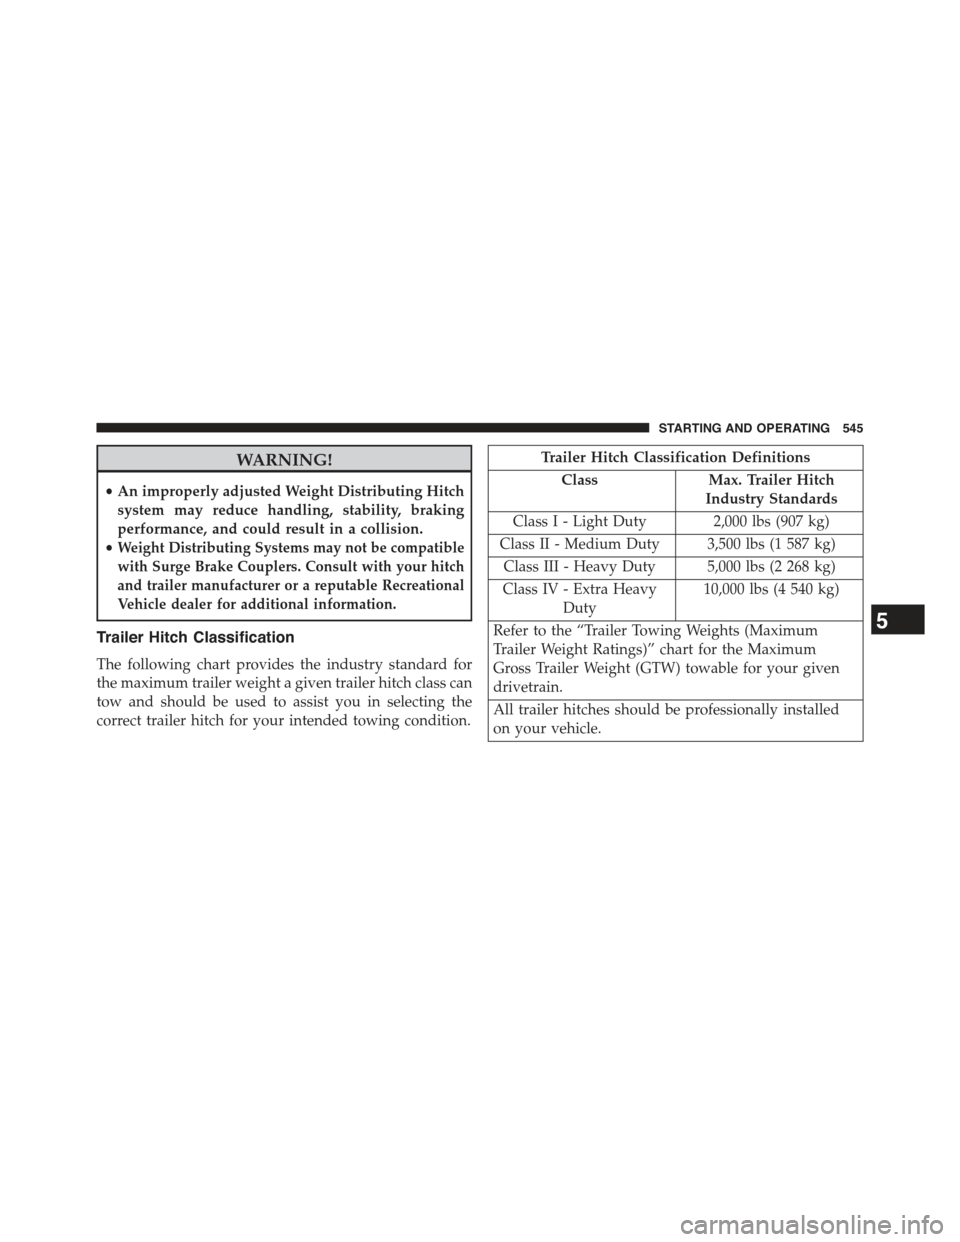
Trailer Hitch Classification
The following chart provides the industry standard for
the maximum trailer weight a given trailer hitch class can
tow and should be used to assist you in selecting the
correct trailer hitch for your intended towing condition.
Trailer Hitch Classification Definitions
ClassMax. Trailer Hitch
Industry Standards
Class I - Light Duty 2,000 lbs (907 kg)
Class II - Medium Duty 3,500 lbs (1 587 kg)
Class III - Heavy Duty 5,000 lbs (2 268 kg)
Class IV - Extra Heavy
Duty
10,000 lbs (4 540 kg)
Refer to the “Trailer Towing Weights (Maximum
Trailer Weight Ratings)” chart for the Maximum
Gross Trailer Weight (GTW) towable for your given
drivetrain.
All trailer hitches should be professionally installed
on your vehicle.
5
STARTING AND OPERATING 545
Page 563 of 717
WARNING!(Continued)
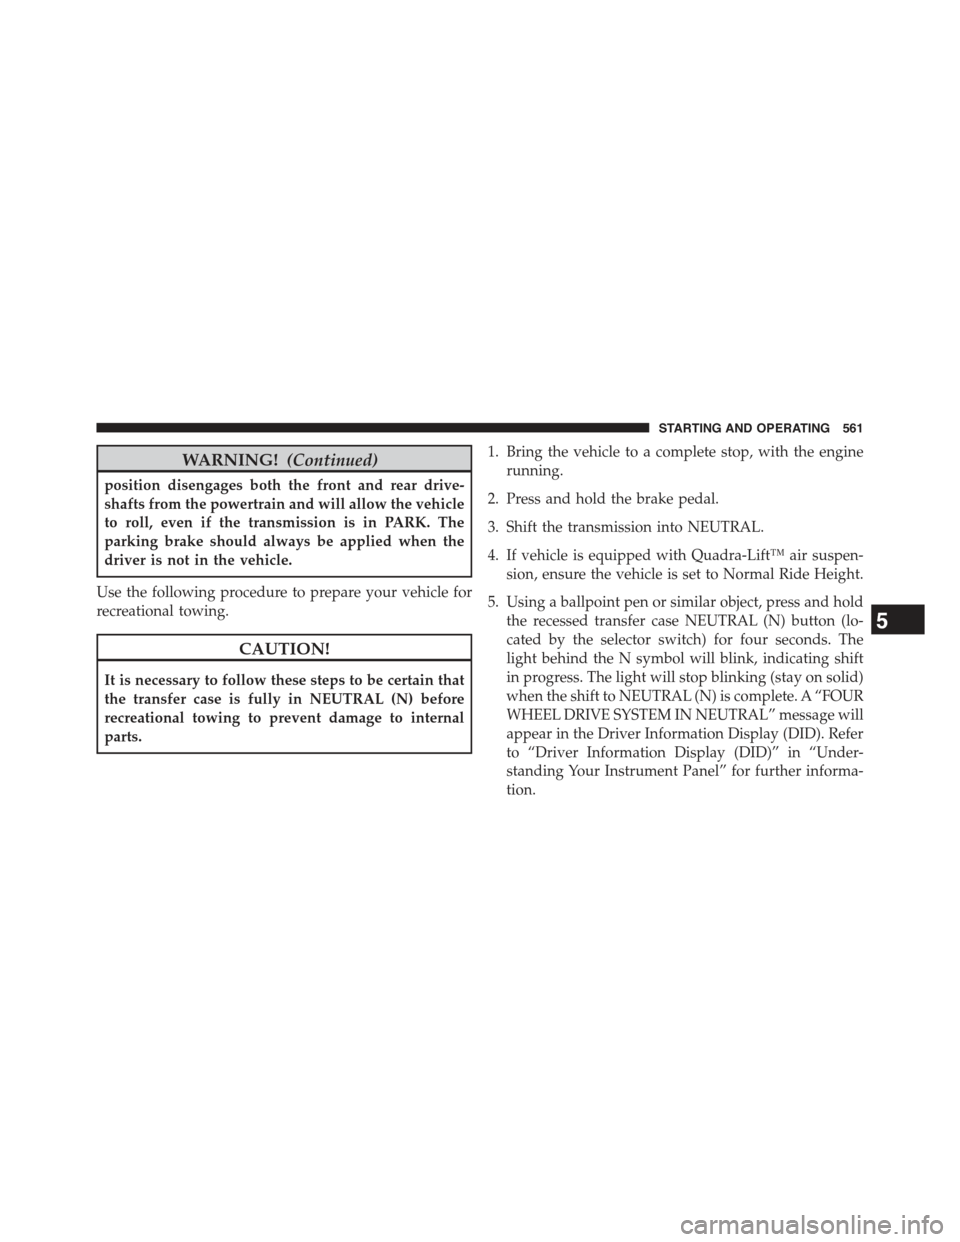
position disengages both the front and rear drive-
shafts from the powertrain and will allow the vehicle
to roll, even if the transmission is in PARK. The
parking brake should always be applied when the
driver is not in the vehicle.
Use the following procedure to prepare your vehicle for
recreational towing.
CAUTION!
It is necessary to follow these steps to be certain that
the transfer case is fully in NEUTRAL (N) before
recreational towing to prevent damage to internal
parts.
1. Bring the vehicle to a complete stop, with the engine
running.
2. Press and hold the brake pedal.
3. Shift the transmission into NEUTRAL.
4. If vehicle is equipped with Quadra-Lift™ air suspen-
sion, ensure the vehicle is set to Normal Ride Height.
5. Using a ballpoint pen or similar object, press and hold
the recessed transfer case NEUTRAL (N) button (lo-
cated by the selector switch) for four seconds. The
light behind the N symbol will blink, indicating shift
in progress. The light will stop blinking (stay on solid)
when the shift to NEUTRAL (N) is complete. A “FOUR
WHEEL DRIVE SYSTEM IN NEUTRAL” message will
appear in the Driver Information Display (DID). Refer
to “Driver Information Display (DID)” in “Under-
standing Your Instrument Panel” for further informa-
tion.
5
STARTING AND OPERATING 561
Page 581 of 717
6. Raise the vehicle by turning the jack screw clockwise.
Raise the vehicle only until the tire just clears the
surface and enough clearance is obtained to install the
spare tire. Minimum tire lift provides maximum sta-
bility.
WARNING!
Raising the vehicle higher than necessary can make
the vehicle less stable. It could slip off the jack and
hurt someone near it. Raise the vehicle only enough
to remove the tire.
7. Remove the lug nuts and wheel.
8. Position the spare wheel/tire on the vehicle and install
the lug nuts with the cone-shaped end toward the
wheel. Lightly tighten the nuts.
CAUTION!
Be sure to mount the spare tire with the valve stem
facing outward. The vehicle could be damaged if the
spare tire is mounted incorrectly.
Rear Jacking Location6
WHAT TO DO IN EMERGENCIES 579
Page 583 of 717
13. Have the aluminum road wheel and tire repaired as
soon as possible, properly secure the spare tire with
the special wing nut torqued to 3.7 ft-lbs (5 N·m),
reinstall the jack and tool kit foam tray, and latch the
rear load floor cover.
WARNING!
A loose tire or jack thrown forward in a collision or
hard stop could endanger the occupants of the ve-
hicle. Always stow the jack parts and the spare tire in
the places provided. Have the deflated (flat) tire
repaired or replaced immediately.
Road Tire Installation
1. Mount the road tire on the axle.
2. Install the remaining lug nuts with the cone shaped
end of the nut toward the wheel. Lightly tighten the
lug nuts.
Stowed Spare6
WHAT TO DO IN EMERGENCIES 581
Page 650 of 717
Your leather upholstery can be best preserved by regular
cleaning with a damp soft cloth. Small particles of dirt
can act as an abrasive and damage the leather upholstery
and should be removed promptly with a damp cloth.
Stubborn soils can be removed easily with a soft cloth
and MOPAR® Total Clean. Care should be taken to avoid
soaking your leather upholstery with any liquid. Please
do not use polishes, oils, cleaning fluids, solvents, deter-
gents, or ammonia-based cleaners to clean your leather
upholstery. Application of a leather conditioner is not
required to maintain the original condition.
WARNING!
Do not use volatile solvents for cleaning purposes.
Many are potentially flammable, and if used in
closed areas they may cause respiratory harm.
CAUTION!
Do not use Alcohol and Alcohol-based and/or Keton
based cleaning products to clean leather seats, as
damage to the seat may result.
Cleaning Headlights
Your vehicle is equipped with plastic headlights and fog
lights that are lighter and less susceptible to stone break-
age than glass headlights.
Plastic is not as scratch resistant as glass and therefore
different lens cleaning procedures must be followed.
To minimize the possibility of scratching the lenses and
reducing light output, avoid wiping with a dry cloth. To
remove road dirt, wash with a mild soap solution fol-
lowed by rinsing.
Do not use abrasive cleaning components, solvents, steel
wool or other aggressive material to clean the lenses.
648 MAINTAINING YOUR VEHICLE
Page 690 of 717
The manufacturer will not stand behind any service
contract that is not the manufacturer’s service contract. It
is not responsible for any service contract other than the
manufacturer’s service contract. If you purchased a ser-
vice contract that is not a manufacturer’s service contract,
and you require service after the manufacturer’s New
Vehicle Limited Warranty expires, please refer to the
contract documents, and contact the person listed in
those documents.
We appreciate that you have made a major investment
when you purchased the vehicle. An authorized dealer
has also made a major investment in facilities, tools, and
training to assure that you are absolutely delighted with
the ownership experience. You will be pleased with their
sincere efforts to resolve any warranty issues or related
concerns.
WARNING!
Engine exhaust (internal combustion engines only),
some of its constituents, and certain vehicle compo-
nents contain, or emit, chemicals known to the State
of California to cause cancer and birth defects, or
other reproductive harm. In addition, certain fluids
contained in vehicles and certain products of compo-
nent wear contain, or emit, chemicals known to the
State of California to cause cancer and birth defects,
or other reproductive harm.
WARRANTY INFORMATION
See the Warranty Information Booklet, located on the
DVD, for the terms and provisions of Chrysler Group
LLC warranties applicable to this vehicle and market.
688 IF YOU NEED CONSUMER ASSISTANCE