Page 312 of 717

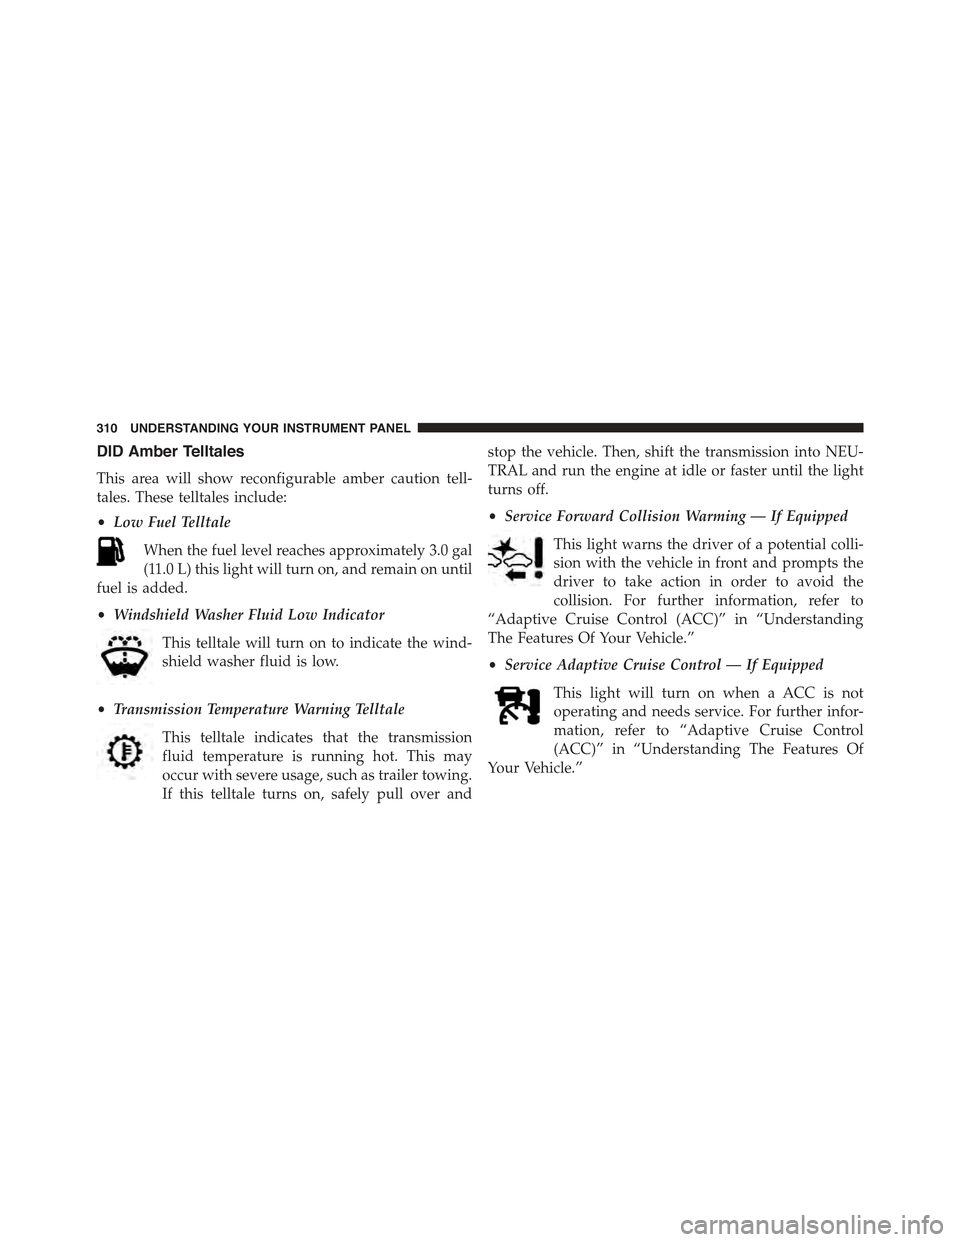
DID Amber Telltales
This area will show reconfigurable amber caution tell-
tales. These telltales include:
•Low Fuel Telltale
When the fuel level reaches approximately 3.0 gal
(11.0 L) this light will turn on, and remain on until
fuel is added.
•Windshield Washer Fluid Low Indicator
This telltale will turn on to indicate the wind-
shield washer fluid is low.
•Transmission Temperature Warning Telltale
This telltale indicates that the transmission
fluid temperature is running hot. This may
occur with severe usage, such as trailer towing.
If this telltale turns on, safely pull over and
stop the vehicle. Then, shift the transmission into NEU-
TRAL and run the engine at idle or faster until the light
turns off.
•Service Forward Collision Warming — If Equipped
This light warns the driver of a potential colli-
sion with the vehicle in front and prompts the
driver to take action in order to avoid the
collision. For further information, refer to
“Adaptive Cruise Control (ACC)” in “Understanding
The Features Of Your Vehicle.”
•Service Adaptive Cruise Control — If Equipped
This light will turn on when a ACC is not
operating and needs service. For further infor-
mation, refer to “Adaptive Cruise Control
(ACC)” in “Understanding The Features Of
Your Vehicle.”
310 UNDERSTANDING YOUR INSTRUMENT PANEL
Page 319 of 717
Driver Assist — If Equipped
Push and release the UP or DOWN arrow
button until the Driver Assist display icon/title
is highlighted in the DID. For further informa-
tion, refer to “Adaptive Cruise Control (ACC)
— If Equipped” in “Understanding The Features Of Your
Vehicle”.
Fuel Economy
Push and release theUPorDOWNarrow
button until the Fuel Economy Menu icon/title
is highlighted. Push and hold theRIGHT
arrow button to reset feature.
•Range
•Current MPG or L/100 km
•Average MPG or L/100 km
Trip
Push and release theUPorDOWNarrow
button until the Trip icon/title is highlighted in
the DID, then toggle left or right to select Trip
A or Trip B.
The Trip A and Trip B information will display the
following:
•Distance mi
•Average Fuel Economy
•Elapsed Time
Hold theOKbutton to reset all the information.
4
UNDERSTANDING YOUR INSTRUMENT PANEL 317
Page 346 of 717

Safety & Driving Assistance
After pressing the “Safety & Driving Assistance” button
on the touchscreen the following settings will be avail-
able:
•Forward Collision Warning — If Equipped
The Front Collision Warning (FCW) feature provides an
audible and/or visual warning to potential forward
collisions. The feature can be can be set to Far, or set to
Near. The default status of FCW is the Far setting. This
means the system will warn you of a possible collision
with the vehicle in front of you when you are farther
away. This gives you the most reaction time. To change
the setting for more dynamic driving, select the Near
setting. This warns you of a possible collision when you
are much closer to the vehicle in front of you. To change
the FCW status, press and release the “Near” or “Far”
button. Then press the back arrow button on the touch-
screen.
For further information, refer to “Adaptive Cruise Con-
trol (ACC)” in “Understanding The Features Of Your
Vehicle”.
•Forward Collision Warning (FCW) Active Braking —
If Equipped
The FCW system includes Advanced Brake Assist (ABA).
When this feature is selected, the ABA applies additional
brake pressure when the driver requests insufficient
brake pressure to avoid a potential frontal collision. The
ABA system becomes active at 5 mph (8 km/h). To make
your selection, press the “Forward Collision Warning
(FCW) with Mitigation - Active Braking” button on the
touchscreen, until a check-mark appears next to setting,
indicating that the setting had been selected. Press the
back arrow button on the touchscreen to return to the
previous menu. For further information, refer to “For-
ward Collision Warning (FCW) With Mitigation” in “Un-
derstanding The Features Of Your Vehicle.”
344 UNDERSTANDING YOUR INSTRUMENT PANEL
Page 461 of 717
NOTE:It is recommend to also remove the radar sensor
on vehicle equipped to Adaptive Cruise Control (ACC).
This radar sensor is specifically calibrated to your vehicle
and is not interchangeable with other radar sensors.
Radar sensor removal procedure (If equipped with
Adaptive Cruise Control [ACC]):
1. With the lower fascia removed, which provides access
to the sensor and bracket, disconnect the wiring
harness from the sensor.
2. Using a suitable tool, disconnect the wire clip from the
bracket.
3. Using a suitable tool, remove the two fasteners that
hold the sensor bracket to the bumper beam.
NOTE:It is recommended to scribe location to assist in
reinstallation.
4. Locate the protective connector on the rear of the
bumper beam.
1 — Inside Bumper Beam2—ProtectiveConnectorLocation3 — Sensor Bracket Fasteners4 — Sensor Bracket
5
STARTING AND OPERATING 459
Page 462 of 717

NOTE:Only models with the Off Road Package are
equipped with the a protective connector.
5. Remove the plug from the protective connector and
install on the sensor.
6. Insert the wiring harness connector into the protective
connector.
7. Store sensor and bracket in a safe place.
NOTE:All cruise control functions will be disabled when
the radar sensor is disconnected.
Radar sensor installation procedure (If equipped with
Adaptive Cruise Control [ACC]):
1. Disconnect the wiring harness connector from the
protective connector on the bumper beam.
2. Remove plug from radar sensor and install in protec-
tive connector.
3. Using the previously scribed marks, reinstall the radar
sensor and bracket using the two fasteners.
NOTE:Some alignment may be required upon fascia
installation to align sensor with fascia.
4. Install the wiring harness connector into the radar
sensor.
NOTE:If you receive a fault, see your authorized dealer
they may need to perform a sensor alignment.
Lower Front Fascia Installation (This will only work if
you have a helper. We suggest):
1. Starting at the center of the vehicle, engage a sufficient
number of tabs to support the weight of the lower
fascia (typically one or two tabs) into the upper fascia.
2. Working your way outward, engage the tabs into the
slots on one side of the vehicle.
460 STARTING AND OPERATING
Page 696 of 717

About Your Brakes........................472
ABS (Anti-Lock Brake System)................473
Adaptive Cruise Control (ACC) (Cruise Control) . . .192
Adding Engine Coolant (Antifreeze)............634
Adding Fuel.............................536
Additives, Fuel...........................530
Air bag . . . . . . . . . . . . . . . . . . . . . . . . . . . . . . . . .67
Air Bag
Advance Front Air Bag....................68
Air Bag Components.....................67
Air bag Operation.......................70
Air Bag Warning Light....................79
Enhanced Accident Response................78
Event Data Recorder (EDR).................82
Front Air Bag . . . . . . . . . . . . . . . . . . . . . . . . . . .67
If A Deployment Occurs...................77
Knee Impact Bolsters.....................71
Maintaining Your Air Bag System............81
Side Air Bags...........................72
Transporting Pets.......................107
Air bag Deployment........................67
Air bag Light.............................79
Air bag Maintenance........................81
Air Cleaner, Engine (Engine Air Cleaner Filter) . . . .610
Air Conditioner Maintenance.................616
Air Conditioning Filter.....................395
Air Conditioning, Operating Tips..............394
Air Conditioning Refrigerant.................616
Air Conditioning System....................392
Air Pressure, Tires.........................506
Air Suspension...........................450
Alarm
Arm The System........................19
Tamper Alert...........................21
Alarm, Panic.............................24
Alarm (Security Alarm)......................19
Alterations/Modifications, Vehicle...............9
Antifreeze (Engine Coolant)..................633
694 INDEX
Page:
< prev 1-8 9-16 17-24