Page 426 of 717
and START. To change the ignition positions without
starting the vehicle and use the accessories follow these
steps:
•Starting with the ignition in the OFF position,
•Push the ENGINE START/STOP button once to place
the ignition to the ACC position (DID will display
“ACC”),
•Push the ENGINE START/STOP button a second time
to place the ignition to the RUN position (DID will
display “ON/RUN”),
•Push the ENGINE START/STOP button a third time to
return the ignition to the OFF position (DID will
display “OFF”).
Extreme Cold Weather (Below –20°F Or−29°C)
To ensure reliable starting at these temperatures, use of
an externally powered electric engine block heater (avail-
able from your authorized dealer) is recommended.
If Engine Fails To Start
WARNING!
•Never pour fuel or other flammable liquid into the
throttle body air inlet opening in an attempt to start
the vehicle. This could result in flash fire causing
serious personal injury.
(Continued)
424 STARTING AND OPERATING
Page 427 of 717

WARNING!(Continued)
•Do not attempt to push or tow your vehicle to get it
started. Vehicles equipped with an automatic trans-
mission cannot be started this way. Unburned fuel
could enter the catalytic converter and once the
engine has started, ignite and damage the converter
and vehicle.
•If the vehicle has a discharged battery, booster
cables may be used to obtain a start from a booster
battery or the battery in another vehicle. This type
of start can be dangerous if done improperly. Refer
to “Jump Starting” in “What To Do In Emergen-
cies” for further information.
Clearing A Flooded Engine (Using ENGINE
START/STOP Button)
If the engine fails to start after you have followed the
“Normal Starting” or “Extreme Cold Weather#proce-
dures, it may be flooded. To clear any excess fuel:
1. Press and hold the brake pedal.
2. Press the accelerator pedal all the way to the floor and
hold it.
3. Push and release the ENGINE START/STOP button
once.
The starter motor will engage automatically, run for 10
seconds, and then disengage. Once this occurs, release
the accelerator pedal and the brake pedal, wait 10 to 15
seconds, then repeat the “Normal Starting” procedure.
5
STARTING AND OPERATING 425
Page 432 of 717

•The torque converter clutch may engage at lower
engine speeds and remain on longer.
•The overall driving performance will be more conser-
vative.
•Vehicles with Quadra-Lift™ air suspension will oper-
ate in#Aero#mode over a broader speed range. Refer
to#Quadra-Lift™#in#Starting and Operating#for
further information.
•Some ECO mode functions may be temporarily inhib-
ited based on temperature and other factors.
Active Noise Cancellation — Summit Models Only
Your vehicle is equipped with an Active Noise Cancella-
tion System. This system uses four microphones embed-
ded in the headliner to detect undesirable exhaust noise.
An onboard frequency generator creates counteracting
sound waves through the audio system to help keep the
vehicle quiet.
Eight–Speed Automatic Transmission
The electronic shift lever in this vehicle does not slide like
a conventional shifter. Instead, the shift lever is spring
loaded and moves forward and rearward, always return-
ing to the center position after each gear is selected. The
transmission gear (PRND) is displayed both on the shift
lever and in the Driver Information Display (DID). To
select a gear range, press the lock button on the shift lever
and move the lever rearward or forward. You must also
press the brake pedal to shift the transmission out of
PARK, or to shift from NEUTRAL into DRIVE or RE-
VERSE when the vehicle is stopped or moving at low
speeds (refer to “Brake/Transmission Shift Interlock Sys-
tem” in this section). To shift past multiple gear ranges at
once (such as PARK to DRIVE), move the lever past the
first (or second) detent. Select the DRIVE range for
normal driving.
430 STARTING AND OPERATING
Page 433 of 717

The electronically-controlled transmission provides a
precise shift schedule. The transmission electronics are
self-calibrating; therefore, the first few shifts on a new
vehicle may be somewhat abrupt. This is a normal
condition, and precision shifts will develop within a few
hundred miles (kilometers).
Only shift from DRIVE to PARK or REVERSE when the
accelerator pedal is released and the vehicle is stopped.
Be sure to keep your foot on the brake pedal when
shifting between these gears.
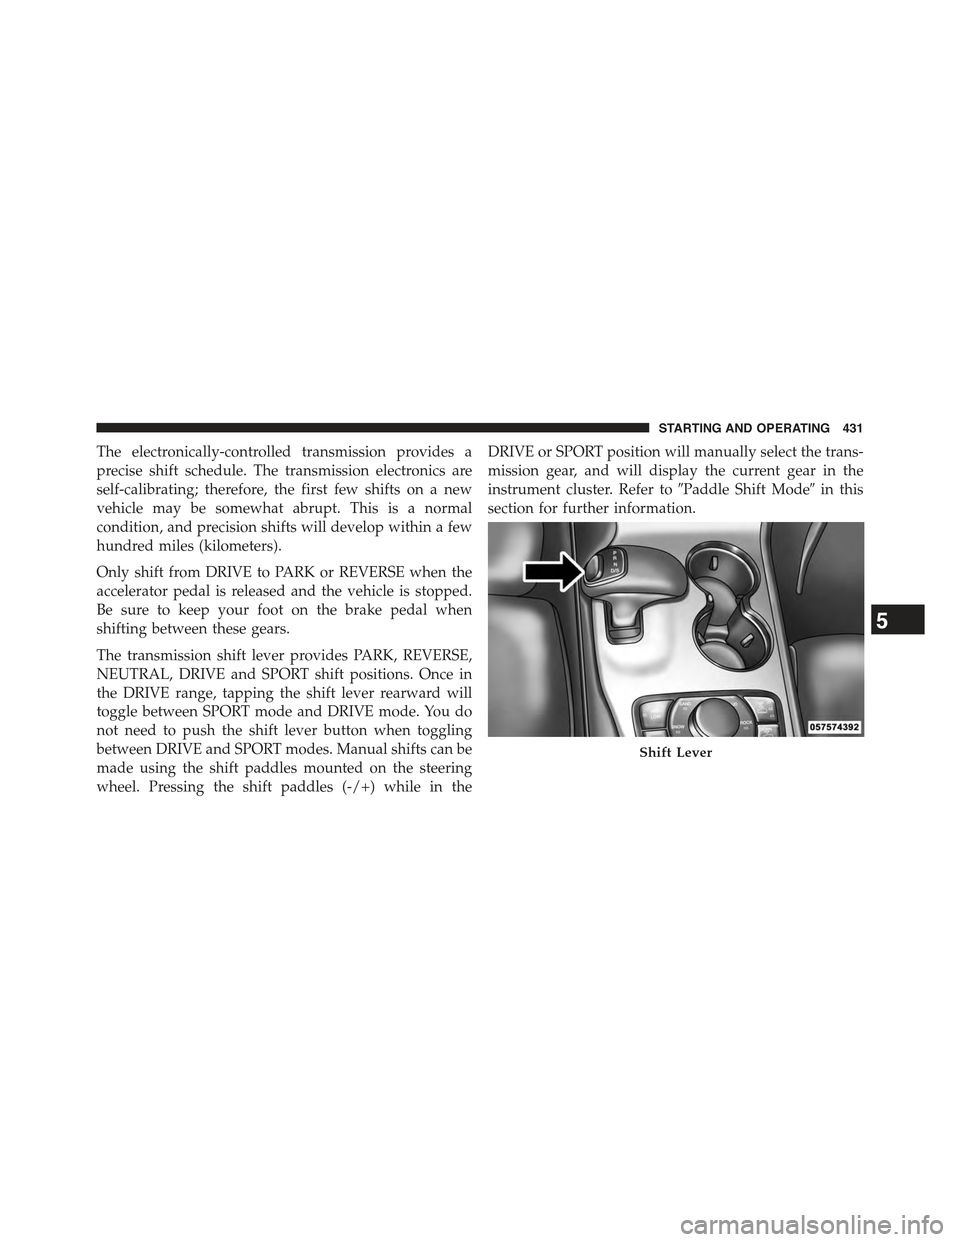
The transmission shift lever provides PARK, REVERSE,
NEUTRAL, DRIVE and SPORT shift positions. Once in
the DRIVE range, tapping the shift lever rearward will
toggle between SPORT mode and DRIVE mode. You do
not need to push the shift lever button when toggling
between DRIVE and SPORT modes. Manual shifts can be
made using the shift paddles mounted on the steering
wheel. Pressing the shift paddles (-/+) while in the
DRIVE or SPORT position will manually select the trans-
mission gear, and will display the current gear in the
instrument cluster. Refer to#Paddle Shift Mode#in this
section for further information.
Shift Lever
5
STARTING AND OPERATING 431
Page 436 of 717

WARNING!(Continued)
•Never leave children alone in a vehicle, or with
access to an unlocked vehicle. Allowing children to
be in a vehicle unattended is dangerous for a
number of reasons. A child or others could be
seriously or fatally injured. Children should be
warned not to touch the parking brake, brake pedal
or the shift lever.
•Do not leave the key fob in or near the vehicle (or
in a location accessible to children), and do not
leave the ignition in the ACC or ON/RUN position.
A child could operate power windows, other con-
trols, or move the vehicle.
CAUTION!
•DO NOT race the engine when shifting from
PARK or NEUTRAL into another gear range, as this
can damage the drivetrain.
•Before moving the shift lever out of PARK, you
must start the engine, and also press the brake
pedal. Otherwise, damage to the shift lever could
result.
The following indicators should be used to ensure that
you have engaged the transmission into the PARK posi-
tion:
•When shifting into PARK, press the lock button on the
shift lever and push the lever all the way forward until
it stops. When released, the lever will return to the
center position.
434 STARTING AND OPERATING
Page 446 of 717

NOTE:If shift conditions/interlocks are not met, or a
transfer case motor temperature protection condition
exists, a “For 4x4 Low Slow Below 3 mph (5 km/h) Put
Trans in “N” Press 4 Low” message will flash from the
Driver Information Display (DID). Refer to “Driver In-
formation Display (DID)” in “Understanding Your In-
strument Panel” for further information.
4WD LOW To 4WD HI
With the vehicle at speeds of 0 to 3 mph (0 to 5 km/h), the
ignition switch in the ON position or the engine running,
shift the transmission into NEUTRAL, and push the
“4WD LOW” button once on the transfer case switch. The
“4WD LOW” indicator light in the instrument cluster
will flash and go out when the shift is complete.
NOTE:
•If shift conditions/interlocks are not met, or a transfer
case motor temperature protection condition exists, a
“For 4x4 High Slow Below 3 mph (5 km/h) Put Trans
in N push 4 Low” message will flash from the Driver
Information Display (DID). Refer to “Driver Informa-
tion Display (DID)” in “Understanding Your Instru-
ment Panel” for further information.
•Shifting into or out of 4WD LOW is possible with the
vehicle completely stopped; however, difficulty may
occur due to the mating clutch teeth not being prop-
erly aligned. Several attempts may be required for
clutch teeth alignment and shift completion to occur.
The preferred method is with the vehicle rolling 0 to
3 mph (0 to 5 km/h). If the vehicle is moving faster
than 3 mph (5 km/h), the transfer case will not allow
the shift.
444 STARTING AND OPERATING
Page 447 of 717

Shifting Into NEUTRAL (N)
WARNING!
You or others could be injured or killed if you leave
the vehicle unattended with the power transfer unit
in the NEUTRAL (N) position without first fully
engaging the parking brake. The NEUTRAL (N)
position disengages both the front and rear drive
shafts from the powertrain and will allow the vehicle
to roll, even if the transmission is in PARK. The
parking brake should always be applied when the
driver is not in the vehicle.
1. Bring the vehicle to a complete stop, with the engine
running.
2. Press and hold the brake pedal.
3. Shift the transmission into NEUTRAL.
4. If vehicle is equipped with Quadra-Lift™ air suspen-
sion, ensure the vehicle is set to Normal Ride Height.
5. Using a ballpoint pen or similar object, push and hold
the recessed transfer case NEUTRAL (N) button (lo-
cated by the selector switch) for four seconds. The
light behind the NEUTRAL (N) symbol will blink,
indicating shift in progress. The light will stop blink-
ing (stay on solid) when the shift to NEUTRAL (N) is
complete. A “NEUTRAL” message will appear in the
Driver Information Display (DID). Refer to “Driver
Information Display (DID)” in “Understanding Your
Instrument Panel” for further information.
5
STARTING AND OPERATING 445
Page 448 of 717
6. After the shift is completed and the NEUTRAL (N)
light stays on, release the NEUTRAL (N) button.
7. Shift the transmission into REVERSE.
8. Release the brake pedal for five seconds and ensure
that there is no vehicle movement.
NOTE:If shift conditions/interlocks are not met, a “To
Tow Vehicle Safely, Read Neutral Shift Procedure in
Owners Manual” message will flash from the Driver
Information Display (DID). Refer to “Driver Information
Display (DID)” in “Understanding Your Instrument
Panel” for further information.
Shifting Out Of NEUTRAL (N)
Use the following procedure to prepare your vehicle for
normal usage.
1. Bring the vehicle to a complete stop.
2. Firmly apply the parking brake.
3. Start the engine.
4. Press and hold the brake pedal.
5. Shift the transmission into NEUTRAL (N).
NEUTRAL (N) Switch
446 STARTING AND OPERATING