Page 77 of 717
The SABICs and SABs (“Side Air Bags”) are designed to
activate in certain side impacts and certain rollover
events. The Occupant Restraint Controller (“ORC”) de-
termines whether the deployment of the Side Air Bags in
a particular side impact or rollover event is appropriate,
based on the severity and type of collision. Vehicle
damage by itself is not a good indicator of whether or not
Side Air Bags should have deployed.
Side Air Bags are a supplement to the seat belt restraint
system. Side Air Bags deploy in less time than it takes to
blink your eyes. Occupants, including children, who are
up against or very close to Side Air Bags can be seriously
injured or killed. Occupants, including children, should
never lean on or sleep against the door, side windows, or
area where the Side Air Bags inflate, even if they are in an
infant or child restraint.
Seat belts (and child restraints where appropriate) are
necessary for your protection in all collisions. They also
help keep you in position, away from inflating Side Air
Bags. To get the best protection from the Side Air Bags,
occupants must wear their seat belts properly and sit
upright with their backs against the seats. Children must
be properly restrained in a child restraint or booster seat
that is appropriate for the size of the child.
WARNING!
•Side Air Bags need room to inflate. Do not lean
against the door or window. Sit upright in the
center of the seat.
•Being too close to the Side Air Bags during deploy-
ment could cause you to be severely injured or
killed.
(Continued)
2
THINGS TO KNOW BEFORE STARTING YOUR VEHICLE 75
Page 85 of 717
Child Restraints
Everyone in your vehicle needs to be buckled up at all
times, including babies and children.
Every state in the United States, and every Canadian
province, requires that small children ride in proper
restraint systems. This is the law, and you can be pros-
ecuted for ignoring it.
Children 12 years or younger should ride properly
buckled up in a rear seat, if available. According to crash
statistics, children are safer when properly restrained in
the rear seats rather than in the front.
WARNING!
In a collision, an unrestrained child can become a
projectile inside the vehicle. The force required to
hold even an infant on your lap could become so
great that you could not hold the child, no matter
how strong you are. The child and others could be
badly injured. Any child riding in your vehicle
should be in a proper restraint for the child’s size.
2
THINGS TO KNOW BEFORE STARTING YOUR VEHICLE 83
Page 88 of 717
Infants And Child Restraints
Safety experts recommend that children ride rear-facing
in the vehicle until they are two years old or until they
reach either the height or weight limit of their rear-facing
child restraint. Two types of child restraints can be used
rear-facing: infant carriers and convertible child seats.
The infant carrier is only used rear-facing in the vehicle.
It is recommended for children from birth until they
reach the weight or height limit of the infant carrier.
Convertible child seats can be used either rear-facing or
forward-facing in the vehicle. Convertible child seats
often have a higher weight limit in the rear-facing
direction than infant carriers do, so they can be used
rear-facing by children who have outgrown their infant
carrier but are still less than at least two years old.
Children should remain rear-facing until they reach the
highest weight or height allowed by their convertible
child seat.
WARNING!
•Never place a rear-facing child restraint in front of
an air bag. A deploying passenger Advanced Front
Air Bag can cause death or serious injury to a child
12 years or younger, including a child in a rear-
facing child restraint.
•Only use a rear-facing child restraint in a vehicle
with a rear seat.
Older Children And Child Restraints
Children who are two years old or who have outgrown
their rear-facing convertible child seat can ride forward-
facing in the vehicle. Forward-facing child seats and
convertible child seats used in the forward-facing direc-
tion are for children who are over two years old or who
have outgrown the rear-facing weight or height limit of
their rear-facing convertible child seat. Children should
86 THINGS TO KNOW BEFORE STARTING YOUR VEHICLE
Page 90 of 717

WARNING!(Continued)
•When your child restraint is not in use, secure it in
the vehicle with the seat belt or LATCH anchor-
ages, or remove it from the vehicle. Do not leave it
loose in the vehicle. In a sudden stop or accident, it
could strike the occupants or seatbacks and cause
serious personal injury.
Children Too Large For Booster Seats
Children who are large enough to wear the shoulder belt
comfortably, and whose legs are long enough to bend
over the front of the seat when their back is against the
seatback, should use the seat belt in a rear seat. Use this
simple 5-step test to decide whether the child can use the
vehicle’s seat belt alone:
1. Can the child sit all the way back against the back of
the vehicle seat?
2. Do the child’s knees bend comfortably over the front
of the vehicle seat – while they are still sitting all the
way back?
3. Does the shoulder belt cross the child’s shoulder
between their neck and arm?
4. Is the lap part of the seat belt as low as possible,
touching the child’s thighs and not their stomach?
5. Can the child stay seated like this for the whole trip?
88 THINGS TO KNOW BEFORE STARTING YOUR VEHICLE
Page 93 of 717
Lower Anchors And Tethers For Children (LATCH)
Restraint System
Your vehicle is equipped with the child restraint anchor-
age system called LATCH, which stands for Lower
Anchors and Tethers for CHildren. The LATCH system
has three vehicle anchor points for installing LATCH-
equipped child seats. There are two lower anchorages
located at the back of the seat cushion where it meets the
seatback and one top tether anchorage located behind the
seating position. These anchorages are used to install
LATCH-equipped child seats without using the vehicle’s
seat belts. Some seating positions may have a top tether
anchorage but no lower anchorages. In these seating
positions, the seat belt must be used with the top tether
anchorage to install the child restraint. Please see the
following table for more information.
2
THINGS TO KNOW BEFORE STARTING YOUR VEHICLE 91
Page 98 of 717
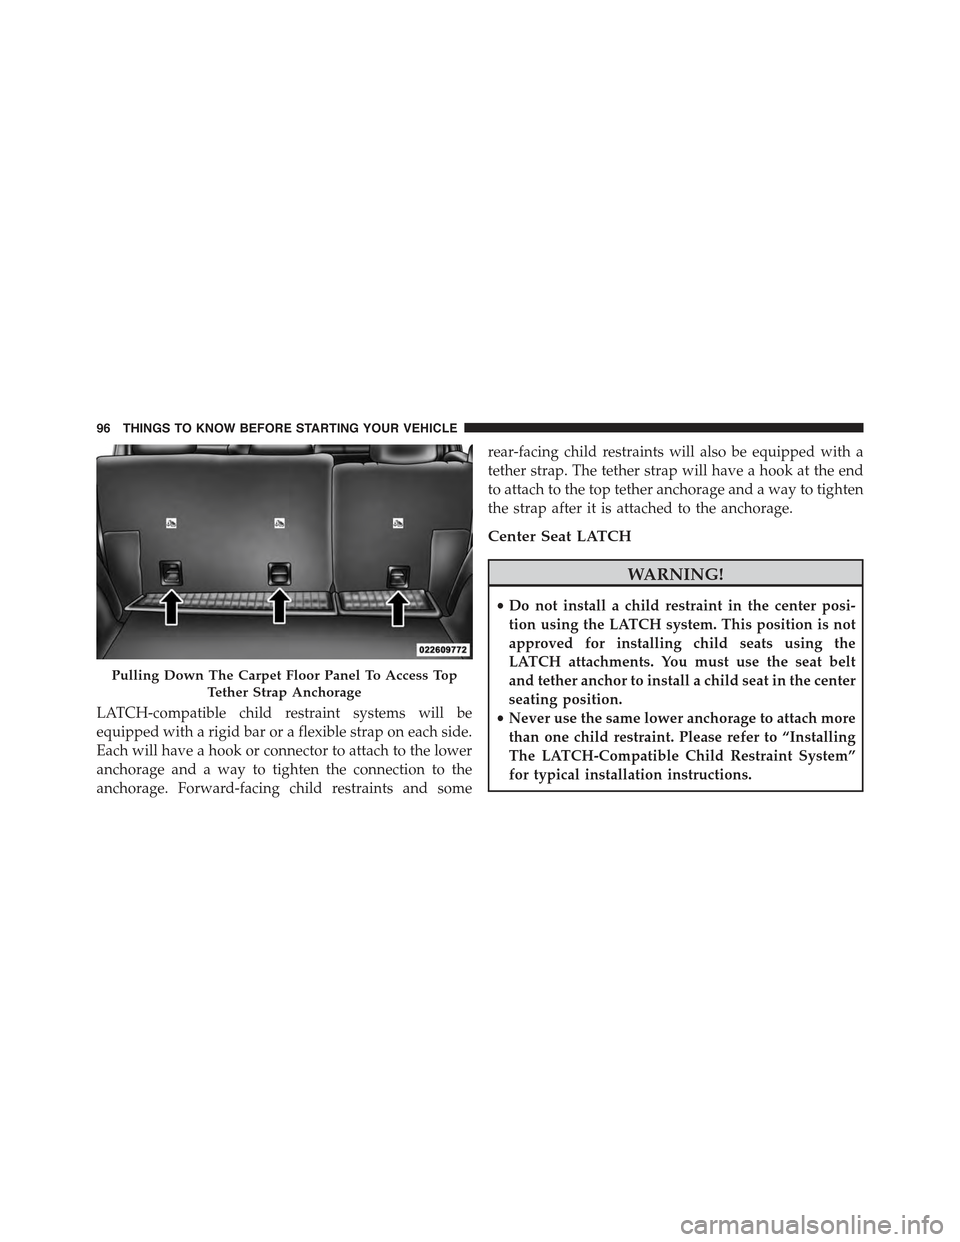
LATCH-compatible child restraint systems will be
equipped with a rigid bar or a flexible strap on each side.
Each will have a hook or connector to attach to the lower
anchorage and a way to tighten the connection to the
anchorage. Forward-facing child restraints and some
rear-facing child restraints will also be equipped with a
tether strap. The tether strap will have a hook at the end
to attach to the top tether anchorage and a way to tighten
the strap after it is attached to the anchorage.
Center Seat LATCH
WARNING!
•Do not install a child restraint in the center posi-
tion using the LATCH system. This position is not
approved for installing child seats using the
LATCH attachments. You must use the seat belt
and tether anchor to install a child seat in the center
seating position.
•Never use the same lower anchorage to attach more
than one child restraint. Please refer to “Installing
The LATCH-Compatible Child Restraint System”
for typical installation instructions.
Pulling Down The Carpet Floor Panel To Access Top
Tether Strap Anchorage
96 THINGS TO KNOW BEFORE STARTING YOUR VEHICLE
Page 100 of 717
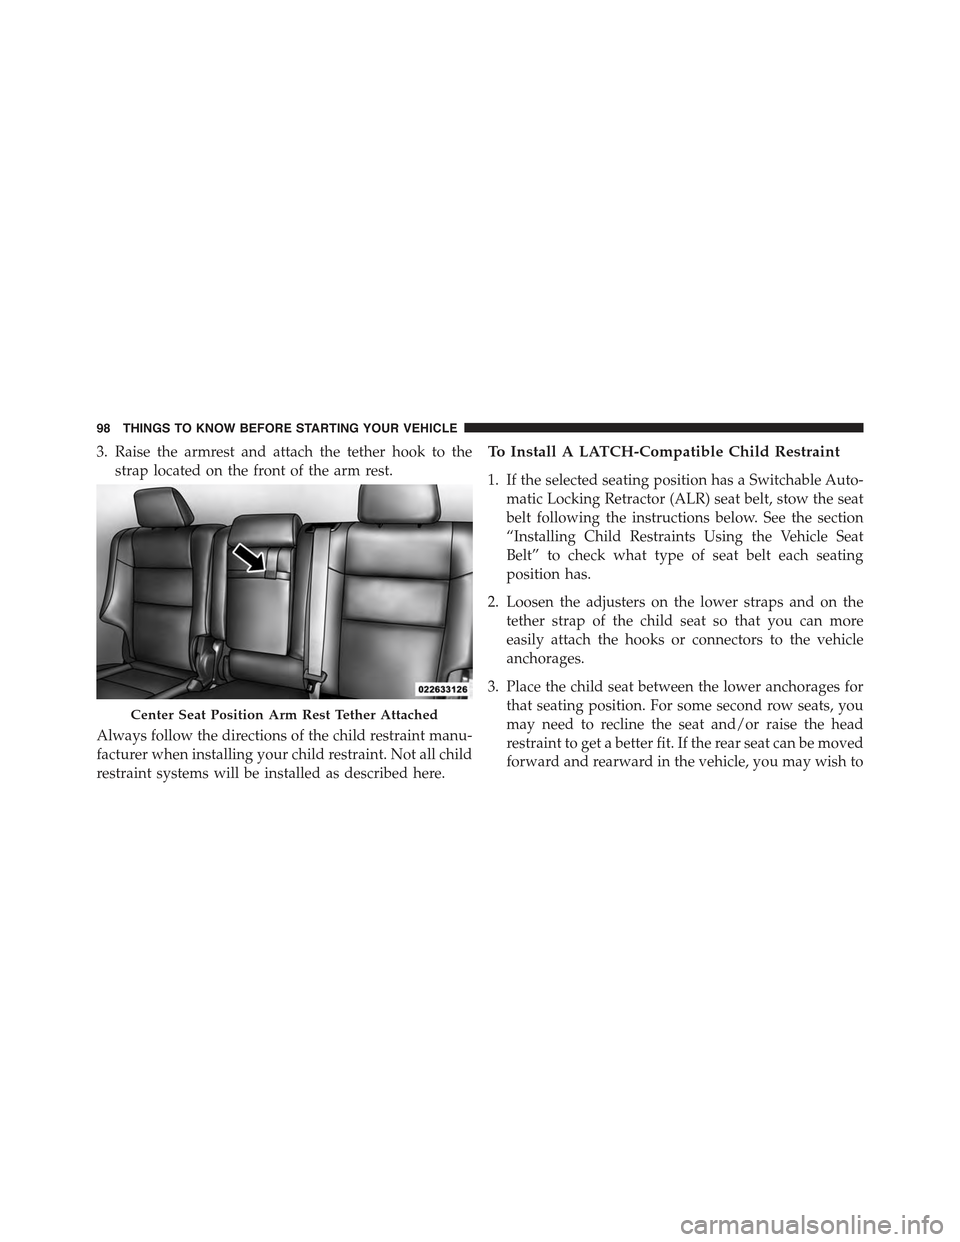
3. Raise the armrest and attach the tether hook to the
strap located on the front of the arm rest.
Always follow the directions of the child restraint manu-
facturer when installing your child restraint. Not all child
restraint systems will be installed as described here.
To Install A LATCH-Compatible Child Restraint
1. If the selected seating position has a Switchable Auto-
matic Locking Retractor (ALR) seat belt, stow the seat
belt following the instructions below. See the section
“Installing Child Restraints Using the Vehicle Seat
Belt” to check what type of seat belt each seating
position has.
2. Loosen the adjusters on the lower straps and on the
tether strap of the child seat so that you can more
easily attach the hooks or connectors to the vehicle
anchorages.
3. Place the child seat between the lower anchorages for
that seating position. For some second row seats, you
may need to recline the seat and/or raise the head
restraint to get a better fit. If the rear seat can be moved
forward and rearward in the vehicle, you may wish to
Center Seat Position Arm Rest Tether Attached
98 THINGS TO KNOW BEFORE STARTING YOUR VEHICLE
Page 105 of 717
Installing A Child Restraint With A Switchable
Automatic Locking Retractor (ALR)
1. Place the child seat in the center of the seating
position. For some second row seats, you may need to
recline the seat and/or raise the head restraint to get a
better fit. If the rear seat can be moved forward and
rearward in the vehicle, you may wish to move it to its
rear-most position to make room for the child seat.
You may also move the front seat forward to allow
more room for the child seat.
2. Pull enough of the seat belt webbing from the retractor
to pass it through the seat belt path of the child
restraint. Do not twist the belt webbing in the seat belt
path.
3. Slide the latch plate into the buckle until you hear a
“click”.
4. Pull on the webbing to make the lap portion tight
against the child seat.
5. To lock the seat belt, pull down on the shoulder part of
the seat belt until you have pulled all the seat belt
webbing out of the retractor. Then, allow the webbing
to retract back into the retractor. As the webbing
retracts, you will hear a clicking sound. This means the
seat belt is now in the Automatic Locking mode.
6. Try to pull the webbing out of the retractor. If it is
locked, you should not be able to pull out any web-
bing. If the retractor is not locked, repeat step 5.
7. Finally, pull up on any excess webbing to tighten the
lap portion around the child restraint while you push
the child restraint rearward and downward into the
vehicle seat.
2
THINGS TO KNOW BEFORE STARTING YOUR VEHICLE 103