Page 144 of 772

The BSM detection zone covers approximately one lane
width on both sides of the vehicle (12 ft or 3.8 m). The
zone length starts at the outside mirror and extends
approximately 10 ft (3 m) beyond the rear bumper of the
vehicle. The BSM system monitors the detection zones on
both sides of the vehicle when the vehicle speed reaches
approximately 6 mph (10 km/h) or higher and will alert
the driver of vehicles in these areas.
NOTE:
•The BSM system does NOT alert the driver about
rapidly approaching vehicles that are outside the de-
tection zones.
•The BSM system detection zone DOES NOT change if
your vehicle is towing a trailer. Therefore, visually
verify the adjacent lane is clear for both your vehicle
and trailer before making a lane change. If the trailer or
other object (i.e., bicycle, sports equipment) extends
beyond the side of your vehicle, this may result in the
BSM warning light remaining illuminated the entire
time the vehicle is in a forward gear.
The area on the rear fascia where the radar sensors are
located must remain free of snow, ice, and dirt/road
contamination so that the BSM system can function
properly. Do not block the area of the rear fascia where
the radar sensors are located with foreign objects (bum-
per stickers, bicycle racks, etc.)
The BSM system will provide a visual alert in the
appropriate side view mirror based on a detected object.
If the turn signal is then activated, and it corresponds to
an alert present on that side of the vehicle, an audible
chime will also be sounded. Whenever a turn signal and
detected object are present on the same side at the same
time, both the visual and audio alerts will be issued. In
addition to the audible alert the radio (if on) will also be
muted.
142 UNDERSTANDING THE FEATURES OF YOUR VEHICLE
Page 187 of 772

Remote Start Mode Inhibit— On vehicles equipped
with Remote Starting system, Rain Sensing wipers are
not operational when the vehicle is in the remote start
mode. Once the operator is in the vehicle and has placed
the ignition switch in the RUN position, rain sensing
wiper operation can resume, if it has been selected, and
no other inhibit conditions (mentioned previously) exist.
TILT/TELESCOPING STEERING COLUMN
This feature allows you to tilt the steering column
upward or downward. It also allows you to lengthen or
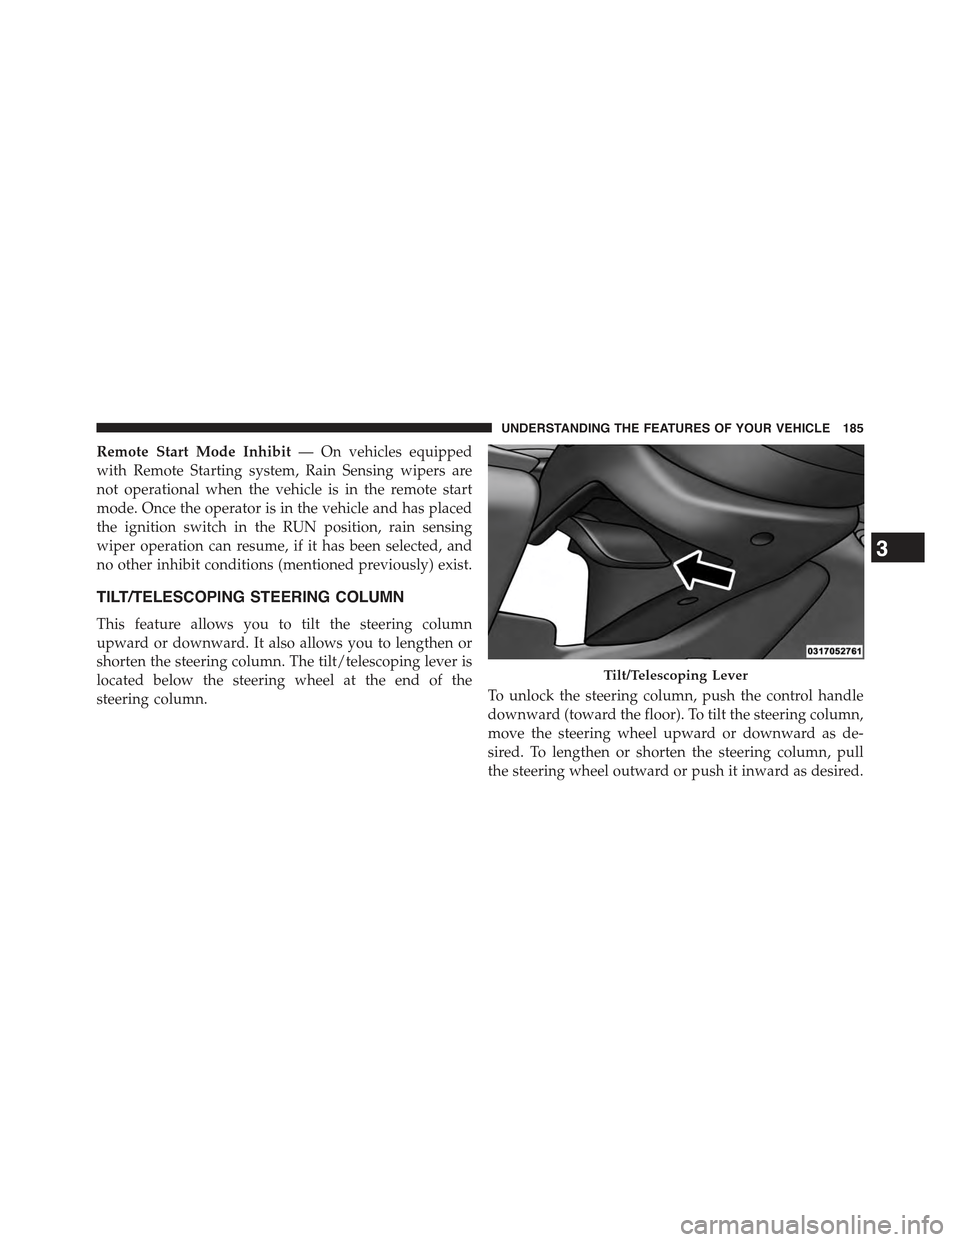
shorten the steering column. The tilt/telescoping lever is
located below the steering wheel at the end of the
steering column.To unlock the steering column, push the control handle
downward (toward the floor). To tilt the steering column,
move the steering wheel upward or downward as de-
sired. To lengthen or shorten the steering column, pull
the steering wheel outward or push it inward as desired.
Tilt/Telescoping Lever
3
UNDERSTANDING THE FEATURES OF YOUR VEHICLE 185
Page 308 of 772

CAUTION!
•Many accessories that can be plugged in draw
power from the vehicle’s battery, even when not in
use (i.e., cellular phones, etc.). Eventually, if
plugged in long enough, the vehicle’s battery will
discharge sufficiently to degrade battery life and/or
prevent the engine from starting.
•Accessories that draw higher power (i.e., coolers,
vacuum cleaners, lights, etc.) will degrade the bat-
tery even more quickly. Only use these intermit-
tently and with greater caution.
•After the use of high power draw accessories, or
long periods of the vehicle not being started (with
accessories still plugged in), the vehicle must be
driven a sufficient length of time to allow the
generator to recharge the vehicle’s battery.
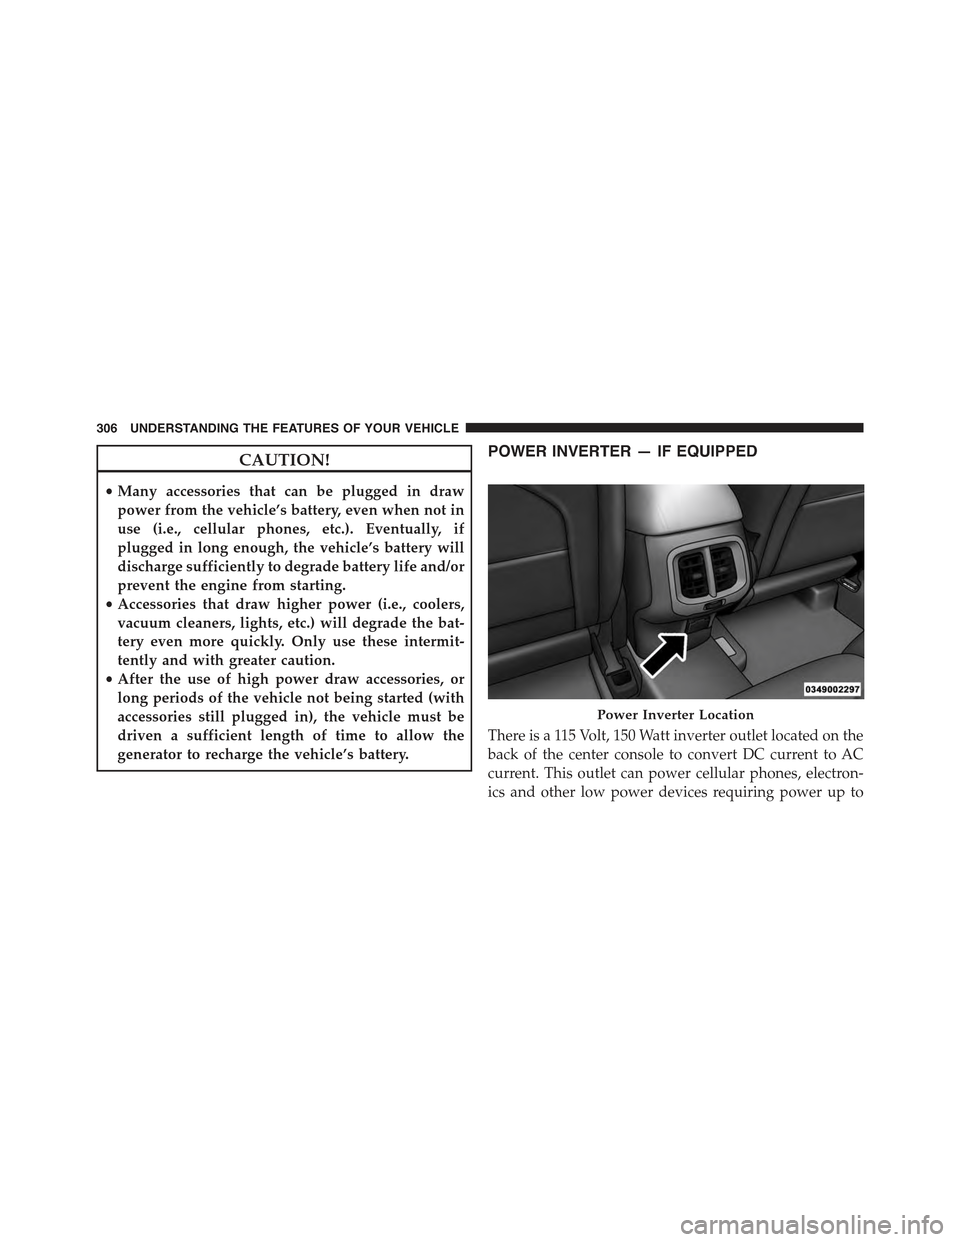
POWER INVERTER — IF EQUIPPED
There is a 115 Volt, 150 Watt inverter outlet located on the
back of the center console to convert DC current to AC
current. This outlet can power cellular phones, electron-
ics and other low power devices requiring power up to
Power Inverter Location
306 UNDERSTANDING THE FEATURES OF YOUR VEHICLE
Page 391 of 772

Voice
•Voice Response Length
When in this display, you may change the Voice Re-
sponse Length settings. To change the Voice Response
Length, press the “Voice Response Length” button on the
touchscreen and select from “Brief” or “Detailed.” Press
the back arrow button on the touchscreen to return to the
previous menu.
•Show Command List
When in this display, you may change the Show Com-
mand List settings. To change the Show Command List
settings, press the “Show Command List” button on the
touchscreen and select from “Always,” “With Help” or
“Never.” Press the back arrow button on the touchscreen
to return to the previous menu.
Clock & Date
After pressing the “Clock” button on the touchscreen the
following settings will be available:
•Set Time
When in this display, you may set the time and format
manually. Press the “Set Time” button then choose from
a 12 hour or 24 hour format. Press the corresponding
arrow above and below the current time to adjust, then
select AM or PM. Press the back arrow button on the
touchscreen to return to the previous menu.
•Set Date
When in this display, you may set the date manually.
Press the “Set Date” button then press the corresponding
arrows above and below the current date to adjust. Press
the back arrow button on the touchscreen to return to the
previous menu.
4
UNDERSTANDING YOUR INSTRUMENT PANEL 389
Page 407 of 772

•Navigation Turn-By-Turn Displayed In Cluster — If
Equipped
When this feature is selected, To make your selection,
press the “Navigation Turn-By-Turn Displayed In Clus-
ter” button on the touchscreen, until a check-mark ap-
pears next to the setting, showing that setting has been
selected. Press the back arrow button on the touchscreen
to return to the previous menu.
Voice
•Voice Response Length
When in this display, you may change the Voice Re-
sponse Length settings. To change the Voice Response
Length, press the “Brief” or “Detailed” button on the
touchscreen until a check-mark appears next to the
setting, showing that setting has been selected. Press the
back arrow button on the touchscreen to return to the
previous menu.
•Show Command List
When in this display, you may choose to Always, With
Help, or Never display the Teleprompter with possible
options while in a voice session. To change the Show
Command List settings, press the “Always,” “With
Help,” or “Never” button on the touchscreen until a
check-mark appears next to the setting, showing that
setting has been selected. Press the back arrow button on
the touchscreen to return to the previous menu.
Clock
After pressing the “Clock” button on the touchscreen the
following settings will be available:
•Sync Time With GPS
This feature will allow the radio to sync time with a GPS
signal. To change the Sync Time setting, press the “Sync
4
UNDERSTANDING YOUR INSTRUMENT PANEL 405