Page 16 of 384

Your vehicle at a glance
2 2
INTERIOR OVERVIEW
OFS013001N
1. Door lock/unlock button ....................4-19
2. Outside rearview mirror control
switch...................................................4-43
3. Central door lock switch....................4-20
4. Power window lock switch.................4-28
5. Power window switches ....................4-25
6. Hood release lever ............................4-29
7. Instrument panel illumination control
switch ................................................4-46
8. Heated steering wheel* ....................4-40
9. ESC OFF button ...............................5-29
10. Rear parking assist system OFF
switch*.............................................4-63
11. Active ECO switch ..........................5-38
12. AC inverter switch*........................4-105
13. Fuse box .........................................7-63
14. Brake pedal
15. Accelerator pedal
16. Steering wheel ..................................4-38
17. Fuel filler lid release lever .................4-31
18. Mirror .................................................4-41
* : if equipped
Page 56 of 384

Safety features of your vehicle
38 3
WARNING
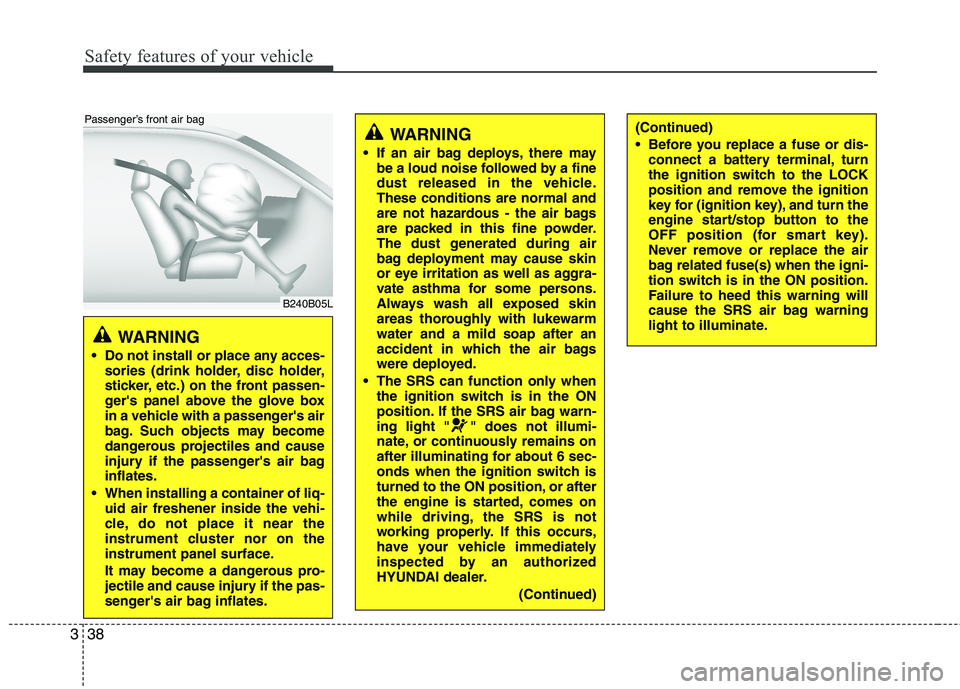
Do not install or place any acces-
sories (drink holder, disc holder,
sticker, etc.) on the front passen-
ger's panel above the glove box
in a vehicle with a passenger's air
bag. Such objects may become
dangerous projectiles and cause
injury if the passenger's air bag
inflates.
When installing a container of liq-
uid air freshener inside the vehi-
cle, do not place it near the
instrument cluster nor on the
instrument panel surface.
It may become a dangerous pro-
jectile and cause injury if the pas-
senger's air bag inflates.
B240B05L
Passenger’s front air bag
WARNING
If an air bag deploys, there may
be a loud noise followed by a fine
dust released in the vehicle.
These conditions are normal and
are not hazardous - the air bags
are packed in this fine powder.
The dust generated during air
bag deployment may cause skin
or eye irritation as well as aggra-
vate asthma for some persons.
Always wash all exposed skin
areas thoroughly with lukewarm
water and a mild soap after an
accident in which the air bags
were deployed.
The SRS can function only when
the ignition switch is in the ON
position. If the SRS air bag warn-
ing light " " does not illumi-
nate, or continuously remains on
after illuminating for about 6 sec-
onds when the ignition switch is
turned to the ON position, or after
the engine is started, comes on
while driving, the SRS is not
working properly. If this occurs,
have your vehicle immediately
inspected by an authorized
HYUNDAI dealer.
(Continued)
(Continued)
Before you replace a fuse or dis-
connect a battery terminal, turn
the ignition switch to the LOCK
position and remove the ignition
key for (ignition key), and turn the
engine start/stop button to the
OFF position (for smart key).
Never remove or replace the air
bag related fuse(s) when the igni-
tion switch is in the ON position.
Failure to heed this warning will
cause the SRS air bag warning
light to illuminate.
Page 339 of 384

763
Maintenance
FUSES
A vehicle’s electrical system is protected
from electrical overload damage by
fuses.
This vehicle has 2 fuse panels, one locat-
ed in the driver’s side panel bolster, the
other in the engine compartment.
If any of your vehicle’s lights, acces-
sories, or controls do not work, check the
appropriate circuit fuse. If a fuse has
blown, the element inside the fuse will be
melted.
If the electrical system does not work,
first check the driver’s side fuse panel.
Always replace a blown fuse with one of
the same rating.
Before replacing a blown fuse, discon-
nect the negative battery cable.
If the replacement fuse blows, this indi-
cates an electrical problem. Avoid using
the system involved and immediately
consult an authorized HYUNDAI dealer.
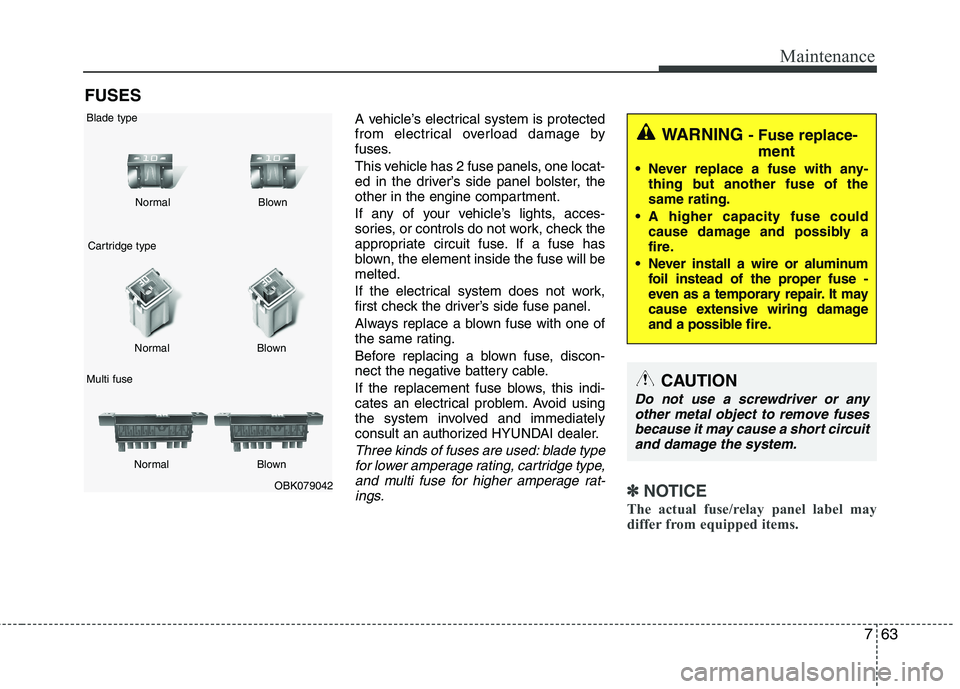
Three kinds of fuses are used: blade type
for lower amperage rating, cartridge type,
and multi fuse for higher amperage rat-
ings.
✽ ✽
NOTICE
The actual fuse/relay panel label may
differ from equipped items.
WARNING - Fuse replace-
ment
Never replace a fuse with any-
thing but another fuse of the
same rating.
A higher capacity fuse could
cause damage and possibly a
fire.
Never install a wire or aluminum
foil instead of the proper fuse -
even as a temporary repair. It may
cause extensive wiring damage
and a possible fire.
CAUTION
Do not use a screwdriver or any
other metal object to remove fuses
because it may cause a short circuit
and damage the system.
OBK079042 NormalNormal Blade type
Cartridge type
Multi fuseBlown
Blown
Normal Blown
Page 340 of 384

Maintenance
64 7
Instrument panel fuse replace-
ment
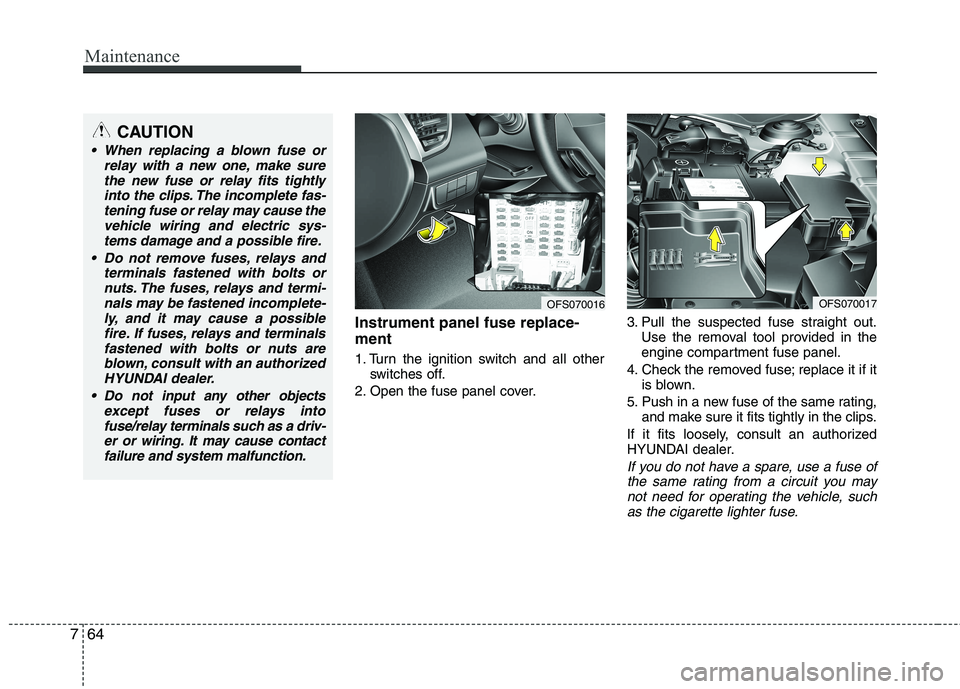
1. Turn the ignition switch and all other
switches off.
2. Open the fuse panel cover.3. Pull the suspected fuse straight out.
Use the removal tool provided in the
engine compartment fuse panel.
4. Check the removed fuse; replace it if it
is blown.
5. Push in a new fuse of the same rating,
and make sure it fits tightly in the clips.
If it fits loosely, consult an authorized
HYUNDAI dealer.
If you do not have a spare, use a fuse of
the same rating from a circuit you may
not need for operating the vehicle, such
as the cigarette lighter fuse.
OFS070016OFS070017
CAUTION
When replacing a blown fuse or
relay with a new one, make sure
the new fuse or relay fits tightly
into the clips. The incomplete fas-
tening fuse or relay may cause the
vehicle wiring and electric sys-
tems damage and a possible fire.
Do not remove fuses, relays and
terminals fastened with bolts or
nuts. The fuses, relays and termi-
nals may be fastened incomplete-
ly, and it may cause a possible
fire. If fuses, relays and terminals
fastened with bolts or nuts are
blown, consult with an authorized
HYUNDAI dealer.
Do not input any other objects
except fuses or relays into
fuse/relay terminals such as a driv-
er or wiring. It may cause contact
failure and system malfunction.
Page 341 of 384
765
Maintenance
If the headlights or other electrical com-
ponents do not work and the fuses are
OK, check the fuse panel in the engine
compartment. If a fuse is blown, it must
be replaced.
Fuse switch
Always, put the fuse switch at the ON
position.
If you move the switch to the OFF posi-
tion, some items must be reset and
transmitter (or smart key) may not work
properly.
Engine compartment fuse
replacement
1. Turn the ignition switch and all other
switches off.
2. Remove the fuse panel cover by
pressing the tab and pulling up.
OFS070016OFS070019
CAUTION
Always place the fuse switch in the
ON position while driving the vehicle.
Page 342 of 384
Maintenance
66 7
3. Check the removed fuse; replace it if it
is blown. To remove or insert the fuse,
use the fuse puller in the engine com-
partment fuse panel.
4. Push in a new fuse of the same rating,
and make sure it fits tightly in the clips.
If it fits loosely, consult an authorized
HYUNDAI dealer.
Multi fuse
If the multi fuse is blown, it must be
removed as follows:
1. Remove the fuse panel in the engine
compartment.
2. Remove the nuts shown in the picture
above.
3. Replace the fuse with a new one of the
same rating.
4. Reinstall in the reverse order of
removal.
✽ ✽
NOTICE
If the main or multi fuse is blown, con-
sult an authorized HYUNDAI dealer.
CAUTION
After checking the fuse panel in the
engine compartment, securely
install the fuse panel cover. If not,
electrical failures may occur from
water contact.
OBK072022
Page 343 of 384
767
Maintenance
Fuse/relay panel description
Inner fuse panel
Inside the fuse/relay panel covers, you
can find the fuse/relay label describing
fuse/relay name and capacity.
✽ ✽
NOTICE
Not all fuse panel descriptions in this
manual may be applicable to your vehi-
cle. It is accurate at the time of printing.
When you inspect the fuse panel in your
vehicle, refer to the fuse panel label.
OFS070022
OFS073050N
Page 344 of 384

Maintenance
68 7
Instrument panel (Driver’s side fuse panel)
Description Fuse rating Protected component
C/LIGHTER 15A Cigarette Lighter
DRL 10A Not Used
HTD STRG 15A Smart Key Control Module, A/C Inverter Module, Steering wheel heated
MDPS 10A EPS Control Module
A/BAG IND 10A Instrument Cluster (Air Bag IND.)
POWER OUTLET 15A Power Outlet
WIPER RR 15A Engine Room Fuse & Relay Box (Rear Wiper Relay), Rear Wiper Motor, Multifunction Switch
IG 2 10AEngine Room Fuse & Relay Box (Front Wiper Relay, Blower Relay), Crash Pad Switch,
Panaroma Sunroof Motor, A/C Control Module, IPS Control Module
WIPER FRT 25A Multifunction Switch, Front Wiper Motor, Engine Room Fuse & Relay Box (Front Wiper Relay)
CLUSTER 10A Instrument Cluster, Tire Pressure Monitoring Module, Sport Mode Switch, Shift Lever Indicator, MTS Module
AUDIO 10APower Outside Mirror Switch, AMP, A/V & Navigation Head Unit, MTS Module,
Smart Key Control Module, IPS Control Module
MULTIMEDIA 15A A/V & Navigation Head Unit, MTS Module
A/BAG 15A Passenger Occupant Detection Sensor, SRS Control Module, Telltale
IG 1 10ARear Parking Assist Sensor LH/RH, Rear Parking Assist Sensor Center LH/RH, Rear Parking Assist Buzzer,
IPS Control Module, Driver/Passenger Seat Warmer, Driver/Passenger Seat Warmer Switch, MTS Module,
A/C Control Module
1 SMART KEY 15A Smart Key Control Module
MEMORY 10A Data Link Connector, Instrument Cluster, A/C Control Module
A/CON 10A ECM
ABS 10A ESC Module, ESC Off Switch, E/R Fuse & Relay Box (HAC Relay, Multipurpose Check Connector)
DR LOCK 20ADoor Lock Relay, Door Unlock Relay, Flasher Sound Relay, Tail Gate Latch Relay,
Two Turn Unlock Relay, IPS Control Module
FOLD'G MIRR/
FOG LP RR15A Not Used