2015 HYUNDAI TUCSON ECO mode
[x] Cancel search: ECO modePage 112 of 653
3-26
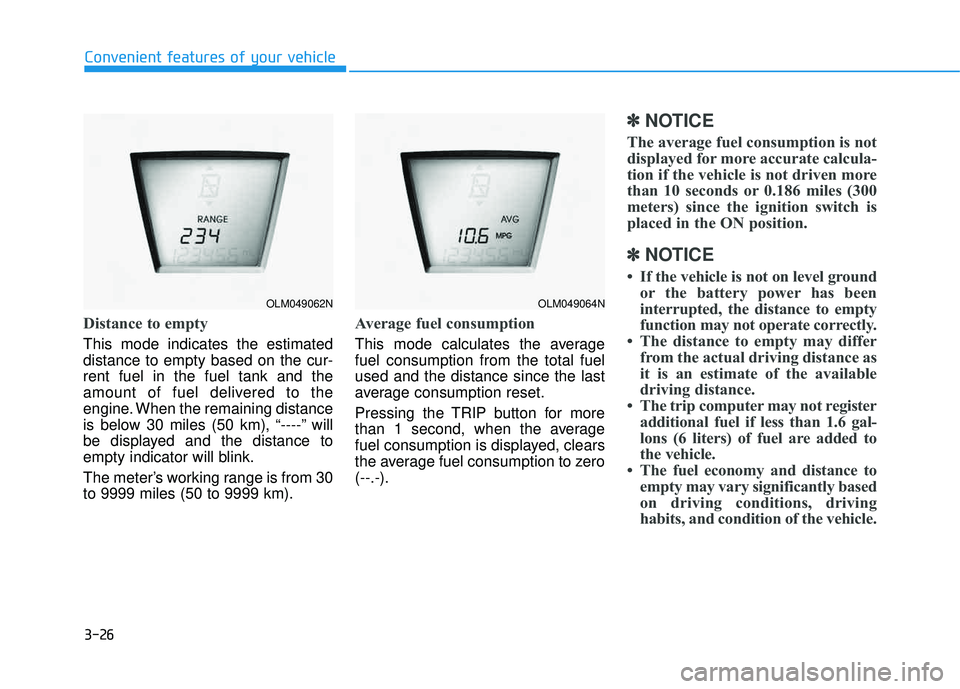
Distance to empty
This mode indicates the estimated distance to empty based on the cur-rent fuel in the fuel tank and the
amount of fuel delivered to the
engine. When the remaining distance
is below 30 miles (50 km), “----” will
be displayed and the distance to
empty indicator will blink.
The meter’s working range is from 30 to 9999 miles (50 to 9999 km).
Average fuel consumption
This mode calculates the average fuel consumption from the total fuelused and the distance since the last
average consumption reset.
Pressing the TRIP button for more
than 1 second, when the average
fuel consumption is displayed, clears
the average fuel consumption to zero(--.-).
✽✽NOTICE
The average fuel consumption is not
displayed for more accurate calcula-
tion if the vehicle is not driven more
than 10 seconds or 0.186 miles (300
meters) since the ignition switch is
placed in the ON position.
✽
✽ NOTICE
If the vehicle is not on level ground or the battery power has been
interrupted, the distance to empty
function may not operate correctly.
The distance to empty may differ from the actual driving distance as
it is an estimate of the available
driving distance.
The trip computer may not register additional fuel if less than 1.6 gal-
lons (6 liters) of fuel are added to
the vehicle.
The fuel economy and distance to empty may vary significantly based
on driving conditions, driving
habits, and condition of the vehicle.
Convenient features of your vehicle
OLM049062NOLM049064N
Page 113 of 653
3-27
Convenient features of your vehicle
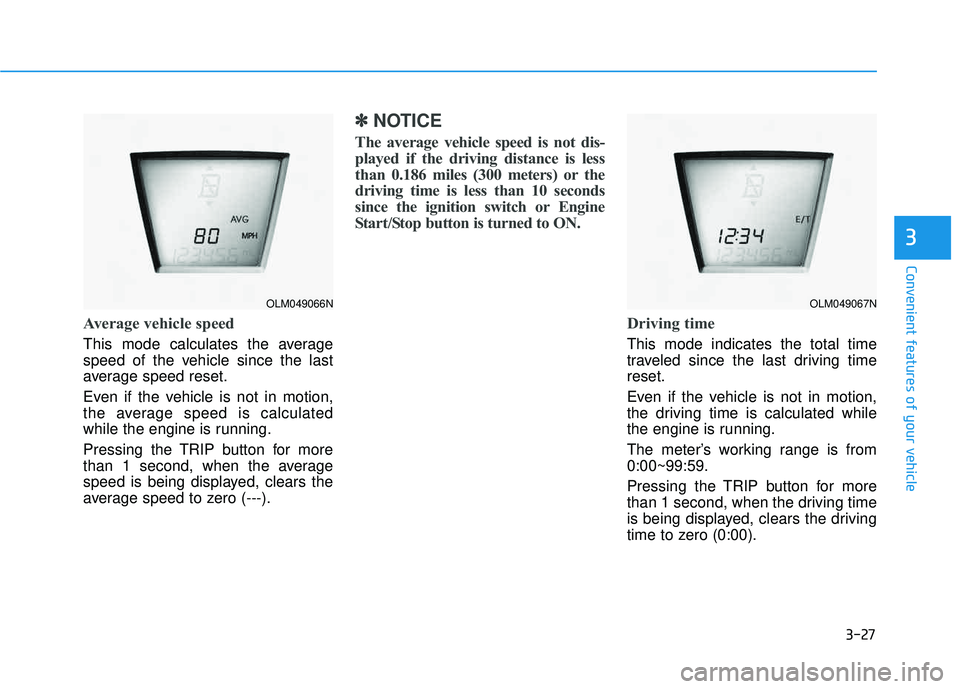
Average vehicle speed
This mode calculates the average
speed of the vehicle since the last
average speed reset.
Even if the vehicle is not in motion,
the average speed is calculated
while the engine is running.
Pressing the TRIP button for more
than 1 second, when the average
speed is being displayed, clears the
average speed to zero (---).
✽✽NOTICE
The average vehicle speed is not dis-
played if the driving distance is less
than 0.186 miles (300 meters) or the
driving time is less than 10 seconds
since the ignition switch or Engine
Start/Stop button is turned to ON.
Driving time
This mode indicates the total time
traveled since the last driving timereset.
Even if the vehicle is not in motion,
the driving time is calculated while
the engine is running.
The meter’s working range is from 0:00~99:59.
Pressing the TRIP button for more
than 1 second, when the driving time
is being displayed, clears the driving
time to zero (0:00).
3
OLM049066NOLM049067N
Page 124 of 653
3-38
Convenient features of your vehicle
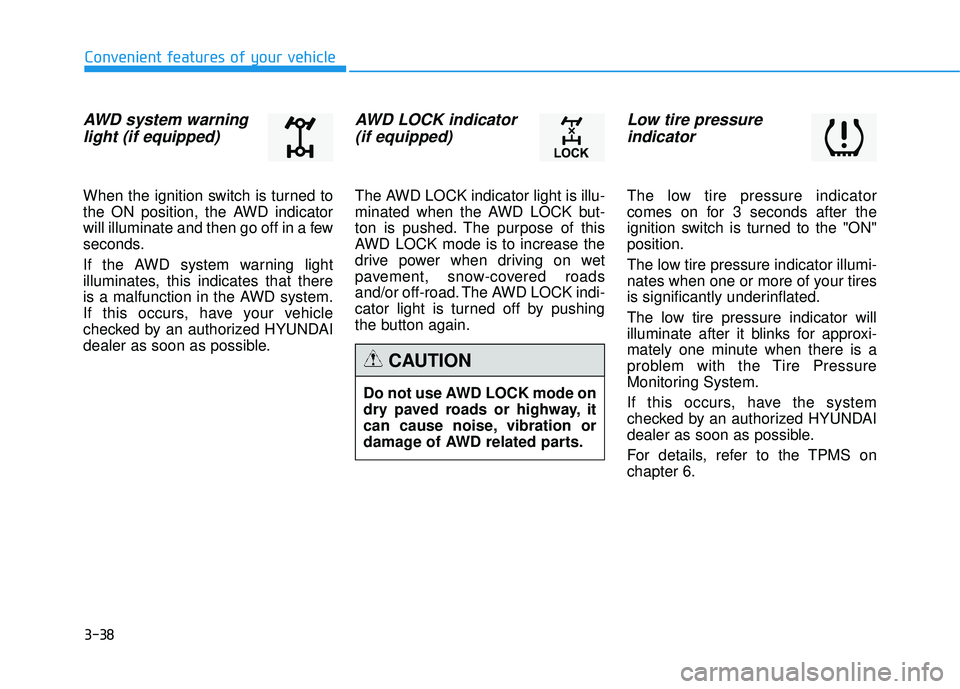
AWD system warninglight (if equipped)
When the ignition switch is turned to
the ON position, the AWD indicator
will illuminate and then go off in a few
seconds.
If the AWD system warning light
illuminates, this indicates that there
is a malfunction in the AWD system.
If this occurs, have your vehicle
checked by an authorized HYUNDAI
dealer as soon as possible.
AWD LOCK indicator (if equipped)
The AWD LOCK indicator light is illu-
minated when the AWD LOCK but-
ton is pushed. The purpose of this
AWD LOCK mode is to increase the
drive power when driving on wet
pavement, snow-covered roads
and/or off-road. The AWD LOCK indi-
cator light is turned off by pushing
the button again.
Low tire pressure indicator
The low tire pressure indicator
comes on for 3 seconds after the
ignition switch is turned to the "ON"position.
The low tire pressure indicator illumi-
nates when one or more of your tires
is significantly underinflated.
The low tire pressure indicator will
illuminate after it blinks for approxi-
mately one minute when there is a
problem with the Tire Pressure
Monitoring System.
If this occurs, have the system
checked by an authorized HYUNDAI
dealer as soon as possible.
For details, refer to the TPMS on chapter 6.
Do not use AWD LOCK mode on
dry paved roads or highway, it
can cause noise, vibration or
damage of AWD related parts.
CAUTION
Page 136 of 653
3-50
Convenient features of your vehicle
Programming HomeLink®
Please note the following:
When programming a garage door
opener, it is advised to park the
vehicle outside of the garage.
It is recommended that a new bat- tery be placed in the hand-held
transmitter of the device being pro-
grammed to HomeLink ®
for quicker
training and accurate transmission
of the radio-frequency signal.
Some vehicles may require the ignition switch to be placed in the
ACC (or "Accessories") position for
programming and/or operation ofHomeLink ®
.
In the event that there are still pro- gramming difficulties or questions
after following the programming
steps listed below, contactHomeLink ®
at: www.homelink.com
or by calling 1-800-355-3515.
Rolling code programming
Rolling code devices which are
"code-protected" and manufactured
after 1996 may be determined by the
following:
Reference the device owner's manual for verification.
The handheld transmitter appears to program the HomeLink ®
Universal Transceiver but does not
activate the device.
Press and hold the trained HomeLink button. The device has
the rolling code feature if the indi-
cator light flashes rapidly and then
turns solid after 2 seconds.
Before programming HomeLink
®
to a garage door opener or gate
operator, make sure people and
objects are out of the way of the
device to prevent potential harm
or damage. Do not use theHomeLink ®
with any garage door
opener that lacks the safety stop
and reverse features required by
U.S. federal safety standards
(this includes any garage door
opener model manufactured
before April 1, 1982). A garagedoor that cannot detect an object- signaling the door to stop and
reverse - does not meet current
U.S. federal safety standards.
Using a garage door opener
without these features increases
the risk of serious injury ordeath.WARNING
Page 139 of 653
3-53
Convenient features of your vehicle
3
Erasing HomeLink®
buttons
Individual buttons cannot be erased.
However, to erase all three pro-
grammed buttons:
1. Press and hold the two outer
HomeLink ®
buttons until the indi-
cator light begins to flash-after 20
seconds.
2. Release both buttons. Do not hold for longer than 30 seconds.
The Integrated HomeLink ®
Wireless
Control System is now in the training
(learn) mode and can be pro-
grammed at any time following the
appropriate steps in the Programming
chapters above. NVS ®
is a registered trademark and
Z-Nav™ is a trademark of the Gentex
Corporation, Zeeland, Michigan.HomeLink ®
is a registered trademark
owned by Johnson Controls,
Incorporated, Milwaukee, Wisconsin.
FCC ID: NZLZTVHL3
IC: 4112A-ZTVHL3 This device complies with Part 15 of the FCC Rules.
Operation is subject to the following
two conditions:
1. This device may not cause harm-
ful interference, and
2. This device must accept any inter- ference received, including inter-
ference that may cause undesired
operation.
Electric chromic mirror (ECM)
with HomeLink ®
system,
compass and Blue Link ®
(if equipped)
Your vehicle may be equipped with a
Gentex Automatic-Dimming Mirror
with a Z-Nav™ Electronic Compass
Display and an Integrated HomeLink ®
Wireless Control System. During
nighttime driving, this feature willautomatically detect and reduce
rearview mirror glare while the com-
pass indicates the direction the vehi-
cle is pointed. The HomeLink ®
Universal Transceiver allows you to
activate your garage door(s), electric
gate, home lighting, etc.
The transceiver has been testedand complies with FCC and
Industry Canada rules. Changes
or modifications not expressly
approved by the party responsi-
ble for compliance could voidthe user's authority to operate
the device.
WARNING
Page 143 of 653
3-57
Convenient features of your vehicle
3
Retain the original transmitter of the
RF device you are programming for
use in other vehicles as well as forfuture HomeLink®
programming. It is
also suggested that upon the sale of
the vehicle, the programmedHomeLink ®
buttons be erased for
security purposes.Programming HomeLink ®
Please note the following:
When programming a garage door
opener, it is advised to park the
vehicle outside of the garage.
It is recommended that a new bat- tery be placed in the hand-held
transmitter of the device being pro-
grammed to HomeLink ®
for quicker
training and accurate transmission
of the radio-frequency signal.
Some vehicles may require the ignition switch to be placed in the
ACC (or "Accessories") position for
programming and/or operation ofHomeLink ®
.
In the event that there are still pro- gramming difficulties or questions
after following the programming
steps listed below, contactHomeLink ®
at: www.homelink.com
or by calling 1-800-355-3515.
Before programming HomeLink
®
to a garage door opener or gate
operator, make sure people and
objects are out of the way of the
device to prevent potential harm
or damage. Do not use theHomeLink ®
with any garage door
opener that lacks the safety stop
and reverse features required by
U.S. federal safety standards
(this includes any garage door
opener model manufactured
before April 1, 1982). A garagedoor that cannot detect an object- signaling the door to stop and
reverse - does not meet current
U.S. federal safety standards.
Using a garage door opener
without these features increases
the risk of serious injury ordeath.WARNING
Page 146 of 653
3-60
Convenient features of your vehicle
Reprogramming a single HomeLink®
button
To program a device to HomeLink ®
using a HomeLink ®
button previously
trained, follow these steps:
1.Press and hold the desired HomeLink ®
button. DO NOT release
the button.
2.The indicator light will begin to flash after 20 seconds. Without releasing the HomeLink ®
button, proceed
with "Programming" step 2.
For questions or comments, contactHomeLink ®
at www
.homelink.comor
1-800-355-3515.
Erasing HomeLink®buttons
Individual buttons cannot be erased.
However, to erase all three pro-
grammed buttons:
1. Press and hold the two outer HomeLink ®
buttons until the indi-
cator light begins to flash after 10
seconds.
2. Release both buttons. Do not hold for longer than 20 seconds.
The Integrated HomeLink ®
Wireless
Control System is now in the training
(learn) mode and can be pro-
grammed at any time following the
appropriate steps in the
Programming chapters above. NVS
®
is a registered trademark and
Z-Nav™ is a trademark of the
Gentex Corporation, Zeeland,
Michigan. HomeLink ®
is a registered
trademark owned by Johnson
Controls, Incorporated, Milwaukee,Wisconsin.
Page 185 of 653
3-99
Convenient features of your vehicle
3
System operation
Ventilation
1. Set the mode to the position.
2. Set the air intake control to theoutside (fresh) air position.
3. Set the temperature control to the desired position.
4. Set the fan speed control to the desired speed.
Heating
1. Set the mode to the position.
2. Set the air intake control to theoutside (fresh) air position.
3. Set the temperature control to the desired position.
4. Set the fan speed control to the desired speed.
5. If dehumidified heating is desired, turn the air conditioning system on.
If the windshield fogs up, set the mode to the or position.
Operation Tips
To keep dust or unpleasant odorfrom entering the car through the
ventilation system, temporarily set
the air intake control to the recircu-
lated air position. Be sure to returnthe control to the fresh air positionwhen the unpleasant odor has
passed to keep fresh air in the
vehicle. This will help keep the driv-
er alert and comfortable.
Air for the heating/cooling system is drawn in through the grilles just
ahead of the windshield. Care
should be taken that the grille open-
ings are not blocked by leaves,
snow, ice or other obstructions.
To prevent the inside of the wind- shied from fogging, set the air intakecontrol to the fresh air position and
fan speed to the desired position,
turn on the air conditioning system,
and adjust the temperature control
to desired temperature.
Air conditioning
HYUNDAI Air Conditioning Systems
are filled with environmentally friendly
R-134a refrigerant.
1. Start the engine. Push the air con- ditioning button.
2. Set the mode to the position.
3. Set the air intake control to the out- side air or recirculated air position.
4. Adjust the fan speed control and temperature control to maintain
the desired comfort.
When maximum cooling is desired, set the temperature con-
trol to the extreme left position, setthe mode control to the MAX A/C
position, then set the fan speedcontrol to the highest speed.