Page 550 of 603
7-64
Maintenance
Instrument panel fuse panel
Fuse Name Fuse rating Protected Component
5 MODULE10A
Front Console Switch, Tire Pressure Monitoring Module, Lane Departure Warning Unit,
Smart Cruise Control Unit, Fuel Filler Door & Trunk Lid Switch, Sport Mode Switch,
Rear Parking Assist Sensor LH/RH, Rear Parking Assist Sensor, LH/RH (Center),
Blind Spot Detection Radar LH/RH
IG125APCB Block
WASHER15AMultifunction Switch (Wiper Low & Washer Switch)
POWER OUTLET20AFront Power Outlet
A/BAG15ASRS Control Module, Occupant Detection Sensor
START7.5A[Without Smart Key & Immobilzer] ICM Relay Box (Burglar Alarm Relay),
Immobilzer] ICM Relay Box (Burglar Alarm Relay), Transaxle Range Switch,
PCM (G4KJ/G4KH)
Page 555 of 603

7-69
7
Maintenance
L
LI
IG
G H
H T
T
B
B U
U L
LB
B S
S
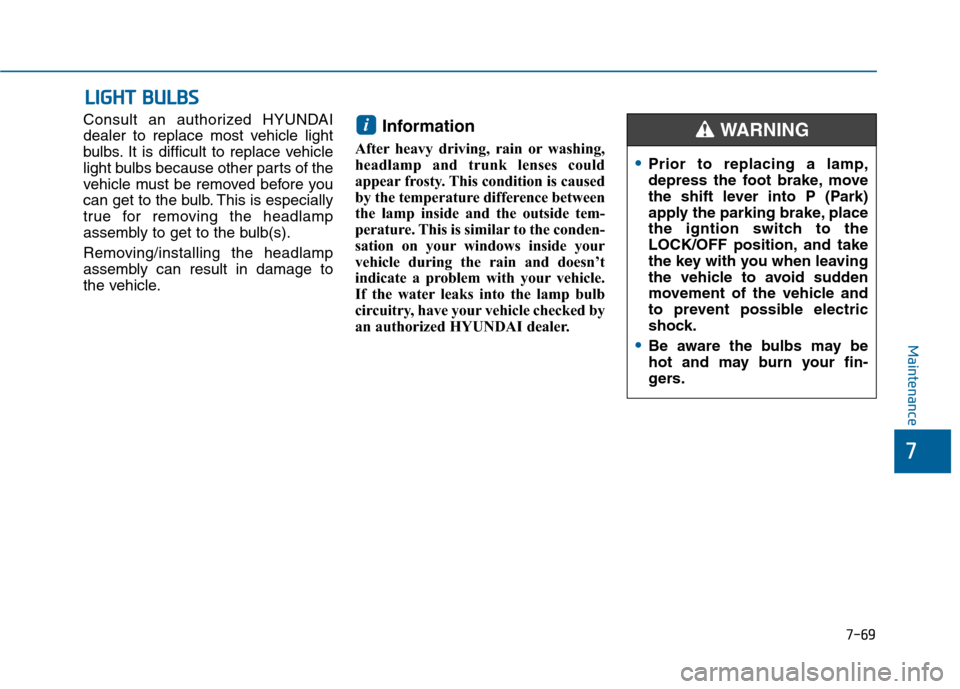
Consult an authorized HYUNDAI
dealer to replace most vehicle light
bulbs. It is difficult to replace vehicle
light bulbs because other parts of the
vehicle must be removed before you
can get to the bulb. This is especially
true for removing the headlamp
assembly to get to the bulb(s).
Removing/installing the headlamp
assembly can result in damage to
the vehicle.Information
After heavy driving, rain or washing,
headlamp and trunk lenses could
appear frosty. This condition is caused
by the temperature difference between
the lamp inside and the outside tem-
perature. This is similar to the conden-
sation on your windows inside your
vehicle during the rain and doesn’t
indicate a problem with your vehicle.
If the water leaks into the lamp bulb
circuitry, have your vehicle checked by
an authorized HYUNDAI dealer.
i
Prior to replacing a lamp,
depress the foot brake, move
the shift lever into P (Park)
apply the parking brake, place
the igntion switch to the
LOCK/OFF position, and take
the key with you when leaving
the vehicle to avoid sudden
movement of the vehicle and
to prevent possible electric
shock.
Be aware the bulbs may be
hot and may burn your fin-
gers.
WARNING
Page 562 of 603
7-76
Maintenance
Rear Combination Light Bulb
Replacement
Type A
(1) Stop/Tail lamp
(2) Turn signal lamp
(3) Tail lamp
(4) Back-up lamp
Stop/Tail lamp and Turn signal lamp
1. Open the trunk lid.
2. Remove the service cover by turn-ing the lock counterclockwise and
then pulling it out. 3. Remove the socket from the
assembly by turning the socket
counterclockwise until the tabs on
the socket align with the slots on
the assembly.
4. Remove the bulb from the socket by pressing it in and rotating it
counterclockwise until the tabs on
the bulb align with the slots in the
socket. Pull the bulb out of the
socket.
5. Insert a new bulb by inserting it into the socket and rotating it until
it locks into place.
OLF074063OLF074062
Stop/Tail lamp
Turn Signal lamp
OLF074060
Page 563 of 603
7-77
7
Maintenance
6. Install the socket in the assemblyby aligning the tabs on the socket
with the slots in the assembly.
Push the socket into the assembly
and turn the socket clockwise.
Backup lamp and Tail lamp
1. Open the trunk.
2. Loosen the retaining screw of thetrunk lid cover and then remove
the cover.
3. Disconnect the connector and then remove the nuts by turning
the nuts counterclockwise. 4. Remove the bulb by pulling it
straight out.
5. Insert a new bulb by inserting it into the socket and rotating it until
it locks into place.
6. Install the socket into the assembly by aligning the tabs on the socket
with the slots in the assembly.
Push the socket into the assembly
and turn the socket clockwise.
7. Reinstall the trunk lid cover by pushing in the screw.
OLF074065OLF074064
Back uplamp Tail lamp
Page 564 of 603
7-78
Maintenance
Type B
(1) Stop/Tail lamp
(2) Turn signal lamp
(3) Back-up lamp
Stop/Tail lamp
If the LED lamp does not operate,
have the vehicle checked by an
authorized HYUNDAI dealer.
Turn signal lamp
1.Open the trunk lid.
2.Remove the service cover by turn-ing the lock counterclockwise and
then pulling it out.
OLF074054
OLF074062
Page 565 of 603

7-79
7
Maintenance
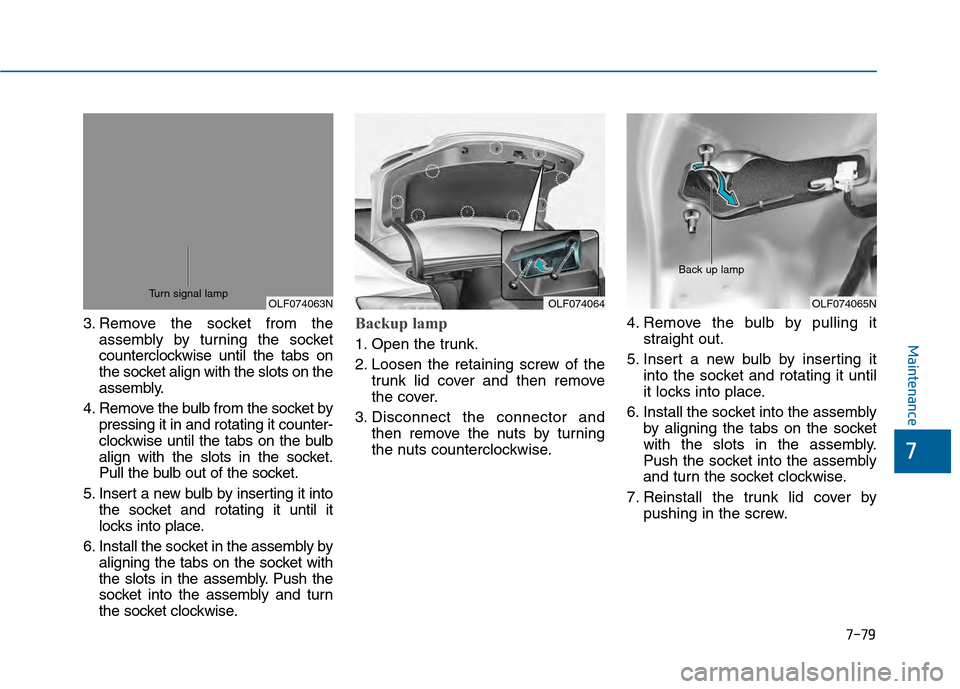
3. Remove the socket from theassembly by turning the socket
counterclockwise until the tabs on
the socket align with the slots on the
assembly.
4. Remove the bulb from the socket by pressing it in and rotating it counter-
clockwise until the tabs on the bulb
align with the slots in the socket.
Pull the bulb out of the socket.
5. Insert a new bulb by inserting it into the socket and rotating it until it
locks into place.
6. Install the socket in the assembly by aligning the tabs on the socket with
the slots in the assembly. Push the
socket into the assembly and turn
the socket clockwise.Backup lamp
1. Open the trunk.
2. Loosen the retaining screw of the trunk lid cover and then remove
the cover.
3. Disconnect the connector and then remove the nuts by turning
the nuts counterclockwise. 4. Remove the bulb by pulling it
straight out.
5. Insert a new bulb by inserting it into the socket and rotating it until
it locks into place.
6. Install the socket into the assembly by aligning the tabs on the socket
with the slots in the assembly.
Push the socket into the assembly
and turn the socket clockwise.
7. Reinstall the trunk lid cover by pushing in the screw.
OLF074064OLF074063NOLF074065N
Back up lampTurn signal lamp
Page 567 of 603
7-81
7
Maintenance
1. Using a flat-head screwdriver,gently pry the lens from the interi-
or light housing.
2. Remove the bulb by pulling it straight out.
3. Install a new bulb in the socket.
4. Align the lens tabs with the interior light housing notches and snap
the lens into place.
If the lamps do not operating, have
the vehicle checked by an authorized
HYUNDAI dealer.
Use care not to dirty or damage
lenses, lens tabs, and plastic
housings.
NOTICE
■ Map lamp - without sunroof
OLF074081N
OLF074082N
■Vanity mirror lamp
■Trunk room lamp
OLF074069
OLF074056
■ Room lamp - without sunroof
Map lamp, Room lamp, Vanity mirror lamp and Luggage room lamp
Page 598 of 603

I-7
Instrument cluster ...........................................................3-63Automatic transmission shift indicator ......................3-69
Dual clutch transmission shift indicator.....................3-69
Gauges ........................................................................\
3-66
Instrument panel illumination ....................................3-65
LCD display control ...................................................3-66
Instrument panel fuse......................................................7-58
Instrument panel overview ...............................................1-5
Interior care .....................................................................7-8\
7
Interior features .............................................................3-152 Clock ........................................................................\
3-155
Clothes hanger ..........................................................3-156
Cup holder ................................................................3-152
Floor mat anchor(s) ..................................................3-157
Luggage net holder ...................................................3-158
Power outlet..............................................................3-153
Side curtain...............................................................3-158
Sunvisor ....................................................................3-15\
3
Interior lamp AUTO cut................................................3-114
Interior lights .................................................................3-116 Door courtesy lamp ..................................................3-116
Glove box lamp ........................................................3-117
Interior lamp AUTO cut ...........................................3-114
Map lamp ..................................................................3-114
Room lamp ...............................................................3-115
Trunk room lamp ......................................................3-116
Vanity mirror lamp ...................................................3-117
Interior overview...............................................................1-4 Jack and tools..................................................................6-15
Jack label........................................................................\
.6-22
Jump starting .....................................................................6-4\
Keys
Remote key...................................................................3-4
Smart key......................................................................3-\
8
Label Air bag warning labels ...............................................2-68
Jack label ....................................................................6-22\
Refrigerant label .........................................................8-10
Tire loading information label....................................5-92
Tire sidewall labeling .................................................7-47
Tire specification and pressure label ..........................8-10
Vehicle certification label .............................................8-9
Lane departure warning system (LDWS) .......................5-69
LCD display ....................................................................3-71\
A/V mode ...................................................................3-73
Information mode .......................................................3-74
LCD modes ................................................................3-71
I
Index
J
K
L