Page 25 of 603

1-4
Your vehicle at a glance
I
IN
N T
TE
ER
R I
IO
O R
R
O
O V
VE
ER
R V
V I
IE
E W
W
1. Door lock/unlock button ....................3-15
2. Driver position memory system ........3-20
3. Outside rearview mirror control
switch ................................................3-42
4. Central door lock switch ....................3-16
5. Power window switches ....................3-45
6. Power window lock switch ................3-47
7. Hood release lever ............................3-52
8. Instrument panel illumination control switch ....................................3-65
9. Blind spot detection system button* ....5-75
10. Lane departure warning system button* ................................................5-69
11. Fuel filler door opener button ..........3-59
12. Trunk release button ........................3-53
13. ESC OFF button ..............................5-43
14. Fuse box ..........................................7-57
15. Steering wheel ................................3-22
16. Steering wheel tilt/telescope lever ......3-23
17. Seat ..................................................2-4
18. Brake pedal ....................................5-28
19. Accelerator pedal
* : if equipped
OLF014003NThe actual shape may differ from the illustration.
Page 115 of 603

3-20
Convenient features of your vehicle
The Driver Position Memory System
is provided to store and recall the fol-
lowing memory settings with a sim-
ple button operation.
- Driver's seat position
- Outside rearview mirror position
- Instrument panel illumination intensity
If the battery is disconnected, the
position memory will be lost and the
driving positions must be stored in
the system again.
If the Driver Position Memory
System does not operate normally,
have the system checked by an
authorized HYUNDAI dealer.
Storing Positions into Memory
1. Check that the shift lever is in P (Park) while the ignition switch is
in the ON position.
2. Adjust the driver's seat position, outside rearview mirror position
and instrument panel illumination
intensity to positions comfortable
for the driver.
3. Press the SET button. The system will beep once and notify you
"Press button to save settings"on
the LCD display.
4. Press one of the memory buttons (1 or 2) within 5 seconds. The sys-
tem will beep twice when the mem-
ory has been successfully stored.
5.
"Driver 1 (or 2) settings saved" will
appear on the LCD display.
D D R
RI
IV
V E
ER
R
P
P O
O S
SI
IT
T I
IO
O N
N
M
M E
EM
M O
OR
RY
Y
S
S Y
Y S
ST
T E
EM
M
(
( I
IF
F
E
E Q
Q U
UI
IP
P P
PE
ED
D )
)
OLF044013
Never attempt to operate the driv-
er position memory system while
the vehicle is moving.
This could result in loss of con-
trol, and an accident causing
death, serious injury, or property
damage.
WARNING
OLF044403N/OLF044404N
Page 116 of 603

3-21
Convenient features of your vehicle
3
Recalling positions from memory
1. Check that the shift lever is in P(Park) while the ignition switch is
in the ON position.
2. Press the desired memory button (1 or 2). The system will beep once,
and then the driver's seat position,
outside rearview mirror position
and instrument panel illumination
intensity will automatically adjust to
the stored positions.
3.
"Driver 1(or 2) settings is applied" will
appear on the LCD display. While recalling the "1" memory
position, pressing the SET or 1
button temporarily stops the
adjustment of the recalled memo-
ry position. Pressing the 2 button
recalls the "2" memory position.
While recalling the "2" memory position, pressing the SET or 2
button temporarily stops the
adjustment of the recalled memo-
ry position. Pressing the 1 button
recalls the "1" memory position.
While recalling the stored posi- tions, pressing one of the con-
trol buttons for the driver's seat,
outside rearview mirror or
instrument panel illumination
will cause the movement of that
component to stop and move in
the direction that the control
button is pressed.
Easy Access Function
When exiting the vehicle the driver’s
seat will move rearward when the
engine is turned off and the shift lever
in P (Park).
When entering the vehicle the dri-
ver’s seat will move forward when the
ignition switch is placed to the ACC
position.
You can activate or deactivate the
Easy Access Function from the User
Settings Mode on the LCD display.
For more information, refer to the
"LCD Display" section in this
chapter.
NOTICE
OLF044401N/OLF044402N
Page 135 of 603

3-40
Convenient features of your vehicle
Erasing HomeLink®buttons
Individual buttons cannot be erased.
However, to erase all three pro-
grammed buttons:
1. Press and hold the two outerHomeLink
®buttons until the indi-
cator light begins to flash-after 20
seconds.
2. Release both buttons. Do not hold for longer than 30 seconds.
The Integrated HomeLink
®Wireless
Control System is now in the training
(learn) mode and can be pro-
grammed at any time following the
appropriate steps in the Programming
chapters above.
NVS
®is a registered trademark and
Z-Nav™ is a trademark of the Gentex
Corporation, Zeeland, Michigan.
HomeLink
®is a registered trademark
owned by Johnson Controls,
Incorporated, Milwaukee, Wisconsin.
FCC ID: NZLZTVHL3
IC: 4112A-ZTVHL3
Information
This device complies with Part 15 of
the FCC Rules.
Operation is subject to the following
three conditions:
1. This device may not cause harmful interference, and
2. This device must accept any interfer- ence received, including interference
that may cause undesired operation.
3. The transceiver has been tested and complies with FCC and Industry
Canada rules. Changes or modifica-
tions not expressly approved by the
party responsible for compliance
could void the user's authority to
operate the device.
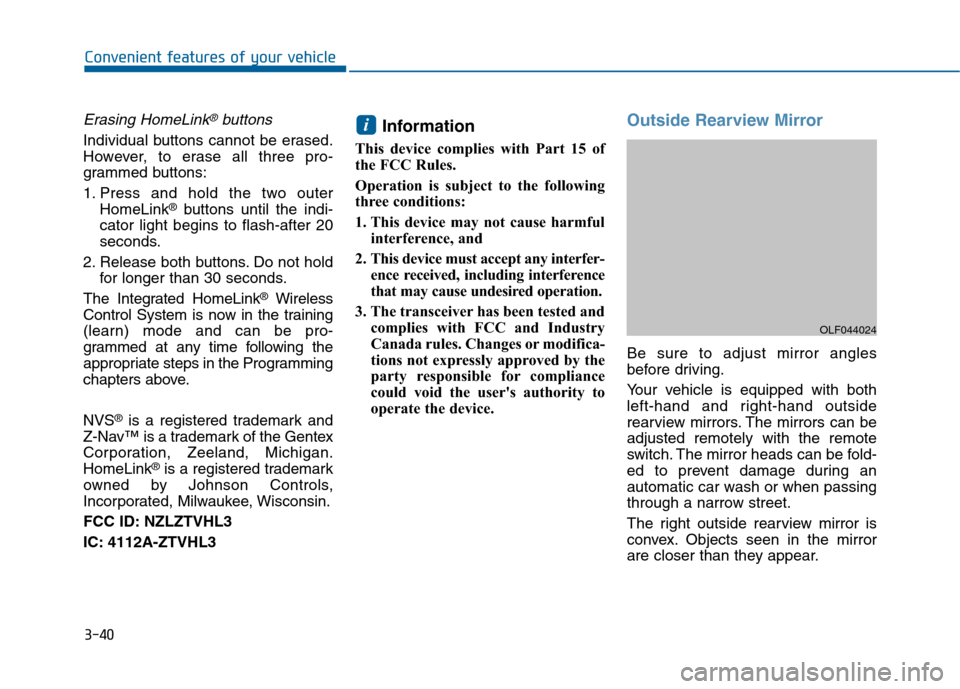
Outside Rearview Mirror
Be sure to adjust mirror angles
before driving.
Your vehicle is equipped with both
left-hand and right-hand outside
rearview mirrors. The mirrors can be
adjusted remotely with the remote
switch. The mirror heads can be fold-
ed to prevent damage during an
automatic car wash or when passing
through a narrow street.
The right outside rearview mirror is
convex. Objects seen in the mirror
are closer than they appear.
i
OLF044024
Page 137 of 603
3-42
Convenient features of your vehicle
Outside rearview mirror control
Adjusting the rearview mirrors:
1. Move the lever (1) towards theL(Left) or R(Right) to select the
rearview mirror you would like to
adjust.
2. Use the mirror adjustment control switch to position the selected mir-
ror up, down, left or right.
3. After adjustment, place the lever (1) in the center to prevent inad-
vertent adjustment. The mirrors stop moving when
they reach the maximum adjust-
ing angles, but the motor contin-
ues to operate while the switch
is pressed. Do not press the
switch longer than necessary,
the motor may be damaged.
Do not attempt to adjust the out- side rearview mirror by hand or
the motor may be damaged.
Folding the outside rearviewmirror
To fold the outside rearview mirror,
grasp the housing of the mirror and
then fold it toward the rear of the
vehicle.
NOTICE
OLF044025N
OLF044026
Page 138 of 603
3-43
Convenient features of your vehicle
3
Reverse Parking Aid Function
When you move the shift lever to the
R (Reverse) position, the outside
rearview mirror(s) will rotate down-
wards to aid with driving in reverse.
The position of the outside rearview
mirror switch (1) determines whether
or not the mirrors will move:
Left/Right :When either the L (Left) or
R (Right) switch is select-
ed, both outside rearview
mirrors will move.
Neutral : When neither switch is select- ed, the outside rearview mir-
rors will not move. The outside rearview mirrors will
automatically revert to their original
positions if any of the following occur:
The ignition switch is placed to
either the LOCK/OFF position or
the ACC position.
The shift lever is moved to any position except R (Reverse).
The remote control outside rearview mirror switch is not selected.
OLF044014N
Page 201 of 603
3-106
Convenient features of your vehicle
Do not cover or spill anything on the sensor (1) located in front of
the rearview mirror.
Do not clean the sensor using a window cleaner, the cleanser may
leave a light film which could
interfere with sensor operation.
If your vehicle has window tint or other types of metallic coat-
ing on the front windshield, the
AUTO light system may not work
properly.
Parking lamp position ( )
The parking lamp, license plate lamp
and instrument panel lamp are turned
ON.
Headlamp position ( )
The headlamp, parking lamp, license
plate lamp and instrument panel lamp
are turned ON.
Information
The ignition switch must be in the ON
position to turn on the headlamp.
i
NOTICE
OLF044086NOLF044087N
Page 219 of 603

3-124
Convenient features of your vehicle
D
DE
EF
FR
R O
O S
ST
T E
ER
R
To prevent damage to the conduc-
tors bonded to the inside surface
of the rear window, never use
sharp instruments or window
cleaners containing abrasives to
clean the window.
If you want to defrost and defog
the front windshield, refer to the
"Windshield Defrosting and
Defogging" section in this chapter.
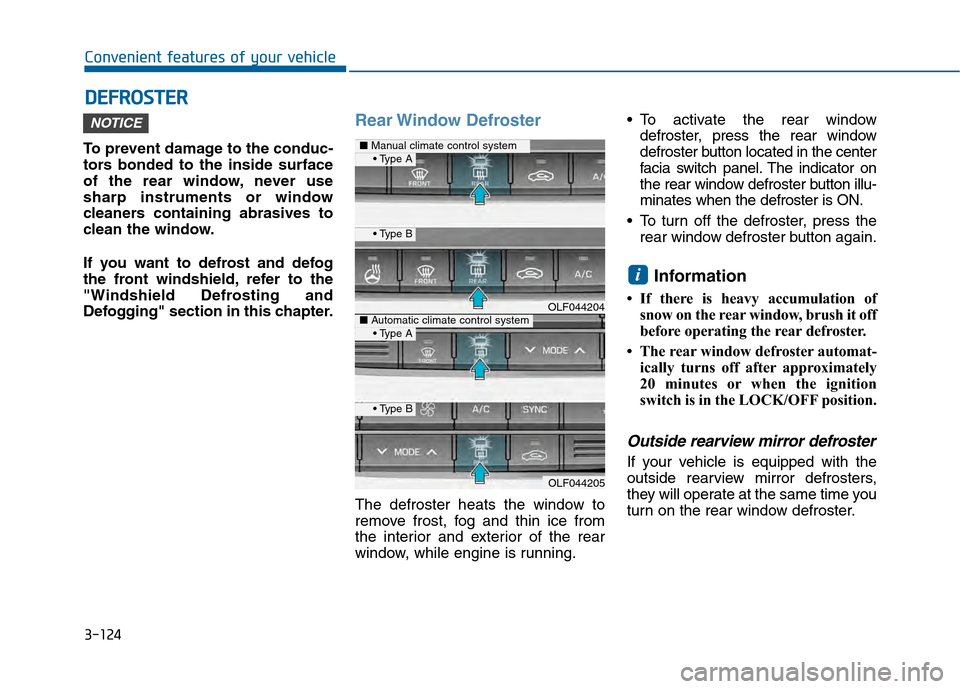
Rear Window Defroster
The defroster heats the window to
remove frost, fog and thin ice from
the interior and exterior of the rear
window, while engine is running. To activate the rear window
defroster, press the rear window
defroster button located in the center
facia switch panel. The indicator on
the rear window defroster button illu-
minates when the defroster is ON.
To turn off the defroster, press the rear window defroster button again.
Information
• If there is heavy accumulation ofsnow on the rear window, brush it off
before operating the rear defroster.
• The rear window defroster automat- ically turns off after approximately
20 minutes or when the ignition
switch is in the LOCK/OFF position.
Outside rearview mirror defroster
If your vehicle is equipped with the
outside rearview mirror defrosters,
they will operate at the same time you
turn on the rear window defroster.
i
NOTICE
OLF044204
OLF044205
■ Manual climate control system
■Automatic climate control system