Page 113 of 504
3-29
Convenient features of your vehicle
3
• The mirrors stop moving when
they reach the maximum adjust-
ing angles, but the motor contin-
ues to operate whilst the switch
is pressed. Do not press the
switch longer than necessary,
the motor may be damaged.
• Do not attempt to adjust the out-
side rearview mirror by hand or
the motor may be damaged.
Folding the outside rearview
mirror
Manual type
To fold the outside rearview mirror,
grasp the housing of the mirror and
then fold it toward the rear of the
vehicle.
Electric type (if equipped)
Right: The mirror will unfold.
Left : The mirror will fold.
Centre (AUTO):
The mirror will fold or unfold auto-
matically as follows:
• Without smart key system
- The mirror will fold or unfold when
the door is locked or unlocked by
the transmitter.
• With smart key system
- The mirror will fold or unfold when
the door is locked or unlocked by
the smart key.
NOTICE
OLF044026/H
OLF044027R
Page 140 of 504
3-56
Convenient features of your vehicle
Engine Coolant Temperature
gauge
This gauge indicates the tempera-
ture of the engine coolant when the
ignition switch or Engine Start/Stop
button is in the ON position.If the gauge pointer moves
beyond the normal range area
toward the "H" position, it indi-
cates overheating that may dam-
age the engine.
Do not continue driving with an
overheated engine. If your vehicle
overheats, refer to "If the Engine
Overheats" in chapter 6.
Fuel Gauge
This gauge indicates the approxi-
mate amount of fuel remaining in the
fuel tank.
NOTICE
Never remove the radiator cap
when the engine is hot. The
engine coolant is under pressure
and could cause severe burns.
Wait until the engine is cool
before adding coolant to the
reservoir.
WARNING
OLF044107
■Type A■Type B
OLF044108
■Type A■Type B
Page 166 of 504

3-82
Convenient features of your vehicle
Parking Brake & Brake
Fluid Warning Light
This warning light illuminates:
• Once you set the ignition switch or
the Engine Start/Stop button to the
ON position.
- It illuminates for approximately 3
seconds
- It remains on if the parking brake
is applied.
• When the parking brake is applied.
• When the brake fluid level in the
reservoir is low.
- If the warning light illuminates
with the parking brake released, it
indicates the brake fluid level in
reservoir is low.
If the brake fluid level in the reser-
voir is low:
1. Drive carefully to the nearest safe
location and stop your vehicle.
2. With the engine stopped, check the
brake fluid level immediately and
add fluid as required (For more
details, refer to “Brake Fluid” in
chapter 7). Then check all brake
components for fluid leaks. If any
leak in the brake system is still
found, the warning light remains
on, or the brakes do not operate
properly, do not drive the vehicle.
In this case, we recommend that
you have the vehicle towed to an
authorised HYUNDAI dealer and
inspected.
Dual-diagonal braking system
Your vehicle is equipped with dual-
diagonal braking systems. This
means you still have braking on two
wheels even if one of the dual sys-
tems should fail.
With only one of the dual systems
working, more than normal pedal
travel and greater pedal pressure are
required to stop the vehicle.
Also, the vehicle will not stop in as
short a distance with only a portion
of the brake system working.
If the brakes fail whilst you are driv-
ing, shift to a lower gear for addition-
al engine braking and stop the vehi-
cle as soon as it is safe to do so.
Page 177 of 504
3-93
Convenient features of your vehicle
3
Parking lamp position ( )
The parking lamp, licence plate lamp
and instrument panel lamps are
turned ON.
Headlamp position ( )
The headlamp, parking lamp, licence
plate lamp and instrument panel
lamps are turned ON.
Information
The ignition switch button must be in
the ON position to turn on the head-
lamp.
High beam operation
To turn on the high beam headlamp,
push the lever away from you. The
lever will return to its original posi-
tion.
The high beam indicator will light
when the headlamp high beams are
switched on.
To turn off the high beam headlamp,
pull the lever towards you. The low
beams will turn on.
i
OLF044086ROLF044087R
OLF044192R
Page 178 of 504
3-94
Convenient features of your vehicle
To flash the high beam headlamp,
pull the lever towards you, then
release the lever. The high beams
will remain ON as long as you hold
the lever towards you.
Turn signals and lane change
signals
To signal a turn, push down on the
lever for a right turn or up for a left
turn in position (A). To signal a lane
change, move the turn signal lever
slightly and hold it in position (B).The
lever will return to the OFF position
when released or when the turn is
completed.
If an indicator stays on and does not
flash or if it flashes abnormally, one of
the turn signal bulbs may be burnt out
and require replacement.
OLF044088R
OLF044091R
Do not use high beam when
there are other vehicles
approaching you. Using high
beam could obstruct the other
driver's vision.
WARNING
Page 190 of 504

3-106
Convenient features of your vehicle
• When washing the vehicle, set
the wiper switch in the OFF
position to stop the auto wiper
operation. The wiper may oper-
ate and be damaged if the switch
is set in the AUTO mode whilst
washing the vehicle.
• Do not remove the sensor cover
located on the upper end of the
driver side windscreen glass.
Damage to system parts could
occur and may not be covered
by your vehicle warranty.
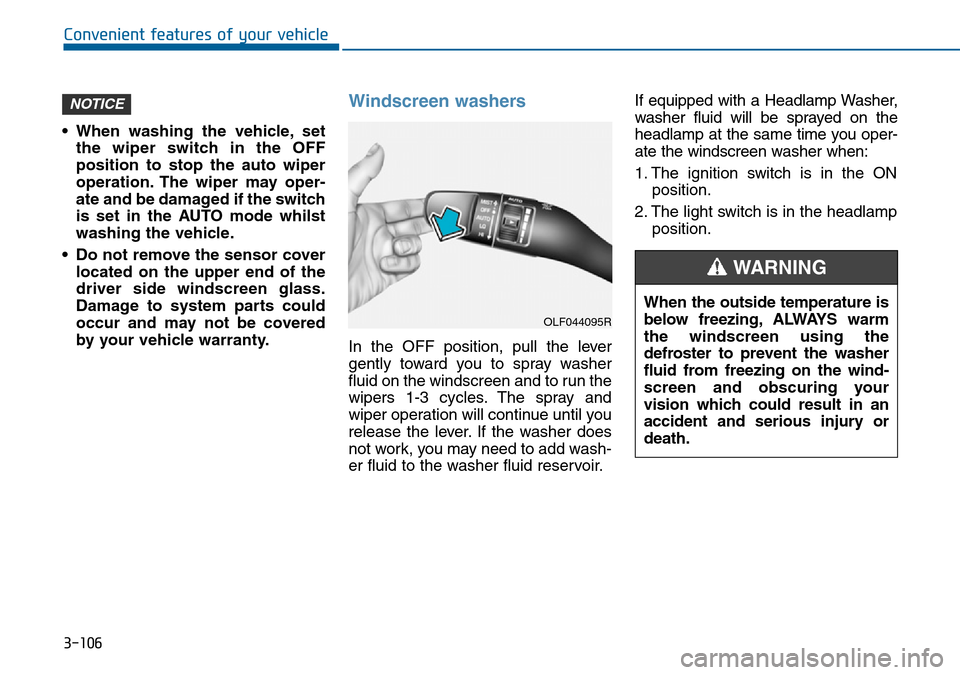
Windscreen washers
In the OFF position, pull the lever
gently toward you to spray washer
fluid on the windscreen and to run the
wipers 1-3 cycles. The spray and
wiper operation will continue until you
release the lever. If the washer does
not work, you may need to add wash-
er fluid to the washer fluid reservoir.If equipped with a Headlamp Washer,
washer fluid will be sprayed on the
headlamp at the same time you oper-
ate the windscreen washer when:
1. The ignition switch is in the ON
position.
2. The light switch is in the headlamp
position.
NOTICE
OLF044095R
When the outside temperature is
below freezing, ALWAYS warm
the windscreen using the
defroster to prevent the washer
fluid from freezing on the wind-
screen and obscuring your
vision which could result in an
accident and serious injury or
death.
WARNING
Page 195 of 504

3-111
Convenient features of your vehicle
3
When you shift into the R (Reverse)
position and one or more of the
below situations occur, this may indi-
cate a malfunction with the parking
assist system.
• You don't hear an audible warning
sound or the buzzer sounds inter-
mittently.
If this occurs, we recommend that
the system be checked by an autho-
rised HYUNDAI dealer.
Non-operational conditions of
rear parking assist system
The rear parking assist system
may not operate normally when:
• Moisture is frozen to the sensor.
• The sensor is covered or stained
with foreign material, such as snow
or water, or the sensor cover is
blocked.There is a possibility of a parking
assist system malfunction when:
• Driving on uneven road surfaces
such as unpaved roads, gravel,
bumps, or gradients.
• Objects generating excessive noise
such as vehicle horns, loud motor-
cycle engines, or truck air brakes
can interfere with the sensor.
• Heavy rain or water spray is present.
• Wireless transmitters or mobile
phones are present near the sensor.
• The sensor is covered with snow.
• Any non-factory equipment or
accessories have been installed, or
if the vehicle bumper height or sen-
sor installation has been modified.
• Trailer towing.Detecting range may decrease
when:
• Outside air temperature is
extremely hot or cold.
• Undetectable objects smaller than
about 1 m (40 in.) and narrower
than about 14 cm (6 in.) in diameter.
The following objects may not be
recognised by the sensor:
• Sharp or slim objects such as
ropes, chains or small poles.
• Objects, which tend to absorb sen-
sor frequency such as clothes,
spongy material or snow.
• is displayed. (if equipped)
Your new vehicle warranty does
not cover any accidents or dam-
age to the vehicle or injuries to
its occupants due to a rear
parking assist system malfunc-
tion. Always drive safely and
cautiously.
WARNING
Page 203 of 504

3-119
Convenient features of your vehicle
3
Mode selection
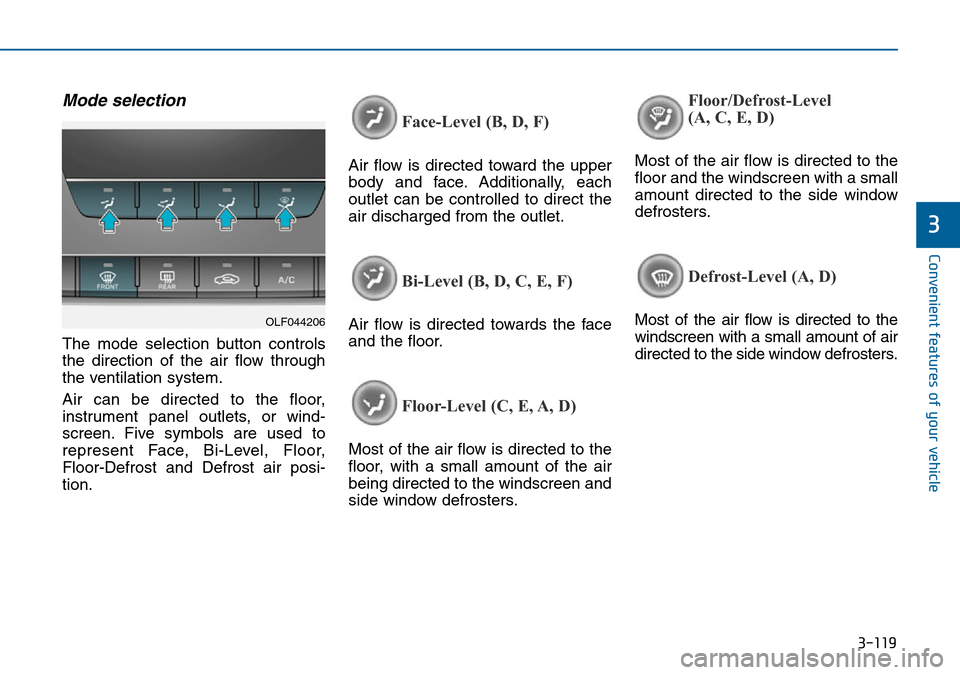
The mode selection button controls
the direction of the air flow through
the ventilation system.
Air can be directed to the floor,
instrument panel outlets, or wind-
screen. Five symbols are used to
represent Face, Bi-Level, Floor,
Floor-Defrost and Defrost air posi-
tion.
Face-Level (B, D, F)
Air flow is directed toward the upper
body and face. Additionally, each
outlet can be controlled to direct the
air discharged from the outlet.
Bi-Level (B, D, C, E, F)
Air flow is directed towards the face
and the floor.
Floor-Level (C, E, A, D)
Most of the air flow is directed to the
floor, with a small amount of the air
being directed to the windscreen and
side window defrosters.
Floor/Defrost-Level
(A, C, E, D)
Most of the air flow is directed to the
floor and the windscreen with a small
amount directed to the side window
defrosters.
Defrost-Level (A, D)
Most of the air flow is directed to the
windscreen with a small amount of air
directed to the side window defrosters.OLF044206